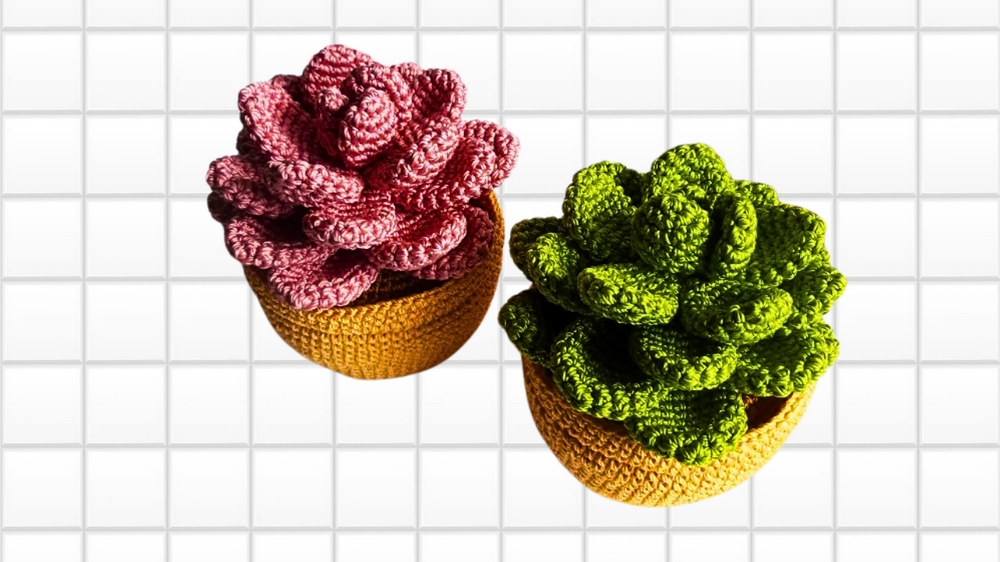
Brighten spaces with Crochet Amigurumi Succulent Pattern bringing everlasting greenery, charming detail, and handmade beauty without any upkeep.
A small pot sitting on a desk can often hold more meaning than just greenery, it can carry a sense of calm, beauty, and personality. Many people adore succulents for their low maintenance and charming shapes, but for those who prefer something everlasting, a handmade version offers the same charm without the need for care. The Free Crochet Amigurumi Succulent Pattern introduces a delightful way to enjoy the charm of these tiny plants in soft yarn form. This project is particularly loved for its adaptability, as it can brighten workspaces, make thoughtful gifts, or add whimsical touches to home décor.
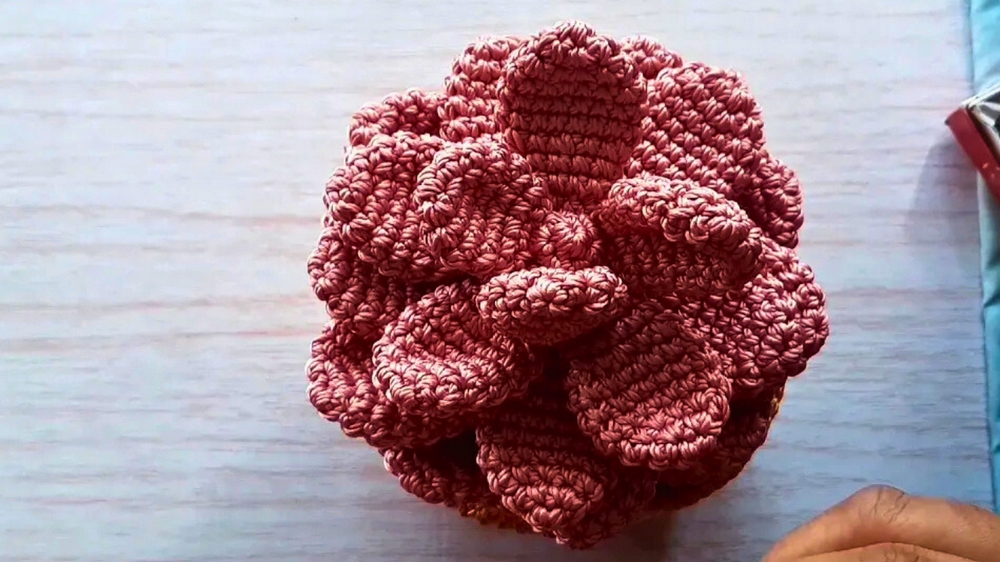
Crochet Amigurumi Succulent Pattern With Realistic Leaf Details
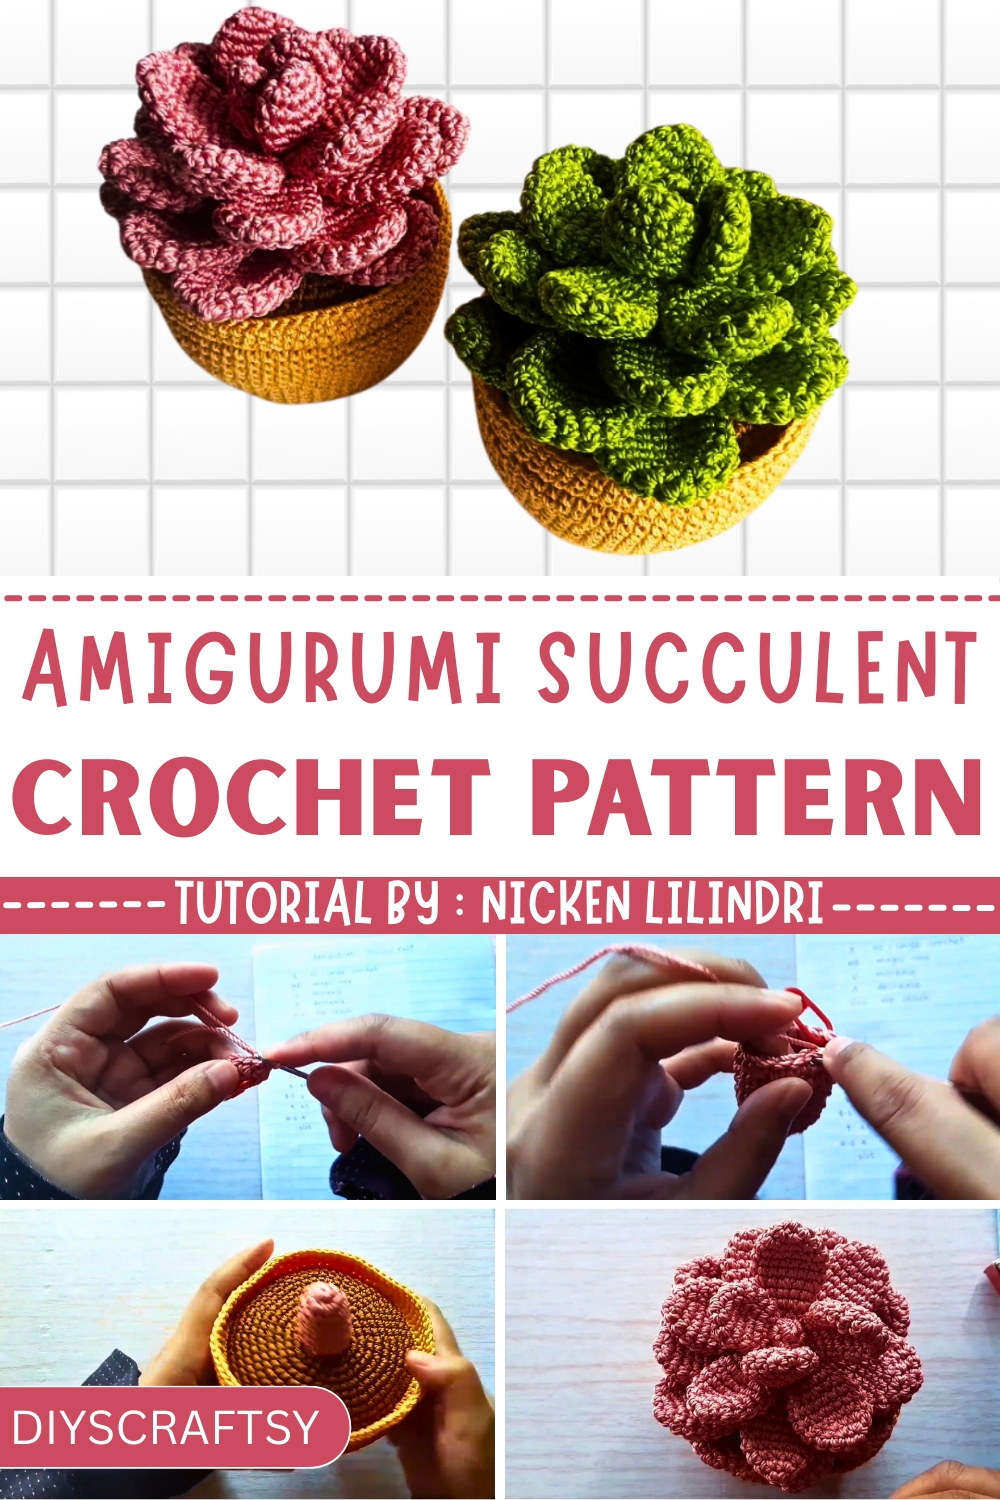
Unlike real plants, these little succulents never wither, ensuring their charm remains constant throughout the seasons. The texture and detail mimic the natural appeal of succulents while giving a playful and artistic twist that brings warmth into any setting. Perfect for plant lovers, minimalists, or anyone looking to decorate in a creative and sustainable way, this pattern combines beauty with practicality.
Whether arranged in a small pot, used as keychains, or placed on shelves, these amigurumi succulents carry a timeless appeal. They bring joy without the worry of watering, making them a truly delightful addition to everyday life.
Step-by-Step Instructions
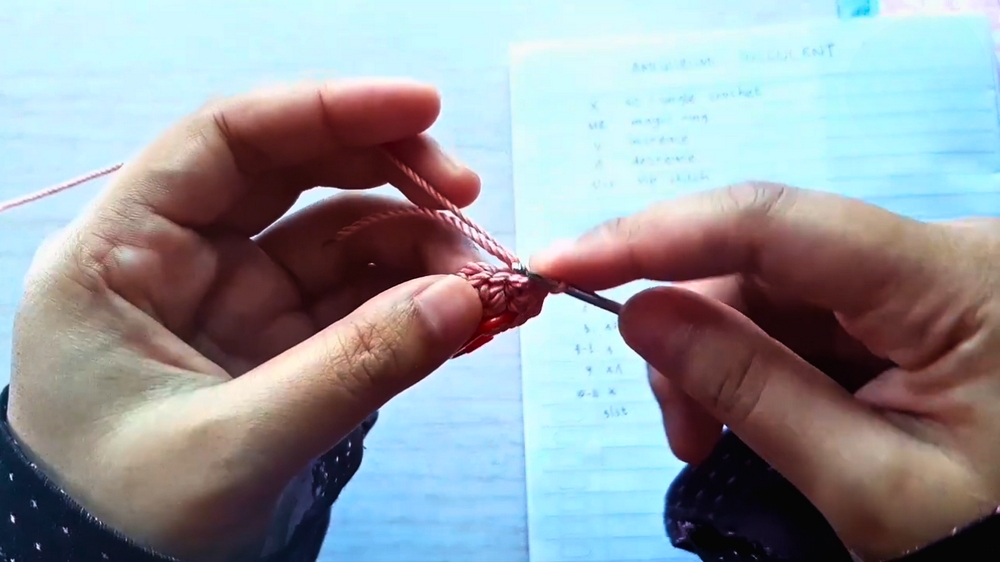
1. Begin with a Magic Ring (Foundation)
- Start by creating a Magic Ring, a fundamental crochet technique used as the base for the design.
- Work six single crochets (SCs) into the Magic Ring, pulling the thread tight to close the circle.
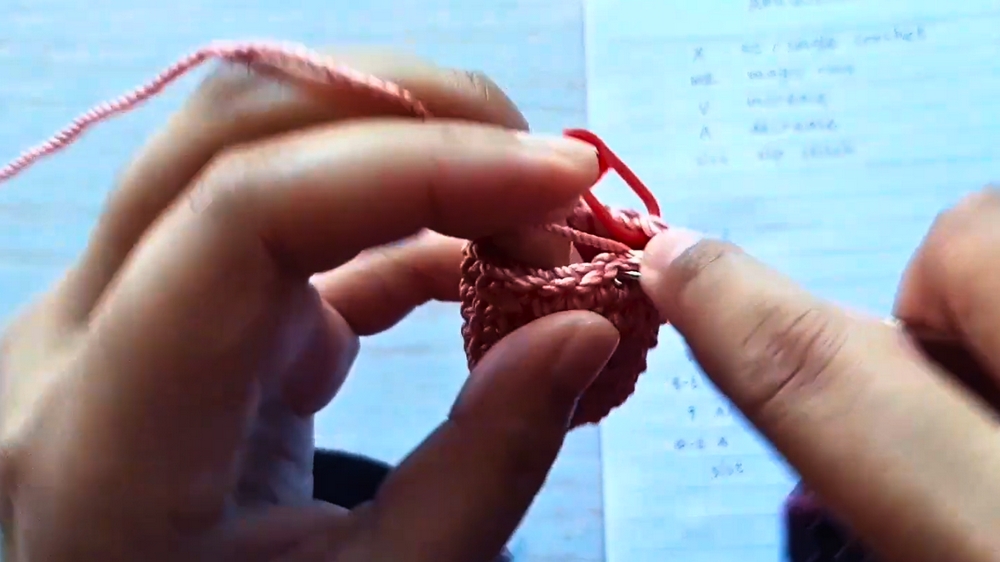
2. Craft the Succulent's First Level (Leaves)
- For the subsequent row, complete two SCs in each stitch from the first row to create a total of 12 stitches.
- Continue building the base by adding single crochets around until you’ve reached four to eight rows (depending on the size required).
3. Create All Required Levels
- The succulent features five levels of leaves, each made separately:
- Level 1 and Level 2: Make ten pieces each, all the same size.
- Level 3 and Level 4: Create five pieces for each, slightly different in size.
- Level 5: Make three pieces that are distinctly smaller for the final level.
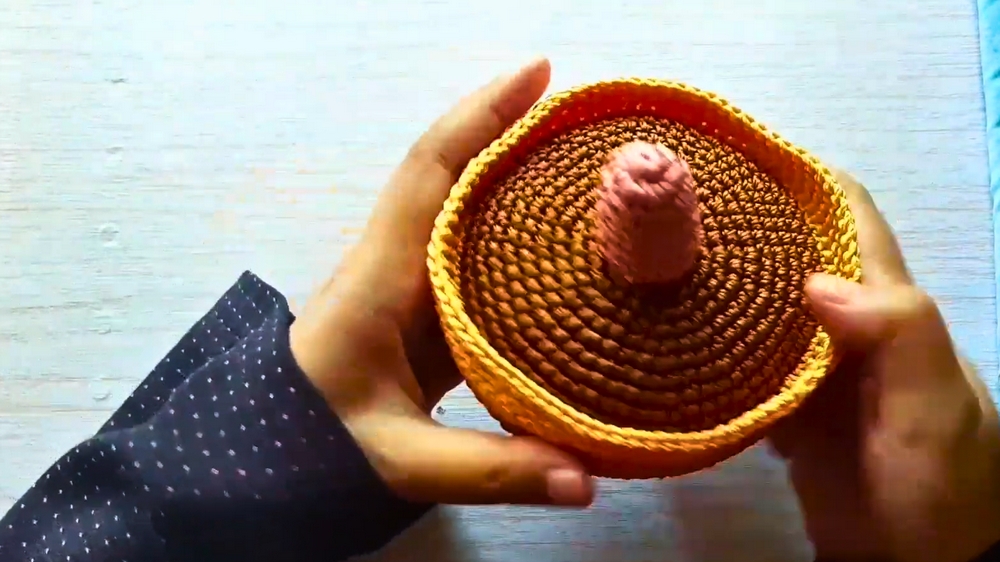
4. Assemble the Succulent and Fill the Stem
- Fill the stem portion with dacron stuffing to give it structure and shape.
- Prepare a tapestry needle for sewing.
5. Attach the Leaves to the Stem
- Use the long thread ends from crocheting to sew the leaves onto the stem. Attach leaves from the bottom level (Level 1) and work your way up to the fifth (and final) level.
- Secure the leaves carefully by sewing one piece at a time. A safety pin or nail needle can be used to hold pieces in place while sewing.
6. Arrange and Display
- Finally, tidy up the threads and arrange the succulent for display. Optionally, place the stem into a small pot for a more realistic effect. The video mentions a separate tutorial for creating the pot.
Special Features
- Realistic Design: The succulent's five levels mimic real-life plants through varied leaf sizes.
- Modular Construction: Each level is crafted separately, allowing flexibility in design.
- Beginner-Friendly Approach: The tutorial explains concepts like the Magic Ring and basic stitches in detail.
Materials Used
- Yarn (preferably in a green color for the leaves)
- Crochet hook
- Dacron stuffing for the stem
- Tapestry needle for sewing
- Optional: Safety pins or nail needles for securing pieces temporarily
- A small pot (for optional display)
Level of Difficulty
- Beginner to Intermediate: The basic crochet techniques make it approachable for beginners, but it requires patience and precision in assembly, making it interesting for intermediate crafters too.
Tutor's Suggestions and Tips
- Marking Progress: Use a stitch marker to track rows and ensure consistent stitching.
- Securing Leaves: Take your time to sew leaves one by one for a neat and professional finish.
- Safety First: Use a safety pin while attaching pieces to prevent them from shifting during sewing.
Uses
- Home decor
- Desk ornament
- A handmade gift for plant enthusiasts
Pro Tip
- When sewing the leaves onto the stem, leave a longer thread on each piece to give yourself more flexibility during assembly. This will ensure the final arrangement looks balanced and aesthetically pleasing.
Conclusion
The video provides an engaging and detailed guide to crocheting an amigurumi succulent from scratch. With clear instructions and useful tips, this project offers a fun and rewarding experience for crochet enthusiasts. Once complete, your handsewn succulent will serve as a beautiful, everlasting plant for display or gifting.