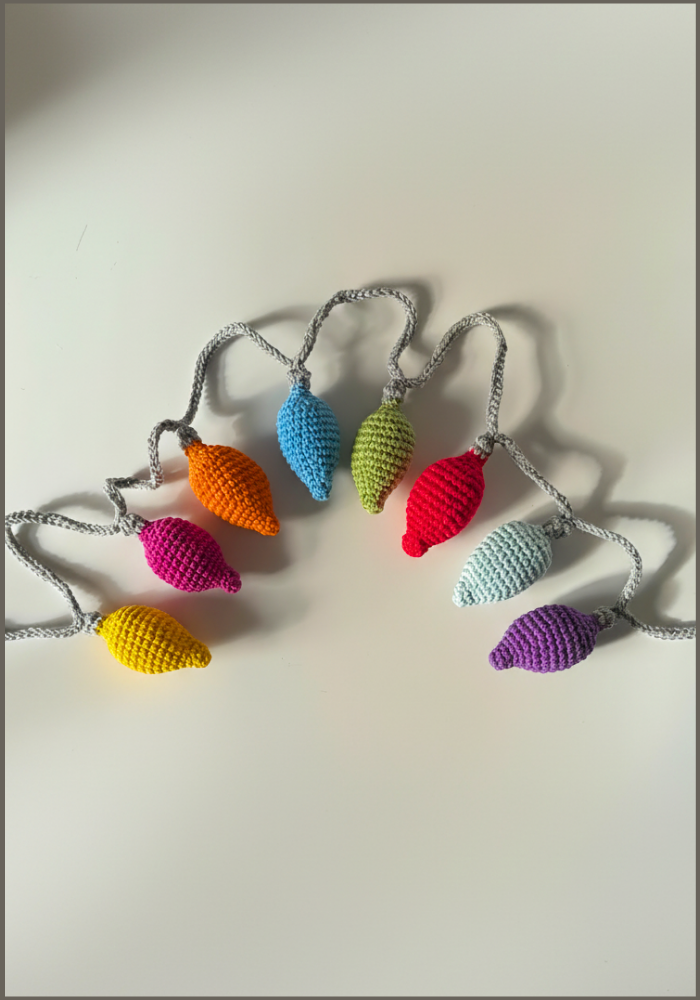
Spruce up your holidays with this free crochet Christmas lights pattern, a fun and creative way to add sparkle and cheer to your festive decor.
Add a touch of festive elegance to your holiday decor with intricate, colorful designs that capture the magic of the season. Perfect for both decoration and gifting, a Crochet Christmas lights pattern allows you to create charming garlands that glow with creativity and warmth. These handmade pieces are not only visually stunning but also eco-friendly and reusable for years to come.
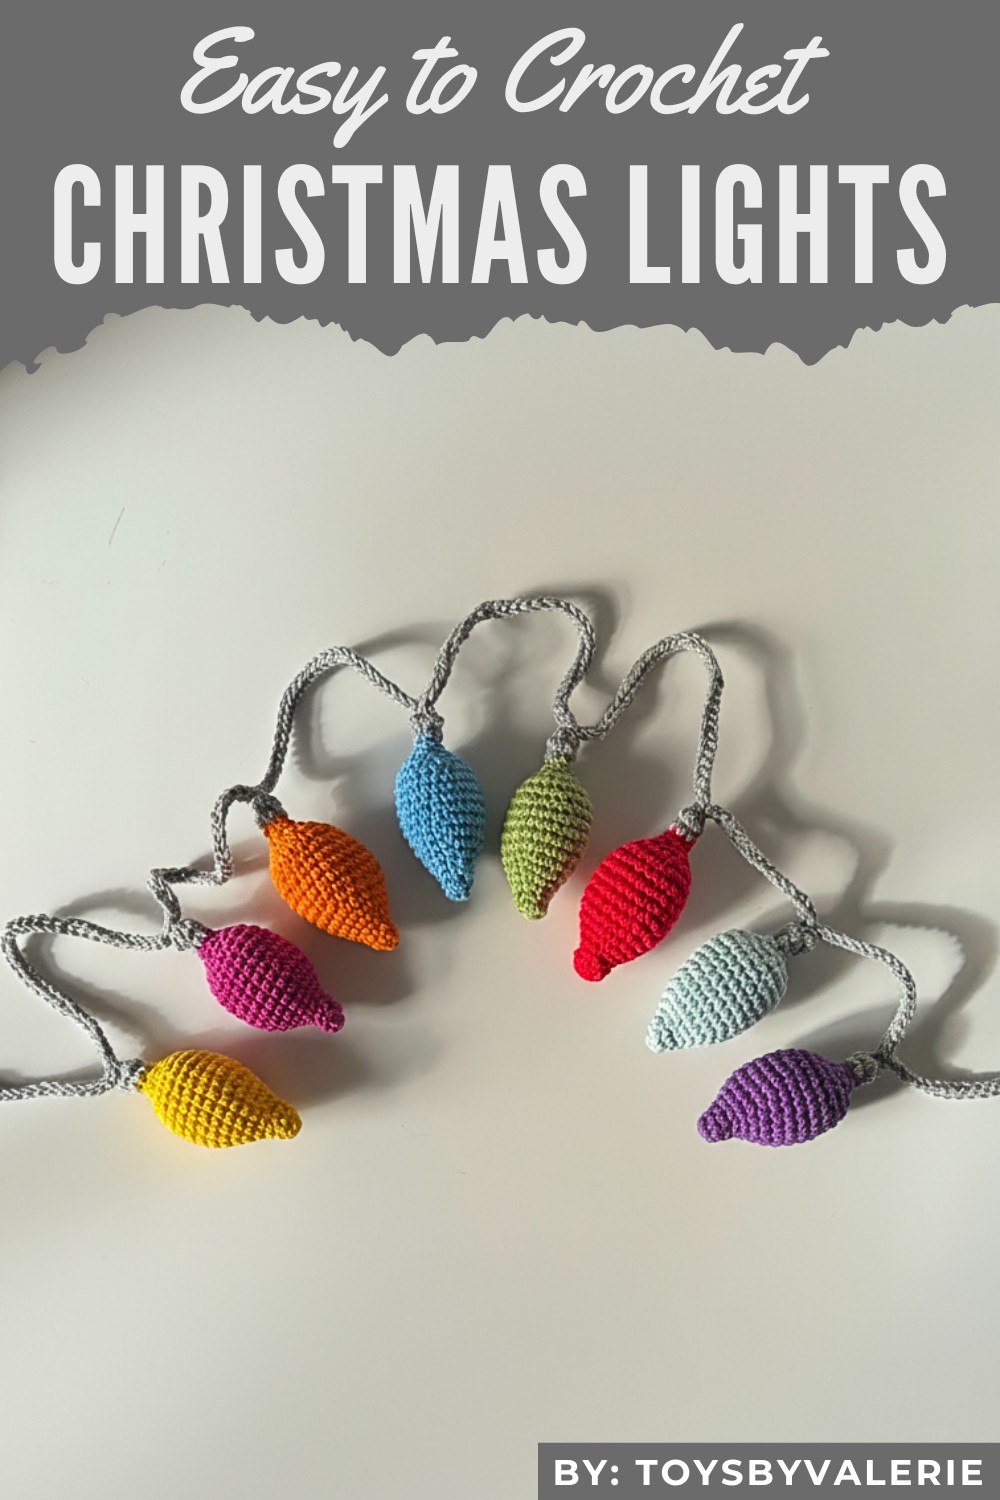
Holiday Decor Crochet Christmas Lights You’ll Love
In this tutorial, the tutor demonstrates how to make a festive Christmas light garland using crochet techniques. The project features multicolored light bulbs, although you can customize the colors based on your preference (e.g., red and white, blue and white). It's an easy and quick tutorial, making it ideal for beginners and experienced crocheters alike. The finished product is perfect for holiday decor or gifting.
Step-by-Step Details
Uses
- Holiday decor for your mantel, tree, or walls
- Gift for friends and family during the festive season
- Eye-catching project for craft shows
Materials
- Yarn in various colors (including gray for bulb tops and a separate garland chain color)
- 3mm crochet hook
- Stuffing
- Stitch marker, scissors, and needle
Create the Magic Circle (First Round)
- Begin by creating a magic circle using your yarn.
- Wrap the yarn around your fingers, pull the tail through, and secure it.
- Crochet 3 single crochets into the magic circle.
- Use your stitch marker to mark the starting point and close the hole by tugging on the tail gently.
Increase in Round Two
- Work 2 single crochets into each stitch from the previous round (increase in every stitch).
- This round can be slightly fiddly due to its small size, but you will end with 6 stitches.
Single Crochets for Round Three
- Crochet 1 single crochet into each stitch from the previous round, maintaining 6 stitches in total.
- Turn your work right-side out after completing this round.
Continue Increasing (Rounds 4–8)
- Round 4: Alternate between 1 single crochet and 1 increase (total: 9 stitches).
- Round 5: Alternate between 2 single crochets and 1 increase (total: 12 stitches).
- Round 6: Alternate between 3 single crochets and 1 increase (total: 15 stitches).
- Round 7: Alternate between 4 single crochets and 1 increase (total: 18 stitches).
- Round 8: Alternate between 5 single crochets and 1 increase (total: 21 stitches).
Single Crochet Rows (Rounds 9–13)
- Work single crochet into each stitch for 5 rounds (21 stitches per round).
- Move the stitch marker as you progress to each row.
Start Decreasing (Round 14 and Beyond)
- Round 14: Alternate between 5 single crochets and 1 decrease.
- Round 15: Alternate between 1 single crochet and 1 decrease.
- Before the hole becomes too small, add stuffing into the bulb.
Final Decrease and Closing (Rounds 16–17)
- Round 16: Work 6 decreases around to close the bulb’s hole.
- Round 17: Crochet 6 single stitches to solidify the shape.
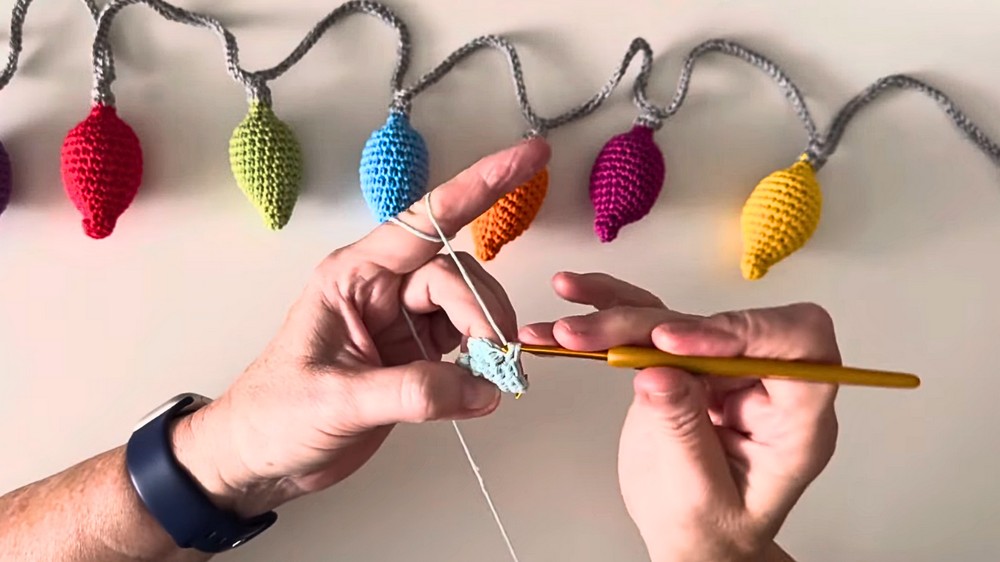
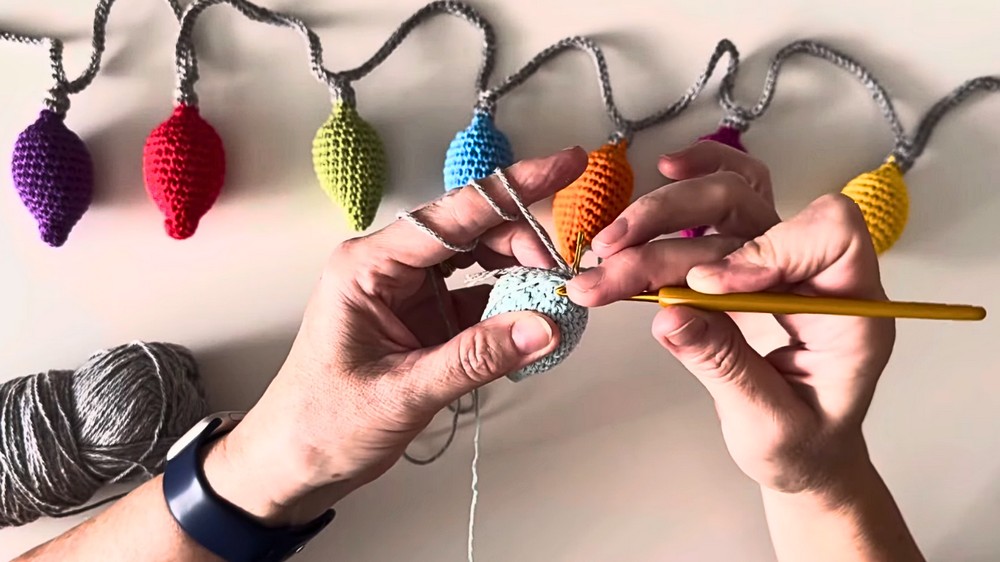
Change Yarn for the Bulb Top (Rounds 18–19)
- Switch to gray yarn (or your preferred bulb-top color). Pull the new color through the loops to join.
- Work two rounds of single crochet, sewing in loose threads as you go.
- Close the hole using a needle to pull through the front loops of the last 6 stitches, tightening to completely shut the opening.
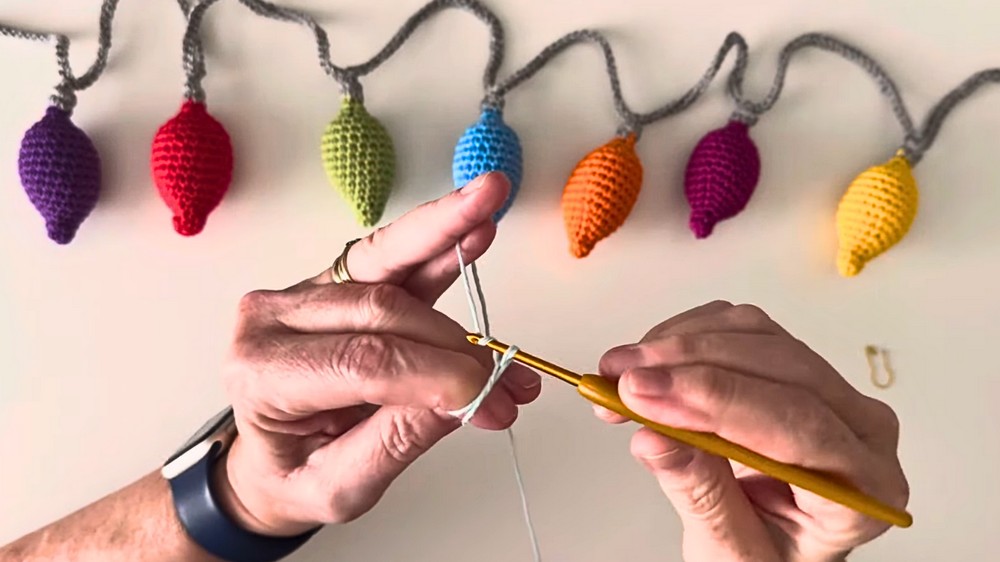
Create the Chain
- Use the same ball of yarn to create an i-cord for the garland string.
- Form loops around your hook and pull through with the other yarn strand, repeating until the cord reaches the desired length.
- Secure the ends by tying knots.
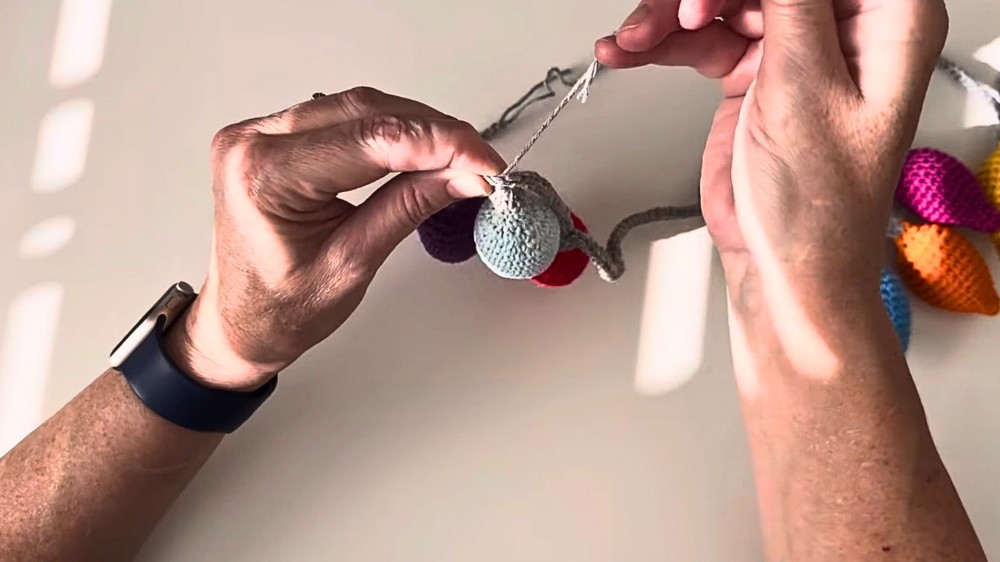
Attach the Bulbs to the Chain
- Use a needle to sew the bulb onto the chain securely, looping through both the chain and bulb a few times.
- Hide any extra yarn at the bulb’s base and trim off excess.
Special Features
- Customization: The garland can be themed using single or multicolored bulbs.
- Reusable Materials: Ideal for using yarn remnants or odd balls.
- Beginner-Friendly Technique: The process is straightforward, from creating the magic circle to forming the chain and attaching bulbs.
Level of Difficulty
The project is easy to moderate, suitable for beginners who are comfortable with basic crochet stitches like single crochet and increases/decreases. Advanced crocheters can also enjoy the process while adding creative twists.
Tutor’s Suggestions
- Use odd balls of yarn to reduce waste and give a cozy homemade feel.
- Focus on keeping the bulb shape intact by following the increase/decrease pattern carefully.
- Tug gently on the yarn when pulling loops to avoid snapping.
- Add stuffing before the bulb’s opening becomes too small.
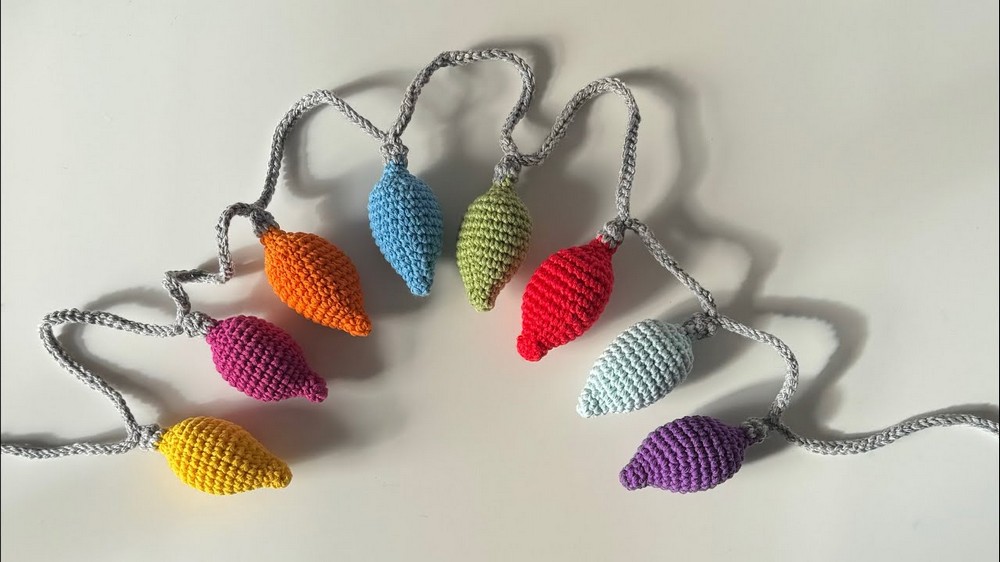
Drape them along your mantel, wrap them around your tree, or hang them as whimsical wall decor to spread the holiday cheer. This delightful project offers endless possibilities for customization, making it a rewarding and enjoyable craft for all skill levels.
Tip
Leave both ends of your yarn easily accessible when creating the chain; this allows you to adjust the length and add bulbs as you go rather than calculating beforehand.
Conclusion
The crochet Christmas light garland is a quick and creative project perfect for the holiday season. With its customizable design and accessible techniques, it’s a fun activity for both beginners and advanced crocheters. The tutorial emphasizes step-by-step clarity to help you create a festive, colorful decoration that can brighten your home or be shared as a thoughtful handmade gift.