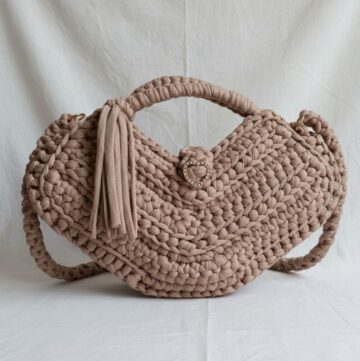
Carry a chic handmade accessory with Crochet Amarena Bag Pattern that lets you stitch a stylish bag perfect for outings gifts and adding charm to everyday use.
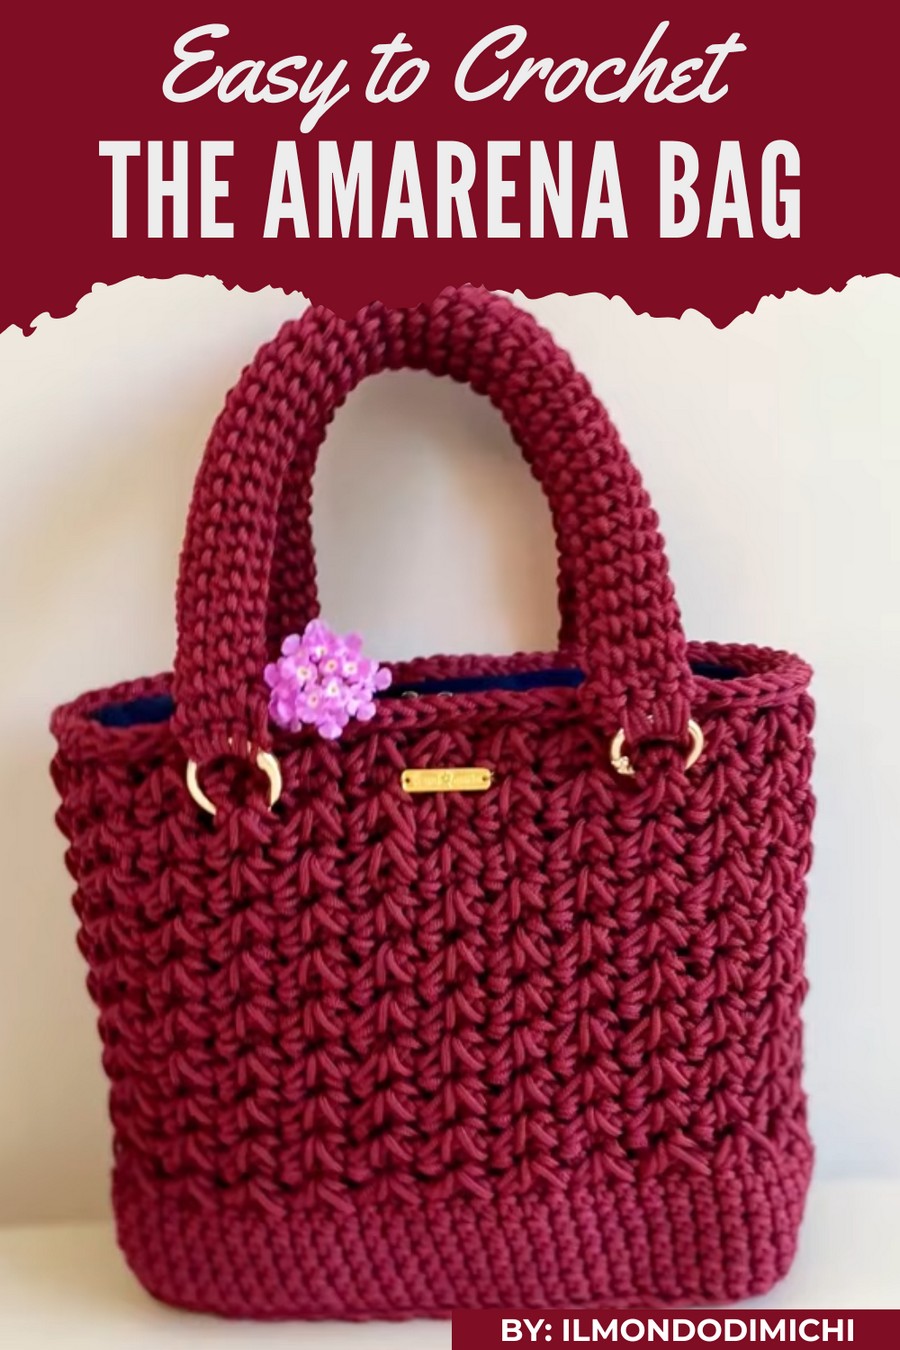
Boring bags are everywhere, but this little creation turns everyday carrying into something fun, stylish, and unique. The Crochet Amarena Bag pattern shows a soft, handmade bag with neat stitches, a smooth rounded shape, and bright, cheerful colors that instantly catch the eye.
Step-by-Step Croche Amarena Bag Pattern for Quick Results
It can be taken on daily errands, casual outings, parties, or even given as a thoughtful handmade gift that everyone will adore. Its most special features are the durable yet soft texture, lightweight design, and charming handcrafted details, which make it stand out, easy to carry, and perfect for adding a playful, handmade touch of style wherever you go.

This handbag pattern will guide you through crocheting a sturdy and stylish bag using synthetic drawstring cord. It's a spacious and functional piece with handles, optional lining, and a professional finishing touch, a perfect project for intermediate to advanced crocheters.
Materials List
Yarn and Supplies
- Yarn:
- Synthetic drawstring cord (commonly used for bags). Approximately 480g required.
Note: A 500g roll is sufficient for this project.
- Synthetic drawstring cord (commonly used for bags). Approximately 480g required.
- Crochet Hook:
- 4mm crochet hook (or hook size suitable for your chosen cord).
- Rings:
- Four metal rings (3.5cm diameter) for attaching straps.
- Optional Materials:
- Bag lining: Fabric to line the bag for additional strength.
- Bag net: To stiffen the bag structure.
- Magnetic button or zipper: For closure.
- Thread for sewing: For attaching the lining, zipper, or handles.
Skill Level
Intermediate to Advanced
This pattern involves working in rows and rounds, precise edge finishing, creating straps, and the assembly/finishing of multiple details like handles and lining.
Key Abbreviations (US Crochet Terminology)
| Abbreviation | Meaning |
|---|---|
| ch | Chain |
| sc | Single Crochet |
| sl st | Slip Stitch |
| dc | Double Crochet |
| sp | Space |
Special Notes
- Rectangular Base: The base measures 21cm wide x 9cm deep, but you can adjust the foundation chain length to suit your preferred size.
- Structure: The bag gains additional structure after adding the net (optional) and lining.
- Handle Options: You can crochet your handles or use pre-made commercial ones.
Step-by-Step Pattern
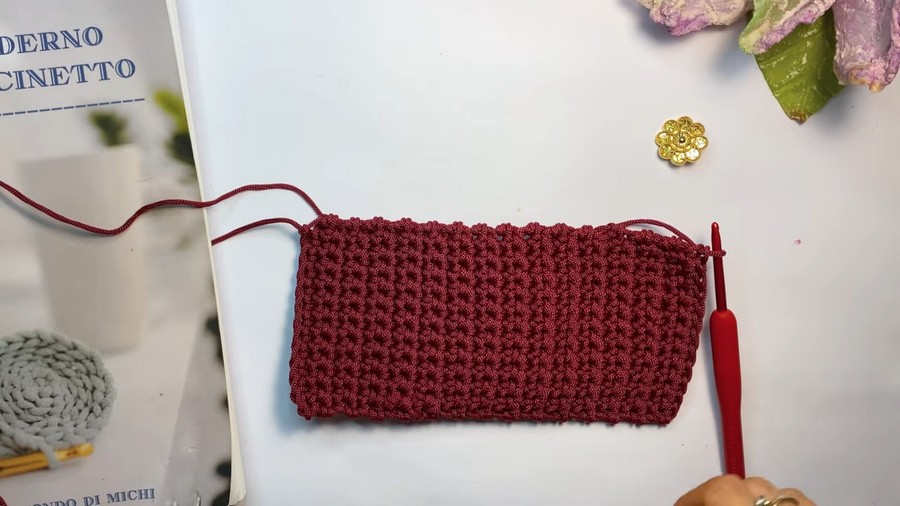
Part 1: Bag Base (Rectangle)
- Foundation Chain:
- Create a chain 9 cm in length (approximately 18-20 ch, depending on your tension and yarn thickness).
- Adjust the length if a deeper or shallower base is desired.
- Row 1:
- Work 1 sc in the 2nd chain from the hook and in each chain thereafter. (Row now measures 9cm.)
- Turn the work and chain 1.
- Rows 2–Multiple:
- Repeat Row 1 (1 sc in each st across) for a total of 19cm in length (approx. 40-50 rows depending on tension). Ensure consistent tension.
- Round 1:
- Once the rectangle is complete, work 1 sl st along the edges of the rectangle to prepare clean edges for working in the round.
- At each corner of the rectangle, work 2 sl st in the same stitch to ensure soft, rounded corners.
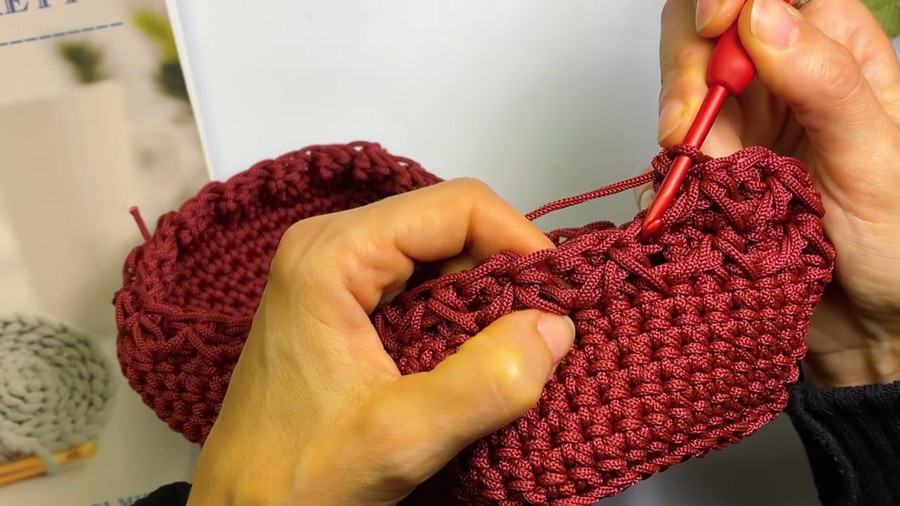
Part 2: Bag Sides
- Transition to Rounds:
- Work sc in the round along the edge of the rectangle to begin building the walls of the bag.
- Use the following process:
- Begin with 1 sc in each edge stitch across the length of the base.
- 2 sc at each corner (to maintain smoothness).
- Work 1 sc in every side stitch along the width of the base.
- Repeat all around, finishing with a sl st into the first sc at the end of each round.
- Rounds 1–7:
- Work 1 sc in each stitch. After seven rounds, you will have built a bottom band for the bag. Adjust height if needed for personal preference.
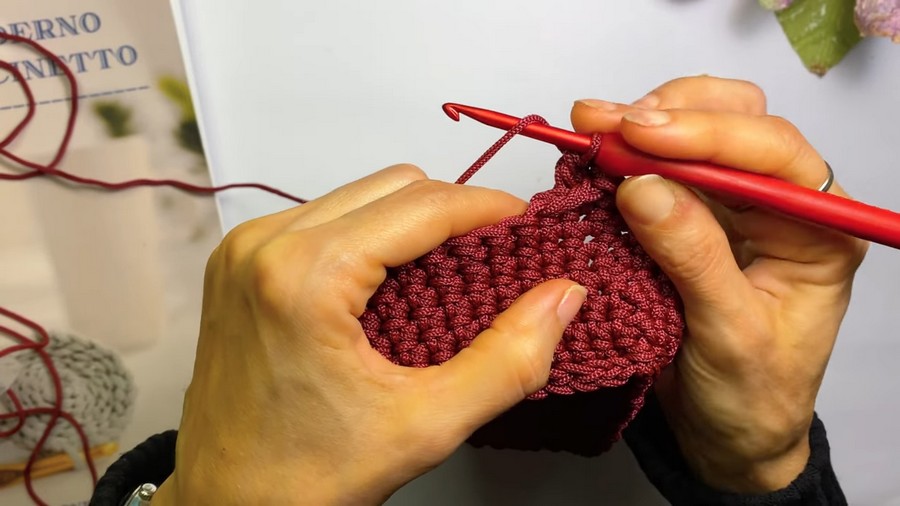
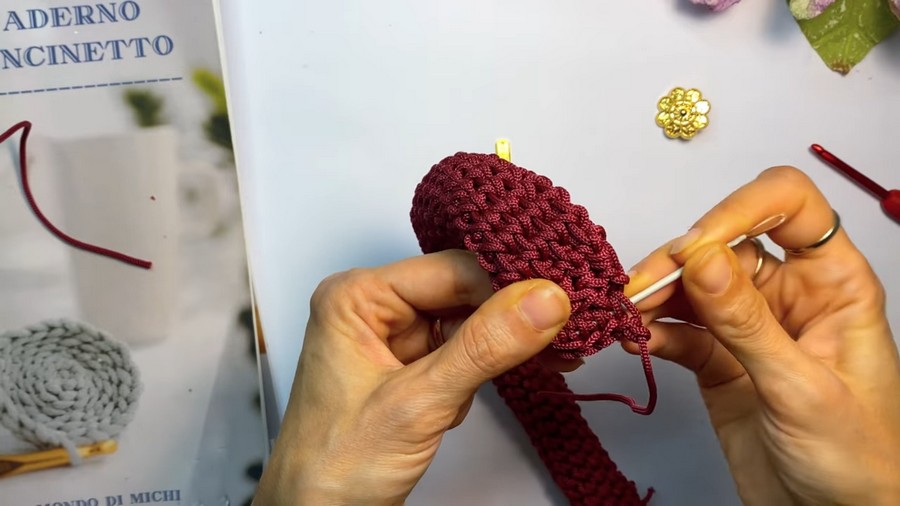
Part 3: Decorative Body Stitch
- Round 8 Onwards (Repeat Stitch Pattern):
- Foundation Decorative Stitch:
- Ch 1, yarn over (yo), insert hook into the next stitch, pull up a loop, yo, skip next 2 stitches, insert hook into the third stitch, pull up a loop, yo, and pull through all loops on hook. This will form a raised stitch pattern.
- Yarn over, and now go back to retrieve skipped stitches:
- Insert hook into the first skipped stitch, complete dc, then insert hook into the second skipped stitch, complete dc.
- Continuously repeat this pattern around the whole row:
- Yo, pull loop, skip 2 sts, dc in skipped sts, forming a striking texture.
- When you complete a round, slip stitch (sl st) into the starting chain 1.
- Foundation Decorative Stitch:
- Subsequent Rounds:
- For each new row, start the same decorative pattern, ensuring alignment between rows for a cohesive look.
- Complete Height:
- Continue the decorative pattern until the bag reaches a total height of 20cm, including the base.
Part 4: Top Edging
- Round 1:
- Work 1 sl st in every stitch along the top edge to give the bag a polished look.
- Round 2:
- In Back Loops Only (BLO), work 1 sl st in each st to emphasize the clean finishing. This rounded effect gives the bag professional detailing.
- Once completed, cut the yarn, pull it tightly through the last slip stitch, and weave in the ends along the inner surface.
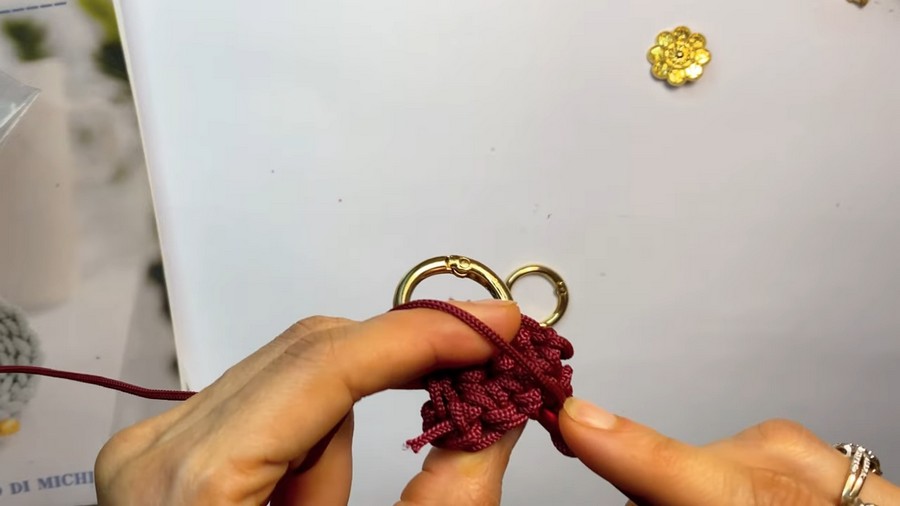
Part 5: Handles
Each handle measures approx. 29cm in length.
- Attach the Cord to the Ring:
- Pass the yarn through a 3.5cm ring and start with a slip stitch to secure.
- Work in Spiral Rounds:
- Make 4 sc into the ring. Turn.
- From this point on, work the stitches in continuous spiral rounds:
- Insert the hook into the back part of each stitch, pulling the previous loop to shape a circular form.
- Continue working this spiral method until the handle measures 29cm in length (or your desired size).
- Finishing:
- Attach the other end of the handle to a second ring by passing the yarn through the loops and securing neatly with slip stitches.
- Repeat to create a second handle. Tools like sewing thread or glue may be used for additional support when securing straps.
Part 6: Optional Lining and Stiffener
- Lining and Net:
- Cut a piece of bag net to fit the base and side panels to ensure the bag holds its structure.
- Then, cut fabric for the lining, ensuring it matches the size of the bag’s interior. Sew the net and lining together.
- Attach the lining to the bag using fabric glue or hand-sewing.
- Closure:
- Install a magnetic button or stitch a zipper as the bag's closure mechanism.
Conclusion
Your crochet handbag is now complete! With clean stitches, durable structure, and refined details (like the handles and decorative stitch pattern), this piece is both practical and stylish. By customizing your yarn type, colors, and added features like lining or a zipper, you can make it your own while ensuring it is functional.
Pattern Corrections
- Check your stitch count in Round 7 before moving to the decorative stitch pattern. Adjust by adding or reducing stitches if necessary to ensure a seamless continuation.
Tips
- Work Tightly: When working with synthetic cord, maintain consistent tension for a polished look.
- Plan Ahead: If lining the bag, add the lining before attaching the top edging for ease.
- Alternative Handles: If crocheting handles feels too bulky, consider using leather or pre-made handles for added elegance.