We all know how sitting before our laptops all day long can be so uncomfortable. It's also unhealthy to sit for too long, especially if you're not in the correct posture. It would be best always to have a laptop stand that will perfectly fit your laptop and give you the best posture while working. The DIY Laptop Stand ideas are fun to make, and they come in different designs. You can also choose the design that best fits your budget and preference. It is essential to get yourself one as soon as possible because working on your laptop without one is pretty unhealthy. It will be a good idea to make some colorful laptop stands that will cheer up your desk and also will be super helpful for you.
The table below contains 20 DIY Laptop Stand Ideas for making your own laptop stand, from easy to more involved. Some are simple, some are complicated, but all are open-source and easy to follow. You just need to be creative and follow all the steps carefully. These are the best ways to make a laptop stand for a bed or table at home without spending much money on it. The good thing is that these tutorials will give you different ideas and tips on making them the easiest way possible. You can also choose which design you would like to use depending on your taste and preference. Let's get creative!
DIY Laptop Stand With Wood
This DIY laptop stand seems to be pretty easy and fast. The basic idea is to use a 1×10 board and a 1×2 board, the same thickness as your laptop, make holes and screw them together, and then use some glue to strengthen them. To apply it on your computer, screw four one-inch screws in the rear of your computer first, then screw the top closed side onto that, then you can secure the bottom piece with screws. After finalizing the correct dimensions of your table, spray paint it with your favorite color spray paint.
DIY Laptop Stand For Bed
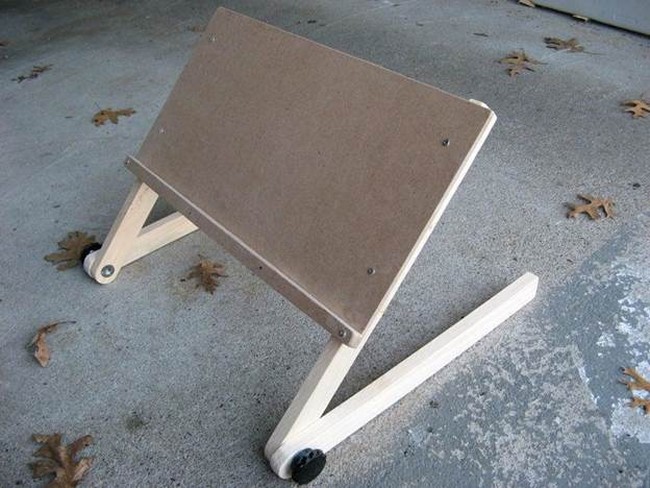
This DIY Laptop Stand For Bed was really easy to make, and it looks really cool. This excellent work stand is suitable for any laptop, notebook, or tablet PC. The material of this stand is wood, so it's effortless to build it but it has good safety for your device. It works for the majority of computers, even for the thicker ones. It will support a 15-inch netbook with adjustable legs and is great to use on a bed or sofa.
6. DIY Metallic Laptop Stand
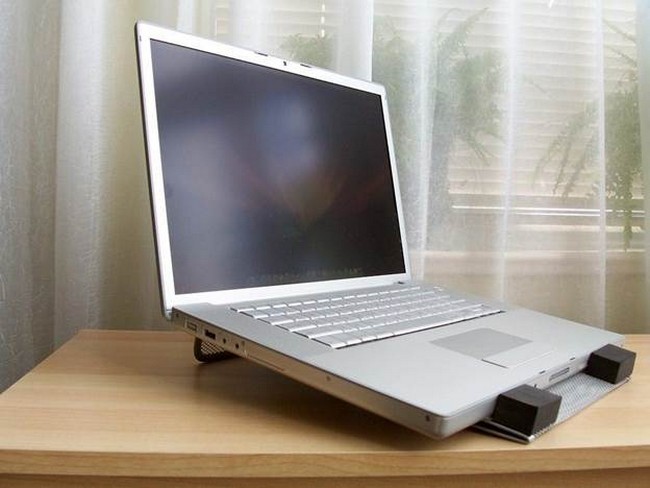
If aesthetics are your key criteria, you can go for a DIY metallic laptop stand. It is cost-effective, takes less than 10 minutes to put together, and is worth the effort. This is because this laptop stand looks excellent and will perfectly suit your personality. To make this stand, you need a Metal Mesh Document Holder, which you need to bend so that the long sides lie flat and flip it upside down so that the short edge sits on the desk. The weight of the laptop will hold the long side flat and make it durable. You will also need a roll of Anti-slip shelf liner, a small block of rubber, and a glue gun.
How To Make A Laptop Stand
One of the things you will be needing to make this laptop stand is cardboard; what you will do is cut out a rectangular shape of the cardboard and then fold the rectangle inwards and glue it together. After that, cut out two side pieces and glue them to the rectangle. You can then reinforce it by cutting out a piece of cardboard or metal and placing it across the front. Lastly, cut out a rectangle for your laptop to rest on and place it on your stand. To see more details about making this, watch this video here.
DIY Laptop Stand
Start cutting the parts of your laptop stand. First, you make the outside piece measuring 8 inches by 11 inches, and then the inside piece. Then you have to measure half of an inch each way so that you can have the right size of your plywood once it is cut out with a hacksaw. The paper will be attached to your plywood with a glue gun so it won't slide off while you are cutting it out. You can also hold down the paper onto your plywood with some clamps; once your laptop stand is ready, place it near your laptop and see if it will work for you.
Laptop Stand DIY Using Scrap Wood

Are your neck and back hurting from looking down all day? Are you ready to create a more ergonomic laptop stand? Well, here is an easy project that gets the job done. In this project, we are using scrap wood as a material. A 1″ x 4″ board for the base and a 1″ x 3″ board for the foot of the laptop stand. Once cut out per the cut list, use wood glue on the corner of the 1″ x 3″ foot and join it with the 1″ x 4″ board at a right angle, then nail through the wood into place.
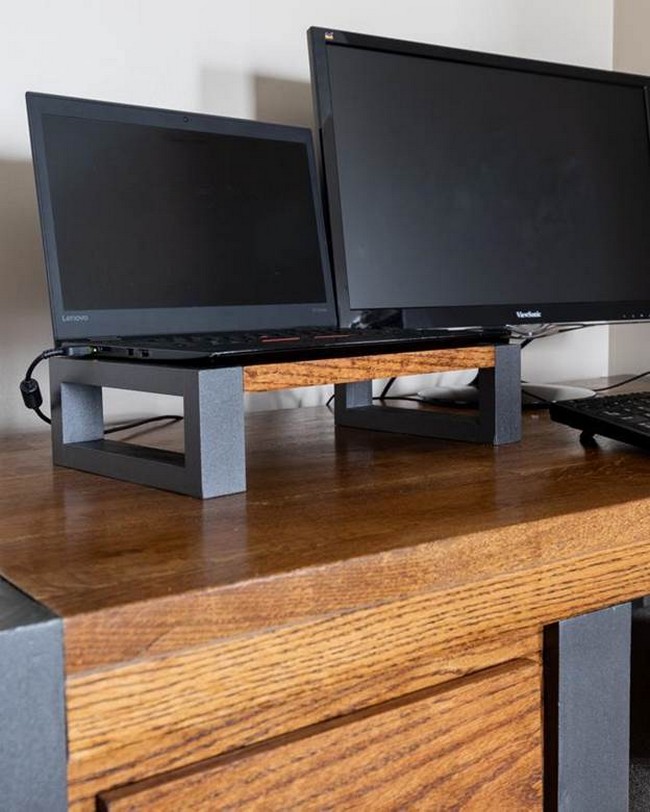
DIY Monitor Stand
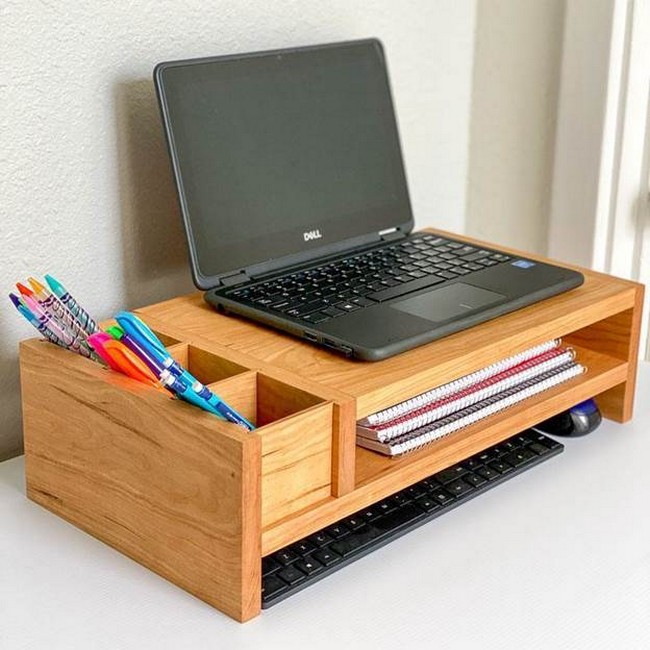
This stand raises your laptop up to eye level for better ergonomics. It also has a small storage space under the stand for small items such as a notepad, pen, or cell phone. This design is excellent for people who make videos with their laptops in front of a camera. If you'd instead not buy something like this, simply place four boxes underneath your computer to raise it and give you more room. The more that you can lift your arms off the table, the easier you will breathe while working on your laptop. Good luck!
Laptop Stand Using Shoebox
Stand up to your laptop screen and keep it at a perfect angle. This shoebox stand is relatively easy to make at home if you need to watch your laptop in bed, on your lap, or on a table. This DIY project only requires a couple of materials available in a typical household and is inexpensive. In making these, you will need glue, a pen to mark out the dimensions, and a ruler, which will help you measure the necessary dimensions.
DIY Folding Laptop Desk
An all-in-one desk solution that is easily collapsible, this DIY laptop table is the solution you need to complete your workspace. Perfect for those looking for a desk away from their traditional workstation or a portable workstation, this desk folds away into a flat surface that can be carried around. This set of instructions and template allows you to build your own laptop table that is perfect for any working environment.
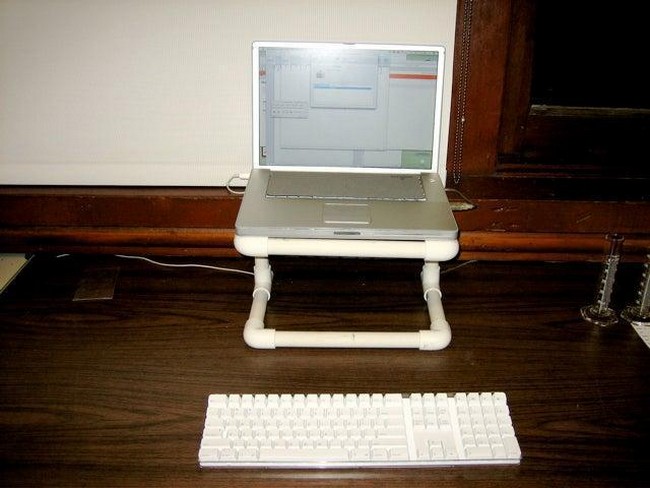
How To Make A PVC Laptop Stand
Among the different DIY stands found on the internet, this one is simply easy to do and also inexpensive. All you need are just 6 PVC pipes, a saw, clamps, and PVC glue. The best part of this laptop stand is that since it is made from PVC pipes, you can easily disassemble the stand whenever you want to bring it to another place. It has legs that are very low, thus making the laptop more comfortable to use.
How To Make A Portable Laptop Stand
Laptop stands are a great thing; you can be more comfortable working on your laptop sitting on the sofa, in bed, or simply in any position. If you want to know how to make a portable laptop stand, this DIY project is easy and won’t take too long to complete. The result will leave you with a professional-looking laptop stand that works great when resting on your lap, having it on a desk, or even in bed. So let’s start with building your DIY portable laptop stand.
How To Make A Simple Laptop Stand
Making a simple laptop stand is easy and affordable. Using suitable materials means it will be very sturdy, allowing you to use the laptop while standing without worrying about it falling down. This design requires a PVC pipe. Which you have to cut into different sizes; afterward, you assemble the pipes together and screw them incorrectly. The only tools required are a screwdriver and hammer. You will also need wood for the surface to make it super comfy. The making process is straightforward and very achievable.
Laptop Bubble Stand DIY
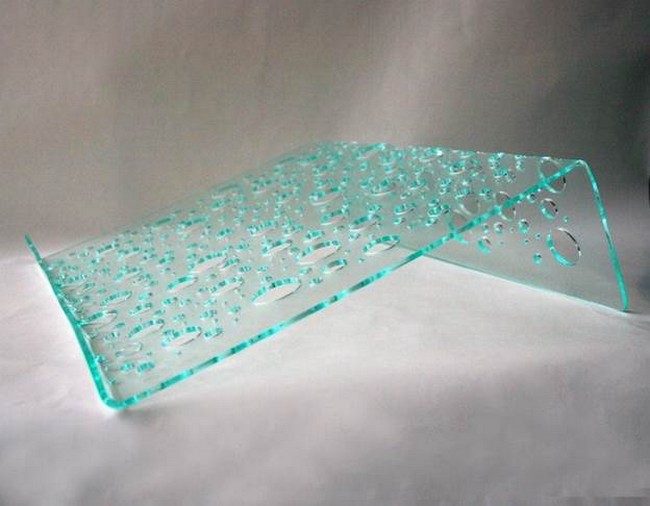
We all know that the laptop stand which comes with a laptop is pretty simple and ugly, and it's not elegant at all! That's why we made this bubble stand DIY for you to make your own creation. It's very easy to make, don't worry about anything! For this project, no special tools are required. And after making one, you'll feel like your laptop isn't boring anymore. Come on, guys, let's get started!
DIY Laptop Stand From Shoebox
Did you ever wish you could watch a movie? There is nowhere to put your laptop except on top of the bed or television? A DIY laptop stand from a shoebox sounds crazy but super easy to make and inexpensive. All you need are materials already available in your house, including a shoebox, a knife to cut out excessively, a pen and a ruler to help mark out measurements, glue, and scissors to cut out the box. Viola, you're done.
DIY Simple Laptop Stand
This DIY Simple Laptop Stand is the perfect solution to help keep your electronics cool and in healthy working order while still keeping your office organized. You’ll love this sleek and minimalistic build that can be made in under five minutes. Made with a few pieces of plywood and a belt sander, this stand will give you that open and airy feeling you’ve been craving in your workspace, plus it will make it easier to access your USB ports.
PVC Laptop Stand DIY
The PVC Laptop Stand is made of PVC pipes, and it's a DIY project. Its main features are to save desk space. You can stow your cables inside the pipes and organize them. Thanks to the materials, PVC pipes, and elbows, you can try all kinds of DIY projects for saving space. The PVC Laptop Stand is easy to make; two lengths of Tee Joints and three lengths of elbow joints will do it all.
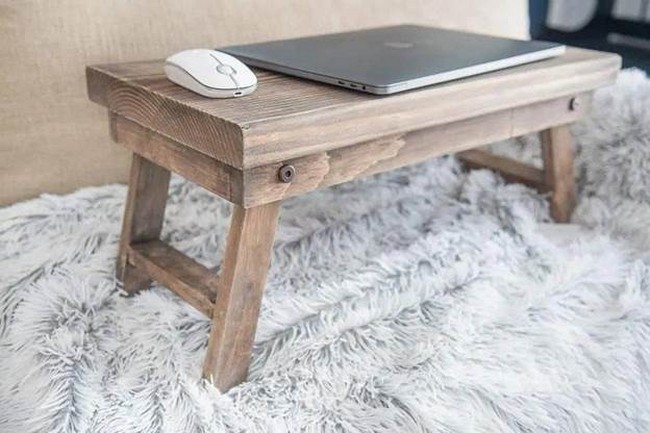
DIY Laptop Stand For Bed

The DIY lap desk allows you to type in bed and provides a comfy flat surface for your legs to rest on. The lap desk fits in front of your tush so that there are no available corners to catch papers, computer cords, etc. This is made with a wooden lap desk top, foam square, fabric trim, staples, wood glue, and a staple gun. The best feature is making the lap desk any height you want. As long as it is taller than your keyboard and matches the width of your bed or couch, you will have enough room for your laptop when it is set up with the typing stand.
DIY Laptop Stand Cardboard
This DIY laptop stand cardboard is perfect for emergencies. Although the stand isn’t durable, it works great for any emergency situation. All supplies such as cardboard, ruler, pen, glue, and scissors are required. A step-by-step tutorial is included with proper measurements taken. The correct measurements will ensure that everything is sturdy and robust. Check out the video guide to learn more!
DIY Wood Laptop Stand
This is a DIY wood laptop stand; this stand is very easy to make, and you will need some pieces of wood. While making this type of laptop stand, you need to have proper planning, your plans will help give proper directives regarding measurements. You will also need a pen, ruler for marking, and screwdriver and drill. This method is recommended for proper analysis of how to measure and make.
DIY Foldable Laptop Stand
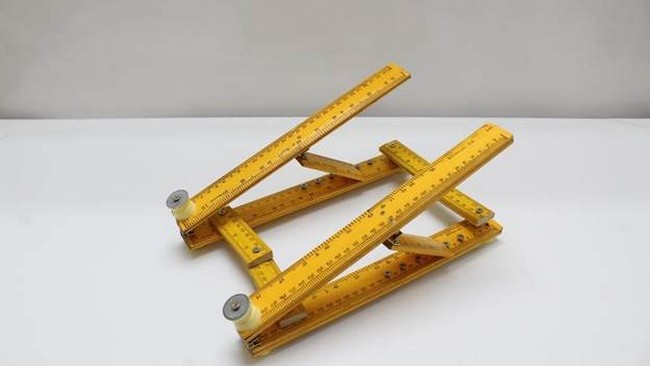
The whole build requires only a few components like wooden rulers, metal hinges, and a few screws. It provides six different angle adjustments for the laptop and also the wooden construction provides a robust design. It could be folded inwards to attain a smaller form factor and thus provides easy storage in our backpacks. This is all creativity and it's simple to build too.
Explore More DIY Tutorials
- DIY chandelier ideas: Discover the benefits of DIY chandelier ideas. Save money and create a unique design that provides a functional solution for lighting your home and adds an aesthetic touch to your living space.
- DIY business card holder: Get inspired by these charming and practical DIY business card holder concepts that will add a touch of personality to your professional image.
- DIY built-in shelves projects: Create a custom look with these easy-to-follow DIY built-in shelves projects to enhance your living space and showcase your decor.
- DIY guitar stand projects: Showcase your prized instruments with confidence using these DIY guitar stand projects, tailored for every skill level and style.


