Slither into fun with this Free crochet Amigurumi Snake Pattern, making cute, soft snakes that bring charm, playful joy, and a whimsical handmade touch.
Are you searching for a creative way to make something both playful and charming? Designing with a "Crochet Amigurumi Snake Pattern" is an exciting choice that allows you to bring a unique character to life. These adorable designs are perfect for gifts, children’s toys, or even fun decor pieces that add a whimsical touch to any room.
FREE Crochet Amigurumi Snake Pattern That Brings Smiles
With this pattern, you can experiment with endless customizations to create a one-of-a-kind snake. Whether you prefer natural, earthy tones for a realistic look or vibrant colors and stripes for a more playful twist, the "Crochet Amigurumi Snake Pattern" provides a flexible foundation for endless creativity.
Step-by-Step Guide to Crochet an Amigurumi Snake
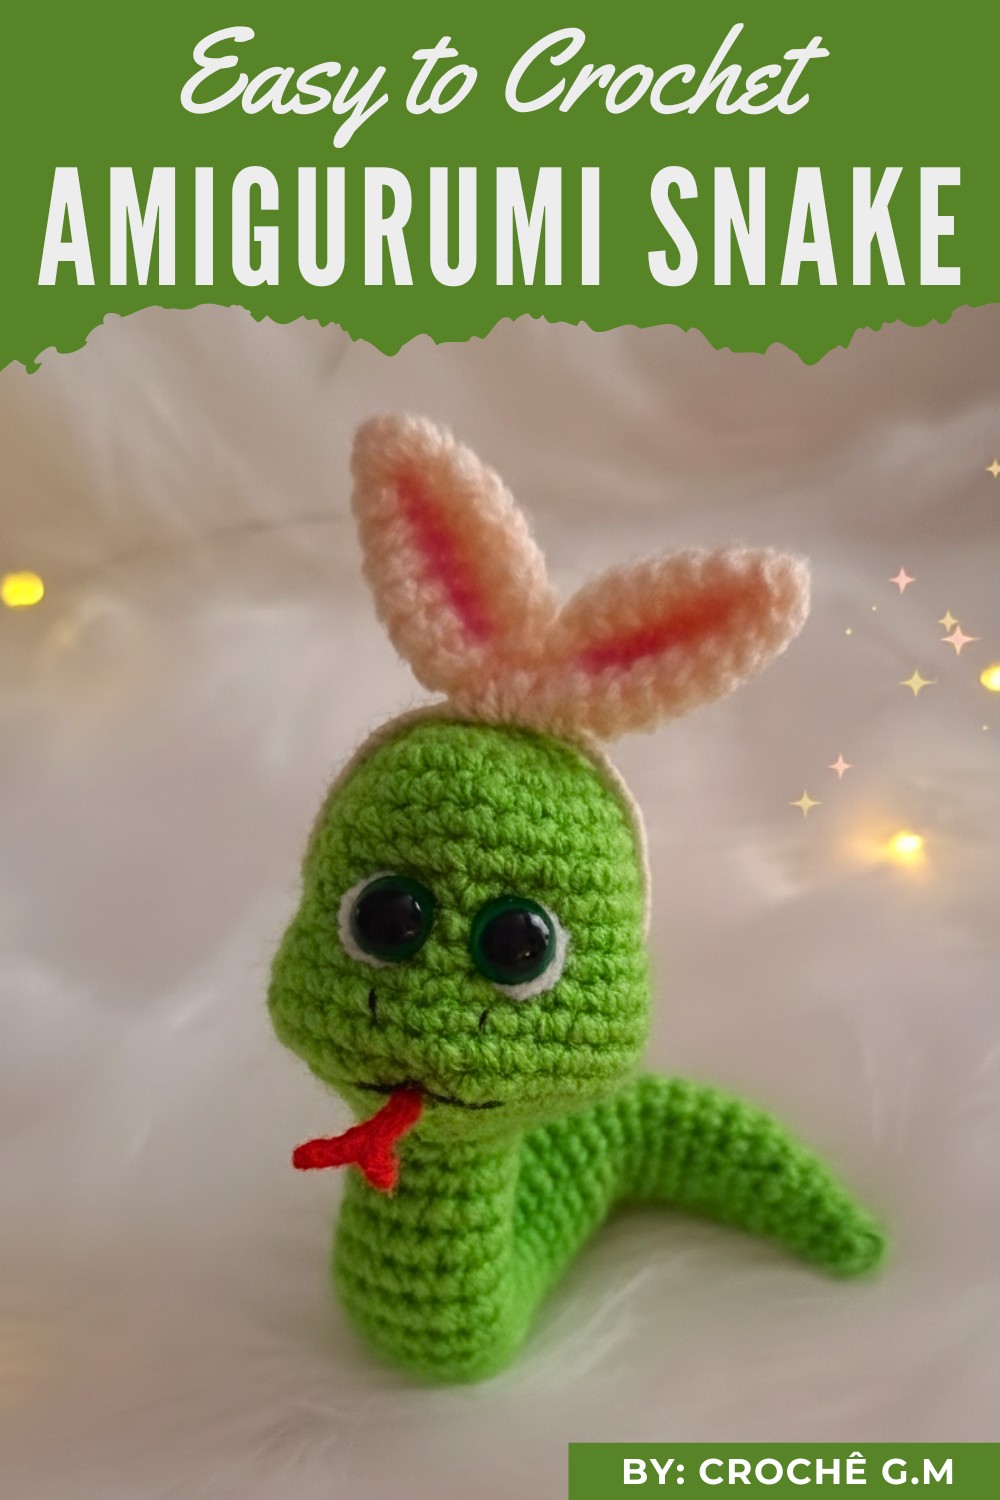
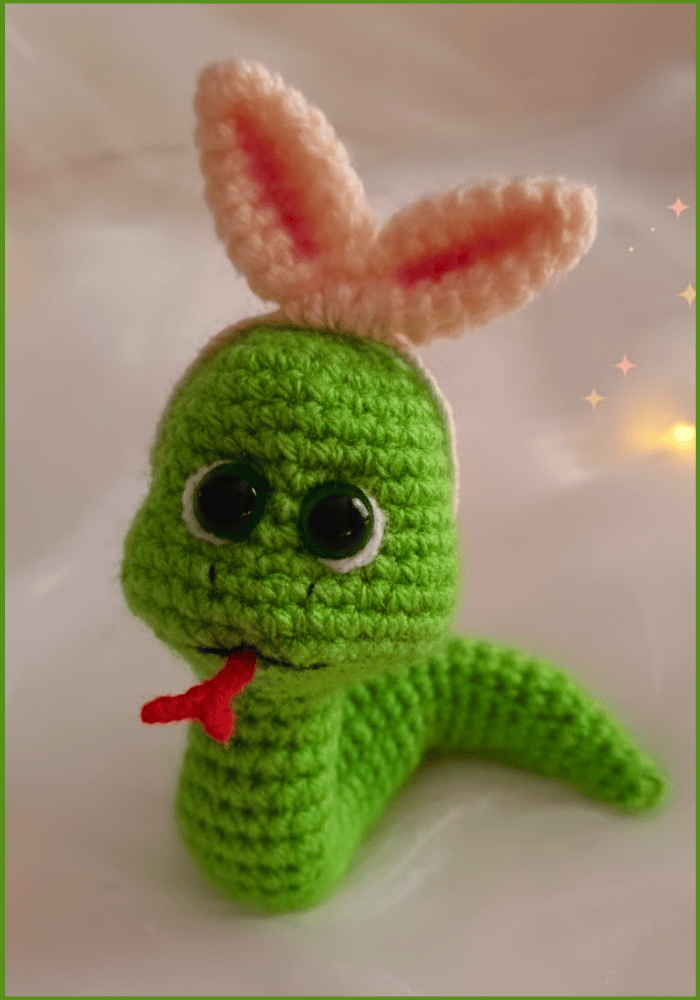
Create this charming Amigurumi snake, featuring a detailed head, a long posable body, and adorable crocheted ears on a removable headband. This project uses continuous rounds of single crochet to achieve the classic snake shape, perfect for a whimsical toy or desktop companion.
Uses
-
Make a whimsical Stuffed Animal or collectible figure.
-
Create a Posable Desktop Decoration or unique toy, thanks to the wire core.
-
Design a fun, handmade Gift for reptile lovers or children.
Materials
-
Yarn:
-
Green yarn for the body and head.
-
Thin red/pink yarn for the tongue.
-
Matching green yarn for wrapping the headband wire.
-
-
Tools:
-
Crochet Hook (2.5 mm is recommended).
-
Tapestry Needle for closing and sewing.
-
Safety Eyes (size not specified, place between R.9 and R.10).
-
Stuffing (polyester fiberfill).
-
Thin, bendable Wire (Arame) for the body and headband.
-
Fabric Glue (for securing yarn to the headband wire).
-
Special Features
-
Posable Wire Core: You integrate a long piece of wire into the stuffed body, allowing you to bend and shape the snake into various poses.
-
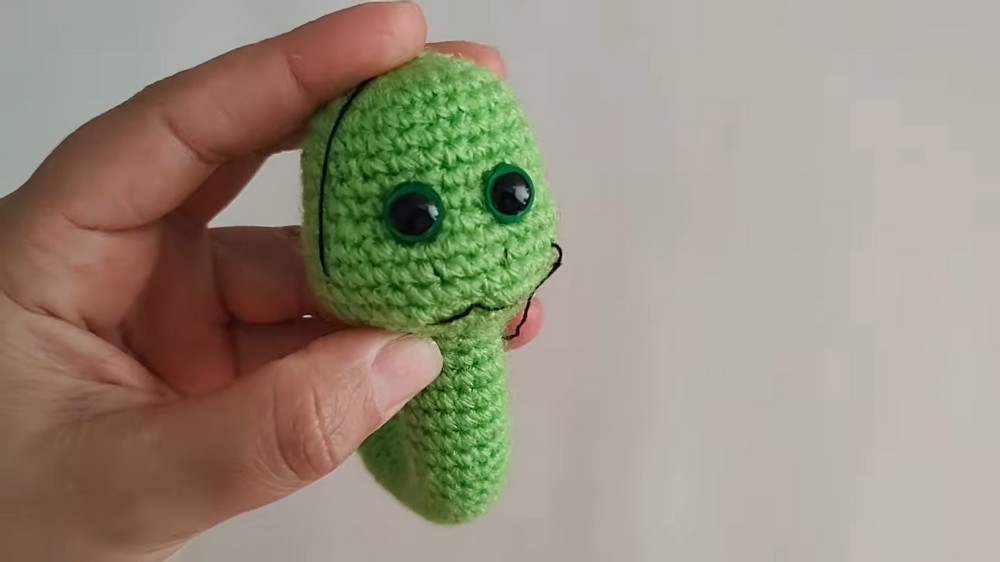
Detailed Head Shaping: The head section uses several increase and decrease rounds to create a realistic, bulbous shape before transitioning into the narrow body.
-
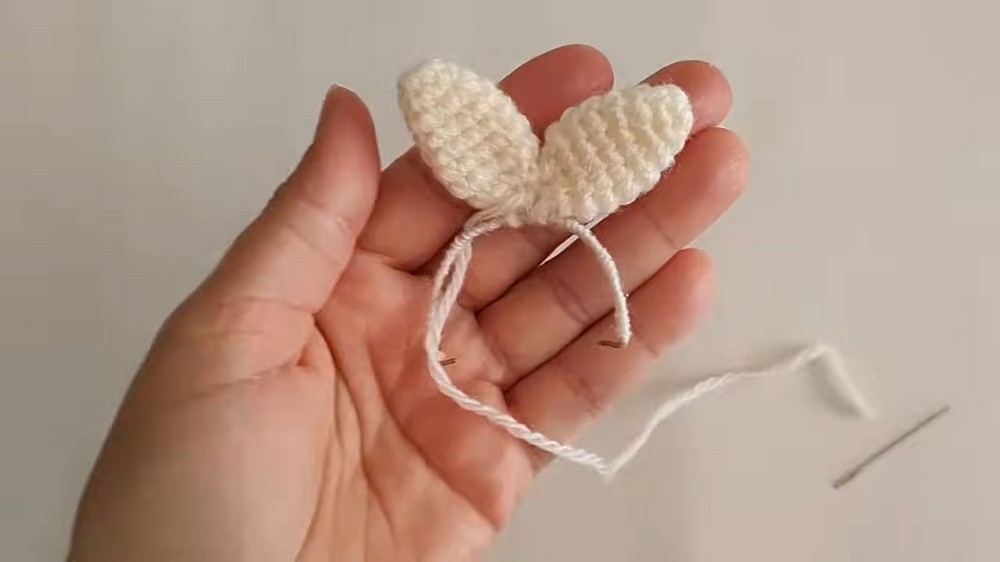
Removable Headband: You crochet two separate ears and attach them to a custom-made, yarn-wrapped wire headband, which you simply fit over the snake's head.
-
Forked Tongue: You use chains and slip stitches to craft a tiny, detailed, two-pronged tongue.
Level of Difficulty
This project is Intermediate. It requires skill in managing tension, following complex increase/decrease patterns for the head shape, and working accurately with the wire and small pieces (tongue, ears).
Tutor's Suggestions
-
Secure Eye Placement: Place the safety eyes between R.9 and R.10, ensuring they remain two Single Crochet stitches apart to center them correctly.
-
Integrate the Wire: Before inserting the wire, bend the end that will sit in the head to prevent it from poking through the crochet work. Wait until the body is partially stuffed before sliding the wire core in.
-
Stuff as You Go: Due to the snake's length, stuff the body gradually every few inches of crocheting to ensure even firmness from head to tail.
Step-by-Step Details
Part 1: Crochet the Head and Body (Green Yarn)
-
R.1 (Start): Make a Magic Ring and work 6 SC.
-
R.2 (Increase): Work 6 Increases (12 SC).
-
R.3 (Increase): Repeat (1 SC, 1 Inc) x 6 (18 SC).
-
R.4 (Increase): Repeat (2 SC, 1 Inc) x 6 (24 SC).
-
R.5-9 (Height): Work 5 rounds of 24 SC (straight rounds).
-
Place safety eyes between R.9 and R.10, 2 stitches apart.
-
-
R.10 (Increase): Repeat (3 SC, 1 Inc) x 6 (30 SC).
-
R.11-14 (Height): Work 4 rounds of 30 SC (straight rounds).
-
R.15 (Decrease): Repeat (3 SC, 1 Dec) x 6 (24 SC).
-
R.16 (Decrease): Repeat (2 SC, 1 Dec) x 6 (18 SC).
-
R.17 (Decrease): Repeat (1 SC, 1 Dec) x 6 (12 SC).
-
Stuff the head firmly.
-
-
R.18-43 (Body): Work 26 rounds of 12 SC.
-
Insert the wire core and continue stuffing as you crochet.
-

Part 2: Crochet and Close the Tail (Green Yarn)
-
R.44 (Decrease): Repeat (1 SC, 1 Dec) x 4 (7 SC).
-
R.45-47 (Point): Work 3 rounds of 7 SC (straight rounds).
-
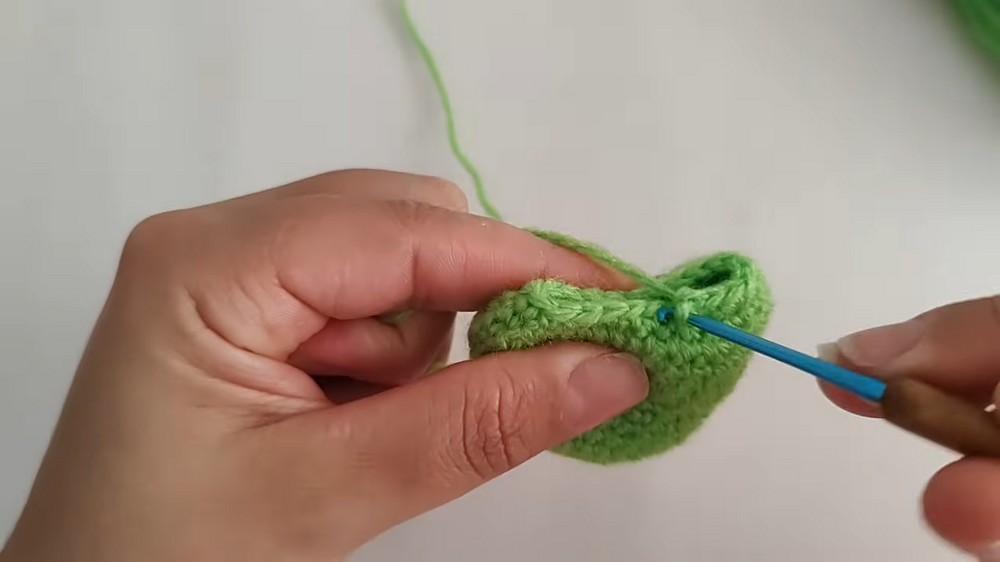
Close: Cut the yarn, leaving a long tail. Use a tapestry needle to sew through the remaining 7 front loops and cinch the hole closed securely.
Part 3: Crochet and Assemble the Tongue (Red/Pink Yarn)
-
Form: Chain 7 stitches.
-
First Prong: Slip Stitch (Sl St) into the 2nd chain from the hook, and Sl St into the next 2 chains (3 Sl St total).
-
Split: Chain 4. Sl St into the 2nd chain from the hook, and Sl St into the next 2 chains (3 Sl St total).
-
Connect: Sl St into the next 3 chains remaining from the original starting chain.
-
Finish: Fasten off, leaving a tail. Sew the tongue to the front opening of the snake's head.
Part 4: Crochet the Ears and Headband (Green Yarn)
-
Crochet Ear (Make 2):
-
R.1: Magic Ring, 6 SC.
-
R.2: 6 SC.
-
R.3: 6 Inc (12 SC).
-
R.4-7 (Height): 4 rounds of 12 SC.
-
R.8 (Decrease): Repeat (1 SC, 1 Dec) x 4 (8 SC).
-
Fasten off, leave a tail. Flatten the ear piece.
-
-
Make Headband: Take a small piece of wire and shape it into a U-shape to fit over the snake's head. Secure the end of the green yarn with glue and wrap the yarn tightly around the wire until the entire wire is covered.
-
Assemble Headband: Sew the crocheted ears onto the yarn-wrapped wire headband.

You can make snakes in different sizes or add unique details, such as a smiling face or textured features, to give them personality and charm. Taking on this project is not only enjoyable but also rewarding, as you’ll get to improve your crochet techniques while working on something truly delightful.
The finished snake combines softness, durability, and charm, making it ideal for imaginative play, novelty decor, or thoughtful gifts that bring a smile. With this imaginative approach, you’re bound to create something that sparks joy and admiration while showcasing your artistic skills.
Conclusion
You have successfully created a delightful and posable Amigurumi snake, complete with a shaped head, a long body, and a fun, accessory headband. Enjoy arranging your creation in various charming coiled positions!
Tip
Pre-wrap the Wire: Before wrapping the wire for the headband, apply a small amount of fabric glue to the wire first. This helps the yarn grip and prevents it from slipping or unraveling while you wrap the wire or when the snake is being played with.