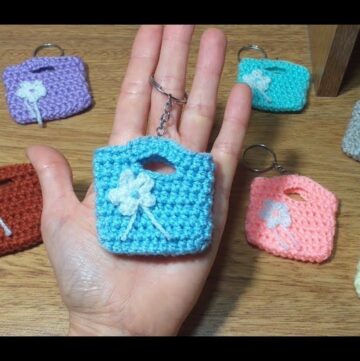
Stitch your way to adorable and personalized Crochet Flower Keychain Pattern perfect for keys bags or gifts while expressing your style with handmade flair.

Add a touch of charm to your daily essentials with this free crochet flower keychain pattern, perfect for brightening up your keys, bags, or gifting to loved ones. With its delicate and timeless design, this pattern allows you to create beautiful, handmade flowers in your favorite colors, giving you endless customization options.

Crochet Flower Keychain Perfect for Keys & Bags
Not just a practical accessory, these miniature floral keychains are a delightful way to express your creativity and elevate your everyday items. Whether you’re a beginner or a seasoned crocheter, this quick and satisfying project is sure to bring joy and inspiration.
Start crocheting your own little blooms today!
Crochet Flower Pattern
Materials List
- Yarn Type: Baby acrylic yarn (or preferred yarn; adjust hook size accordingly)
- Three different colors (center, petals, and border).
- Hook Size: 3.0 mm crochet hook
- Tools: Scissors, tapestry needle
- Optional: Stitch markers (recommended for beginners)
Skill Level
Intermediate to Advanced
Key Abbreviations (US Crochet Terminology)
- ch: Chain
- sc: Single crochet
- hdc: Half double crochet
- dc: Double crochet
- tr: Treble crochet
- sl st: Slip stitch
- magic ring: Magic circle to create a foundation
- inc: Increase (work two stitches into the same stitch)
Special Notes
- Adjust yarn thickness and hook size to achieve desired petal and flower size. Thicker yarn and larger hooks create larger flowers, while thinner yarn and smaller hooks make smaller flowers.
- Work loosely when needing petal volume for the finished result.
- This flower design consists of a pronounced center, layered petals, and a border.
Pattern Instructions
Step 1: Flower Center
- Start with color for the center (ex. yellow or lighter tone):
- Make a magic ring.
- Ch 3 (counts as the first dc).
- Work 15 dc into the magic ring.
- Tighten the ring but leave a small hole in the center.
- Cut the thread and secure with a knot:
- Use the tapestry needle to finish by working through the first stitch, pulling through to secure a flat finish.
- Hide loose ends inside the stitches.

Step 2: First Petal Round
Color for Petals (Example: Pink)
- Attach your new yarn color to any dc stitch from the previous round.
- Create a slip knot, and pull through.
- Build the base for the petals:
- Ch 3 (counts as 1 dc).
- In the same stitch, work 1 dc (an increase).
- Repeat 2 dc into each dc around the entire round (total 30 dc).
- End the round with a sl st into the third chain from the starting ch.

Step 3: Building Petals Shape
This round establishes the 3D structure and height for the petals.
- Ch 1: Start the petal details by working in the following sequence.
- Across each petal, repeat the sequence:
- Into the first stitch: sc
- Into the second stitch: hdc
- Into the third stitch: dc (increase)
- Into the fourth stitch: Work 3 tr (triple crochet, increase)
- Into the fifth stitch: dc (increase)
- Into the sixth stitch: hdc
- Into the seventh stitch: sc
- Continue repeating the petal stitch sequence across the round to make 5 petals.
- Finish the round with a sl st to close the round.

Step 4: Final Petal Enhancements
- Resume the petal structure by creating a second layer of increases within the existing petals.
- Repeat petal sequences for sc, hdc, dc, five dc increases, and corresponding treble/double stitches.
- End this layer by completing the petal tips one by one and shaping nicely using the same sl st to finish.
Step 5: Border Round
Color for Border (Example: Natural/Raw Color)
- Attach the third yarn color to any sc around a petal edge.
- For the border:
- Ch 1
- Work sc in each stitch of the petal edges.
- At the junction point between petals, insert the hook into the space, work a long sc (pulled stitch), and resume working around the next petal edge.
- Once reaching the starting point, fasten off and cut the yarn.
- Secure thread using a tapestry needle, tying discreet knots and hiding all tail ends.


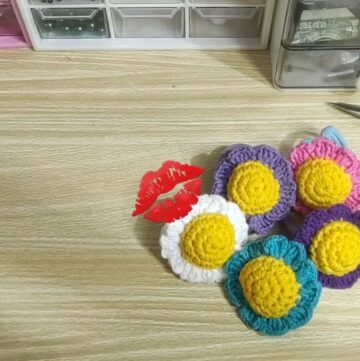
Conclusion
Your crochet flower project is complete! The flower should have beautiful volume with a layered appearance. The center offers a neat, circular shape, and petals exhibit depth and texture. The final border adds a clean, polished finish.
Pattern Corrections and Tips
- Petal Count: Ensure the petal sequence is repeated consistently across all stitches. Miscounts on petal shaping may create uneven results.
- Tidy Finish: Use a tapestry needle carefully to avoid pulling yarn too tight when hiding ends.
- Customizations:
- If you want larger petals, add more rounds of increases following principles (dc, tr) with proportional stitch counts.
- Add contrast with metallic or gradient yarn for a unique effect.