Bring cozy handmade charm with the Free crochet Granny Square Pattern, perfect for creating stylish blankets, décor, or playful accessories with ease.
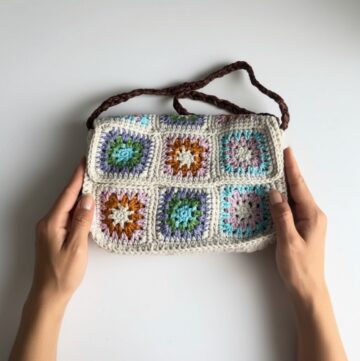
Adding a personal touch to home décor or fashion can transform simple items into standout pieces. A crochet granny square pattern is a versatile design that creates small square motifs, which can be joined to make blankets, cushions, bags, or even clothing.
Playful Crochet Granny Square Pattern Which Inspires Fun

Uses and Materials
Materials You Need
-
Yarn (Barbante): Use crochet yarn or twine size 8 or any other suitable weight for your project.
-
Hook: A crochet hook appropriate for your chosen yarn size. (The video implies a standard hook size for an 8-ply yarn).
Uses of the Project
-
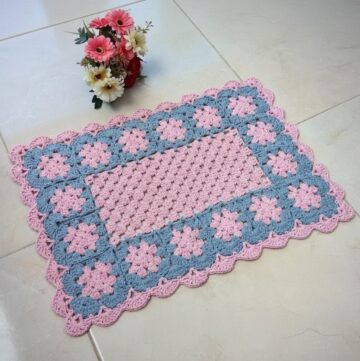
Base for Rugs/Mats: Use the finished squares as the foundation for large floor coverings.
-
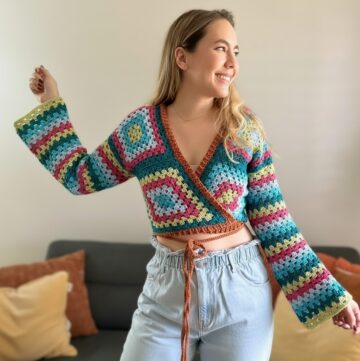
Granny Square Projects: Apply this technique to create any project requiring a perfectly square motif, such as blankets, pillows, or garments.
Special Features
-
Seamless Start: The tutor avoids the traditional Chain 3 start, which often leaves a visible seam mark. Instead, you create a seamless chainless Double Crochet (DC) at the beginning of each round to perfectly match the height of a regular DC.
-
Chainless Corner Transition: You use a chainless DC/Half DC to transition directly into the center of the previous round's corner space. This eliminates the need to slip stitch across two or three stitches, resulting in a cleaner, less bulky transition.
-
Squared Edges Technique (The Tilt): To keep the square from leaning or buckling, you intentionally incline or "tilt" the 3-DC groups on the side, always pulling them toward the next corner. This helps maintain a straight, perfect square shape.
-
Seamless Joining: You join squares together using a Chain 1, Single Crochet (SC), Chain 1 method worked on the wrong side (avesso), which creates a clean, low-profile seam.
Level of Difficulty
This is an Intermediate technique. While it uses basic stitches (Double Crochet, Chain, Single Crochet), the unique methods for the seamless start, chainless corner transition, and the intentional tilting of stitches require focus and practice beyond a standard beginner granny square.
Tutor's Suggestions
-
Avoid the Chain 3: Always use the elongated stitch/chainless DC technique for the start of the round. It helps prevent a noticeable seam and ensures a cleaner, professional look.
-
Work Towards the Corner: When working along the sides, pull the stitches of the 3-DC block (the group) toward the next corner space. This is the key to achieving a perfectly straight, non-skewed square.
-
Reduce Yarn Ends: When joining multiple squares, join them one after the other without cutting the yarn. This significantly reduces the number of ends you need to weave in later.
-
Check the Seam: When joining squares, ensure you pick up the stitches from the back loop/chain of the attached square. This makes the seam lie flatter and straighter.
Crochet Granny Square

Each square is worked from the center outward, allowing easy customization in size, color, and stitch style. This flexibility makes granny squares suitable for beginners while still offering experienced crocheters the ability to experiment with patterns and textures.

The process begins with a small loop or foundation chain at the center.

Successive rounds are built using clusters of double crochet stitches separated by chain spaces, with extra chains added at the corners to maintain the square shape.

Once the square reaches the desired size, the yarn is fastened off and ends are woven in neatly.

Multiple squares can then be joined to create larger projects. This method efficiently uses yarn scraps and produces visually appealing, functional, and customizable pieces for both home décor and fashion.

Step-by-Step Details
Master the technique of creating a perfectly square crochet base, essential for making custom rugs or blankets. This tutorial teaches you the classic crochet square while introducing special methods to eliminate the noticeable starting seam and ensure the piece remains flat and square. Learn the unique approach to creating straight edges and a simple, seamless joining technique to connect multiple squares.
Conclusion
You successfully created a clean, perfectly square crochet motif using advanced seamless techniques. By implementing the tutor's method of intentional stitch tilting and the chainless start, you eliminated common flaws. The seamless joining technique allows you to quickly assemble a large, tidy fabric for your rug, blanket, or other crochet project.
Tip
Achieve Perfect Corner Seams: When transitioning from working a corner on one square to a corner on the next attached square (joining two adjacent corners), your connecting single crochet must land in the center DC of the 3-DC group in the corner fan of the attached square. This precise placement ensures the join is centered and avoids creating a tight pucker or gap at the four-square meeting point.