Sloths in a drawing look more adorable and innocent, don't they? That's why we have rounded up these easy sloth drawing ideas to help you sketch this animal in different natural poses, their habitat, and many art styles. You will also find the most basic illustration example of a sloth for those who want to start from scratch. So, don't miss these for beginners and experts alike!
Best Sloth Drawing Ideas
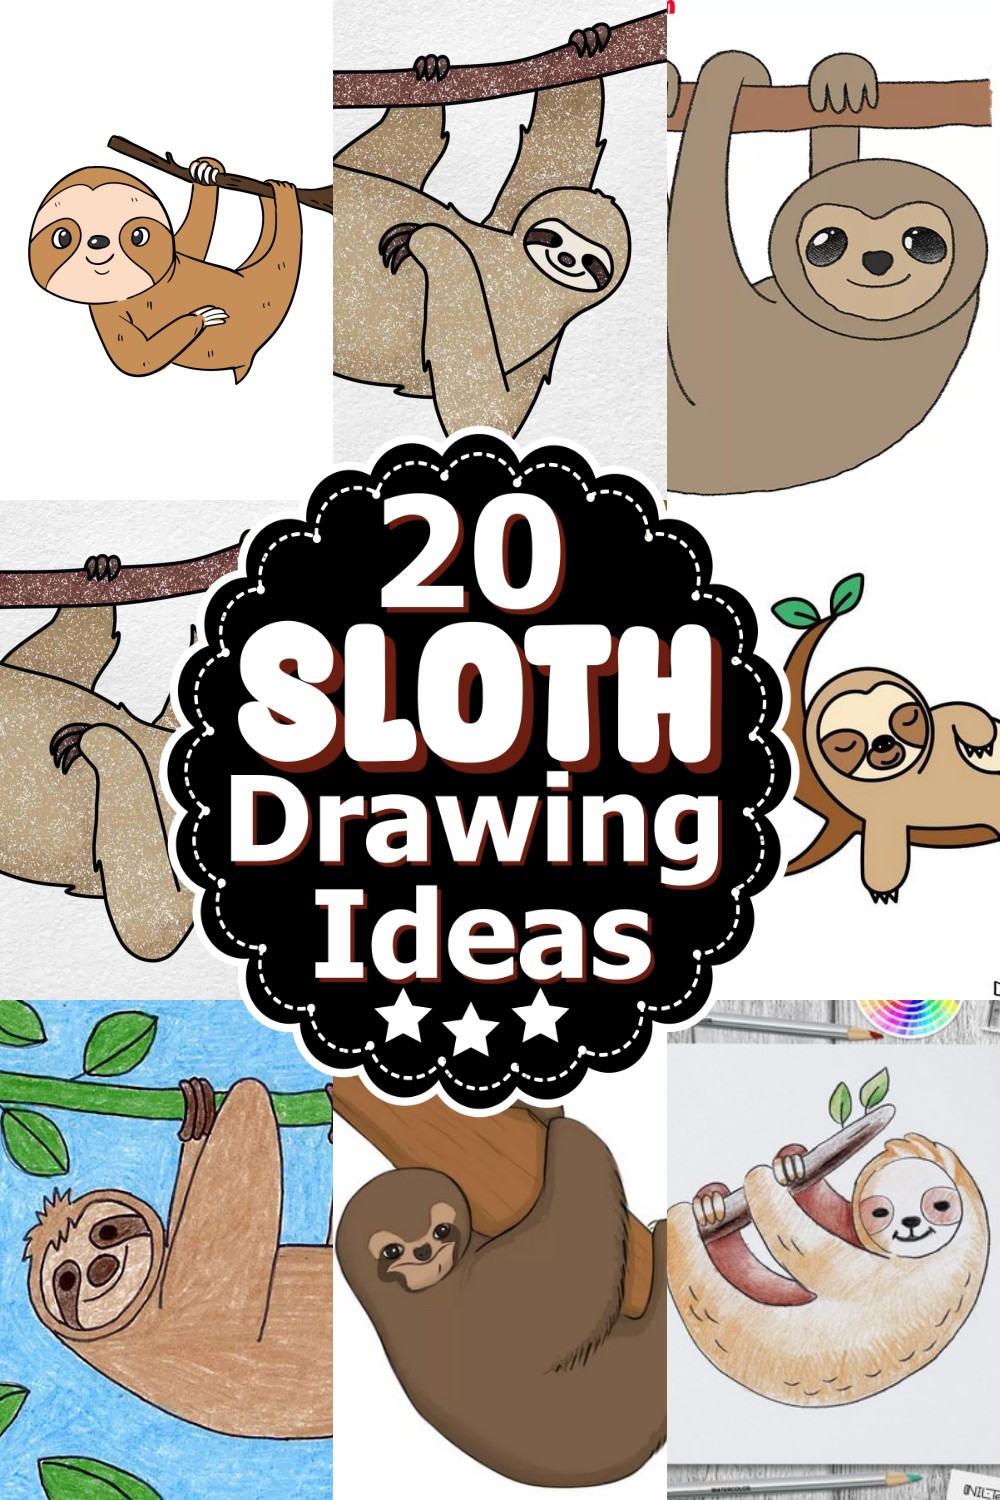
Mammalian animals like sloths may seem intimidating to beginners when come to drawing. But sloths can be drawn using very basic shapes. However, in these sloth drawing ideas, we have added a bunch of cartoonish and simple sloth looks. You can catch in the hanging by the tree branch, sleeping on the branch, and even standing. So, keep reading this list!
Supplies Needed
- Dedicated Sketch Book
- Outliners
- ColorsHow To Draw A Sloth In 5 Minutes
Uses:
Having this skill can make you the star of any gathering. Picture yourself dazzling friends with your sketching prowess or becoming the linchpin of a classroom presentation with your remarkable artistic abilities. Learning to draw a sloth in just more than five minutes isn't just for personal satisfaction; it's an artistic multitool, suitable for social settings, educational presentations, and even gifting a unique art piece. It's a simple yet versatile skill, like a secret weapon in your creative arsenal.
Drawing:
How can you possibly sketch this Mendelian marvel in just five minutes? Well, the answer beautifully carves itself through a series of simple steps like a dance routine under a spotlight. All it needs is a steady hand, a focused mind, and a dash of creativity, and you will transform a blank page into a mini-masterpiece. A smile here, a claw there, add a bunch of furs and watch your Sloth come to life.
Materials:
- A Pencil, sharp and ready
- A trusty Eraser
- A Sketchpad, bare and waiting
- [Optional] Colored pencils or crayons for coloring your creation
How To Draw A Sloth
Uses:
A remarkable way to awaken the inner artist, the fun involved in sketching a sloth paves the way for creativity, relaxation, and skill improvement. It helps to unleash the power of imagination, doubles as an excellent activity for children to keep them engrossed cultivates patience, and assists in enhancing artistic ability - regardless of your skill level!
Drawing:
This tutorial has been designed meticulously, reducing complexities to present a seamless drawing experience. As you navigate through different stages of sketching, you'll soon find yourself engrossed in the beautiful process of creating art, one step at a time. The joy multiplies as an individual image is dedicated to every step, allowing you to sketch at your own pace, making the drawing adventure engaging and user-friendly.
Materials:
- Pencil - standard HB or mechanical
- Eraser - any kind that won't smear your work
- Paper - a simple white drawing or printer paper will do
- Coloring materials - colored pencils, crayons, or watercolor, based on your preference
Easy How To Draw A Sloth
Uses:
Drawing a sloth is not only a delightful activity, but it also sparks creativity and encourages visual understanding. It's a splendid activity for both kids and adults alike. It enhances focus, develops observational skills, and is just downright enjoyable!
Drawing:
Drawing an adorable sloth is both enjoyable and easy to learn. It's as effortless as following a straightforward video guide. Everyone can create a charming sloth sketch, regardless of their drawing skills. Watch the video, take your time, pause when needed, and remember there is no rush. Remember, patience pays when you're capturing the laid-back nature of a sloth!
Materials:
To create your Sloth, you will need:
- Sharpie (or any other drawing tool)
- Paper
- Markers
- Colored pencils
How To Draw A Sloth
Uses;
Drawing takes you to a world where sloths come alive right beneath your fingertips. A sloth sketch isn't merely a two-dimensional piece of art. It's a silence breaker in a room, instantly captivating everyone's attention. It's a visual narration that transforms a blank space on your notebook or bedroom wall into a vibrant jungle right at your home.
Drawing:
Waking up that latent artist within you is as simple as pie if you have the right resources. Don't be scared if you don’t have any prior experience. With the sloth drawing tutorial, you'll realize drawing is much easier than you ever thought it to be. Just follow the easy video guide and watch, mesmerized, as your very own sloth sketch comes to fruition.
Materials:
- A clean, blank sheet of paper
- A pencil, ideally a sketching pencil
- A good eraser for any minor mishaps
- Colored pencils or markers to add that dash of color to your masterpiece
Easy How To Draw A Sloth
Uses:
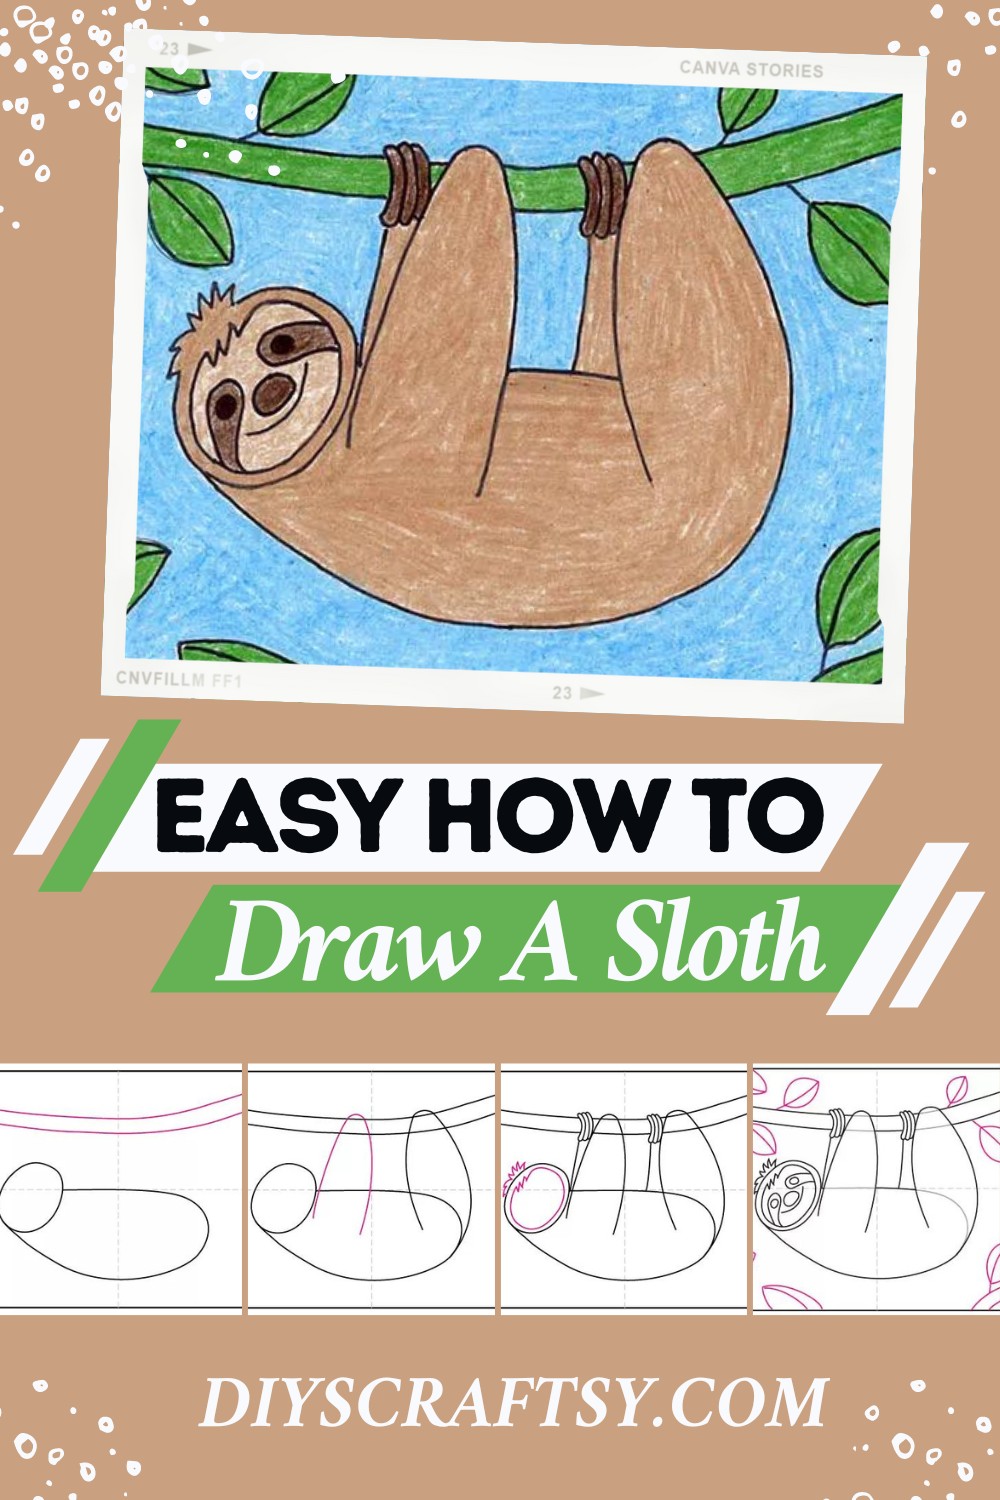
Drawing serves as relaxing downtime away from the everyday hustle and bustle while gently tapping into creative potential. A hand-drawn Sloth carries a mark of originality and a personal touch and provides a glimpse into the drafter's creative process. It's a fun and easy way to expand creative skills and introduce youngsters to the world of art. A Sloth drawing can also act as a helpful educational tool while discussing nature or animal behavior.
Drawing:
Initiate your journey with an oval for the Sloth's head and a loosely attached body. Above the Sloth, sketch a branch it's hanging from. Softly draw the back leg of Sloth, connecting the body with the branch. A front and another side leg are added afterward; make sure you leave space for distinctive long claws. Outline the face, and patiently fill in with features. Add leaves to the tree for a refreshing pop of green. Once you're satisfied with your sketch, trace everything with a darker marker and invite colors to the party with a wide assortment of crayons. Your very own custom-made, adorable Sloth is ready to be admired!
Materials:
- A piece of drawing paper
- A pencil for sketching
- Black marker for darker lines
- Wide selection of crayons for coloring
Once you have these ready, you can embark on your artistic quest!
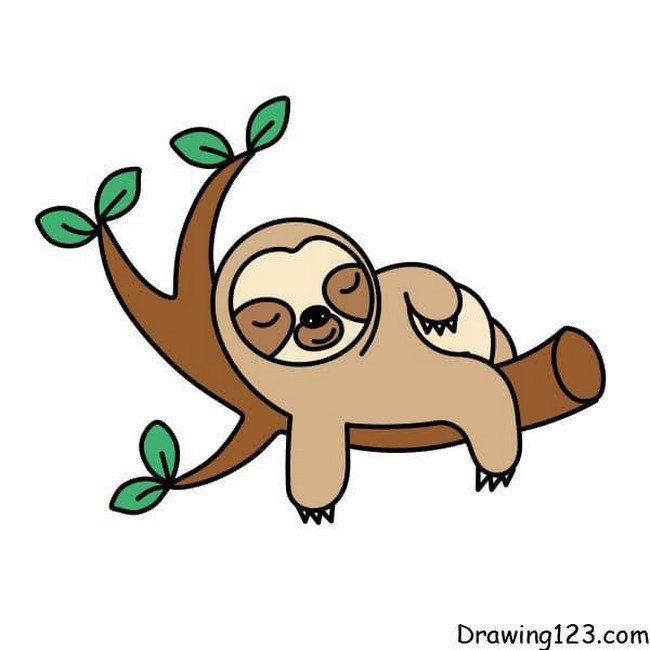
Easy Sloth Drawing
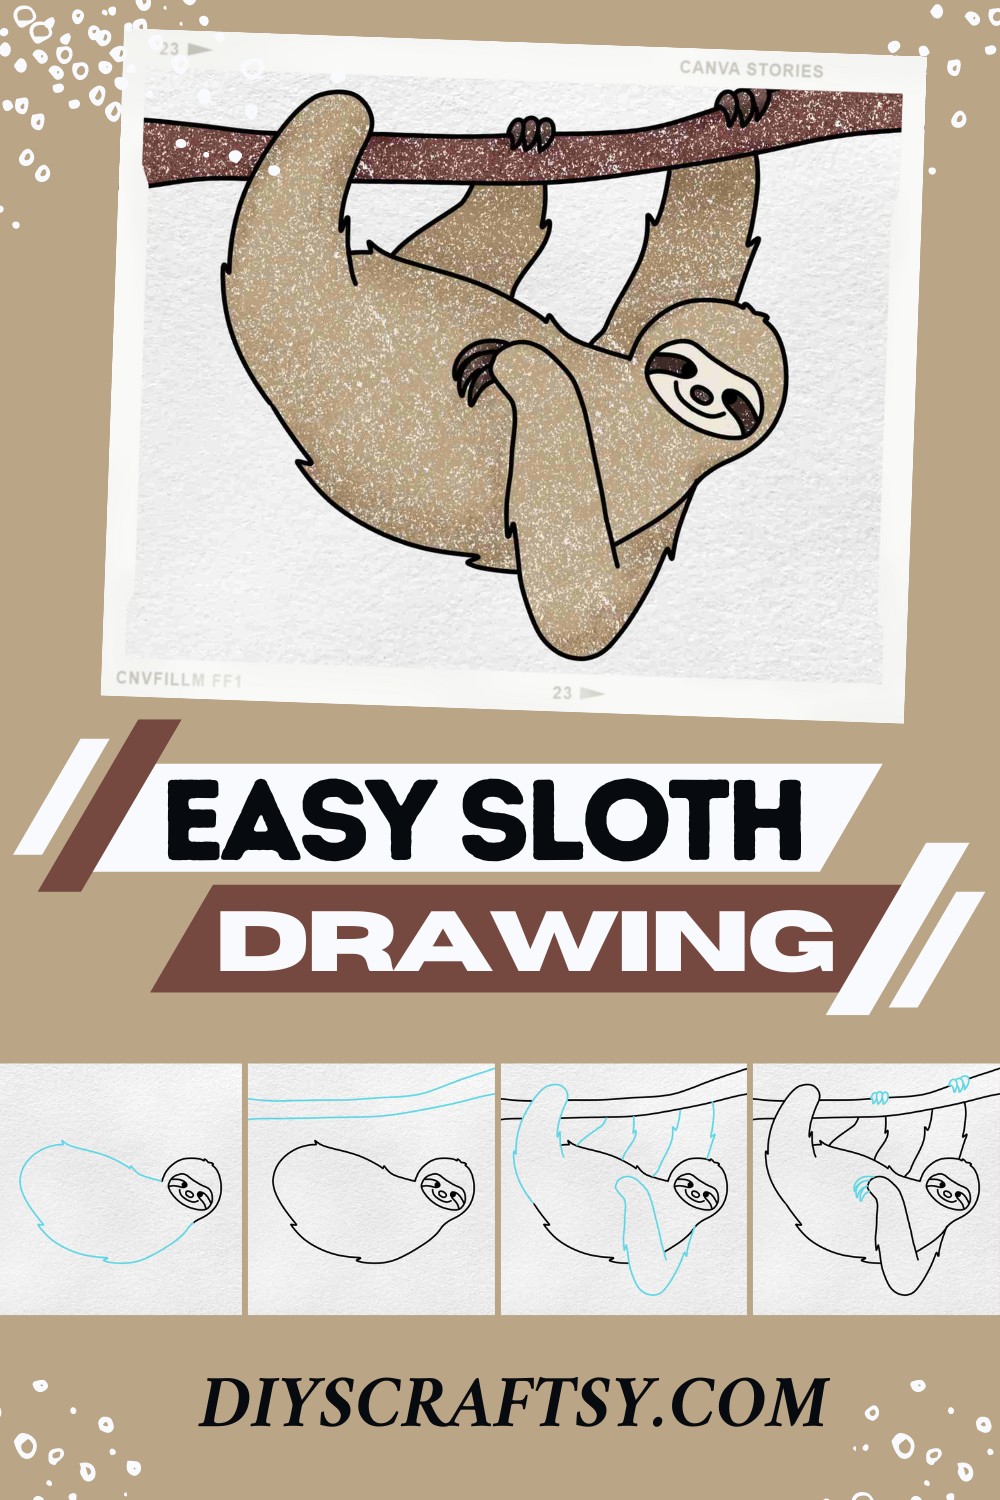
Uses:
Learn how to draw an adorable sloth by following easy, enjoyable steps in this tutorial. Accomplishing this simple activity can improve focus and fine motor skills while nurturing creativity. Teachers and parents could find this practical exercise as an exciting and engaging way to entertain children and young teens.
Drawing:
The journey to create a charming sloth starts with an oval for the face. Next, add shaded circles for the eyes, an oval for the nose, and a curved line as a smile. Elevate the appearance by drawing a curved line to form a unique eye pattern. Construct a rounded head and an oval for the body, then create the Sloth's limbs as elongated shapes. Remember the Sloth's natural habitat; sketch a wavy tree branch for it to cling to and dangle from. Complete the Sloth by forming pointed claws on its limbs. To polish your artwork, add a splash of color to make it charismatic and endearing.
Materials:
- Pencil
- Drawing Paper
- Crayons or Colored Pencils
- Black Marker (optional)
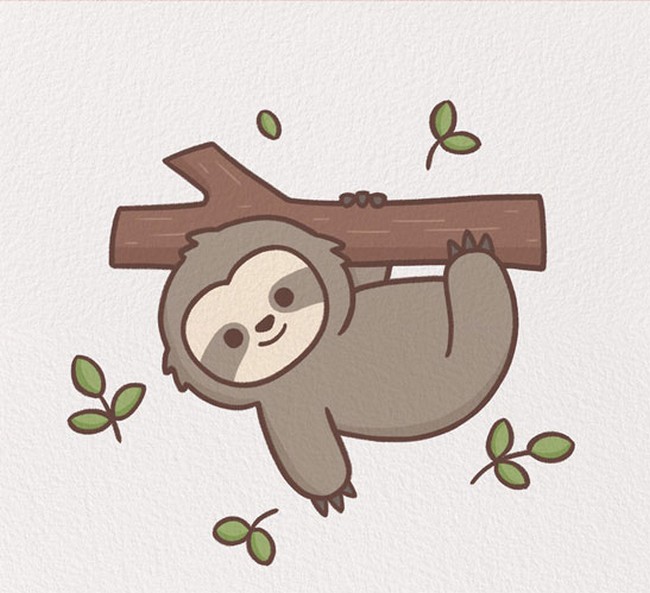
Cute Sloth Drawing
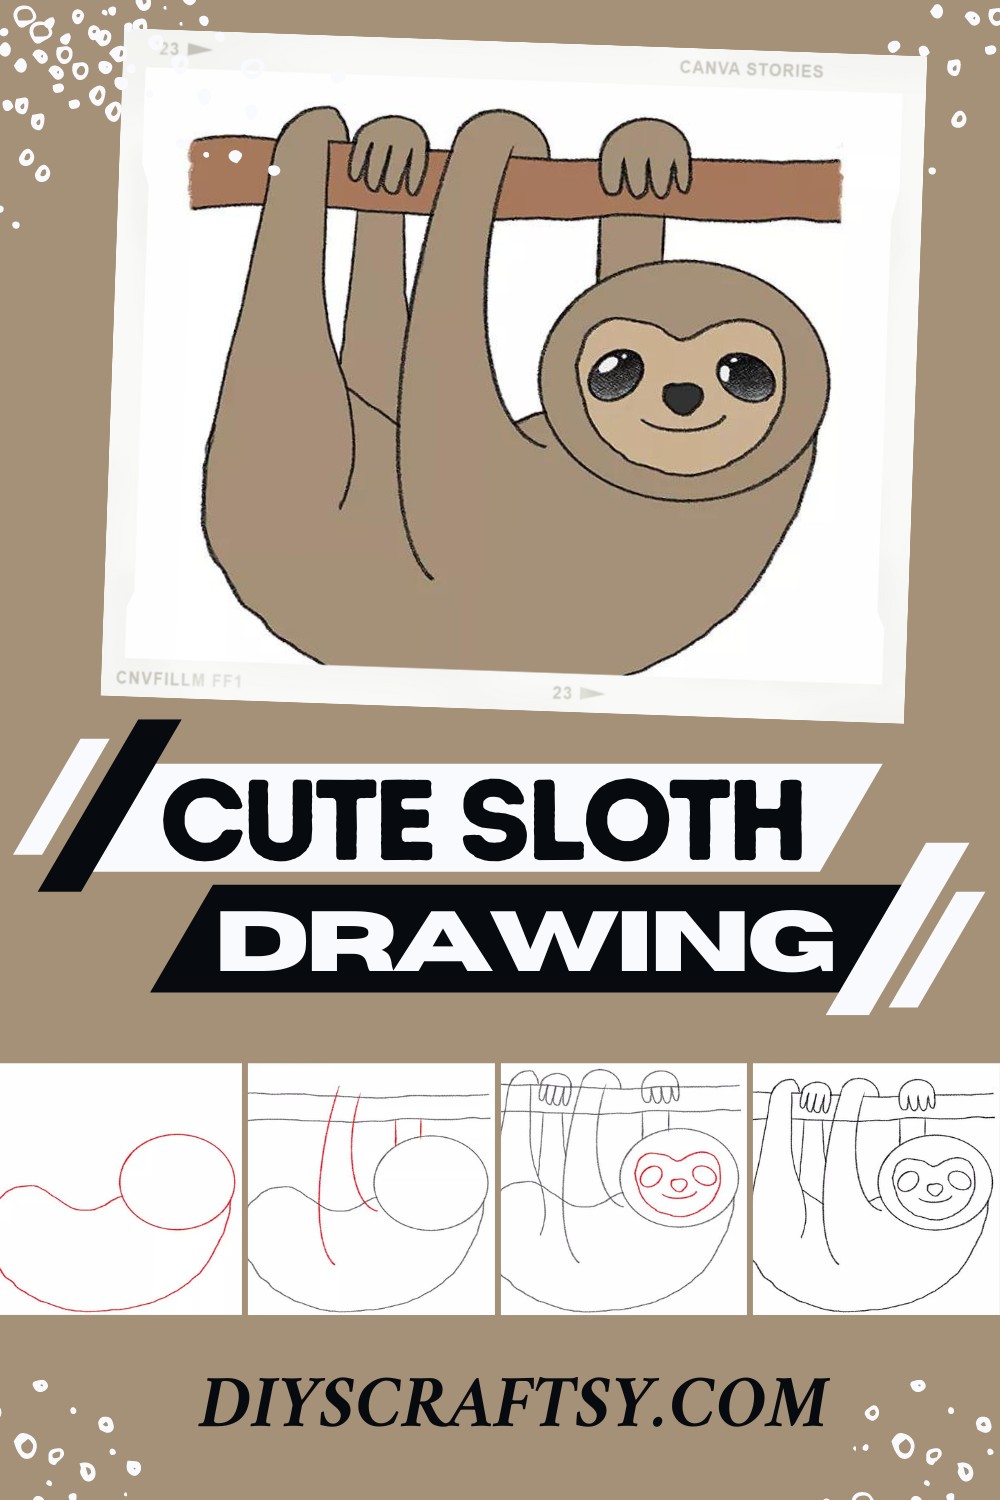
Uses:
This Cute Sloth Drawing could add a charming touch to any kid's room or could be a happy addition to a school nature project. Imagine displaying this loveable creature in living spaces, where it would surely bring smiles to anyone's face! Plus, drawing a sloth is an activity that can bring joy while allowing you to relax and take things slow, just like a sloth does.
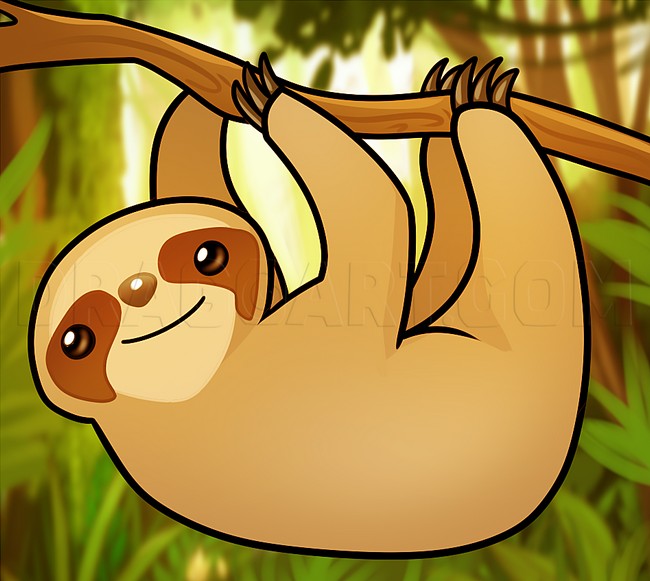
Drawing:
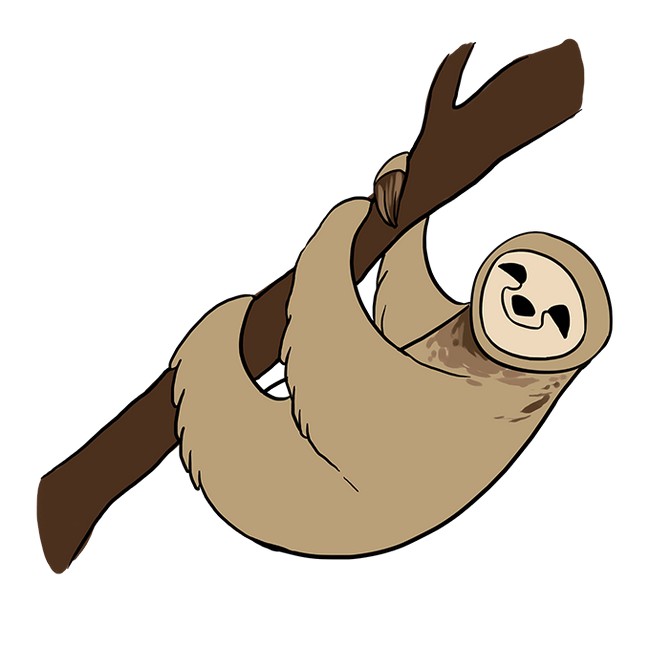
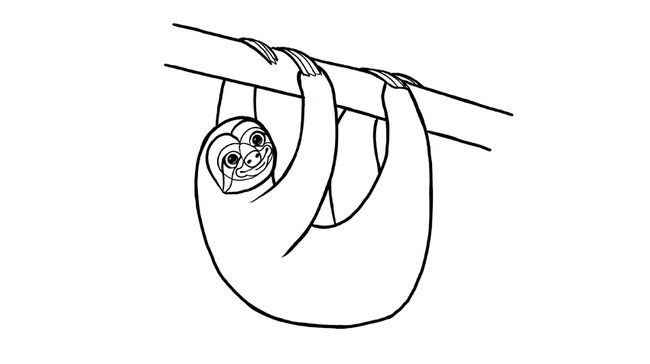
Drawing a Cute Sloth is quite a straightforward task; all we need is to follow a few steps. First, sketch out the Sloth's round head and curvy body. Then, draw those long paws that are going to grip the vine. Next, create the vine above for which our Sloth is hanging. It's necessary to remove the Sloth's feet holding onto the vine, and finally, it's time to express the Sloth's charming character through the facial features - eyes, nose, and a tiny mouth. Remember to erase the extra lines and add color at the end to make your Sloth come to life.
Materials:
- Pencil
- Paper
- Eraser
- Coloring supplies
Cartoon Sloth Drawing
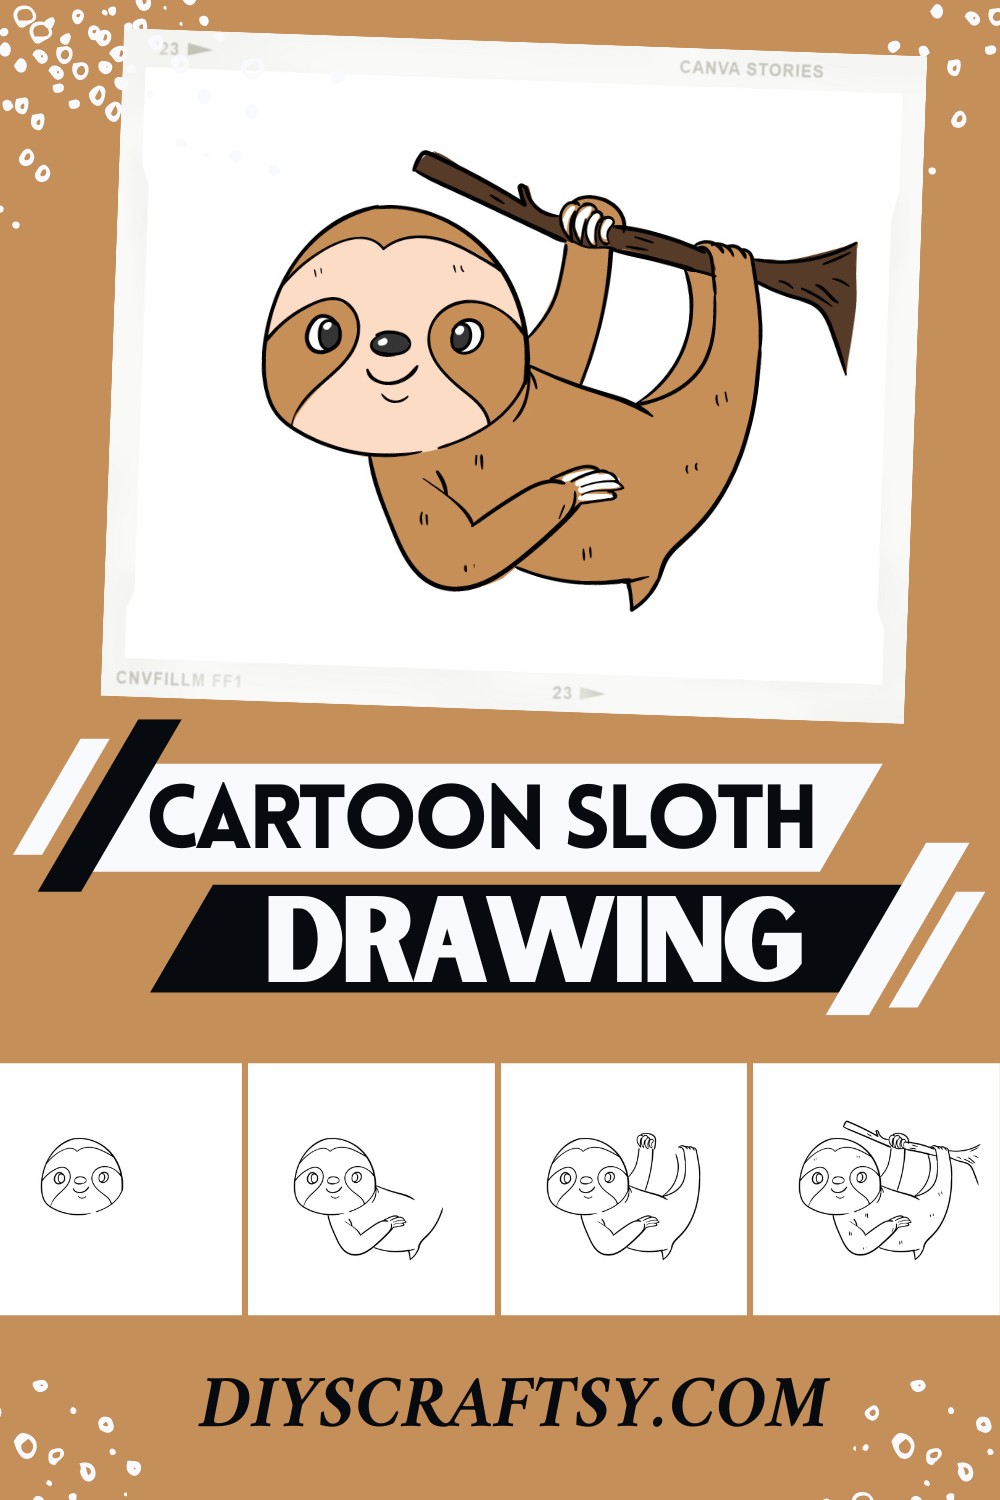
Uses:
The mesmerizing cartoon sloth drawing holds a unique charm. With its cute and playful looks, it can be used to lighten up any space and bring a smile to anyone's face. The drawing can be wonderfully utilized as a delightful decoration in a kid's room, or it could serve as the focus of a homemade greeting card. It's also a perfect tool for teaching kids about different animals, their habits, and their appearances in a fun and engaging manner!
Drawing:
Drawing a cartoon sloth is like immersing oneself in the slow-paced world of these fascinating tree-dwelling creatures. It begins with the unique formation of its head, leading to the distinctive facial features enclosing its cute eyes and smile. The next step involves sketching out its strong climbing arms, followed by the formation of its body and agile legs. Finally, the Sloth is depicted hanging blissfully from a branch, giving it a natural charm. The drawing journey doesn't just end here; one can add a number of personal creative touches as well to bring life to the drawing, enabling it to reflect absolute happiness and peace, just like a sloth!
Materials:
- A pencil
- An eraser
- Colors that could be crayons, watercolors, or colored pencils
- Drawing or sketching paper
Simple And Beautiful Instructions For Sloths
Uses:
Everyone loves sloths, don't we? Their slow pace, furry body, and adorably sleepy faces bring a smile to anyone's face. So, why not bring this joy into drawing? Drawing a sloth is a relaxing, enjoyable activity. It can be a fun way to fill your free hours, keep you engaged, and add another skill to your hat. What's impressive about it? It helps improve your focus, creativity, and patience. Cool, isn't it?
Drawing:
Drawing a sloth is easier than you think. The first thing to do is to sketch a circle for the Sloth's head. Follow that up with a couple more circles forming the body and legs. The next step is giving it face features - a pair of eyes, a nose, and a sleepy smile. Remember the claws? Draw them and give your Sloth something to hang from, maybe a tree branch? Before we're finished, add a few lines here and there to show its fuzzy fur. Now comes the best part - coloring! Give your Sloth a warm, earthy color, bringing it closer to its real-life version. And just like that, your very own cute Sloth is ready to get a dollop of joy!
Materials:
- A sheet of plain white paper
- A simple pencil
- Eraser
- Sharpener
- Colors (crayons or colored pencils)
Sloth Drawing
Uses:
Drawing is a beautiful way to explore and express creativity. And when the subject is an animal as unique and exciting as a sloth, it brings an extra layer of excitement to the process. Drawing a sloth not only develops hand-eye coordination but also educates on the specific characteristics of this fascinating creature!
Drawing:
A sloth drawing starts with a simple sketch, using basic geometric shapes as a guide. Firstly, draw a semi-circle to create the Sloth's head. Then, additional lines and curves help to form the facial features, such as its eyes and nose. Following the head, the body of the Sloth - consisting of arms, claws, and legs - takes shape. Once the individual parts are in place, blending them and refining the details provides a more realistic representation. To make the Sloth look like it's in its natural habitat, draw a curved line to represent a branch. Remember, the journey of drawing should be enjoyable, so keep going until you're pleased with the output.
Materials:
- A piece of paper
- A pencil for the guiding lines and sketching
- An eraser
- A black Sharpie or a pen for the outlines
- Markers or colored pencils for coloring.
How To Draw A Baby Sloth
Uses:
Drawing a baby sloth sparks the imagination while fine-tuning motor skills for kids and beginning artists. The simple strokes, combined with fun, define this activity. It paves the way for a cozy afternoon with creativity flowing and an introduction to the fascinating world of wildlife.
Drawing:
Step into a beautiful jungle adventure without leaving the comfort of your home. Start with the head as a large circle, followed by two filled-in ovals representing the Sloth's calming eyes. The nose and mouth appear in easy shapes to form an endearing face. Venture next to the body, sketching a gentle curve for the back and a small bump for the tail—the arms and legs drape, displaying the creature's serene nature. And remember the little triangles at the ends - they are the Sloth's signature claws! The final step conjures a tree branch, bringing your Sloth to life, hanging with leisurely ease.
Materials:
- Drawing paper
- Pencil for primary sketch
- An eraser to correct mistakes
- Finalizing pen
- Colour pencils, crayons, or watercolors for filling
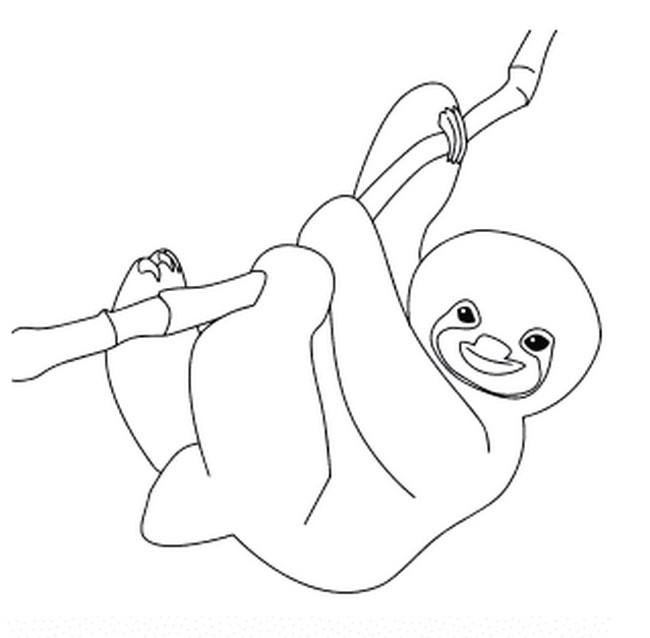
Sid The Sloth Drawing
Uses:
This drawing isn't just any drawing; it's a journey into the world of Sid the Sloth! Kids can take this journey to improve their hand-eye coordination, build fine motor skills, and learn about the animal kingdom. Adults can also join in on this journey to enhance their drawing skills, relax, or perhaps rekindle their love for art. The fun doesn't stop there — everyone can frame and display this masterpiece in their living space or gift it to someone they adore.
Drawing:
Drawing Sid the Sloth is as easy as one, two, three! Start by drawing two parallel lines for the tree trunk where our friend Sid will hang. Sketch out basic shapes for the body next — the head and torso are simple oval shapes! The front and back legs connect the head and torso using thin lines. Now comes the fun part: the face! Two circles for the eyes, and a little lower, a cute nose. Add details to the beginning, and then move onto the front and back paws. Remember to draw three large, narrow claws on Sid's front paws and the hind foot. Lastly, color the drawing using different shades of brown. Voila! You have your own Sid the Sloth!
Materials:
- A pencil: to sketch your outline
- An eraser: to correct any mistakes
- A good quality paper: to make your drawing last
- Different shades of brown color pencils or crayons: to give life to Sid
- A black sketch pen or marker: for final outlines and details
How To Draw A Sloth For Kids
Uses:
Drawing a sloth can offer multiplied doses of fun and creativity! It opens up a magical door of imagination for both kids and adults. Not only does it boost drawing skills and encourage focus, but it's also an engaging way to teach kids about this unique animal. Let's fill the canvas of art with joy and excitement!
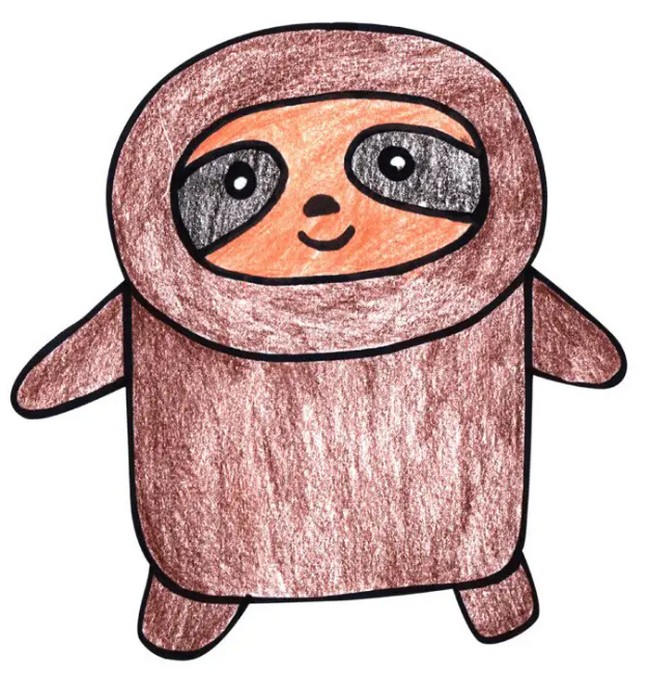
Drawing:
In the simple journey of drawing a sloth, the little artists would first start with the Sloth's head, drawing a round shape. Then, with tiny strokes, they'll sketch in the Sloth's sleepy eyes and cute little mouth. Bit by bit, they add in the body, tail, and legs before wrapping up with the detailed texture of the Sloth's fur. The entire process unfolds delightfully in small, manageable steps.
Materials:
- A piece of paper
- A pencil
- Some colored pencils for adding a dash of life to the sloth sketch
- An eraser for fixing minor mishaps and making tweaks.
How To Draw A Cartoon Sloth
Uses:
The charm and delight of drawing can not be understated. It helps to free your mind, expressing your imagination and creativity. Drawing cartoon characters like a sloth can sound complicated, but it's easy and fun once you know how to do it.
Drawing:
Drawing a cartoon sloth is a step-by-step process. First, you kick off by designing two shapes: one for the head and the other for the body. Sketch facial guidelines and move to the next phase. With the guides, start penciling the head and body shape, then craft the limbs (arms and legs). The claws will be clinging to the branch that the Sloth hangs from. Drawing the marking line on the forehead and the markings on the face for the eyes follows next. Fill in those markings with eyes, nose, and mouth. Drawing the large branch that the Sloth is hanging from concludes the drawing steps. Lastly, erase the guidelines and mistakes.
Materials:
- Pencil
- Eraser
- Sketch Paper
Sloth Drawing Easy
Uses:
Sloths! Aren't they just the cutest, coziest creatures out there? What if you could draw an adorable sloth all by yourself? Sounds exciting. Drawing a sloth is more than just putting pencil to paper; it's an adventure! You can enjoy this relaxing activity while enhancing your creativity and focus. Plus, what's better than impressing your dear ones with a self-made sloth drawing? So, let's jump into this world of colors and shapes, shall we?
Drawing:
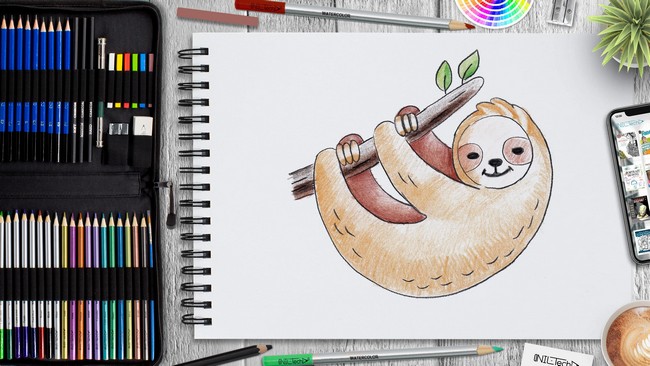
Now, let’s get those hands working! Begin the exciting journey of drawing your Sloth by sketching a branch it will hang from and the shape of the Sloth. Now, onto the fun bit - the legs and the adorable oval face. Don't forget those fingers, and the smiling eyes, the nose and mouth. It's shaping up nicely. Now, erase the unnecessary lines and draw some paws and leaves for that real-life touch. Adding color is the magic part – a soft beige for the body and warm brown shades for the legs and the branch. Voila! You just brought to life your very own artistic masterpiece. That didn't seem complicated.
Materials:
- A simple 4H pencil
- An HB pencil
- A 2B pencil
- A 5B pencil
- Colored Pencils
- A Mechanical Pencil
- A user-friendly Kneaded Eraser
- A White Vinyl Eraser
How To Draw A Sloth
Uses:
Sloth drawings are a big bundle of joy and learning. Imagine the power to draw a creature that's known for its slow-paced life, spending most of its time relaxing on trees in the rainforests of South and Central America! By drawing a sloth, you can fine-tune your ability to capture unique characteristics on paper and learn about these intriguing mammals. The whole experience of bringing the Sloth to life on paper can be an exciting way to improve drawing skills and learn about nature at the same time!
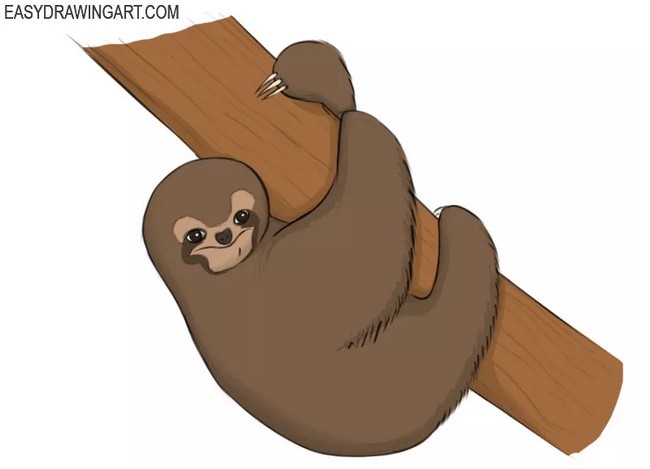
Drawing:
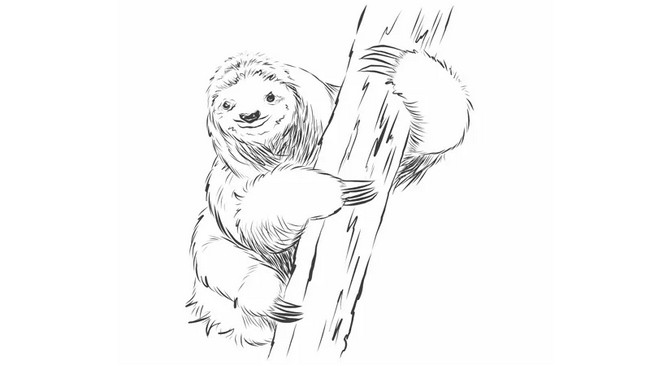
The Sloth begins to form on paper from a basic round shape that serves as its head. From here, a longer, irregularly rounded shape extends from this circle to depict the body of our Sloth. The arms and legs, characterized by a series of short curved lines, give our Sloth a furry, welcoming appearance. The final touches involve creating the Sloth's face inside the circular head and adding in the tree branch that the Sloth grabs onto. With these elements, the Sloth comes to life on paper, ready to fill anyone who gazes upon it with a sense of slow-paced tranquility.
Materials:
- A pencil to stake out initial guidelines and sketching
- An eraser to rectify any mistake—everyone makes them!
- A sheet of paper to serve as the canvas for your masterpiece
- A different colored pencil or pen to breathe life into the Sloth through coloring.
Sloth Drawing Realistic
Uses:
Bonding with art by sketching a realistic sloth captures not just your curiosity but your heart. This enchanting exercise enhances your drawing skills and instills patience in the artists. It's perfect for those looking for a relaxing pastime or those who love nature and want to capture its harmony on paper.
Drawing:
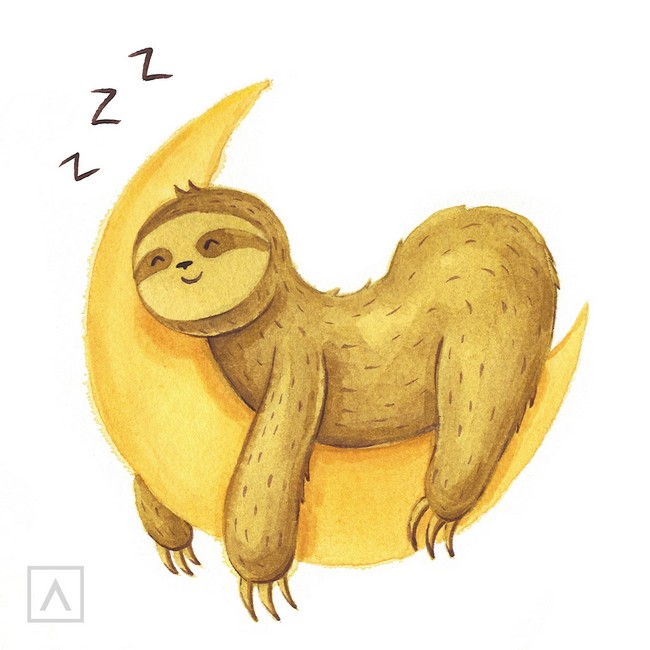
Creating a realistic sloth starts with sketching a lazy circle for a perch and surging forward to the main act – the Sloth. Use gentle shapes, a medley of circles and ovals, to form the lazy posture of this charming creature, complete with its drooping limbs. Don’t forget the distinctive 'U' for the eye detailing. This makes your Sloth look like it's peacefully sleeping. It's beneficial to add layers of color to your Sloth, giving it depth and creating shadows. Your first base can be a gentle wash of a soft color. Once dry, another layer of the same color darkens the body. Your final touch, dark color spots for the eye patches, and little strokes for the fur bring your Sloth magically to life.
Materials:
- Arteza Portable Watercolor
- HB Pencil
How To Draw A Easy Sloth
Uses:
Our friendly sloth drawing is a joy to complete for all ages! For young ones, it can assist in enhancing hand-eye coordination while introducing the marvel of the natural world. For adults, not only can this activity help develop drawing skills, but it also provides a serene, tranquil moment away from the hustle and bustle of life. Once it's done, the result could be an excellent addition to a personal art gallery, a unique gift, or even an engaging color activity.
Drawing:
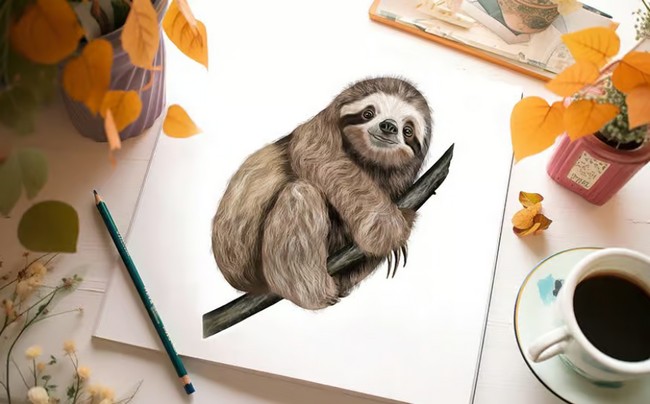
Mastering the art of drawing an adorable sloth doesn’t need to be a complicated process. Kickstart your adventure by sketching a rounded face shape and penciling in the future position of facial features. Next – three simple shapes make up the Sloth's body! An almost circular shape at the top, an oval-like shape in the middle, and a more fluid form at the bottom. Follow this with elongated, simplistic shapes to represent the Sloth’s arms, ending in claw formations. Add detail to your drawing with careful depiction of facial features, including the eyes, nose, and mouth. After this, place the Sloth on a sketch of a tree, adding some curves to hint at texture. To finish your lovable Sloth, add some final details, such as giving him a furry texture, and you're done!
Materials:
- A sketchbook: to become the canvas of this masterpiece
- A pencil: to guide your lines and shapes
- An eraser: to conveniently fix any errors
- A black ink pen: to intensify the outline and details
- Optional colors: to add a personal touch and bring your Sloth to life
How To Draw A Sloth Create An Adorable Sloth Sketch
Uses:
Drawing an adorable sloth picture is a rollercoaster of fun and thrill! It's a fantastic way to unfold the magic of rainforest creatures and bring them alive on paper. This activity lights up the young minds with creativity, helping kids understand this slow yet fascinating creature in a fun and imaginative way.
Drawing:
To start their drawing adventure, budding artists sketch the Sloth's round head. Then, they capture the unique body shape, along with long arms and legs. The Sloth's impressive hook-like claws are brought to life in just a few strokes! Adding detailed facial features like the big, innocent eyes and happy mouth helps to depict the cute persona of the Sloth. The last touch in the drawing involves following the fur texture, with individual strokes bringing out the fluffy yet sleek fur. In the end, it's a thrilling expedition to draft out the Sloth in its natural environment, hanging onto a tree branch.
Materials:
- A good quality drawing paper.
- A smooth pencil for sketching.
- Some erasers to correct the drawing.
- Artistic brushes of different sizes for adding effects and details.
- A variety of colors (paints or colored pencils) to bring a realistic touch to the sloth sketch.
How To Draw A Sloth Step By Step
Uses:
Drawing unlocks the door to creativity and self-expression. For children and those young at heart, it can whisk you away to new worlds. Drawing a cute sloth might sound tricky, but fear not! It's much simpler than you think.
Drawing:
The secret to creating a charming sloth on paper lies in breaking it down into steps. Start by sketching a pair of circles to act as the head and body. Add an oval on each side, and these will become Sloth's arms. Connect the components to the body with curved lines, remembering to include Sloth's iconic long, claw-like fingers. Next, it's time to draw the face. Start with two simple circles for the eyes, then add a charm-filled grin. Once your Sloth has taken shape, put in big leaves around it to create an enticing rainforest scene. Once happy, go over your soft lines with a heavier hand, giving your sloth life. Finally, erase any remaining pencil marks.
Materials:
- Pencil
- Paper
- Eraser


