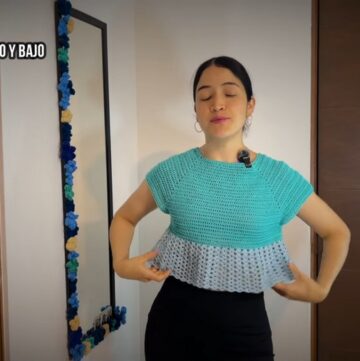
Wear a gorgeous crochet necklace & scarf that showcase unique beauty and elegance perfect for all outfits while offering a soft and stylish touch every day.

A beautiful mix of style and comfort, these handmade accessories add a charming touch to any outfit, with delicate designs and soft textures that catch everyone’s eye. The necklace adds elegance with its intricate patterns, while the scarf wraps you in warmth and beauty, perfect for any season.
Unique Crochet Necklace & Scarf Looks for Every Occasion
These pieces are great for casual outings, special events, or gifting to loved ones. Their unique and detailed appearance makes them stand out, bringing a personal and stylish vibe to your wardrobe. Easy to pair with any outfit, they are both practical and stunning, making them a must-have for everyday wear.

Materials Needed
- Yarn: Choose a medium-weight (Category 4) acrylic or cotton yarn. The yarn amounts may vary depending on the cardigan size.
- Recommended yardage:
- Approx. 1500–2500 yards depending on the size and cardigan length.
- Base Color(s): Any color for the body (e.g., light beige, gray, or your preferred neutral tone).
- Contrasting Color: For decorative borders or stripes.
- Recommended yardage:
- Crochet Hook: 5 mm (H-8).
- Scissors.
- Measuring Tape: Essential for precise measurements.
- Tapestry Needle: For weaving in ends.
- Stitch Markers: Optional but helpful, especially for marking stitches in sleeves or yoke sections.
Skill Level
Intermediate to Advanced – Familiarity with basic stitches (e.g., chains, single crochet, double crochet), taking measurements, working in rows, and basic garment construction is recommended.
Key Abbreviations (US Terminology):
- ch: Chain
- sc: Single Crochet
- dc: Double Crochet
- sl st: Slip Stitch
- yo: Yarn Over
Special Notes
- Top-Down Technique: This cardigan is worked from the top down, starting with the yoke and then separating for the sleeves and body. This method allows you to try on the garment as you crochet to achieve the perfect fit.
- Customizations:
- Add stripes or use multiple colors.
- Lengthen or shorten the body and sleeves as desired.
- Measurements: For accurate sizing, take basic measurements of your bust, shoulders, sleeve length, and cardigan length.
Pattern Instructions
Step 1: Taking Measurements
- Use a measuring tape to measure the circumference of your head, bust, shoulders, and intended cardigan length.
- Example: For a medium-sized cardigan:
- Bust circumference: 36–40 inches
- Shoulder width: 16 inches
- Cardigan length: 28–34 inches
- Example: For a medium-sized cardigan:
- Chain the appropriate amount based on the circumference of your head to begin the foundation chain. For medium sizing, a foundation chain of approximately 80–100 chains is sufficient.
Step 2: Foundation Chain
- Begin: Make a slip knot on your hook.
- Foundation Chain: Chain a number of stitches equal to your head circumference (e.g., 90 ch).

Step 3: The Yoke
The yoke is the upper part of the cardigan, including the neckline and shoulders.
Row 1:
- Insert your hook into the second chain from the hook and work 1 sc.
- Continue to work 1 sc into each chain across, keeping your stitches consistent.
- Important: This row forms the base of the yoke.
Row 2:
- Ch 3 (counts as 1 dc here and throughout the pattern), turn your work.
- Work 1 dc into the next stitch.
- Increase: In the third stitch, work a dc, ch 2, dc into the same stitch.
- This will create a V-stitch increase at the yoke to shape the cardigan.
- Repeat this process (dc into each stitch, V-stitch into the next stitch) across the row.
- At the end of the row, ch 2 and turn.
Rows 3–10 (or as needed):
- Continue working rows of double crochet with V-stitch increases at regular intervals where necessary for the front, back, and shoulders.
- Tip: You may use stitch markers to denote the seams between the front and back sections.
- Stop once the yoke is large enough to cover your shoulders fully and closet comfortably at the bust.
Step 4: Body Construction
Splitting for Sleeves:
- After completing the yoke, leave spaces for the sleeves:
- Use stitch markers or chains to skip stitches for the sleeves on each side.
- Example: For a medium size, you might skip 10–15 stitches per sleeve.
- Work chains (e.g., 5–8 ch) underarm across the skipped sections and join to the body section with dc.
Body Rows:
- Work in rows of double crochet to build the length of the cardigan.
- Continue for the desired length, turning after each row.
Optional Stripes or Color Changes:
- Change to a contrasting color as desired. For example, introduce a stripe detail after every 4–5 rows.
Step 5: Sleeves
- Attach yarn to one of the sleeve spaces, working in rounds for a smooth sleeve construction.
- Sleeve Rounds:
- Work dc rounds, decreasing evenly to taper the sleeve if you want fitted sleeves.
- For a straight sleeve, continue without decreasing.
- For a bell sleeve, increase the number of stitches gradually toward the sleeve’s end.
- Switch colors if desired for cuff decoration.
- Repeat for the second sleeve, ensuring both match in size and stitch patterns.

Step 6: Edging and Finishing Touches
- Crab Stitch Edging:
- Work crab stitches (reverse single crochet) along the cardigan’s entire border and sleeve cuffs for an elegant finish.
- Example: Insert the hook into the last stitch from left to right (reverse direction), yo, pull through, and complete the sc.
- Work crab stitches (reverse single crochet) along the cardigan’s entire border and sleeve cuffs for an elegant finish.
- Weave in Ends: Use your tapestry needle to securely weave in all loose yarn tails.
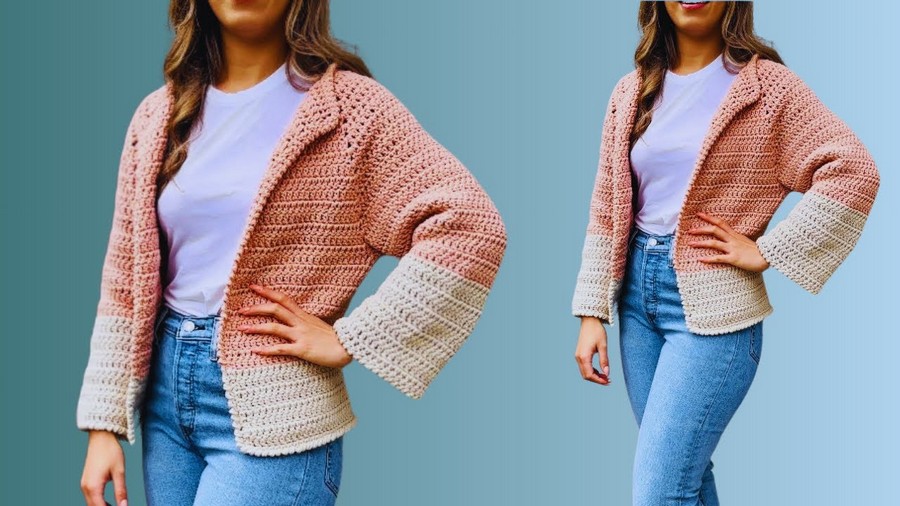
Conclusion
The final cardigan is a comfortable, stylish top-down garment perfect for layering. It can be customized for size, length, and styling preferences. With its seamless construction, it’s wearable straight off the hook!
Pattern Corrections
- Ensure you measure your yoke properly at the start to prevent reworking later. Adjust stitch counts as needed for perfect sizing.
Tips for Success
- Keep Notes: Especially for the sleeves! Write down the number of rounds, stitches, and decreases for the first sleeve to ensure they match perfectly.
- Yarn Substitution: If substituting yarn, ensure it has a similar weight and drape to maintain the cardigan's structure.
- Patience: The yoke and body require focus for even shaping, but the result is worth it!