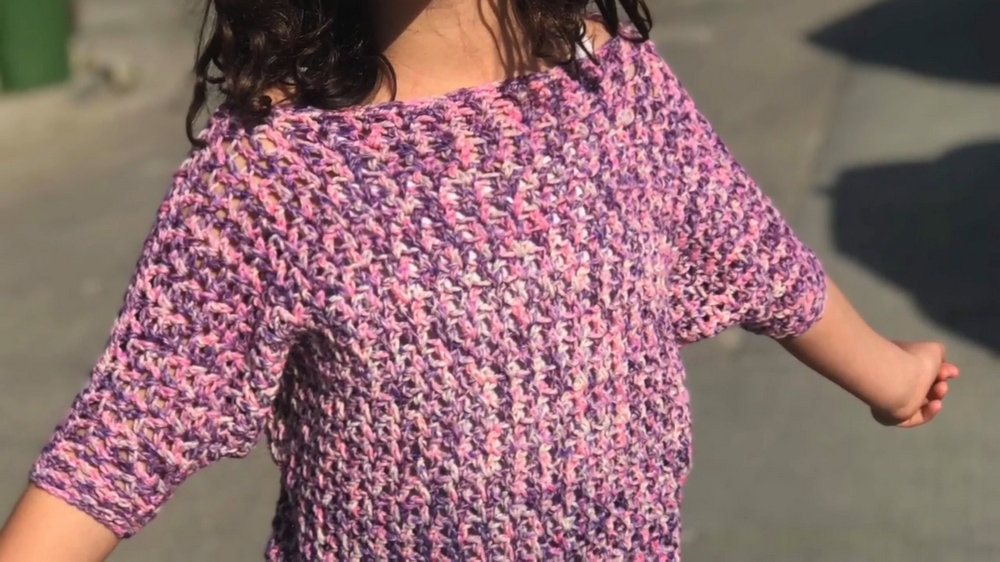
Breeze through seasonal changes in style with this Free Crochet Batwing Sweater Pattern offering comfort flattering drape and effortless layering all year round.
In the shifting moods of early autumn, when mornings feel crisp but afternoons still hint at summer warmth, a versatile garment becomes more than a convenience, it becomes a wardrobe necessity. The crochet batwing sweater has long held its place in fashion for its ability to balance comfort with soft sophistication. Loose sleeves offer freedom of movement without compromising structure, making it ideal for work-from-home days, outdoor brunches, or cool evening walks. The relaxed silhouette skims the body gracefully, flattering all shapes while offering ease in layering over camisoles or under coats.
Free Crochet Batwing Sweater Pattern That Works for All Seasons & Outfits
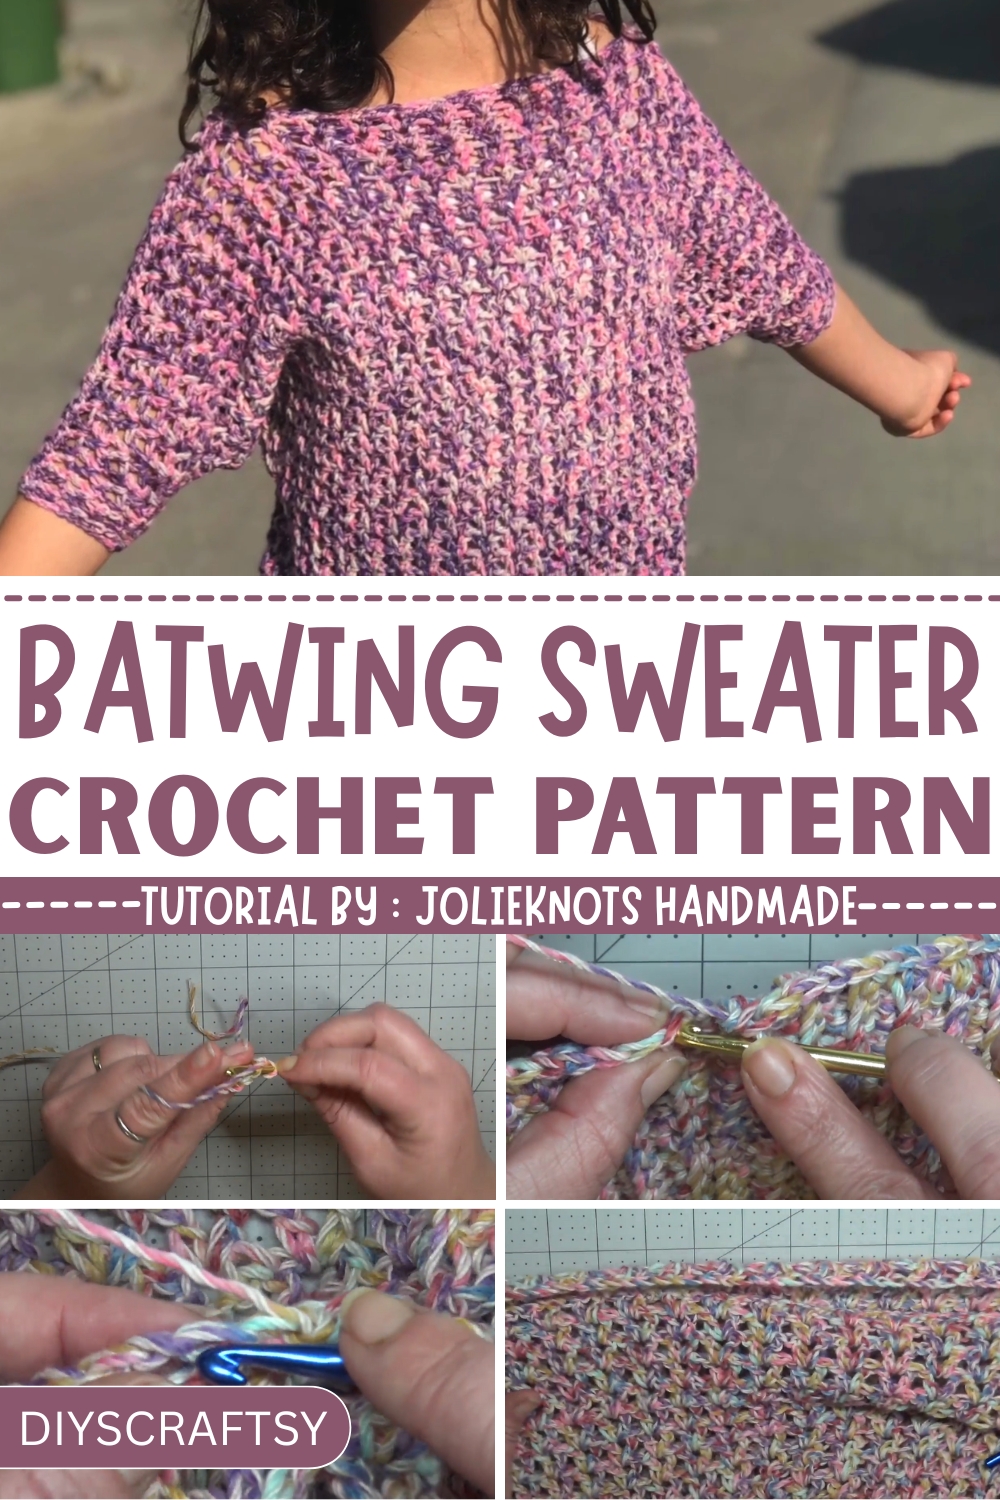
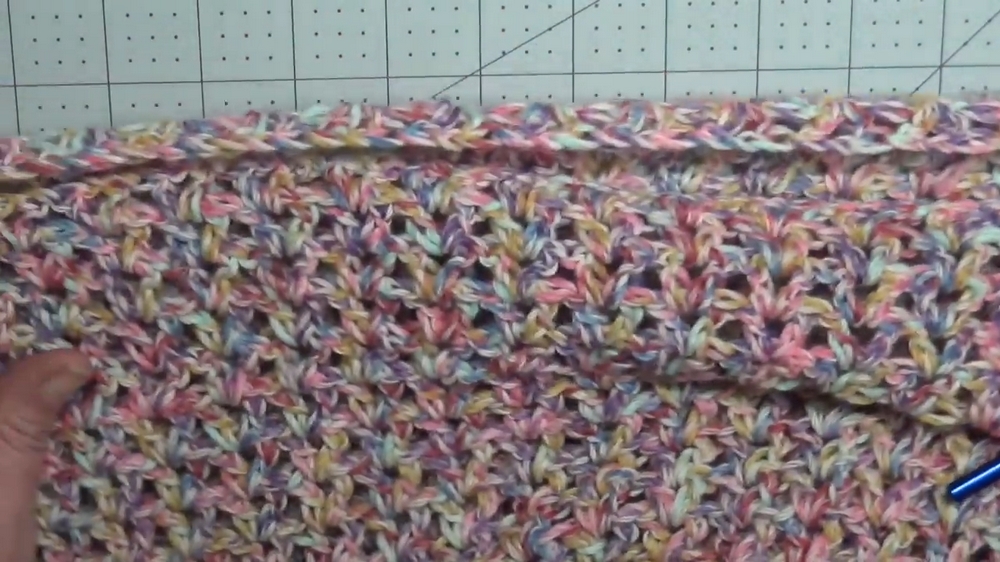
The Free Crochet Batwing Sweater Pattern brings together soft texture and visual interest through airy stitchwork and generous shaping. The side-to-side construction provides a seamless flow across the torso and sleeves, avoiding bulk while maintaining warmth. Its subtle drape gives the piece a natural rhythm, whether paired with jeans or a midi skirt.
Equally practical and stylish, this sweater is a go-to option for transitional dressing. Lightweight yet cozy, it’s wearable throughout multiple seasons and can shift easily from casual to polished looks. Whether you're heading out or staying in, this batwing sweater offers a modern, relaxed approach to everyday layering—built for movement, made for comfort, and admired for its effortless charm.
Step-by-Step Instructions
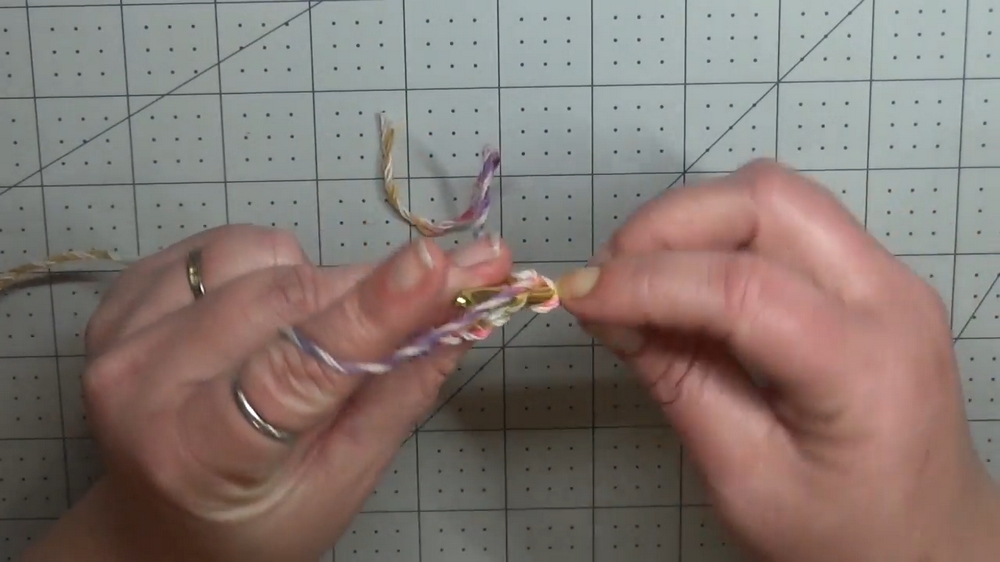
1. Creating the Band at the Bottom
- Materials: Start with a 5mm crochet hook and yarn (Lyons Brand Comfy Cotton, Flower Garden color recommended).
- Steps:
- Make a slipknot and chain 16 stitches.
- Crochet single stitches into the second chain from the hook and each chain thereafter (15 single crochets total).
- Chain 1, turn your work, and complete a single crochet in the back loop only across all 15 stitches.
- Repeat row 2 until the band matches the circumference of your waist (check the screen for size rows based on hip measurement).
- Seam the band ends together using slip stitches and fold to make this the inside of the sweater.
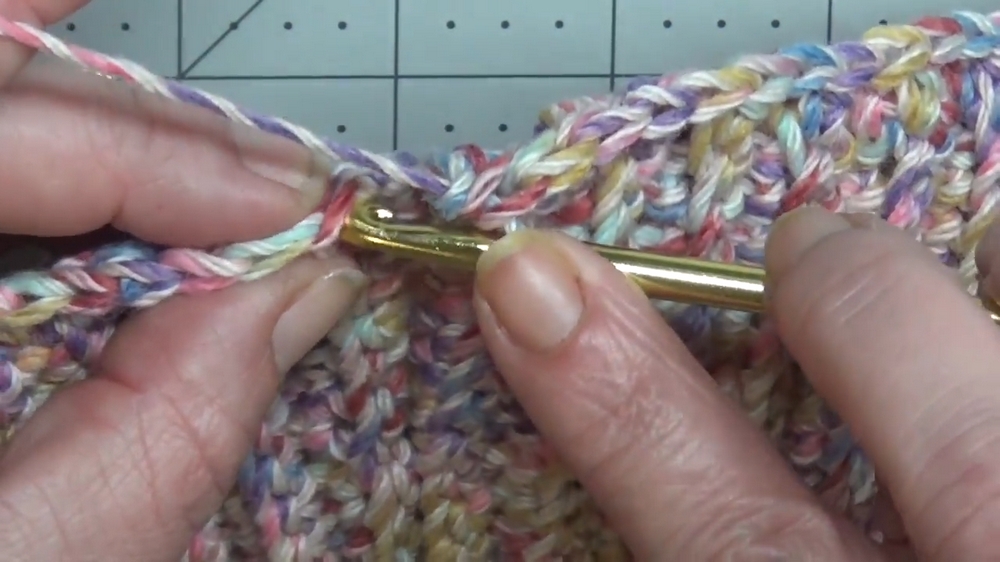
2. Transition to the Main Body
- Switch Hooks: Change to a 6mm crochet hook.
- Half double crochet into the side of each row of the band. The number of rows equals the number of half double crochet stitches around the band.
- Join with slip stitches to form a loop.
3. V Stitch Rows
- Chain 4 (counts as a double crochet and chain space).
- Double crochet into the stitch where the slip stitch was made to create the first V stitch.
- Skip one stitch, and create another V stitch in the next.
- Continue to repeat until the round is complete.
- Create 9 total rows of V stitches without increasing or decreasing.
4. Increasing Rows
- Marking the Sides: Use stitch markers to mark the sides of the sweater, defining the front and back.
- Increase Process:
- Add an increased V stitch at each stitch marker. Chain 4, double crochet into the marked space, and move the stitch marker up to the new center.
- Work V stitches along the entire round, increasing again at the second stitch marker.
- Repeat this 2-row process of increasing (rounds 11 and 12) until you complete the number of repeats specified for your desired height (check the screen for height-based details).
5. Separating Panels for Armholes
- Split into Two Panels: Begin working back and forth (instead of in rounds) to create the armholes.
- Crochet V stitches on one panel (front or back) and double crochet at the end of rows. Turn the work after chaining 3.
- Repeat for both panels, ensuring you keep the correct number of rows for your size.
6. Seaming the Shoulders
- Count V stitches for the neck opening, placing stitch markers for symmetry (customize neck width as needed).
- Use the long tail yarn left at the end of your panels to whip stitch the front and back shoulders together, leaving the marked area open for the neckline.
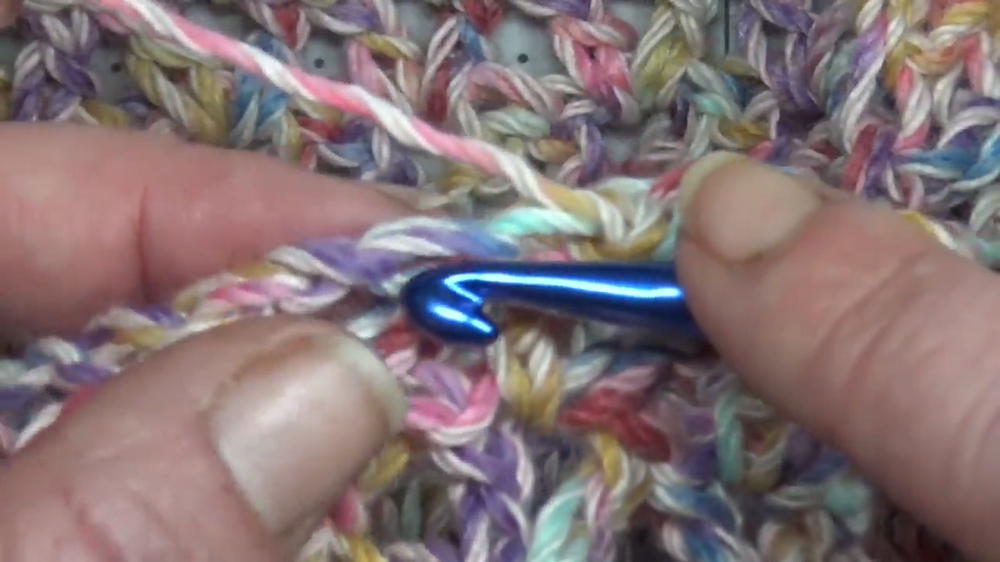
7. Finishing the Neckline
- Attach yarn to one side of the neckline using a chain stitch.
- Single crochet into every double crochet and chain space around the neckline to prevent overstretching.
Special Features of This Sweater
- Wide Size Range: Fits sizes XS to 4X, with adjustments provided for height customization.
- Child Sizes: The instructor hints at forthcoming designs for children.
- Versatile Neckline: Customize as wide or narrow as desired, even for off-the-shoulder looks.
- Light and Comfortable Yarn: Lyons Brand Comfy Cotton is a blend of 50% cotton and 50% polyester, ensuring durability and comfort.
Materials
- Yarn: Lyons Brand Comfy Cotton in "Flower Garden" (3-weight yarn; 392 yards per cake).
- Hooks: 5mm hook (for the band) and 6mm hook (for the body).
- Tools: Stitch markers, tapestry needle for sewing seams, scissors.
Tutor's Suggestions
- Gauge Check: Ensure the band gauge matches (15 stitches = 3.5 inches wide; 14 rows = 4 inches tall).
- Height Customization: Follow screen instructions for height-based repeat numbers to suit your body.
- Yardage Estimate: Taller individuals may require additional yarn, while shorter individuals may need less.
- Neckline Customization: Adjust the stitch marker placement for the neck opening based on personal style preferences.
Difficulty Level
Beginner to Intermediate. While basic stitches are used throughout, managing stitch markers and working in sections requires attention to detail. Clear visual instructions in the tutorial also make the process beginner-friendly.
Uses
This batwing sweater is perfect for casual wear, layering over tank tops or long sleeves, or for adding a stylish handmade touch to any outfit during colder months. Its flowy design and cotton-polyester blend yarn make it breathable and versatile.
Conclusion
The super simple batwing sweater is a delightful crochet project for anyone looking to create a fashionable and highly customizable garment. This crochet provides a clear step-by-step demonstration, ensuring that crocheters of all skill levels can recreate this beautiful design. Once finished, you'll have not only a cozy sweater but also the satisfaction of having made it yourself.
Bonus Tip
When working on the neckline and seams, use stitch markers to ensure alignment and symmetry, this will help your sweater look polished and professional!


