Snuggle in style with the Free Crochet Corner Ribbing Blanket Pattern offering cozy warmth, charming texture, and a perfect handmade touch for any space.
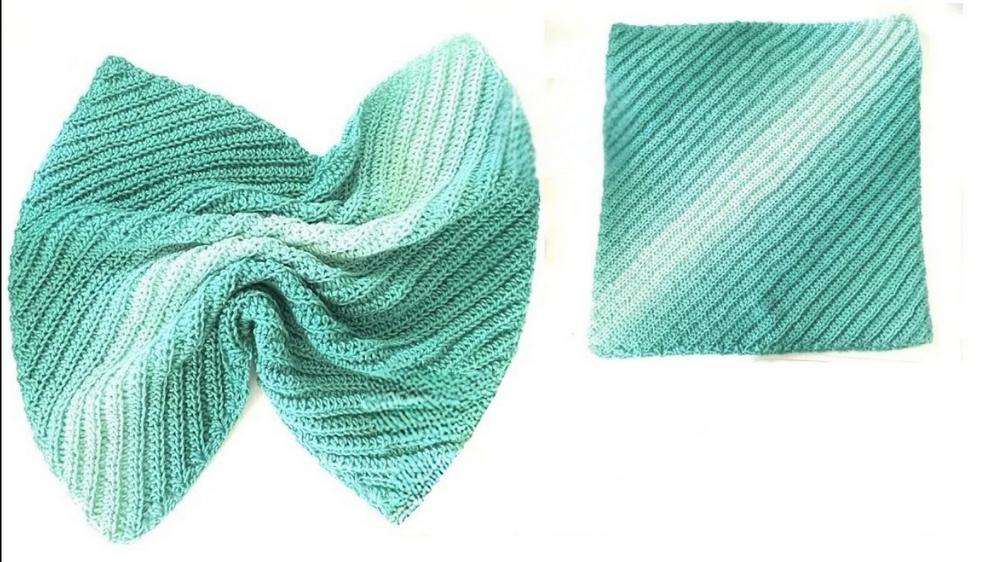
A chilly evening in the living room often calls for something warm and comforting, and this is where a thoughtfully made blanket can make all the difference. The Crochet Corner Ribbing Blanket offers more than just warmth; it adds texture, charm, and a personal touch to any space. Its unique corner ribbing technique creates a structured yet flexible edge, making it both visually appealing and practical for snuggling under on cold nights. Ideal for couches, beds, or gifting to loved ones, this blanket blends comfort with subtle sophistication.
How to Use Crochet Corner Ribbing Blanket Pattern
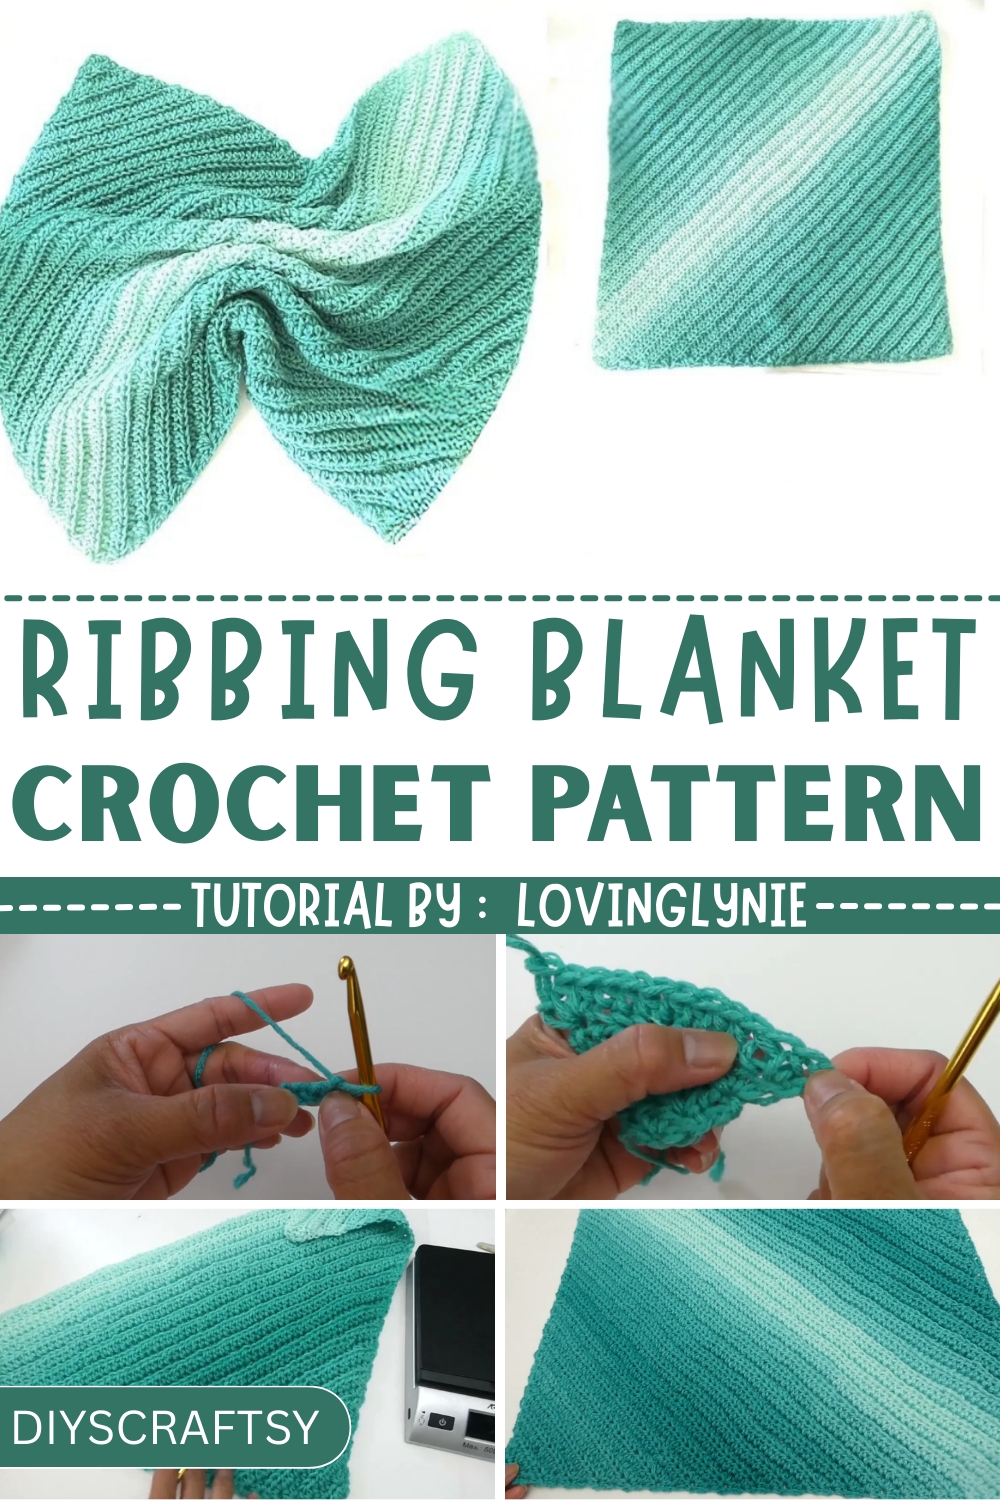
The pattern begins with a simple foundation that gradually builds into intricate ribbing along each corner, giving the blanket a distinctive frame that holds its shape beautifully. Midway through, the alternating rows of stitches enhance durability and texture, ensuring that every inch is cozy and resilient. The final steps emphasize finishing touches, securing edges, and highlighting the clean, professional look of the ribbed corners.
Beyond warmth, the blanket’s versatility allows it to serve as a decorative throw, a baby blanket, or a thoughtful handmade gift. Lightweight yet substantial, it provides both comfort and style, demonstrating the joy of handmade pieces. The Free Crochet Corner Ribbing Blanket is a perfect blend of function and elegance, making every snuggle feel luxurious and every display charming.
Step-by-Step Details
Step 1: Materials Needed
- Yarn: The tutorial uses Red Heart Super Saver Ombre in the "Spearmint" colorway (Medium Weight #4, 100% Acrylic). However, any yarn and its corresponding recommended hook can be used.
- Crochet Hook: 5 mm crochet hook (or the recommended size for your yarn).
Step 2: Starting with a Slip Knot and Foundation Chain
- Create a slip knot and chain 3.
- In the first chain, make 3 half double crochet (HDC) stitches. This completes Row 1.
Step 3: Increasing Rows (Rows 2 and Onwards)
Each row increases the stitch count by 3.
- Start every row with a chain 2 (ch 2) and turn your work.
- In the first stitch, crochet 2 HDC through both front and back loops.
- For the middle stitches, crochet HDC in the back loop only to create the ribbing texture.
- In the last stitch of each row, crochet 3 HDC stitches through both front and back loops.
Key Tip: Keep track of the number of middle stitches as they increase by 3 each row. For example:
- Row 2: 1 middle stitch
- Row 3: 4 middle stitches
- Row 4: 7 middle stitches
These repetitions continue until you reach the desired size.
Step 4: Decreasing Rows (Shaping the Opposite Corner)
Once you complete the increase rows and achieve the desired size, begin the decrease rows to shape the square.
- Start every row with a chain 2 and turn your work.
- In the first stitch:
- Yarn over, insert the hook into the front and back loops, pull up a loop.
- For the next stitch: Yarn over, insert into the back loop only, pull up a loop.
- Yarn over, pull through all loops on the hook (Double HDC Decrease).
- Yarn over, insert the hook into the front and back loops, pull up a loop.
- Make HDC (back loop only) across the middle stitches until there are 4 stitches left.
- For the last 4 stitches:
- Complete a Triple Half Double Crochet Decrease over 3 stitches.
- Crochet the last stitch as a regular HDC through both front and back loops.
Repeat this process until you finish the square. The number of decrease rows must match the number of increase rows (e.g., 10 increase rows = 10 decrease rows).
Step 5: Finishing the Project
- For the final row, complete a Triple HDC Decrease using the last 3 stitches.
- Chain 1, cut the yarn, and securely weave in the ends.
Optional: Add a border using single crochet stitches or other decorative edging techniques.
Special Features
- Ribbing Texture: Achieved by crocheting in the back loop only for middle stitches.
- Corner-to-Corner Construction: Begins with a small corner, expands into a square, then decreases to finish the opposite corner.
- Customizable: Use any yarn type, color, or hook size to match your preferences or project requirements.
Tutor's Suggestions
- Use any yarn and hook combination suitable for your project.
- If you're a beginner, pay attention to the first and last stitches of each row, as the counts are critical for maintaining the design's symmetry.
- Skip the border if you prefer a more natural edge, but borders can add a polished look to your finished piece.
Uses of the Pattern
- Ideal for baby blankets, square cushion covers, or other square-shaped crochet projects.
- Adaptable for larger or smaller projects by simply increasing or decreasing the number of rows.
Level of Difficulty
- Beginner to Intermediate: The tutorial is highly detailed, making it accessible for beginners, yet the design's structure and decreases encourage skill-building.
Tip for Beginners
Always count your stitches at the end of every row. This avoids mistakes in stitch counts that may disrupt the square's symmetry later.
Conclusion
This crochet corner ribbing crochet pattern is simple yet visually appealing, with its textured ribbing and corner-to-corner design. Whether you're creating a cozy blanket or a decorative square, this tutorial provides all the steps and tips needed to ensure a successful project.


