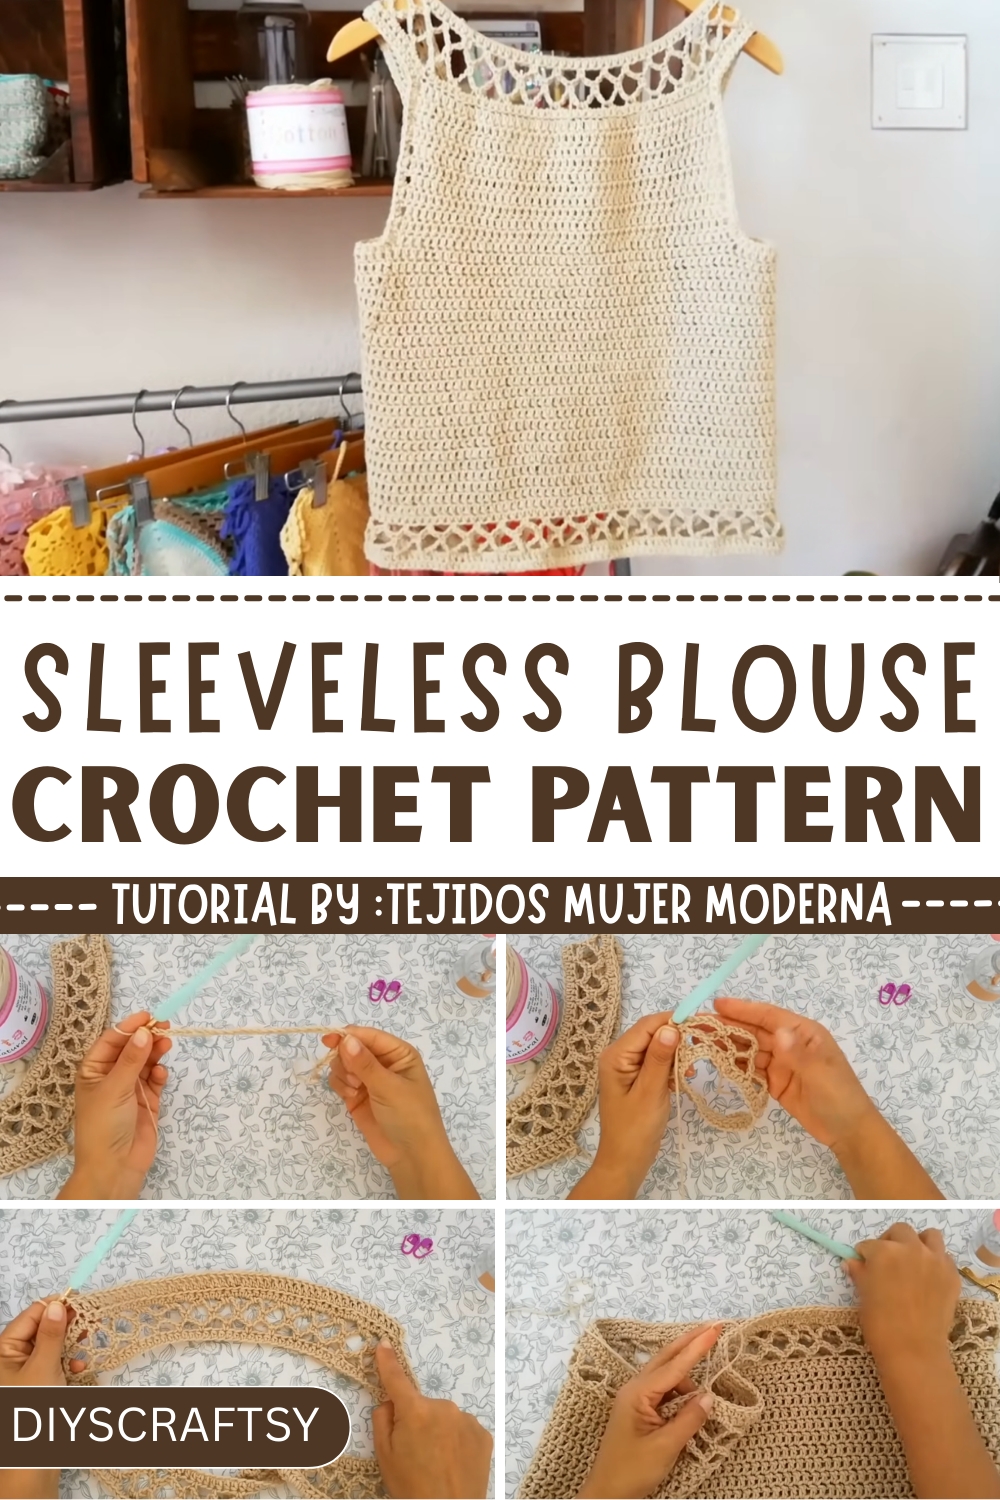
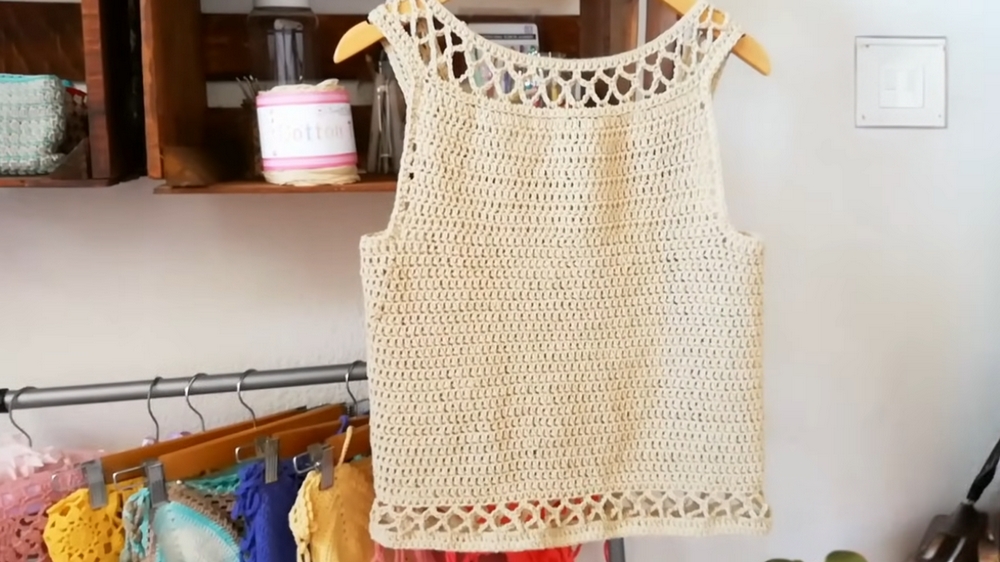
Stay cool and stylish with this Crochet Sleeveless Blouse Pattern, creating a breathable, versatile top perfect for summer outings and casual wear.
Warm summer mornings often call for clothing that balances comfort with effortless style. A sleeveless blouse offers just that, allowing air to flow freely while maintaining a polished, versatile look. The Free Crochet Sleeveless Blouse Pattern provides a breathable, lightweight garment that can easily transition from casual daytime outings to relaxed evening gatherings. The construction begins with a series of precise stitches forming the body, gradually shaping the torso to fit comfortably without restricting movement. Its open and airy texture makes it ideal for warm weather, while the clean lines of the sleeveless cut offer a modern, flattering silhouette.
Crochet Sleeveless Blouse Pattern That Enhances Any Outfit
Versatile in nature, it can be paired with jeans, skirts, or layered over camisoles, making it a wardrobe staple for various occasions. Intermediate crocheters will enjoy the process, which emphasizes stitch consistency, shaping, and finishing touches that bring the blouse to life. The result is a piece that not only enhances style but also promotes comfort, coolness, and practicality.
Beyond aesthetics, this blouse offers a rewarding hands-on experience, blending functional technique with creative satisfaction. Each stitch contributes to a garment that is both visually appealing and practical, proving that handmade clothing can provide elegance, ease, and versatility in equal measure.
Difficulty Level
The project is suitable for beginner to intermediate crocheters, requiring knowledge of basic stitches such as the half-double crochet (HDC) and double crochet (DC). The openwork stitch patterns and circular construction introduce elements that may challenge absolute beginners but remain manageable with patience and focus.
Materials Needed
- Yarn: Natural cotton blend or another yarn (thickness number 3)
(Recommended: Cotton-acrylic blend for comfort and durability) - Crochet hook: 5 mm
- Stitch markers
- Scissors
- Optional: Measuring tape
Step-by-Step Instructions
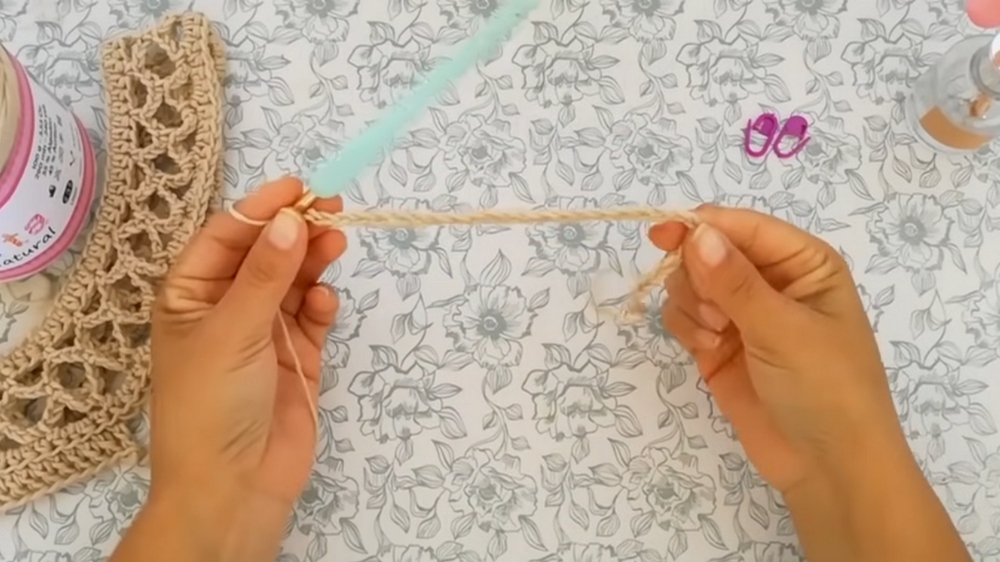
1. Starting the Yoke
- Foundation Row: Begin by creating a chain of starting stitches based on your preferred size (e.g., 114 chains for medium size).
- Join in the Round: Slip-stitch into the first chain to form a circle ensuring the chain is not twisted.
- First Round:
- Go up with 2 chains. Crochet a half-double crochet (HDC) in each chain around the circle.
- Slip-stitch to the second chain at the start to close the round.
- Subsequent Rounds for the Yoke:
- Round 2: Openwork pattern begins with 5 chains forming arches, skipping stitches.
- Round 3: Expand the arches to 6 chains.
- Round 4: Reduce arches to 3 chains, alternating repeat patterns.
- Round 5 (Final Yoke Round): Fill the arches with HDCs around and close the yoke.
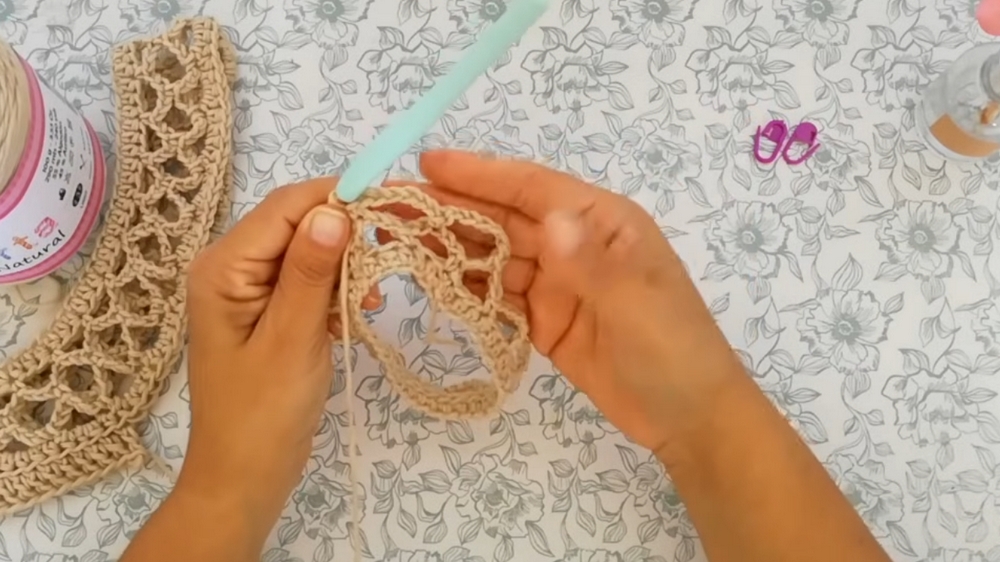

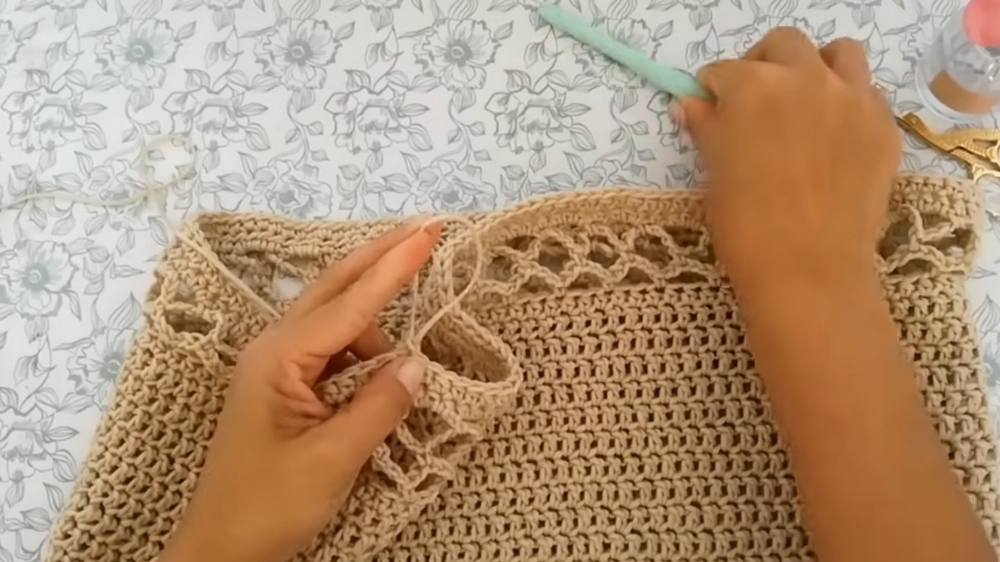
Special Feature: The circular design with arches creates a lacy openwork pattern that serves as the blouse's neckline and shoulder area.
2. Crocheting the Back Part
- Begin with the last completed stitch on the yoke.
- Create double crochets for the back piece, working only on the back loop of the chain for the first round.
- Continue with full double crochets for subsequent rounds until you complete 10 rows (medium size).
- Leave the working thread attached at the end for further continuity.
3. Crocheting the Front Part
- Separate stitches for the sleeves by marking skipped chains, ensuring symmetry for the front and sleeves.
- Using a new working thread, crochet across the front yoke area, adding increases at the beginning and end of rows to match the stitch count of the back piece.
- Keep all stitches aligned with the back's layout.
- Once rows are complete, cut the thread and set the front piece aside.
4. Shaping the Cuffs and Joining Front & Back
- Rejoin the working thread at the back piece. Crochet chains for the sleeve's cuff space (e.g., 13 chains for medium size).
- Connect to the front with a double crochet, ensuring the circular construction is preserved.
- Knit around the join area using double crochets for both cuffs, transitioning seamlessly between the front and back.
5. Adding Length to the Blouse
- Begin circular rows of double crochets to add the desired length (e.g., 50 cm from the shoulder down).
- Adjust the length according to personal preference or styling needs.
6. Adding the Bottom Edge
- Add a decorative edge to match the yoke.
- Follow the same stitch pattern used for the yoke's openwork:
- Row 1: HDC.
- Row 2: 5-chain arches.
- Row 3: 6-chain arches.
- Row 4: 3-chain arches.
- Row 5 (Final Row): HDC to complete the edge.
- Ensure counts are a multiple of 3 to evenly space the arches and maintain symmetry.
7. Finishing Touches
- Edge the sleeves with a simple round of HDCs to ensure a neat and professional finish.
- Hide and sew in all loose thread ends.
Tutor’s Suggestions
- Material: Stick to yarn with a thickness of number 3 for accurate chain and stitch counts.
- Gauge/Hook: Use a 5 mm hook for the suggested yarn—changing the hook size or yarn thickness requires recalculating the number of stitches.
- Customization: Feel free to adjust the length of the blouse, neckline depth, or sleeve width based on personal preferences.
Uses
The "Migas Blouse" is versatile, ideal for casual or semi-formal occasions. It can be paired with jeans, skirts, or even layered over dresses. The lightweight design makes it perfect for warmer weather while still offering moderate coverage.
Tip:
Keep track of stitch counts and measurements consistently. Use stitch markers generously and count periodically to ensure alignment between the front and back sections, especially when dealing with increases or joining sections.
Conclusion
The "Migas Blouse" is an achievable project combining simplicity, elegance, and thoughtful design. With its seamless circular construction and customizable features, this blouse is both stylish and functional. The step-by-step instructions guide you through every phase, ensuring success even for less experienced crocheters.


