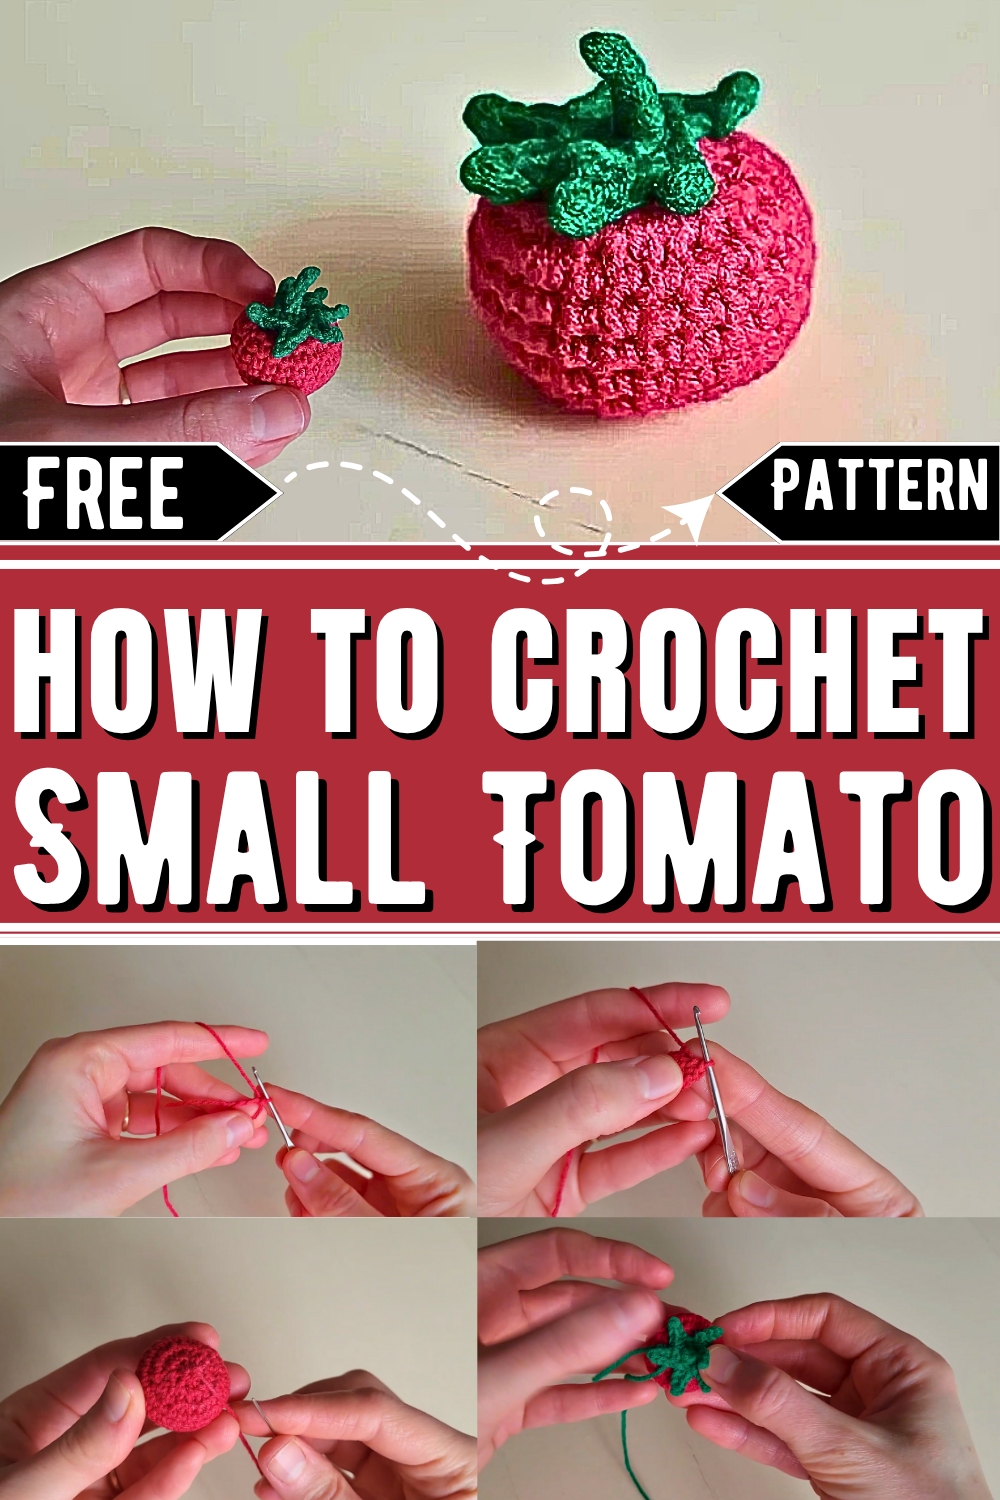
Turn leftover yarn into a cute and versatile small tomato with this free crochet pattern ideal for decor, gifts, play, and creative crochet fun!
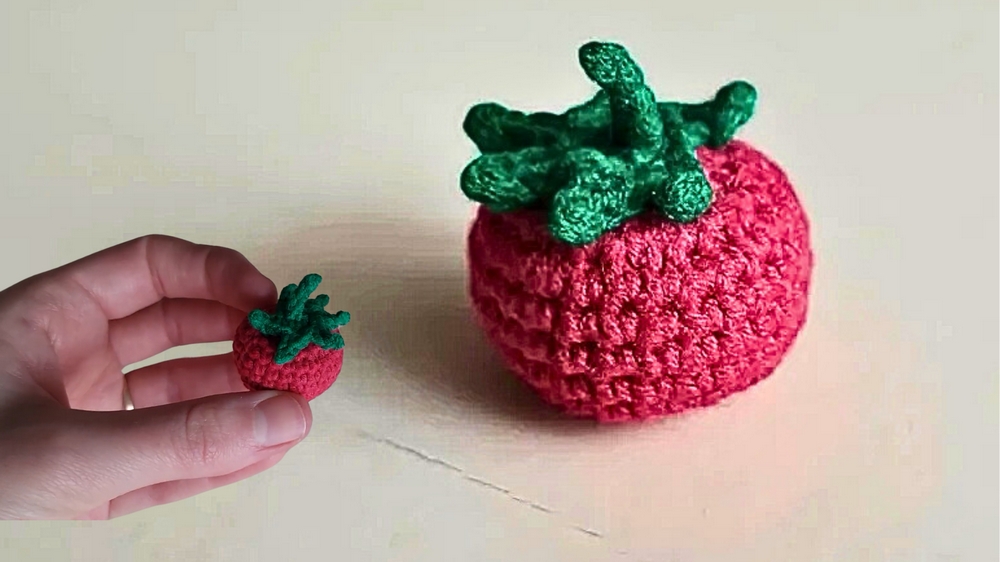
Who knew a simple ball of yarn could convert into such a delightful burst of creativity! The free crochet small tomato pattern is a fun and engaging project that brings a smile to anyone who takes it up. This tiny, playful tomato not only adds a touch of whimsy to your creations but also serves multiple purposes. From charming keychains and adorable home decor accents to essential elements in children's play kitchens, the uses for this little tomato are as varied as your imagination. Crafted with soft yarn and a bit of fiberfill, it’s a perfect way to use up scraps from your stash, making it an eco-friendly project as well.
Crochet Cute And Sweat Small Tomato
These handmade tomatoes also make lovely, thoughtful gifts, showing that you’ve put time and effort into creating something special. New to crochet? This small pattern is a fantastic starting point, helping you build confidence and develop fine motor skills without overwhelming you.
Despite its diminutive size, this project is incredibly satisfying, fitting seamlessly into even the busiest of days. Add a pop of color and a heap of charm to your crochet repertoire with this delightful little tomato!
How To Crochet
Step 1: Materials Needed
Before we begin, gather the following materials:
- Yarn: Dark red (for the tomato) and green (for the leaf/stem)
- Crochet Hook: Size 1.6mm
- Fiberfill: For stuffing the tomato
- Needle: For closing the hole and shaping
- Scissors: For cutting the thread
Introduction
In this simple and fun crochet project, you’ll learn how to make a cute, handmade mini tomato toy that resembles a tiny carrot, pumpkin, or apple. This adorable crochet is perfect for beginners and can enhance any collection of handmade fruits and vegetables. Let’s create something unique together!
Step 2: Crochet the Tomato Body
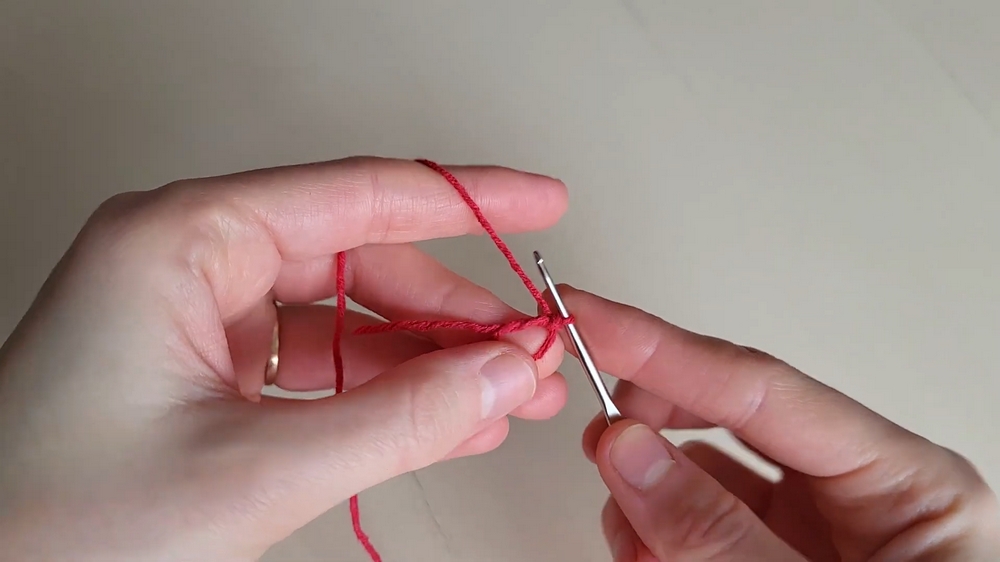
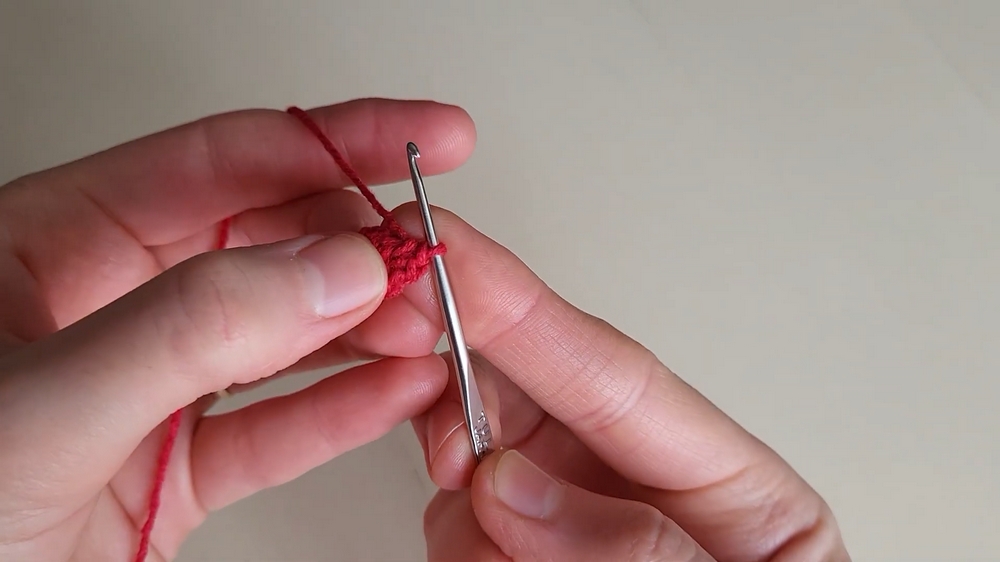
Round 1: Start with a Magic Ring
- Create a magic ring.
- Crochet 8 single crochets into the magic ring.
- Slip stitch into the first stitch to close the round.
- Chain and pull the thread tight to eliminate the hole in the center.
Round 2: Add Increases
- Make 8 increases by crocheting 2 single crochets into each stitch.
- After completing all increases, you’ll have 16 stitches.
- Slip stitch into the first stitch and chain to prepare for the next round.
Round 3: Alternate Increase and Single Crochet
- Crochet 1 increase (two single crochets in the same stitch).
- Crochet 1 single crochet in the next stitch.
- Repeat the sequence: increase, single crochet around the round.
- This round ends with 24 stitches.
Rounds 4-8: Build the Body
- Crochet 24 single crochets in each round without any increases or decreases.
- Work 5 rounds to build the tomato’s shape.
Round 9: Begin Decreases
- Start decreasing by alternating: 1 decrease (join two stitches together) and 1 single crochet.
- Repeat the sequence: decrease, single crochet until the end of the round.
Final Round: Close the Tomato
- Continue with 8 decreases to shrink the opening.
- Slip stitch to secure the round and pull the thread.
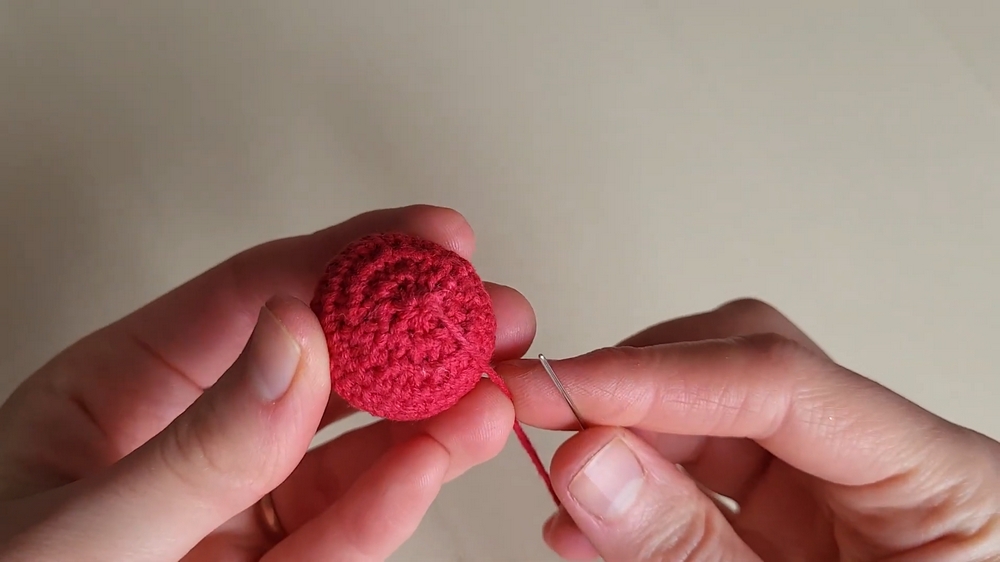
Step 3: Add Fiberfill and Finish
- Stuff the tomato with fiberfill.
- Use a needle to close the hole by sewing through the front loops of the last round.
- Shape the tomato by pulling and adjusting the stitches.
- Hide the end of the thread inside the toy.
Step 4: Crochet the Green Top
Make the Centerpiece
- Start with a slip stitch and chain 6 stitches.
- Work 5 slip stitches back into the chain.
- In the final loop, crochet 6 single crochets.
- Slip stitch into the first stitch to center the piece.
Create the Leaves
- Chain 4 stitches.
- Work 1 slip stitch, 1 slip stitch, and 1 single crochet into the chain.
- Slip stitch into the next loop and repeat:
- Chain 4, slip stitch, slip stitch, single crochet.
- Continue until all loops of the centerpiece have leaves attached.
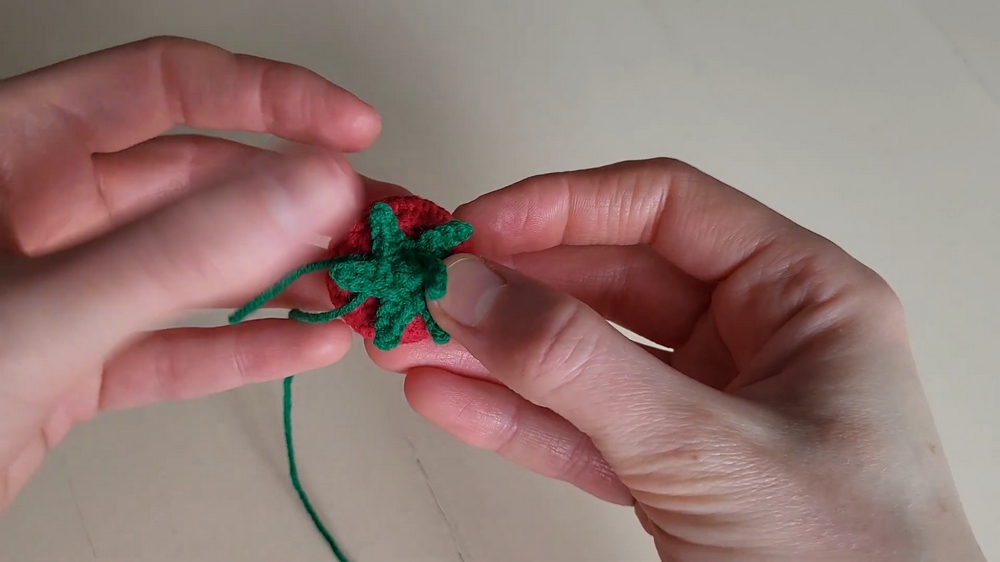
Secure the Green Top
- Finish with a slip stitch, pull the thread to the back side, and cut it.
- Use the long end of the thread to sew the green top securely to the tomato.
Step 5: Final Adjustments
- Tidy up the threads and hide them inside the tomato.
- Adjust the shape to ensure the green top sits centered and the tomato looks even.
Conclusion
Your mini tomato is ready! This crochet project is quick, fun, and ideal for beginners or experienced crocheters looking for whimsical handmade designs. You can use this pattern to create other fruits and vegetables by swapping the colors and adjusting the shapes. Add this tiny tomato to your handmade collection, gift it to a friend, or use it for decoration!


