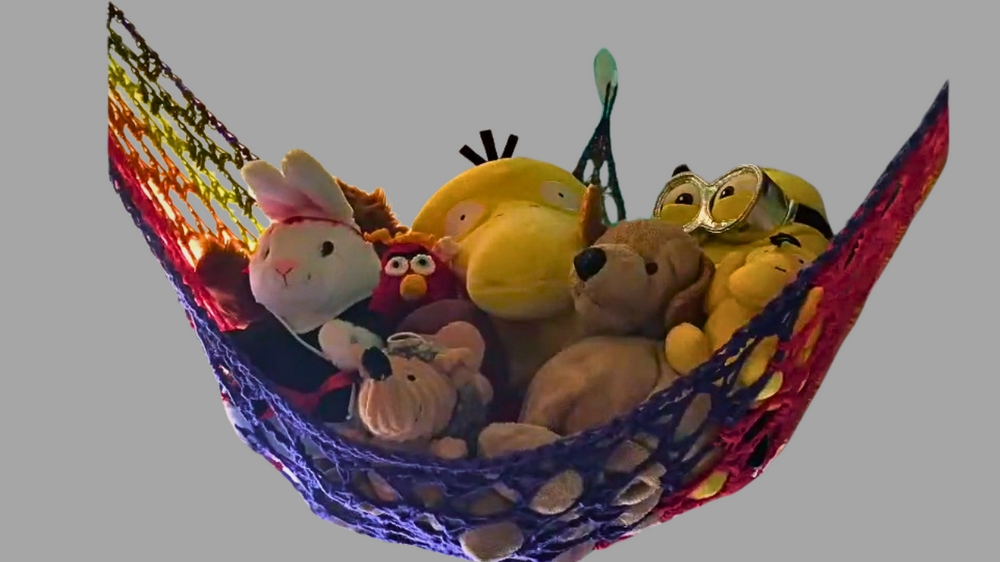
Tidy up playtime with the Free Crochet Stuffed Toy Net Pattern, offering smart storage, playful charm, and an easy way to keep toys neatly organized.
A pile of toys often brings joy to children, but for parents, it can sometimes turn into scattered clutter that feels impossible to manage. A simple and effective way to keep everything in order is through a soft, handmade net that holds stuffed animals neatly while still keeping them visible and accessible. The Free Crochet Stuffed Toy Net Pattern offers just that, a practical storage solution that doubles as a charming accent for any room. By working with this project, you gain not only a functional organizer but also a lightweight and breathable holder that prevents toys from being tucked away out of sight.
Free Crochet Stuffed Toy Net Pattern for Easy Room Organization

This kind of storage makes tidying up fun for children since their favorite companions are displayed in one spot, ready for play at any time. The net stretches generously, allowing it to store plenty of stuffed toys without taking up much floor space. It’s a thoughtful choice for nurseries, playrooms, or even bedrooms where extra storage is always welcome.
Easy to hang and simple to maintain, this project brings both order and charm into daily life while offering a smart way to keep toys from overwhelming small spaces. Practical, stylish, and wonderfully useful, it makes organization feel effortless.
Step-by-Step Details
Materials
- Yarn: Worsted weight medium 4 yarn. The tutorial specifically recommends Bernat Pop (100% acrylic), which comes in a 5-ounce cake (280 yards). Colors used in the tutorial:
- Greenhouse, used for the demonstration (green-colored).
- Full Spectrum, used for the rainbow hammock in the thumbnail.
- Crochet Hook: A large N/P-10mm hook.
- Additional Supplies:
- Yarn needle (for weaving in ends).
- Scissors (for snipping the yarn).
- Stitch markers (optional but recommended).
Special Features
- Simple Pattern:
- Uses basic stitches: double crochet, treble crochet, single crochet, and chain stitches.
- Builds up in repetitive rows, creating a triangular "granny square" net.
- Stretchability:
- The hammock stretches as items are placed inside, making it functional and versatile for storage.
- Customizable Size:
- You can adjust the size of the hammock by adding or reducing rows. Larger hammocks will require more yarn, while smaller ones will use less yarn.
Difficulty Level
This project is beginner-friendly. According to Dawn, it can be completed while watching TV or during downtime as it follows a repetitive and straightforward pattern.
Tutor’s Suggestions
- You don’t have to use Bernat Pop yarn specifically; any medium 4-weight yarn would work for this project.
- Working over the yarn tail while crocheting or weaving it in later is up to you—it enhances flexibility depending on your preference.
Steps to Make the Toy Hammock
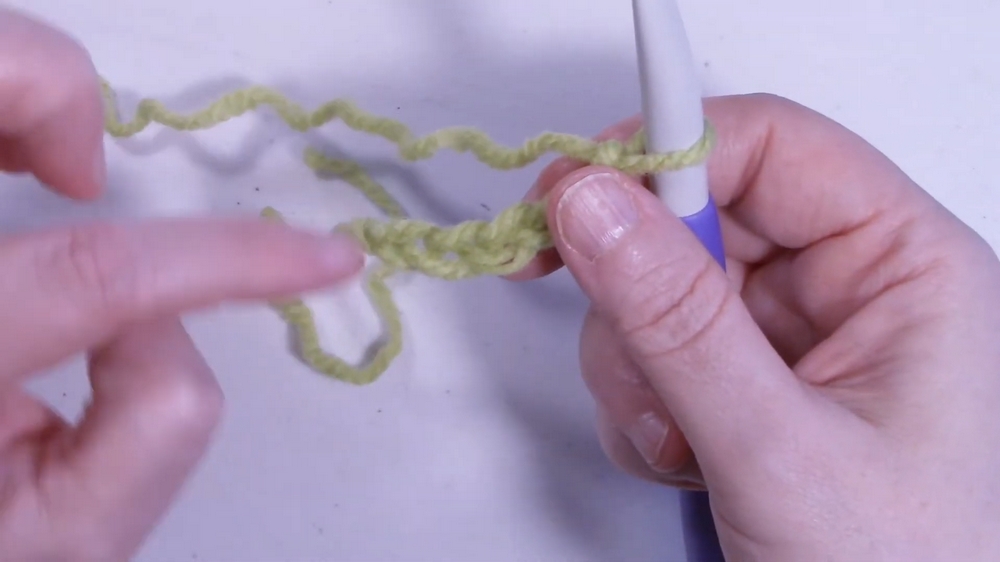
- Start the Triangle (Row 1)
- Create a slip knot on your hook.
- Chain 5, insert the hook into the first chain, and slip stitch to form a ring.
- Chain 5 (counts as treble crochet + chain 1).
- Insert 2 double crochets into the ring, chain 2, another 2 double crochets into the ring, chain 1, and end with a treble crochet.
- Result: A triangular base begins to form.
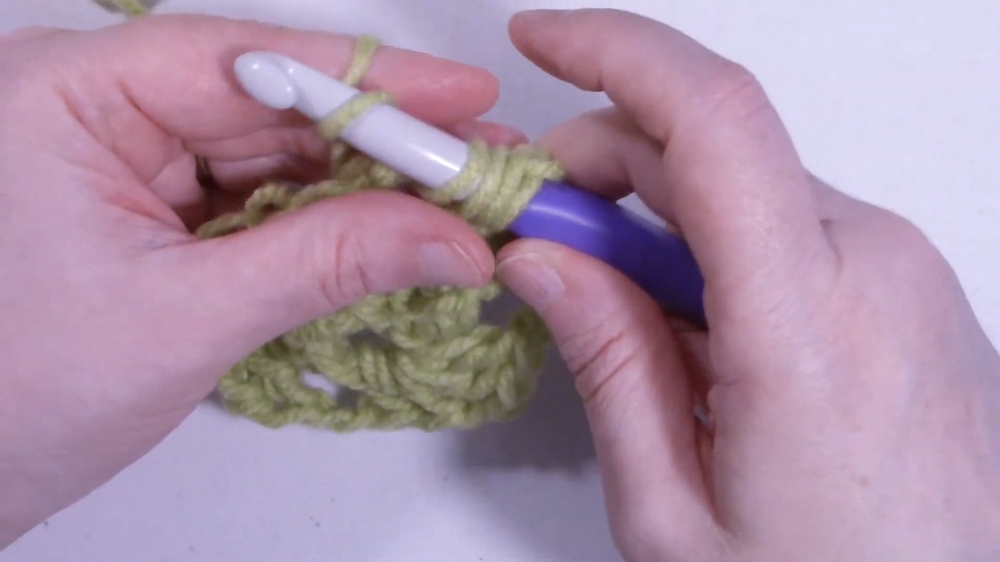
- Expand the Rows (Repetitive Rows 2–20)
- Row Setup: Each row starts with a chain 5 (counts as treble crochet + chain 1) and ends with a treble crochet after chaining 1.
- Double crochet into each chain space, adding a chain 2 between stitches.
- In the center point of the triangle: Insert 2 double crochets, chain 2, another 2 double crochets to maintain the triangle's shape.
- Repeat until you’ve completed 20 rows.
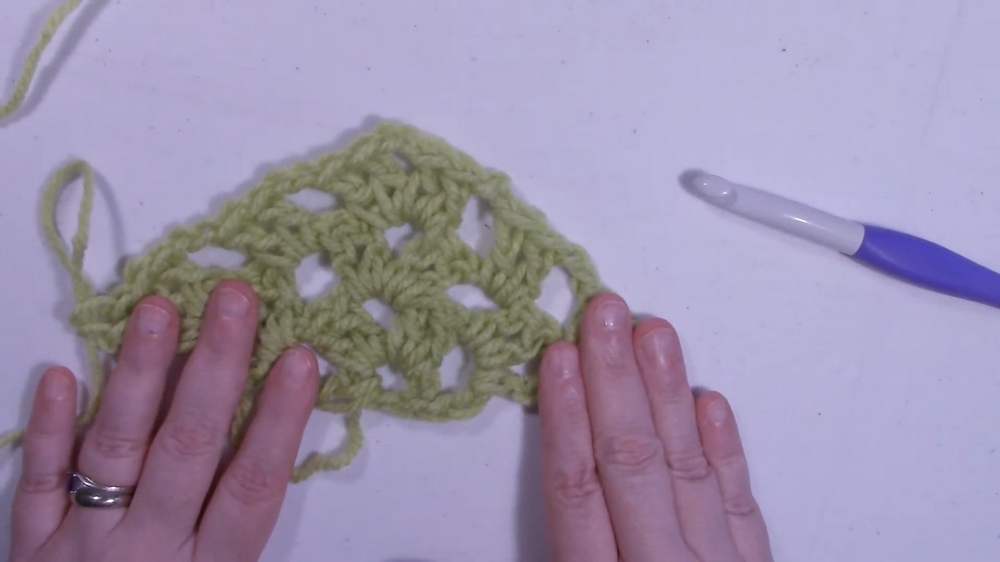
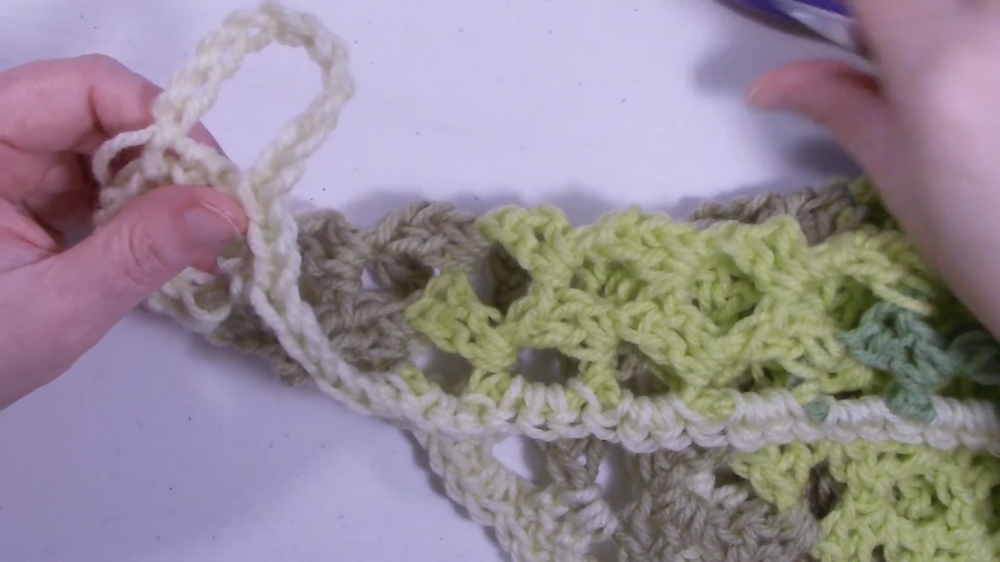
- Finish the Edging
- After completing Row 20, chain 1, turn the work, and start the border using single crochets:
- Single crochet into the first chain and stitch.
- In chain-two spaces, insert 2 single crochets.
- When you reach the corner point, insert 2 single crochets, chain 10 (to form the loop for hanging), and then insert 2 more single crochets back into the corner.
- Continue with single crochets around the edges, following the same routine for chain spaces and stitches.
- At the final corner, chain 10 again, slip stitch into the chain space, and fasten off.
- After completing Row 20, chain 1, turn the work, and start the border using single crochets:
- Finish Up
- Weave in the yarn ends to clean up the hammock.
- The finished hammock should resemble a large granny triangle.
Uses of the Toy Hammock
- Storage: Perfect for organizing stuffed animals, plush toys, or lightweight household items efficiently.
- Decor: Adds a colorful touch to rooms, especially children's spaces.
- Customizable: You can make hammocks of varying sizes depending on your needs and yarn availability.
Tip
When crocheting this repetitive pattern, try using stitch markers to mark key points, such as the center of the triangle, to avoid confusion and speed up the process.
Conclusion
The Crochet Stuffed Toy Net is a beginner-friendly crochet project that is fun, easy, and functional. By following simple stitches and repetitive rows, you can create a colorful and practical triangular net for toys and storage. With customization options and minimal material requirements, this project is perfect for first-time crocheters or those seeking quick, rewarding results.


