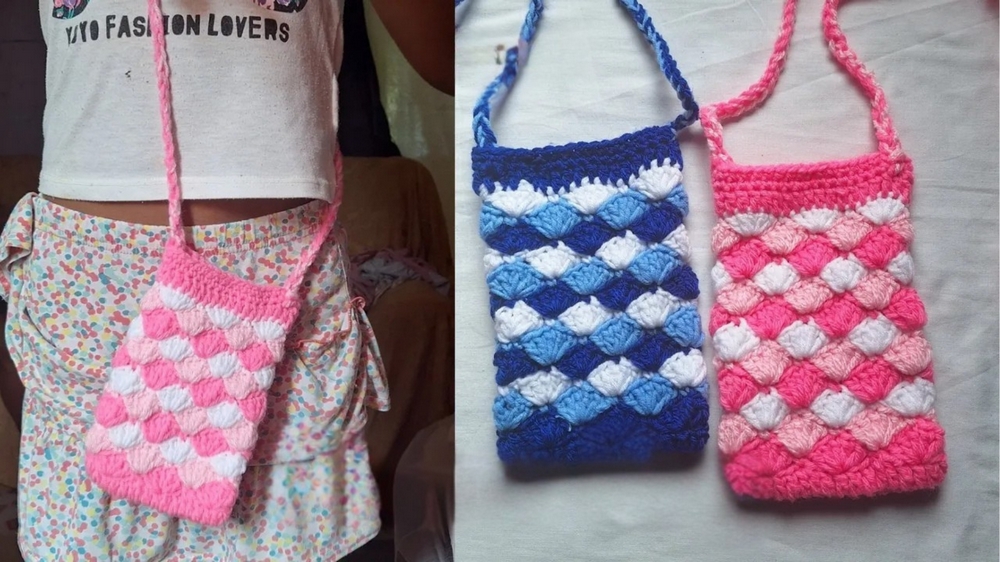
Keep your phone protected and stylish with this elegant crochet bag featuring shell stitches—perfect for everyday use and easy to carry with added versatility.
What’s a stylish way to protect your phone while keeping it accessible? A crochet phone bag using shell stitches might be the answer you’re searching for. This charming bag combines elegance and practicality, with its unique textured design offering both visual appeal and durability. The shell stitch pattern creates a layered effect that not only enhances its beauty but also provides extra protection for your device against minor bumps or scratches.
Crochet a Stylish Phone Bag Using Shell Stitches
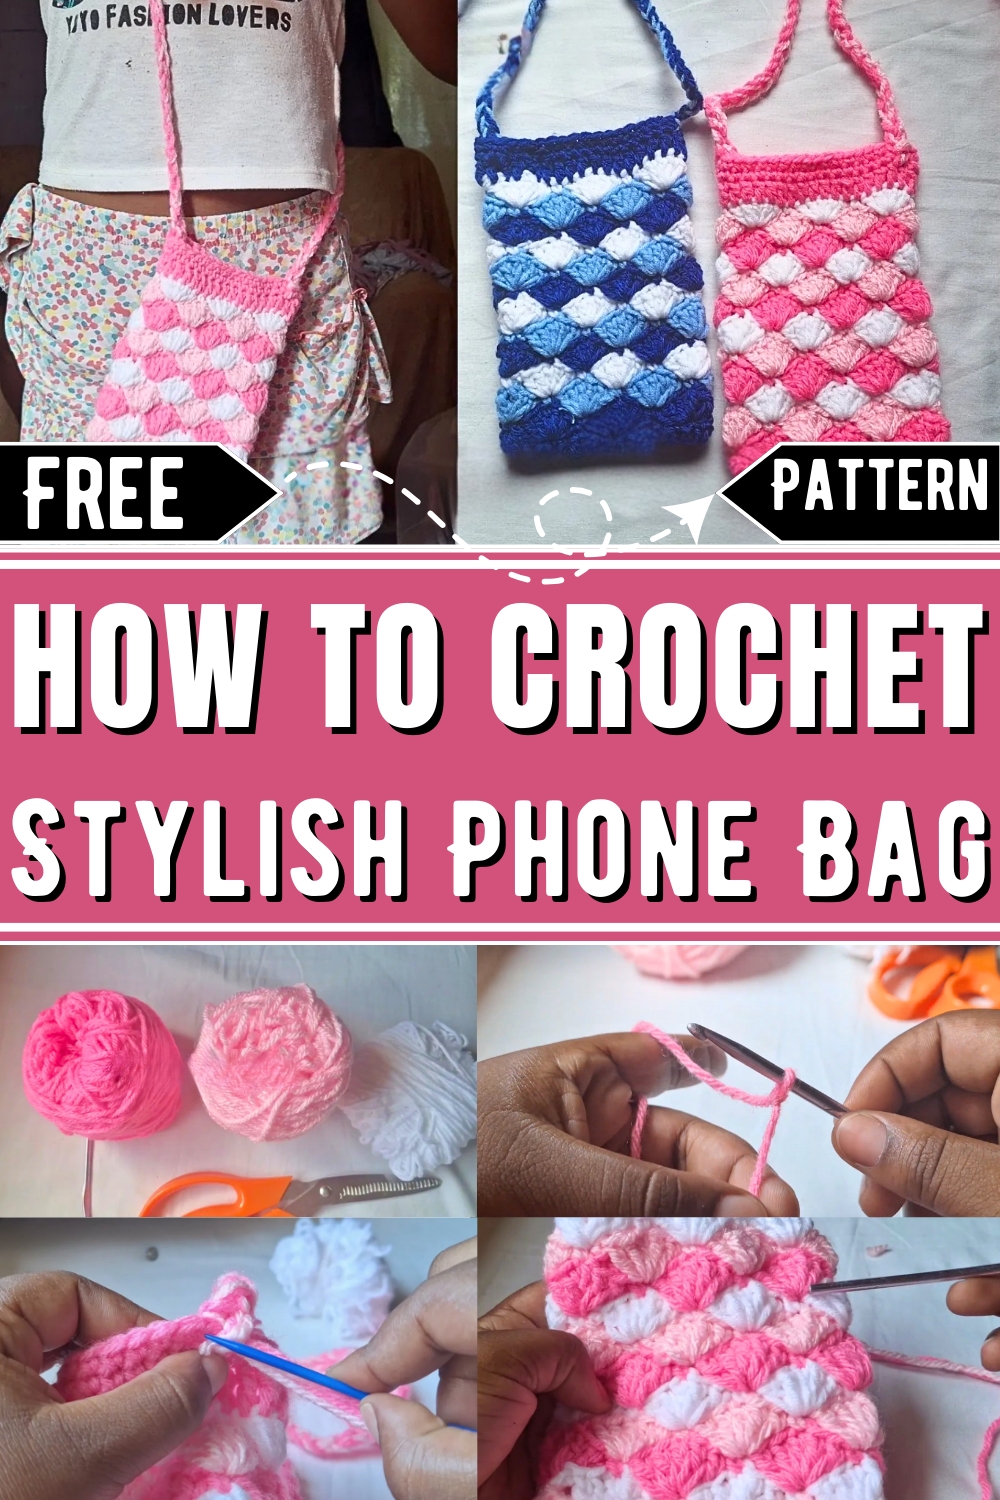
Light and portable, this phone bag is ideal for everyday use. Whether carried on its own or attached with a strap, it adapts effortlessly to any outfit or occasion. Crafted from soft, eco-friendly yarns, it offers a sustainable alternative to mass-produced accessories.
Keeping your phone safe, it serves as a personal expression of creativity and style, making it far more meaningful than a standard case. Perfect for outings, errands, or as a thoughtful, handmade gift, this crochet phone bag is designed to match convenience with elegance.
How To Crochet Stylish Phone Bag
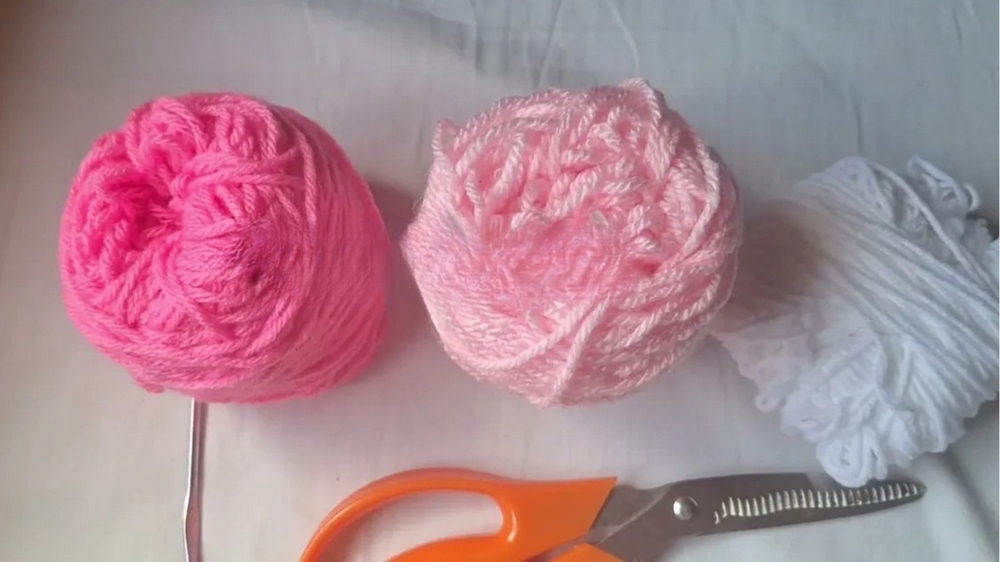
Materials Needed
- Yarn: Any type of four-weight yarn (three colors recommended).
- Crochet Hook: 4 mm hook for the main body of the bag and a 6 mm hook for the strap.
- Tapestry Needle: For sewing the strap to the bag.
- Scissors: To cut excess yarn.
Introduction
In this pattern, you’ll learn how to crochet a stylish phone sling bag using shell stitches. The shell stitch pattern gives the bag a unique and elegant texture, and the project can easily be customized by using different yarn colors. This step-by-step guide is beginner-friendly, making it a great opportunity to hone your crochet skills while creating a functional accessory.
Step-by-Step Instructions
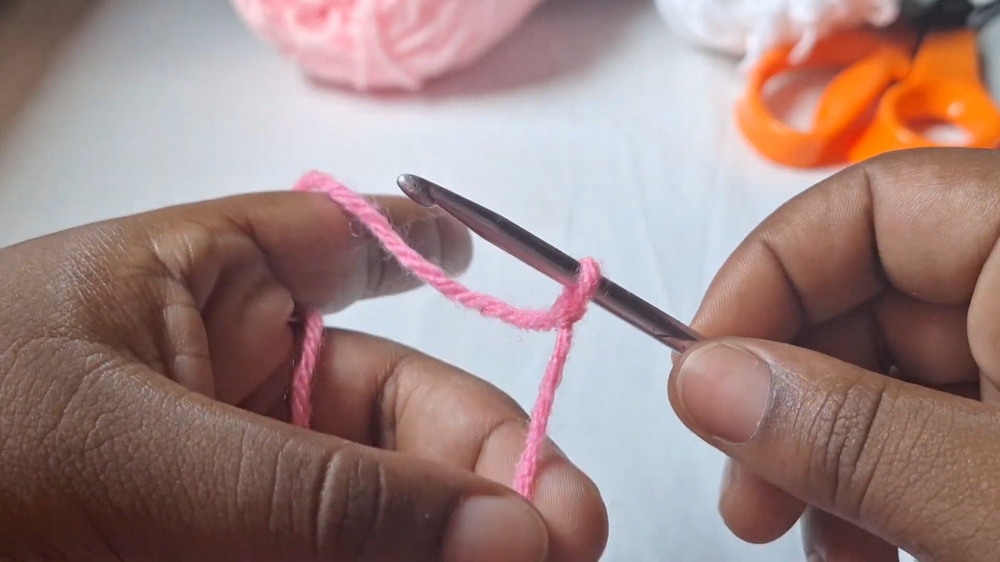
1. Foundation and Row 1
- Begin by making a slip knot.
- Create a foundation chain of 19 chains.
- Skip the first two chains, and place three double crochet into the third chain from the hook.
- Place one double crochet into each of the following chains across.
- In the last chain, place three double crochet.
- Turn your work, and along the other side of the foundation chain, work one double crochet into each chain across.
- Finish the row with a slip stitch into the first double crochet.
- Total stitches for Row 1: 36 stitches.
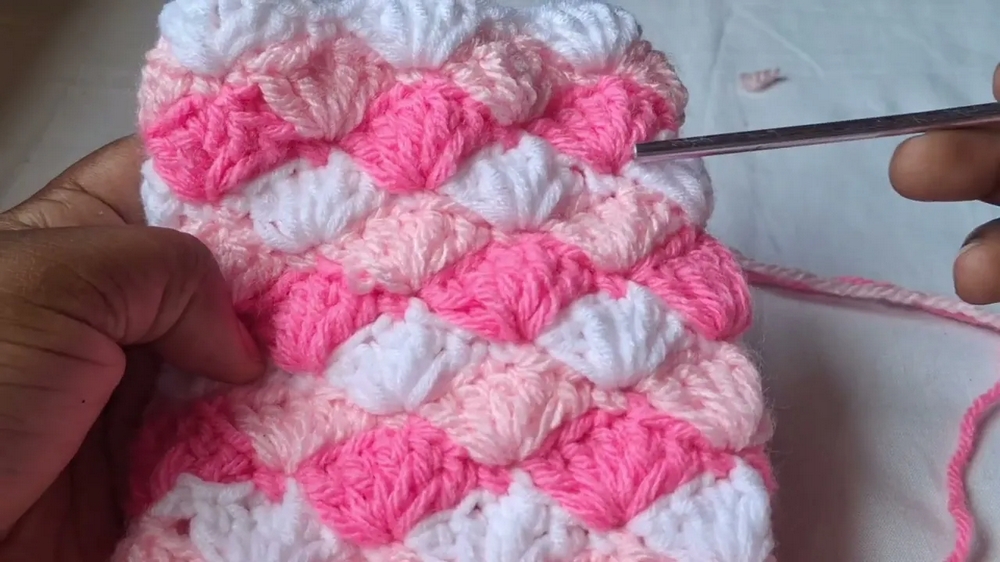
2. Row 2: Creating Shell Stitches
- Start with a chain 1 and make one single crochet into the first stitch.
- Skip two stitches and place five double crochet into the next stitch (forming the shell pattern).
- Repeat: Skip two stitches, make one single crochet, then skip two more stitches and place five double crochets into the next stitch.
- Continue this pattern around the row.
- Finish with five double crochets, skip the last two stitches, and complete the row with a slip stitch into the first single crochet.
3. Row 3: Continuing Shell Pattern
- Change the yarn color, if desired.
- Begin with a chain 3 (counts as the first double crochet).
- Place two double crochet into the first stitch.
- Repeat the shell sequence from the previous row:
- Skip two stitches, make one single crochet in the middle of the shell from the last row.
- Skip two stitches, place five double crochet in the single crochet from the previous row.
- Continue alternating shells and single crochet stitches.
- Finish the row with a single crochet and two double crochet in the last stitch, followed by a slip stitch into the top of the third chain.
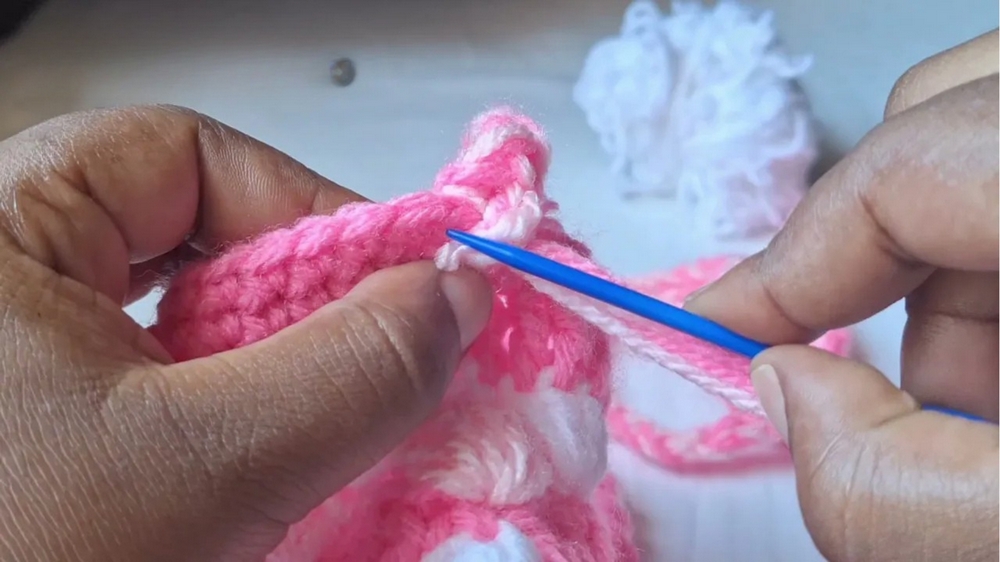
4. Rows 4–13: Build the Bag Body
- Work a repetition of Row 2 and Row 3.
- Alternate yarn colors to add a colorful flair (optional).
- Continue crocheting until you’ve created 12 rows of shell stitches, totaling 13 rows including Row 1.
5. Row 14: Double Crochet Edge
- Use your main color to create a finishing row.
- Start with a chain 3, then place one double crochet in each stitch across.
- Work one double crochet into each of the five double crochets and every single crochet.
- Total stitches for this row: 36 double crochets.
- End the row with a slip stitch into the first double crochet.
6. Rows 15 & 16: Single Crochet Edge
- For the final two rows, use single crochet stitches:
- Start with a chain 1 and place one single crochet into each stitch around.
- Finish each row with a slip stitch.
7. Making the Strap
- Use two strands of yarn (either two different colors or the same color).
- With a 6 mm hook, make a slip knot and create a chain of 100–125 chains (adjust based on desired strap length).
- Use a tapestry needle to sew the strap securely to the sides of the bag.
Conclusion
Congratulations! You have now created a beautiful shell stitch phone sling bag. This practical accessory combines style and functionality, and the colorful design options allow you to tailor it to your preferences. Whether for personal use or as a thoughtful handmade gift, this crochet bag stands out as a versatile project. Keep experimenting with colors and textures to make it uniquely yours.


