Just like adults, kids have a lot of stress in their lives. Between school and extracurricular activities, there's a lot on their plate. Making your fidget toys can be a great way to help boost your kids' learning ability and build up their focusing capabilities. Fidget toys are also a great way to keep restless little hands busy while sitting at their desk or working on homework. And they provide a fun, constructive outlet for all that nervous energy that builds up during the day. The repetitive motion of fidget toys helps children concentrate and stay on task. We love these DIY Fidget Toys because they are inexpensive to make and can be fun for kids of all ages! Making these DIY fidget toys can be an excellent idea for playdates or during school creative activities.
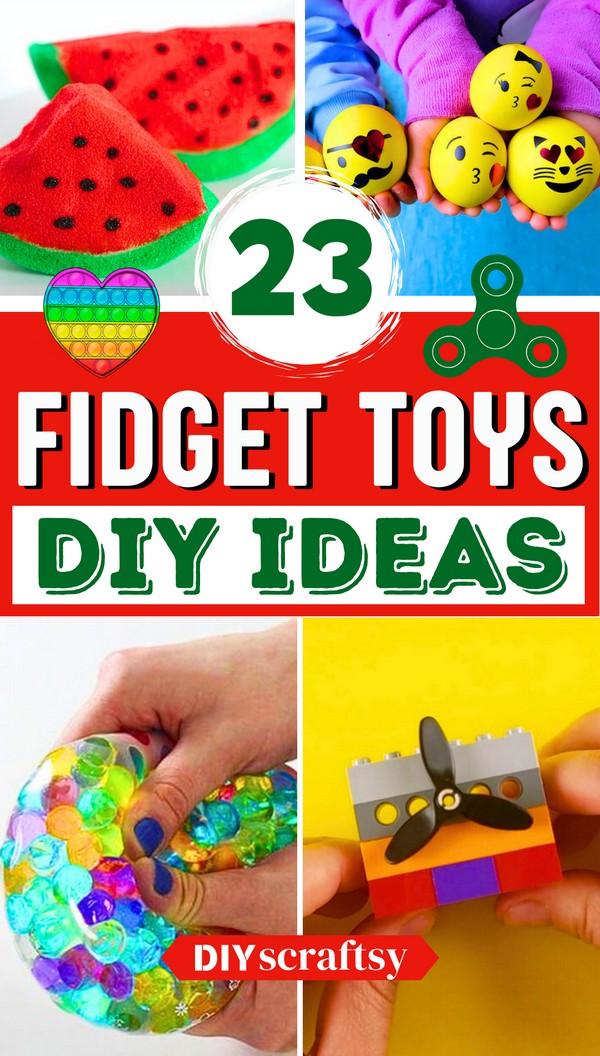
If you're looking for something new to help your child concentrate better without having to spend too much money, this list of 23 DIY Fidget Toys is just what you need. Each of these DIY fidgets is easy and inexpensive to make with items found around the house. And since they are homemade, you can customize them according to your child's needs and personality. These DIY fidget toys also make excellent and thoughtful gifts that everyone would love to receive! Check out this guide if you want to make one or all of these DIY fidget toys: they come in various shapes, sizes, and materials. Try out some of these DIY fidgets!
Easy DIY Begleri Fidget Toy
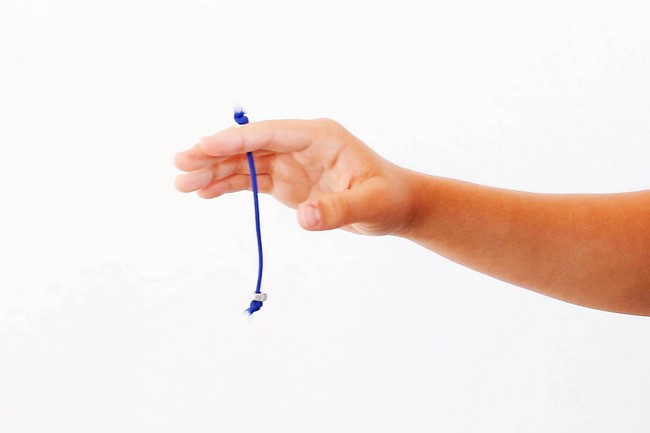
Introduce your child to a new handmade toy in a few minutes. He can work the begleri between, over, and around their fingers, creating impressive combos as he masters various moves. The toy is not only visually appealing but also provides a fantastic way to develop hand-eye coordination and finger dexterity.
Start by threading your chosen objects onto the cord. Tie off to achieve your preferred length, considering your flipping style. A shorter length brings faster flipping and ease of maneuvering around fingers, while a longer length ensures slower flipping and makes it easier to flip around your palm. Adjust the length as per your preference. Finally, accelerate your play, master the flow, and do amazing tricks.
Materials:
- Cord
- Nuts
Homemade Weighted Pencil

Let us help your child overcome the difficulty of holding a pencil or pen with this DIY craft. This small yet effective modification can significantly improve writing comfort for children as well as adults. Customize your pencil by picking a grip in your favorite color and switch between having a weighted or unweighted pencil, depending on the task.
Start by affixing the weight to the pencil, which will provide additional proprioceptive input. This helps the student become more aware that they're holding something. Supplement this with a grip in the student's favorite color at the lead end of the pencil. This color-coded cue will encourage the student to hold the pencil correctly using their thumb and first two fingers.
Materials:
- Pencil
- Gummy grip (for better grasp)
- Metal nuts
Best Therapy Putty Recipe
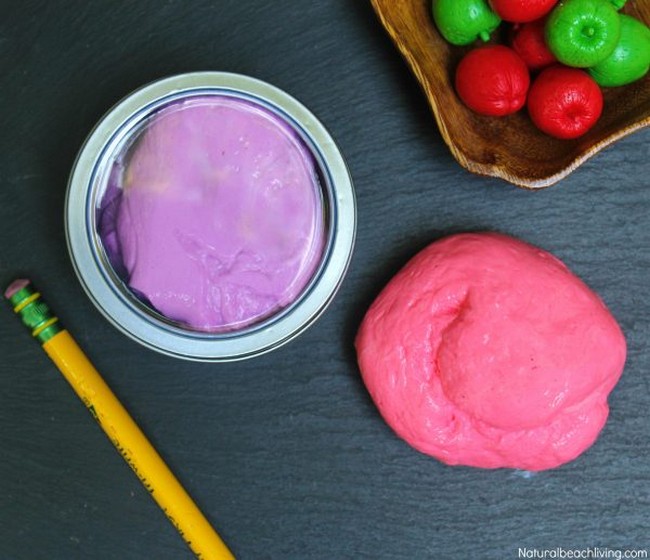
Here's the recipe to make a toy that will keep children engaged for hours. Either for therapeutic reasons like therapy putty to aid kids and young during work or as a stress reliever for yourself, this therapy putty recipe is perfect. Kids love squeezing, pulling, stretching, and playing with their putty.
Mix the initial substances in a bowl and add your preferred color. In a separate container, prepare a solution with hot water and dissolve a certain substance in it. Combine both mixtures, stir, and knead until you obtain a non-sticky consistency. Remove excess water and leave it to dry for a bit before using the therapy putty for strengthening hand muscles or stress relief.
Materials:
- 4 oz Elmer's white glue
- ¼ cup Cornstarch
- ¼ cup hot water
- ¼ teaspoon Borax
- 2-5 drops of food color
DIY Ninja Fidget Spinner Using Paper
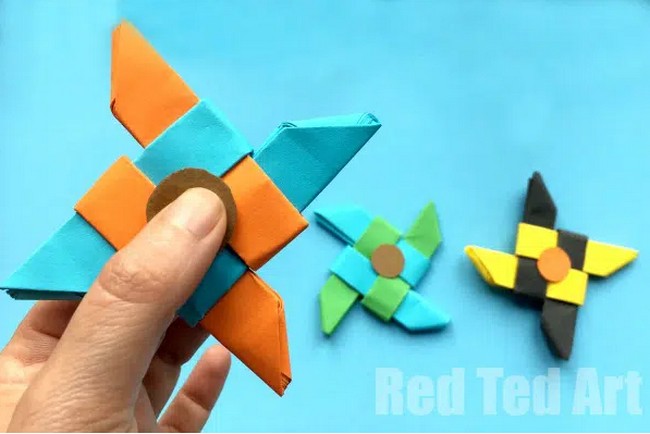
The Ninja Fidget Spinner is reminiscent of Origami Ninja Stars, manning the classic folds and corners. The crafting process involves making an Origami Ninja Star first before transforming it into a fidget spinner. So, choose to watch the video given below, gather the materials in preferred colors, and start making!
Begin by crafting an origami ninja star, the key element of this fidget spinner. Once your origami ninja star is ready, move forward by incorporating a no-bearing mechanism into the construction. This special mechanism allows the spinner to revolve. That's it; your ninja fidget spinner is ready. Enjoy your DIY origami fidget spinner.
Materials:
- 4 pieces of square paper
- a toothpick
- a little card (we used some cards from a cereal box)
- a little glue
DIY Soda Bottle Top Fidget Toy
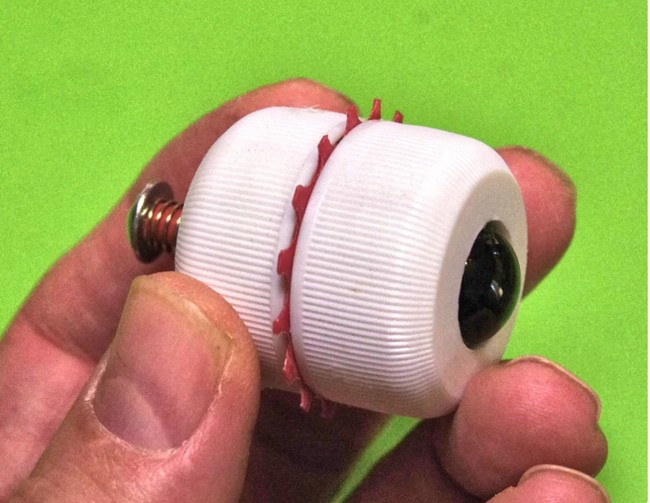
This Soda Bottle, Top Fidget Toy, features two halves that turn independently, a gear in the center for additional manipulation, and a joystick that can be pressed and wiggled, ensuring hours of fidgeting fun. On the other side, a marble adds an extra tactile dimension, making this toy not only fun but also potentially therapeutic, providing a soothing activity for restless hands.
First, prepare and assemble all necessary components. Fabricate the gear, wooden discs, and joystick before drilling holes for the joystick and marble on the caps. Attach the joystick and fit the wooden discs together. Apply glue to secure lids to the wooden discs while ensuring gear and hats can move independently. Finally, add the marble and assemble everything to complete the spinning fidget toy.
Materials:
- 2 Soda Bottle Tops
- Wooden Discs
- Gear made from a Yogurt Container Top
- A Bolt, Nut, and Spring (For the joystick)
- A Marble
- 6mm hardboard rings (for glue gripping area)
- Glue (To attach the caps to the discs)
- A 4mm bolt for the joystick
DIY Googly-Eyed Snake Pencil Toppers
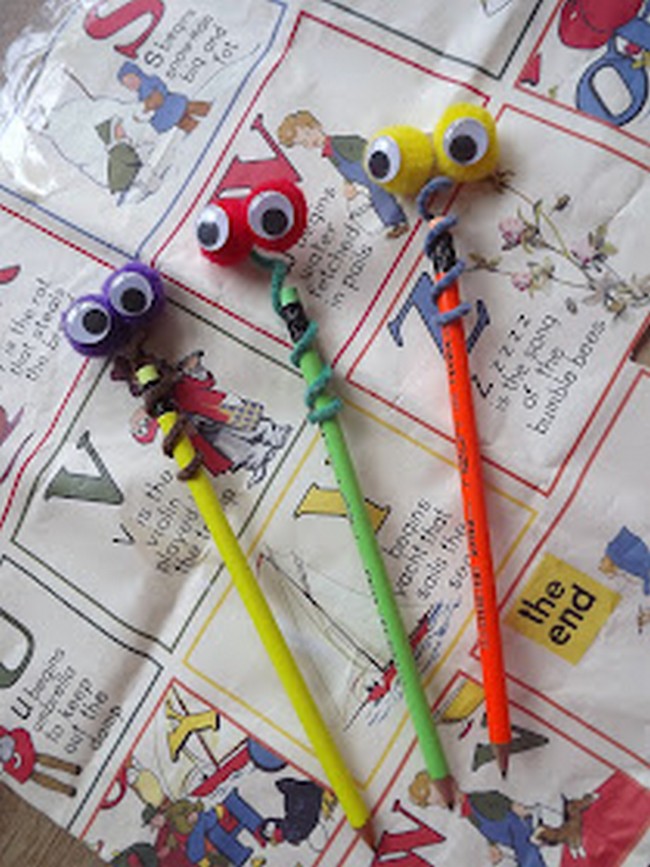
Here's a fun DIY craft to make for your child that will brighten up any school day, encouraging them to reconnect with their tools and inspiring them towards writing. It is crafted with simplicity, bursts with vibrant colors, and is sure to make your child the center of attention in the class while writing!
Begin by selecting the color of pom poms for each pencil. Twist a pipe cleaner around the top of the pencil, making it look like a spiral. Affix googly eyes onto the chosen pom poms. Next, glue your pom pom googly eyes onto the top of the pipe cleaner. Repeat these steps for the rest of the pencils. Now, you've successfully created some googly-eyed snake pencil toppers.
Materials:
- Selection of colored pencils
- Colored pom poms
- Googly eyes
- Pipe cleaners
- Glue
DIY Chewable Teething Necklace
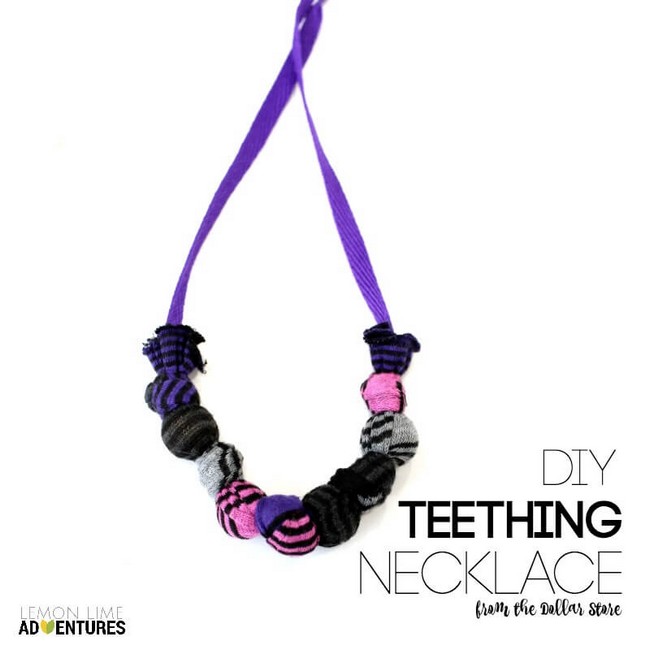
This creative DIY Chewable Teething Necklace for Older Kids stands out as more than just a fidget to it serves as an innovative solution for kids who have the urge to chew. One of the fantastic features of this DIY craft is its versatility. Depending on the child’s preference, it can be a necklace or a bracelet, offering multiple ways to interact and stim.
Start by cutting toe areas off from thin socks or tights and string a lace through, ensuring it's even across the lace. Fold the lace in half, tying a knot in the middle of your necklace. Place a wooden bead on either side after the knot, cover the knot with the sock, and tie another knot after the bead. Follow this pattern until you run out of socks on each side. If you're concerned about safety, consider adding a breakaway clasp or transforming it into a bracelet.
Materials:
- Wooden Beads
- Shoelaces (or longer ribbon if an adult is wearing this)
- Thin Knee knee-high socks, Tights or Hose
How to Create Anti-stress Balls
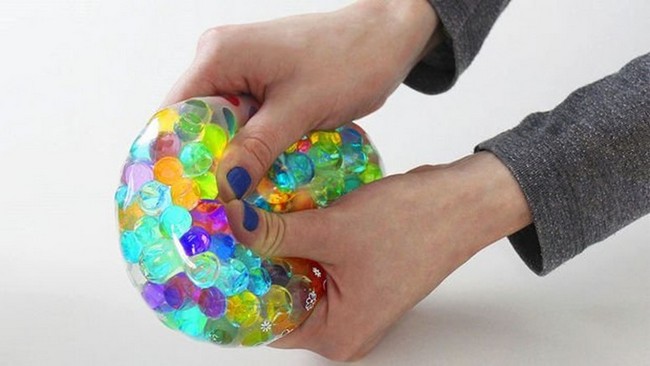
This DIY guide teaches you to make two types of balls within a few minutes. The Water Stress Ball uses a transparent balloon, decorative glass stones, and water for a soothing texture. Meanwhile, the Soft Anti-Stress Ball employs cooking starch within a regular balloon for a classic stress-relief squeeze. Enjoy this simple family craft that combines creativity and stress management!
Create a water stress ball by pouring decorative stones into a container, rinsing them, transferring them to an empty bottle, and adding clean water. Attach a thick transparent balloon to the bottle's neck, transfer the contents into the balloon, and tie the end. Next, make a soft anti-stress ball using a conventional balloon and starch. Fill the balloon with starch using a funnel, tie the end, and draw a face on it with a marker. Your anti-stress balls are ready!
Materials:
- Thick transparent balloon
- Decorative stones from glass
- Plastic container
- Water
- An empty plastic bottle
- Scissors
DIY Watermelon Squishy Toy
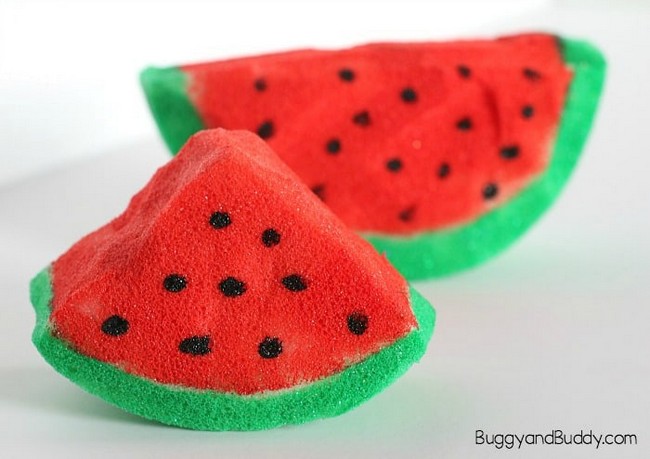
If you're looking for an excellent DIY fidget toy that's easy to make and super fun to play with, this tutorial is for you! This simple, step-by-step guide will show you how to make your very own watermelon-scented squishy toy out of everyday household items. In addition to being able to squeeze it over and over again when you need it, this toy will also smell like sweet watermelon as you do so!
Commence by acquiring some memory foam to fashion your squishy shape. Utilize sharp scissors to cut through the foam and shape it into the design you prefer. Once satisfied with the shape, apply fabric paint with paintbrushes according to your desired color scheme or pattern. Leave your squishy creation on a flat surface to dry overnight. After drying completely, the squishy toy is ready for play and enjoyment. Remember to handle the foam and paint carefully to achieve the best result.
Materials:
- Memory foam
- Very sharp scissors
- Fabric paint in various colors
- Paintbrushes
- Paper plate or other surface for paint
- Wax paper or parchment paper
- Art mat for working
DIY Infinity Cube Fidget Toy

This DIY Infinity Cube Fidget Toy is a simple and enjoyable project that can keep you entertained for hours. It's perfect for kids who find it tough to stay focused. This toy is safer as it doesn't have small parts that can be swallowed, like some other fidget toys. The toy is appealing because it's visually stimulating, light in weight, and moves smoothly.
Commence by acquiring some memory foam to fashion your squishy shape. Utilize sharp scissors to cut through the foam and shape it into the design you prefer. Once satisfied with the shape, apply fabric paint with paintbrushes according to your desired color scheme or pattern. Leave your squishy creation on a flat surface to dry overnight. After drying completely, the squishy toy is ready for play and enjoyment. Remember to handle the foam and paint carefully to achieve the best result.
Materials:
- 8 Wooden cubes
- Thin duct tape
- A craft or utility knife
- Non-stick scissors
- Martha Stewart soft gel watercolors
Emoji Squishy Stress Balls Filled With Slime
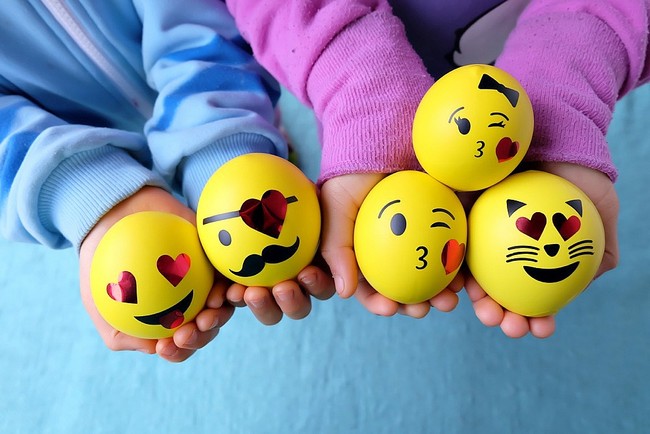
DIY Emoji Squishy Stress Balls Filled with Slime is a delightful combination of emojis, slime, and squishy toys that kids absolutely love! This craft caters to your child's interests while serving as a creative, stress-relieving activity. Perfect as a non-candy Easter Basket stuffer, a fun Valentine's Day present, or a birthday party favor, these emoji squishy balls with customizable faces make for a versatile and exciting gift.
First, create your slime. Take a balloon, expand it by scattering your fingers inside, and fill it with the prepared silt. Once complete, knot the balloon tightly near the slime to maintain a round shape. Cut off the extra part of the filled balloon. Prepare another balloon by removing its narrow part. Stretch this balloon over the filled one, covering and securing the knot. Add emoji faces to your stress ball with the chosen method. Your DIY Emoji Squishy Stress Ball is ready.
Materials:
- Scissors
- Yellow Balloons
- Cricut Maker
- Regular Grip Cutting Mat
- Black and Red Cricut Vinyl
- Cricut Transfer Tape
- My Cricut Emoji Face Cut File
Fidget Bracelet with Built-in Marble Maze
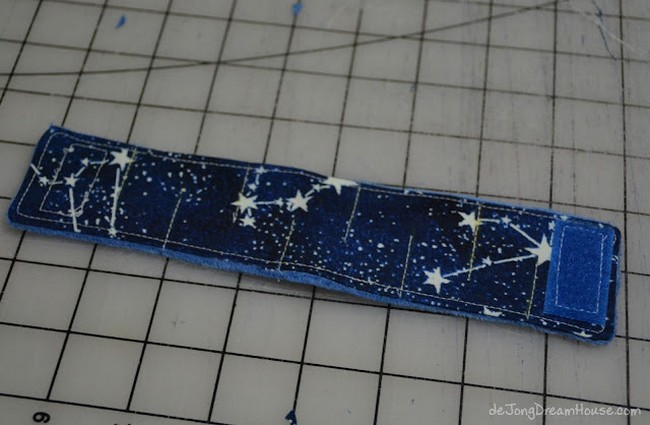
This creative DIY Fidget Bracelet with a built-in Marble Maze keeps busy hands calm and helps increase focus. It's carefully made to be soft, quiet, and relaxing. These bracelets can be made from different types of cloth to give a new sensory feeling each time they're worn. The built-in marble maze provides brain stimulation that soothes the need to fidget while encouraging mental involvement.
Start off by measuring your wrist, including some additional length for comfort. Next, cut two fabric strips according to your measurements. Align them together, right sides facing each other. Sew around the edges, but remember to leave an inch open to turn it later. Once turned right-side out, sketch lines that will form the maze for the bead. Insert the bead through the open section, then close it up by sewing. Secure Velcro on each end to fasten the bracelet. It's now ready to wear!
Materials:
- Two pieces of fabric.
- Velcro
- Small bead or marble.
- Standard sewing supplies.
DIY Rings and Chain Fidget

This DIY Rings, and Chain Fidget Toy is a hand-friendly tool beneficial for both children and adults who find a hard time sitting still or need to occupy their hands to boost focus. Made with a couple of simple materials like a bike chain, key rings, and, optionally, rainbow loom rubber bands, it's a practical and fun project that anyone can undertake.
Begin by breaking the bike chain into two pieces (one outer link and one inner link). Then, break the chain again to have four outer or inner links. Attach two of the outer/inner links to the outside of the main link piece, and run a key ring through the eye holes. Use a chain break tool to remove the pin, securing the links with rubber bands. Finally, pass the key ring through the eye hole and link all the rings together. Your Rings and Chain Fidget is complete.
Materials:
- Bike chain
- Two key Rings
- Chain breaking tool
- 2 to 4 Rainbow loom rubber band
How to Make a Duct Tape Endless Cube
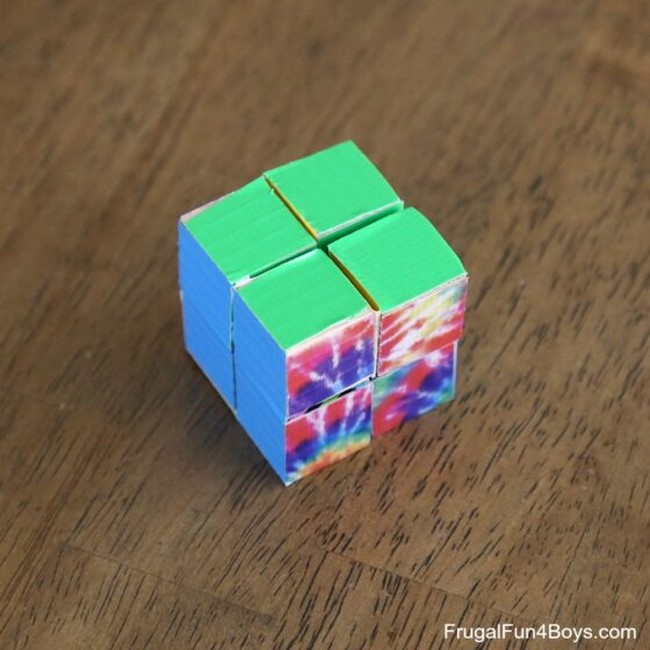
Take your child's fidgeting to another level with the Duct Tape Endless Cube, a fascinating DIY toy that transforms into different shapes in an endless cycle. Crafted from wooden cubes and duct tape, this cube offers a visually satisfying transformation, making it an exciting and addicting hands-on activity for all ages.
Kick off the process by arranging eight cubes in two rows of four. Apply tape horizontally to form four groups of two cubes. Rotate it and connect the two center cubes with additional tape. Repeat on the other side. Turn the structure so the connected side faces down, then adhere the right and left cubes vertically. Make sure not to tape them together. Repeat this process until all cubes are secured, ensuring the mobility of the structure. Voilà, your endless cube is ready to fidget with.
Materials:
- ¾ inch wooden cubes.
- Small rolls of duct tape, ¾ inches wide.
- A craft or utility knife for cutting the tape.
Awesome DIY Braided Yarn Dolls

Enjoy making and playing with Braided Yarn Dolls in this fun DIY project, loved by kids. You don't need mush tools and materials as you can use your yarn scraps. These dolls will also be great for creative play and can make heartwarming handmade gifts to give to friends and family.
Make this DIY craft by wrapping yarn around a piece of cardboard until you achieve the desired thickness. Remove the bundle and cut one end to create equal length strands. Next, fold this bunch in the middle and tie it tightly to form the doll's head. For the arms, separate two sections from the bundle and tie them off. For the waist and legs, tie the middle section. Braid and trim the arms, then decide whether to braid or trim the bottom part to form legs or a skirt, respectively. Now you have a braided yarn doll!
Materials:
- Yarn
- Cardboard scrap
- Scissors
Easy to Make Zipper Bracelets

Discover a new way to express creativity with DIY Zipper Bracelets. Using simple sewing skills instead of typical jewelry-making techniques, these bracelets come to life using zippers in various colors. Perfect for teenagers or preteens, this quick and fun craft project gives a spin to traditional bracelet making.
Trim the cloth from the zipper as closely as possible, and finish the outside with a polish to prevent fraying. Measure it according to your wrist size, ensuring it can slip over easily. Sew the ends together by threading a needle with floss and inserting it in the center of the zipper. Join the two sides, wind the string around both sides till secure, make another stitch inside the zipper, thread it back through, and tie a knot to ensure it's secure. Trim the zipper once it's firmly secure.
Materials:
- Cheap, colorful zippers (9″)
- Fabric scissors
- Embroidery floss
- Embroidery needle
DIY Lego Fidget Cube for Kids

Gift your child an endless amount of fun with the DIY Lego Fidget Cube. Constructed from LEGO Technic pieces, this fidget cube continuously transforms, providing endless fascination. The best part is its durability, which allows it to last for years.
First, connect two cross blocks using a pin, forming a 'w' and 'c' shape. Attach these to a beam using an axle. Flip this structure and add another axle into the 'w' shape. Repeat to make four connected blocks. Similarly, build another chain of four blocks starting with a 'm' shape. Now you have two lines of four blocks. Finally, place the two lines side by side, join their ends, and you have your fidget cube. It makes a continuous chain when you start folding.
Materials:
- 8- LEGO Black Technic Pin with Lengthwise Friction Ridges and Center Slots (2780)
- 16- LEGO Black Axle 2 with Grooves (32062)
- 8- LEGO Yellow Beam 2 (43857)
- 8- LEGO Red Technic Cross Block 2 x 2 Split (Axle/Twin Pin) (41678)
- 8 – LEGO Dark Blue Technic Cross Block 2 x 2 Split (Axle/Twin Pin) (41678)
We like to get these sets to keep parts on hand:
- Lego Technic Gears
- Lego Technic Joints
- Lego Axles


Build a Fidget Spinner With Lego Bricks
The LEGO Fidget Spinner is made using bright and colorful LEGO bricks, offering a satisfying spin that challenges kids to create their own designs. By assembling the spinner, children can learn about distributing weight and reducing friction between moving parts, turning their toy into a mini physics class!
Attach a round plate on the top and bottom of another round plate, then slide a tile with a hole onto an axle. Add a round plate to the axle and attach this assembly to another round plate. Add a plate with an X-shaped hole onto the axle while ensuring the spinner is free to turn. Put a plate under the round plate, then add another plate. Attach all four arms, and the spinner is ready. To use, place one finger on each side and spin.
Materials:
- 6 x 6 round plate (LEGO)
- 4 x 4 round plates (LEGO)
- 2 x 2 round tile with a round hole (LEGO)
- An axle - 3 studs long with a stud on the end (LEGO)
- A variety of additional LEGO plates and tiles for constructing the arms of the fidget spinner.
- Part number for the 2 x 2 round tile with hole: 15535 (LEGO)
- Part number for axle: 6587 (LEGO)
How to Make Paper Spinner Toys
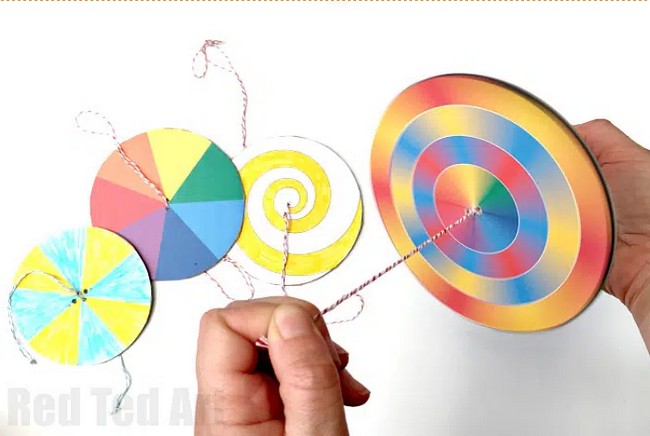
Setting the scene between magic and science, these DIY Paper Spinner Toys add color to your child's playtime and learning.Your child can have fun with the colors and patterns while learning how the blending of different hues creates unique results.A fusion of fun and learning right at the tips of your child's fingers!
Create two circles with different colors or designs, and cut them out. Attach one of the circles onto a piece of cardboard and cut out the same circle shape from the cardboard. Stick the second circle onto the back of the cardboard circle. Make two small holes about 1 cm apart in the center of the cardboard. Thread a string through the holes and tie it. Now, hold the ends of the string, and spin your paper spinner to enjoy the color-mixing effect.
Materials:
- Paper
- Card
- String or pennies to make a penny spinner
- Pens
- Scissors
- Glue stick
Awesome DIY No-sew Mermaid Fidget Bag

Ideal for fidgety kids who struggle to sit still, the No-Sew Mermaid Fidget Bag is an easy and fun DIY project that doubles as a portable sensory aid. This magical bag, boasting brilliant mermaid-themed fabric, not only captures visual interest but also offers tactile stimulation. It can be filled with quiet fidget toys, morphing into a 'big girl purse' your little one will adore.
Switching things up, you're going to begin by slicing an old t-shirt into three strips. Bind these at one end and braid them together, securing with a knot at the other end. Now, take a pillowcase with a particular fabric facing outward and fold it with the zipper upward, maintaining a space at the top. Cut four holes on the sides of the pillowcase. Now, onto the braided shirt strands. Affix these into the prepared holes on each side to form handles, and there you have it - your own mermaid fidget bag!
Materials:

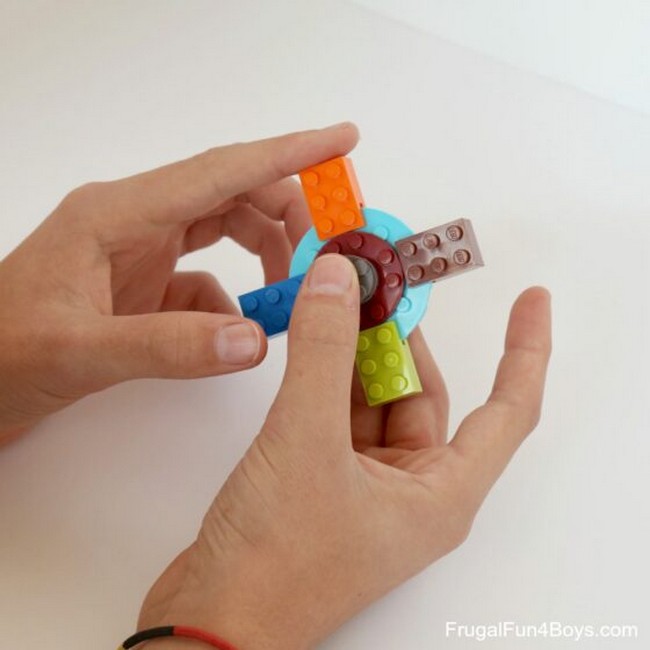
DIY LEGO Spinner Pencil Topper

This project transforms your child's pencil into an interactive learning tool, keeping their hands engaged and minds focused. Made with a propeller piece, round LEGO pieces, a pencil, and a few twists, this masterpiece fuses fun and functionality in a striking way.
Start by assembling three round LEGO pieces together. Attach a propeller to a round piece that functions as an axis, and ensure its stability with a small piece. Push the axis through the circular LEGO parts. Next, tightly fix the LEGO piece onto a pencil, twisting it to secure it. If needed, add glue. You now have a LEGO spinner topper fixed on your pencil, which you can spin and help you concentrate.
- A pencil
- 3 round LEGO pieces
- A round piece that will act as an axis
- A propeller piece
- A small piece to keep the propeller in place
DIY Epic Lego Fidget Cube

Many of us have a lot of memories of playing with Lego building blocks as kids and thought those days were behind us. Well, we've got great news for you: They're not! Now that you're an adult, those same bricks can serve a new purpose: a stress-reducing fidget toy. All you need to build your own is one LEGO brick, a little bit of paint, and this handy guide. You'll find step-by-step instructions on making your own set of colorful Lego Fidget bricks here.