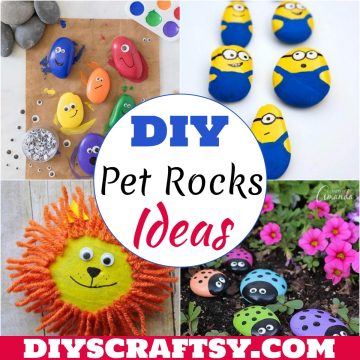
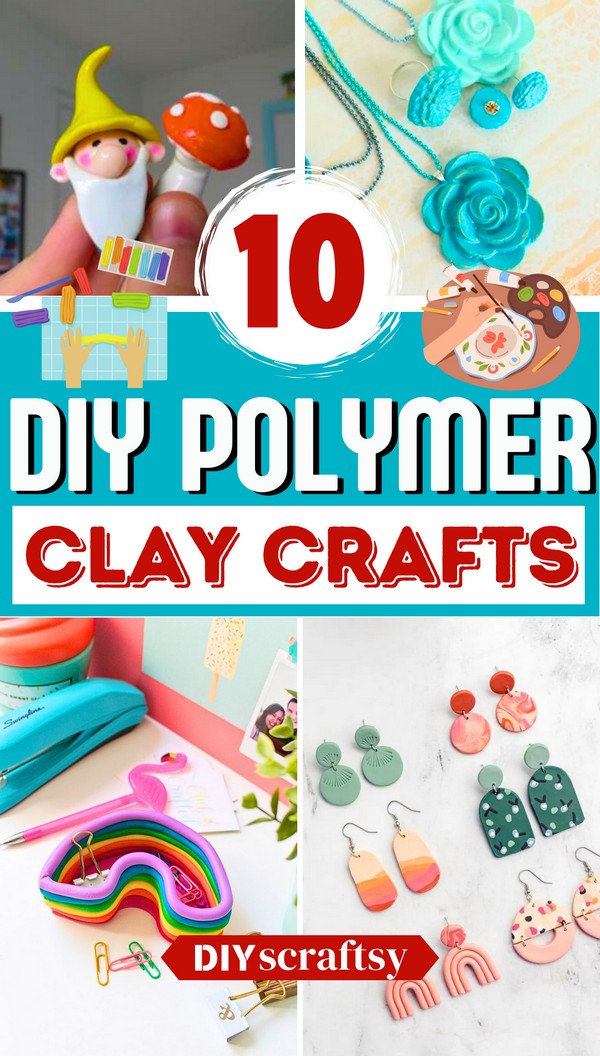
You can replicate any item using polymer clay easily, cheaply, and funly. But, if you are looking for some polyester clay ideas to DIY, this list offering 10 tutorials will help you. You will find options for jewelry, toys, small decorations, useable items, and much more! So go down to have a look at it and impress yourself!
What is The General Way to Make Anything With Polymer Clay?
The way of crafting something from polymer clay may vary a little with the overall look and requirements of an item. However, all polymer clay ideas follow the same basic steps as follows:
- Open the wrapper and Knead, or squeeze polymer clay and warm a little until it's soft enough (conditioning!) to shape easily. You can use a clay roller to speed up. One can also mix clays of different colors together.
- Shape the conditioned clay into any form with your hands or sculpting tools (sculpt process!). It may be a replica of any character or object, like pendants, flowers, earrings, animals, etc. It requires practice!
- If molded clay looks simple, one can carve finer details using various tools or everyday objects. You can use comb, lace, leaves, or anything else by embedding and removing.
- Bake the shaped clay and stylize in the oven (usually for 15-30 minutes). You can check the instructions label to check the temperature.
- After baking and cooling, finish by sanding, painting, or sealing.
Tips For Ideal DIY Polymer Clay Project
These two tips for polymer clay ideas are helpful to some extent:
Don't Cook Clay In The Microwave: Clay packages and expert clay crafters both forbid cooking clay in the microwave. Unbaked parts, overheated parts forming bubbles, and hydrogen chloride gas are hazardous aspects of this hack.......!
A better way is to use an oven that will provide even heat to the clay.
Bake 3D Sculptures in Layes: Bake each layer before adding more details to maintain the goodness of your clay.
Benefits of DIY Polymer Clay Ideas
DIY polymer clay ideas are a fun way to create unique and personalized items. This can be done by using your favorite colors and designs. The most important thing is that you have to know how to use this material properly and effectively.
There are many benefits of DIY polymer clay ideas:
- It is cheaper than buying ready-made products;
- You can make cute gifts.
DIY Clay Jewelry Idea For Kids

This DIY clay jewelry craft offers a magnificent blend of fun, learning, and creativity that kids will surely love. By using this DIY guide, you can mold the clay into diverse shapes, expressing your personality through the colors you choose. So, create pendants, earrings, and rings to elevate your personality or as gifts.
Start by kneading a piece of clay and molding it into a ball to fit the mold you want to use. Press this clay into the mold and scrape off any excess. Pop out the shape from the mold and set aside. Insert metal parts or poke holes in the clay as needed before baking. After baking, allow the pieces to cool. Paint with glaze and/or metallic acrylic paint if desired. Finally, use super glue to attach jewelry components.
Materials:
- Sculpting clay
- Silicone molds
- Jewelry parts, such as pendant bails, earring hooks, and rings
- Super Glue
- Clay glaze
- Gold metallic acrylic paint
- Cookie/baking sheet
You can also see: DIY Clay Flower Pot Ideas
Polymer Clay Earrings
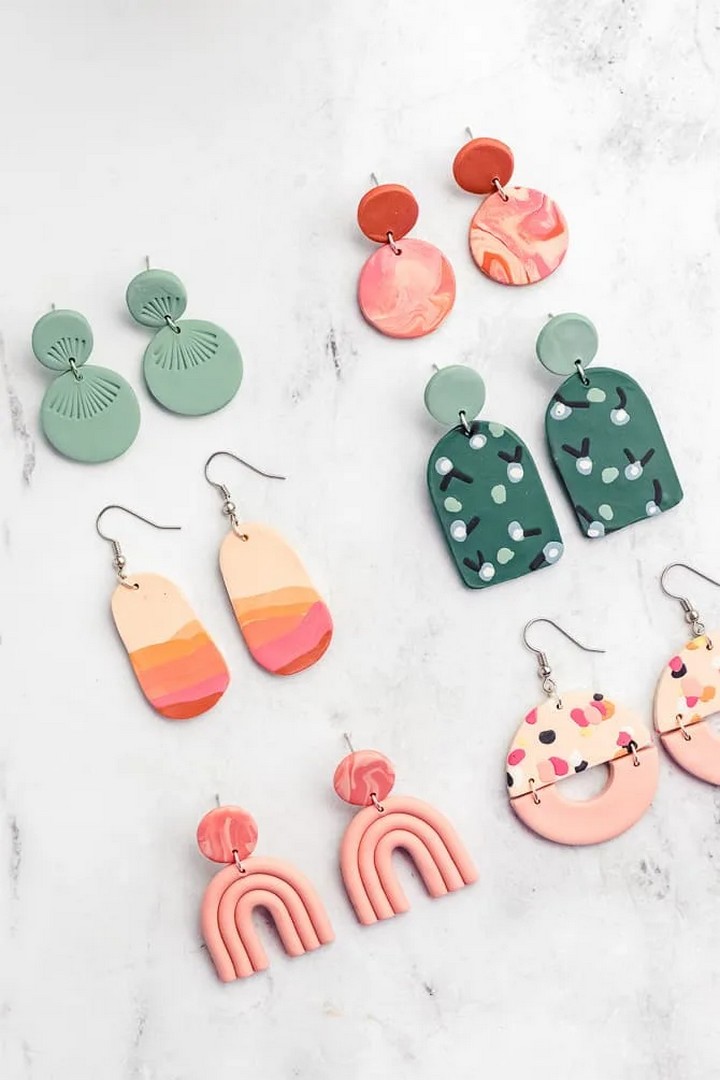
Explore the exciting world of handmade polymer clay earrings with this comprehensive guide. The step-by-step instructions lead you through softening clay, mixing colors, and creating unique earring designs such as rainbow arch-shaped earrings, floral patterned slab earrings, terrazzo pattern earrings, and marbled clay earrings. Make all and create your collection to wear with all dresses!
Begin by conditioning the polymer clay. Roll out a slab of clay and use a craft knife or a cutter to create your desired shapes. Create patterns like marble, abstract landscape, or terrazzo by manipulating colors and shapes of clay on the slab. Carefully add texture or floral patterns if desired. Cut out your earring shapes from the slab. Bake according to the clay instructions, and after cooling, add jump rings and earring backs. For finishing, sand and smoothen edges as needed.
Materials:
- Polymer clay in various colors
- Earring backs (either posts, hooks, or hoops)
- Jump rings
- Flexible superglue (such as Loctite Gel or Gorilla Glue Gel Superglue)
- Parchment paper or foil
Hygge Clay tea light
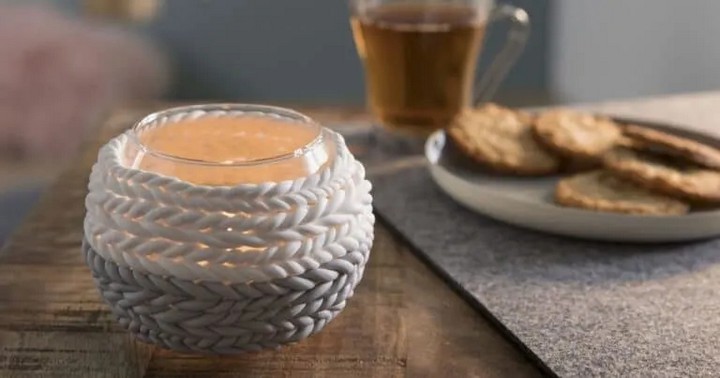
This simple yet elegant decoration adds a touch of Hygge charm to your home, neutralizing stress and inviting a cozy, heartwarming atmosphere. The candle emits a sweet and cozy light, making it a perfect addition to your dining experience, be it a candlelight dinner or placed on your computer table. Don't limit yourself to monochromatic colors; embrace vibrant color combinations that suit your personality.
Begin by rolling four cords, 5mm thick, and twist two cords of the same color in a clockwise direction. Do the same with the other two cords, but twist them anti-clockwise. Lay the twisted cords lengthways next to each other and press them together to create a knitted look. Press the knitted strips around the tea light, with the lighter color at the top and the darker color at the bottom. Cut off any leftovers and harden the tea light in a preheated oven for 30 minutes at 110°C (230°F) on upper and lower heat.
Materials:
- Oven-bake Modelling Clay (Dolphin Grey)
- Oven-bake Modelling Clay (White)
- Blades Set
- Oven Thermometer
- Smooth Working Surface (Glass or Ceramic)
- Round Tea Light
DIY Polymer Clay Gnome Idea

Bring playful charm and character to your living space with this adorable DIY Polymer Clay Gnome and Mushroom set. These whimsical creations can be placed anywhere from a cozy nook in your home to the heart of a thriving terrarium or a potted plant. Being easy and fun, the craft allows for personal expression, letting you play with colors to suit your style and environment.
Craft a gnome from polymer clay by rolling flesh-toned clay for the body and head with a small piece for the nose. Shape your chosen color of clay into a cylinder for the body and affix the head. Create hair with a thin white clay rectangle around the head. Form a beard from white clay and position it under the nose. For the gnome's hat, mold a ball of colored clay into a point at the top. Attach two semi-circular, flesh-toned clay pieces for the ears at the junction of the beard and hair. Bake, paint details, and glaze.
Materials:
- Flesh-toned polymer clay
- Colored polymer clay
- White polymer clay
- Wire (optional for attaching to potted plants or terrariums)
- Acrylic paint (black and pink)
- Polymer glaze
- Sculpting tools or household items for shaping and cutting the clay
Make Duo Tone Necklace With DIY Polymer Clay

The Beautiful Duo Tone Necklace is a fun, easy-to-make DIY project, transforming ordinary polymer clay into a unique piece of minimalist jewelry. This elegant piece serves as a stylish wardrobe accessory that adds a personalized and fashionable touch to your simple dress. The best part is that you can choose the colors that match your outfit!
Start by cutting three pieces of clay and knead until softened, rolled into balls, and then flattened into thick discs. Use a skewer to create a hole at the top of each disc for the cord. For texture, take a textured button and press it into the first soft clay disc. Remove the button slowly and repeat the process with the other two discs. To join them, stack the beige disc between the green and use the skewer to connect the three pieces by piercing them through the holes again. Lastly, place the necklace on a baking tray and bake.
Materials:
- Polymer clay
- Knife
- Skewer
- Cotton cord
- Textured buttons
- Baking paper
- Baking tray
- Oven
Monster Horns Using DIY Polymer Clay Idea

This tutorial is for making an excellent set of DIY monster horns using polymer clay. These horns are adjustable and look great in just about any color or design you want. They would be a great quirky and fun accessory, perfect for imaginative play or costume parties.
The process of making Monster Horns starts with dividing the polymer clay in half and molding it into cylinder-like shapes. Then, you pinch the tops to fashion them into a cone shape. After that, punch holes through them using a wooden dowel. Bake the polymer clay according to its package directions. Cut a piece of ribbon, thread it through the holes, and secure the horns by making knots on both sides. Lastly, ensure you place the horns far enough apart on the ribbon so they fit well on your head, then tie the ribbon and enjoy your homemade Monster Horns.
Materials:
- Polymer clay
- Wood dowel or pencil
- Ribbon
- Oven
DIY Polymer Clay Snowman Buttons Idea

Discover the joy of creating your own winter-themed accessories with these DIY Polymer Clay Snowman Buttons. These cute buttons are great for Christmas decorations, jewelry, accessories, and cards. Get inspiration from this DIY guide, choose the customization according to your needs, and start making.
To create snowman buttons, first prepare three clay pieces: two small black balls for the eyes, a thin orange wedge for the carrot nose, and a thin black curve for the smile. Knead another larger piece and flatten it into a disc. Press the smaller pieces into the disc to form the snowman's face. Make two buttonholes using skewers through the designated areas in the clay, ensuring the holes go all the way through. Bake the clay as recommended and let it cool before applying a layer of gloss to finish.
Materials:
- Polymer clay
- Empty water bottle (optional)
- Sculpey gloss glaze
- Paintbrush
- Toothpicks
DIY Polymer Clay Easter Eggs Plan

Bring in the Easter cheer with an artistic twist with these Polymer Clay Easter Eggs. This DIY project is not just a vivid addition to your Easter decorations, but also a fun crafting experience.
For creating Polymer Clay Easter Eggs, first produce small pieces of polymer clay tiles using unique patterns or colors. Attach these tiles to your eggs, leaving some gaps. After that, roll the eggs to flatten the clay and eliminate the gaps. The original blog post mentions that they didn't bake the eggs for fear of melting, but feedback suggests that it's safe to bake the eggs without causing any damage. After baking and cooling, your decorated clay eggs are ready.
Materials:
- Plastic Eggs
- Polymer Clay
- Knife
- Cutting Board
DIY Monogram Polymer Clay Keychains Idea

Personalize your keys or craft a thoughtful gift with these DIY Monogram Clay Keychains. You can choose the color of the clay and the shape and even add more personalization by punching letters or symbols into the clay to represent names and initials. Follow the tutorial for a more detailed guide.
Start by rolling out the clay onto a covered cutting board and cut out the desired shape. After this, load the letters into the stamper from the embossing kit and stamp it into the clay. Poke a hole towards the top of the clay piece using a toothpick, making it large enough to accommodate a metal ring. Cut the parchment around the clay and put it onto a baking sheet. Bake the clay until hard, then attach a jump ring through the hole, add a smaller jump ring to it, and finally, attach this smaller jump ring to a key ring.
Materials:
- Clay in black, white, and granite
- Rolling pin
- Parchment paper
- Clay cutters
- Clay embossing kit
- Toothpick
- Assorted jump rings
- Keyrings
- Two pliers
Make Rainbow Catch-all Dish With DIY Polymer Clay

Are you looking for a playful, colorful way to organize your keys, jewelry, and other small trinkets? This Rainbow Dish is a great gift you can create with polymer clay. It's easy to make, and because it's made of clay, you can use any colors or mix them up to design your own! It is not difficult; the main thing is patience and attention. Enjoy!
Kick off the process by shaping your first color of clay into a semi-circular base with an arch cut out. Next, mold your second clay color into a thin rope, aligning and pressing it lightly along the edge of your base. Ensure to keep up the shape. Repeat these steps for all the colors of your rainbow, tweaking the sides to remain vertical. Then, bake as instructed until it gets somewhat firm. The dish will further harden as it cools. Once totally cooled, your vibrant catch-all dish is ready to hold your small belongings.
Materials:
- Oven-bake polymer clay, rainbow colors
- Clay knife
- Clay rolling pin