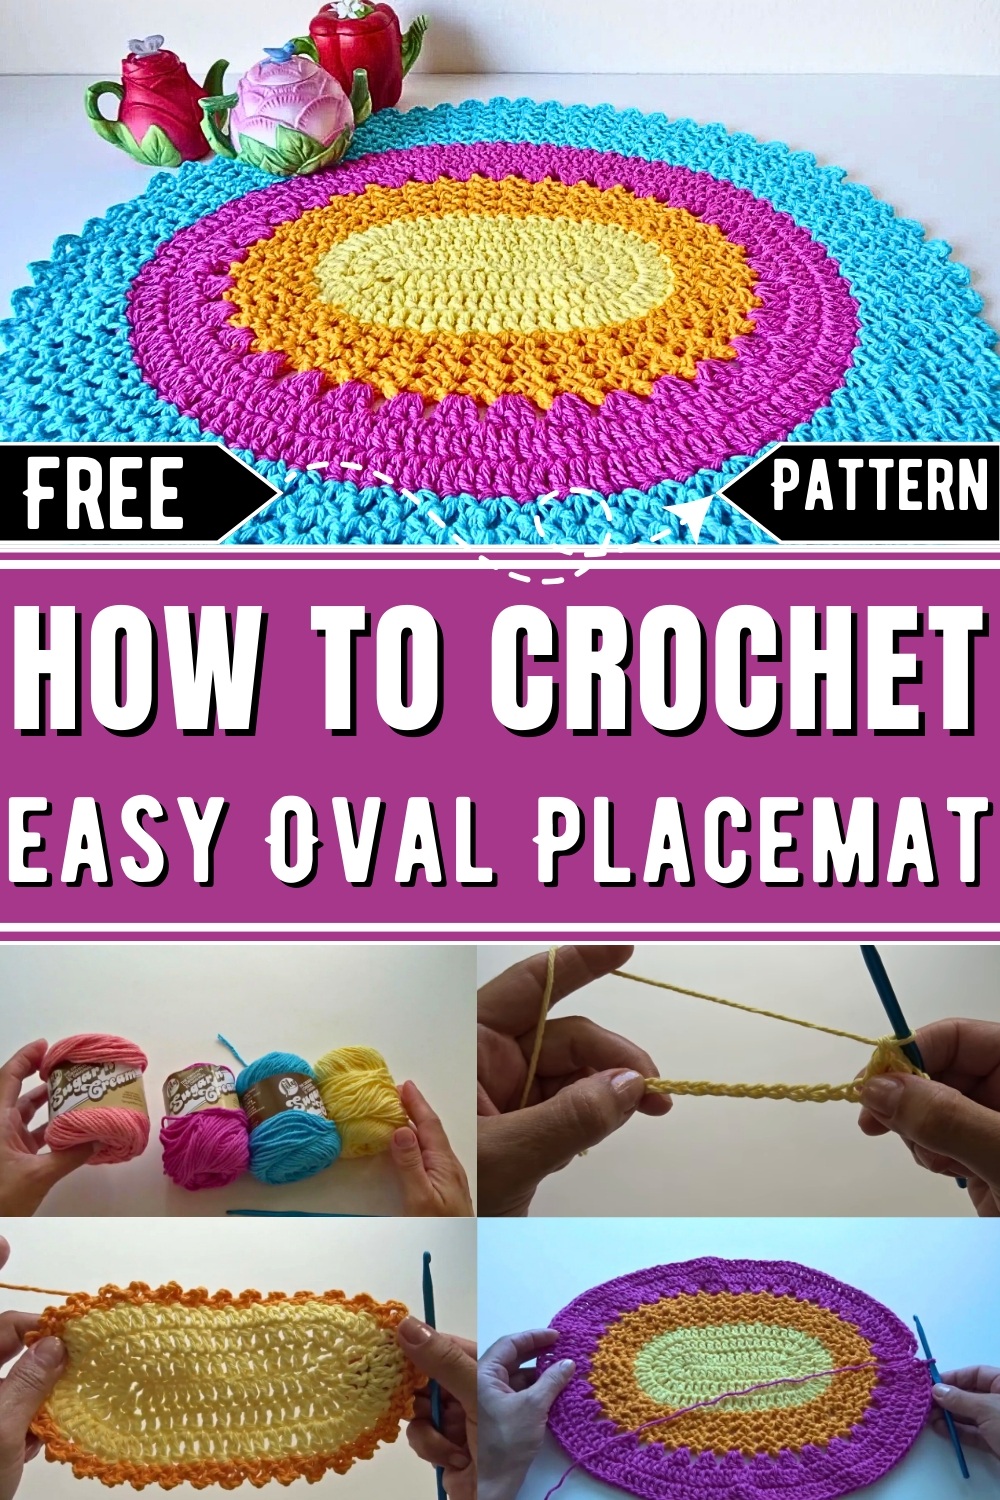
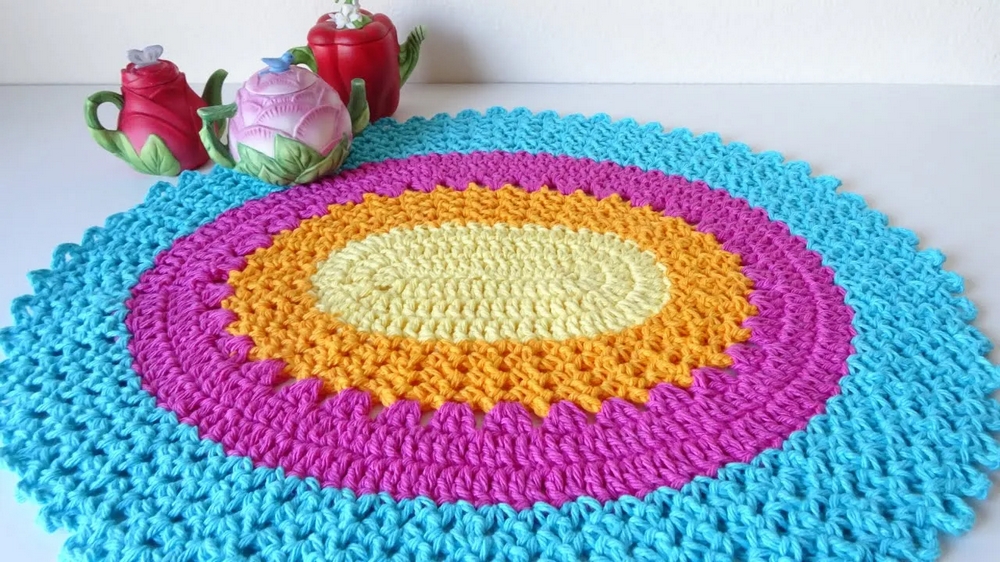
Enhance your table decor with a timeless oval placemat pattern that's easy to crochet, versatile, and perfect for adding charm and functionality to any setting.
Ever wondered how to bring a touch of handmade charm to your dining table? A crochet oval placemat might just be the answer. Designed to combine practicality and beauty, this free pattern offers a simple way to enhance your dining space while protecting your surfaces. These placemats not only serve as a functional barrier against spills and heat but also add a unique and personal flair to your home décor. Ideal for everyday use or special occasions, their timeless oval shape fits perfectly with a variety of table settings.
Versatile and Easy-to-Make Crochet Oval Placemats
The lightweight yet durable construction ensures they’re easy to clean and store, making them both convenient and long-lasting. Whether used under dinner plates, coffee mugs, or flower arrangements, these placemats enhance the aesthetic appeal of your tabletop effortlessly. They also make meaningful, handmade gifts suitable for any occasion.
The pattern is beginner-friendly, making it accessible to all skill levels, and allows for customization in colors to match your style. Perfect for cozy family meals or stylish gatherings, this design is a simple way to add character and warmth to your space. Let these placemats bring a practical yet decorative upgrade to your table settings year-round!
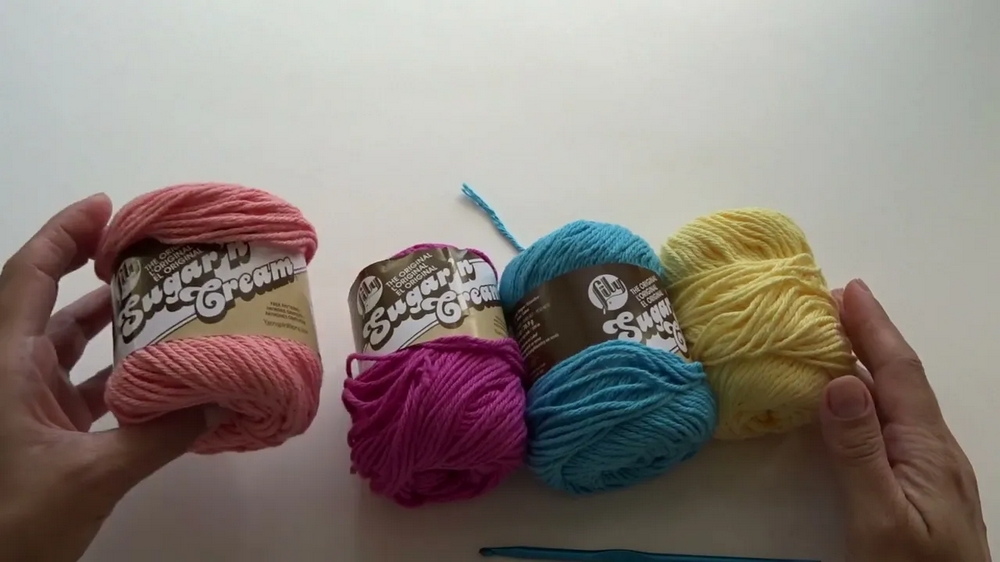
Materials Needed
- Medium weight (number 4) cotton yarn, such as Sugar and Cream
- 5mm crochet hook
Introduction
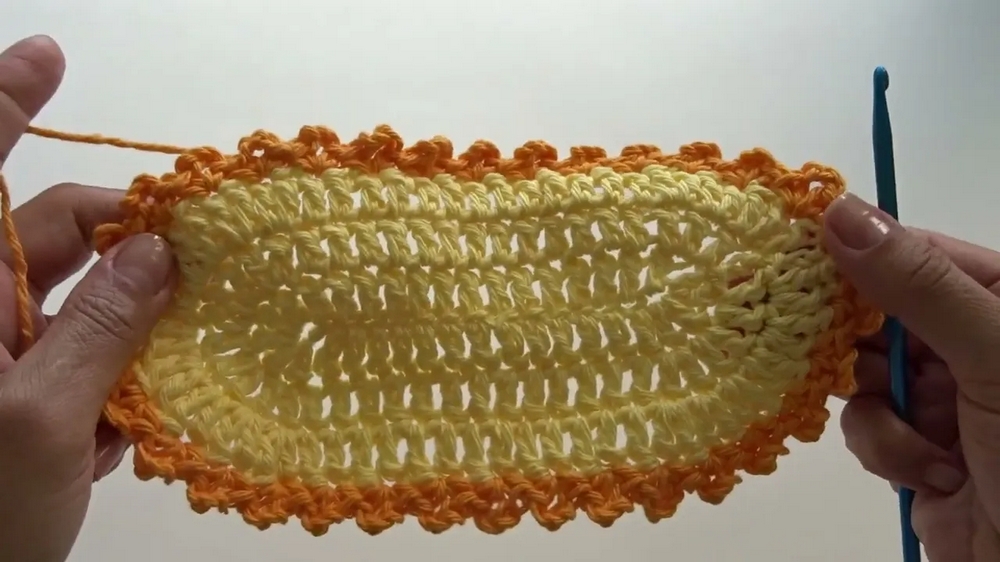
In this pattern, we learn how to crochet an elegant oval placemat using simple crochet techniques. With just double crochets, single crochets, and chain stitches, you can craft this beautiful piece to enhance your home decor. This pattern is designed to be easy and accessible. The completed placemat measures 18 inches long by 15 inches wide.
Steps to Crochet Oval Placemat
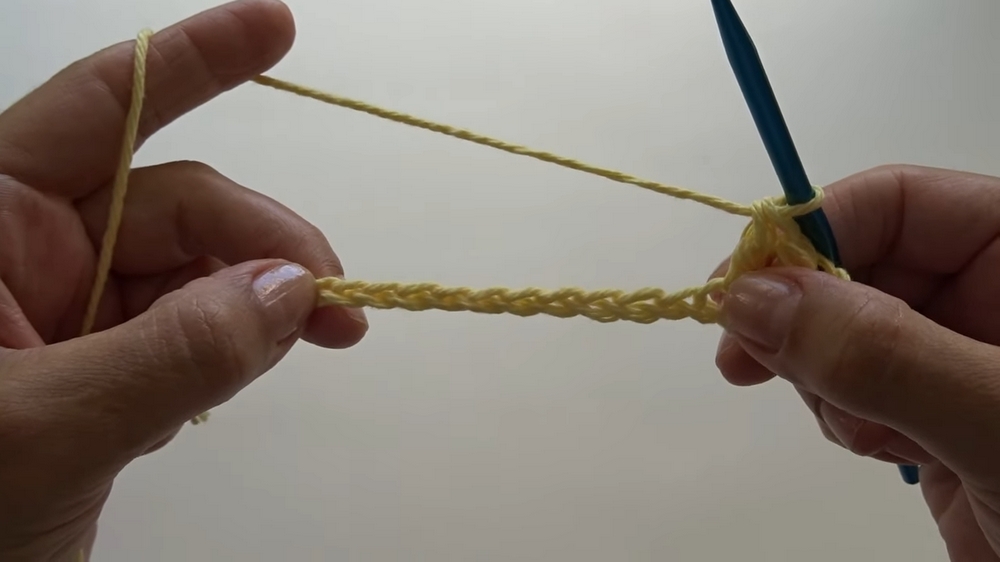
Step 1: Base Chain and First Row
- Create a Slip Knot
- Begin by making a slip knot on your hook.
- Chain 18
- Crochet a foundation chain of 18 stitches.
- Double Crochet
- Into the fourth chain from the hook, work a double crochet stitch. This forms your first set of two double crochets when combined with the initial chain three.
- Continue Double Crochet
- Work one double crochet into each of the next 13 chains, leaving the last chain unworked.
- End of Row
- In the last chain, work five double crochets to create a curve.
- Opposite Side
- Turn your work and crochet 13 double crochets across the opposite side of the chain.
- End of Round One
- In the final unworked chain, crochet three double crochets, completing the round with 36 double crochets. Slip stitch to the top of the third chain to close.
Step 2: Second and Third Rows
- Start with Chain Three
- Begin with chain three and add an additional double crochet in the same stitch.
- Double Crochet Sets
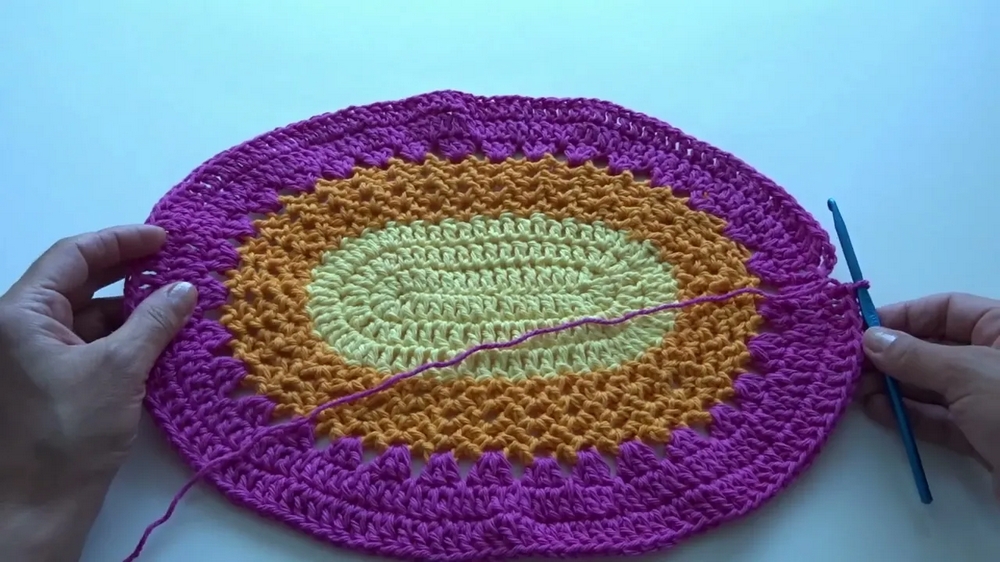
- Round Two: Continue with 13 single double crochets followed by sets of two double crochets into the next stitches in rounded areas. Complete with 13 single double crochets.
- Round Three: Similar process, enhancing the sets of double crochets in curved areas, totaling ten sets of two double crochets.
- Slip Stitch to End Rounds
- Use a slip stitch to connect the end of each round on top of the third chain.
Step 3: Adding Lace Edging
- Change Yarn Color (optional)
- Begin with a new color by slipping the yarn through an aperture and chaining one.
- Single Crochet and Chains
- Create a lace edge by crocheting one single crochet, chain three, and another single crochet in the same stitch. Skip one stitch and repeat across the work.
- Additional Rounds with Lace Pattern
- Repeat Step 12 across multiple rounds to enhance the lace appearance.
Step 4: Final Rows and Edging
- Repeat for Depth
- Continue repeating the lace edge instructions over several rounds.
- Final Touch: Chain Four Edging
- In the final row, chain four instead of three to refine the lace look.
- Finish and Weave Ends
- Slip stitch to end the final round and cut the yarn. If working yarn tails in, trim excess yarn and weave ends securely through the back loops using a needle.
Conclusion
This easy crochet pattern is perfect for beginners to practice both basic and decorative crochet techniques. By following the detailed phases from base chain setup to intricate lace edge, crocheters can create beautiful and practical oval placemats in various colors to suit their aesthetic.


