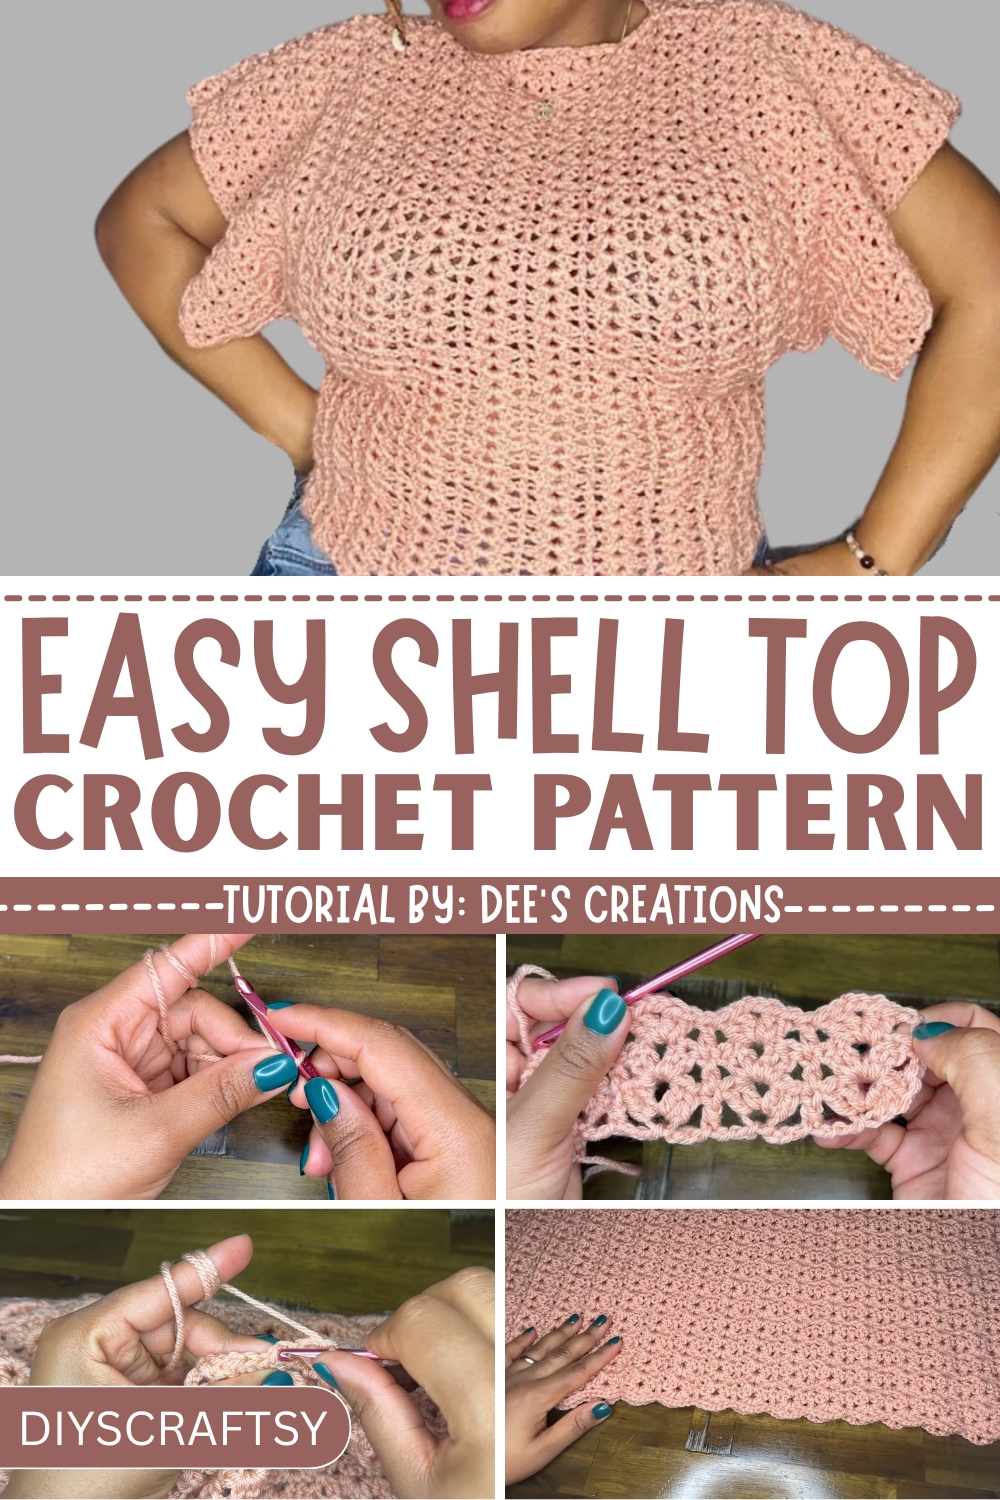
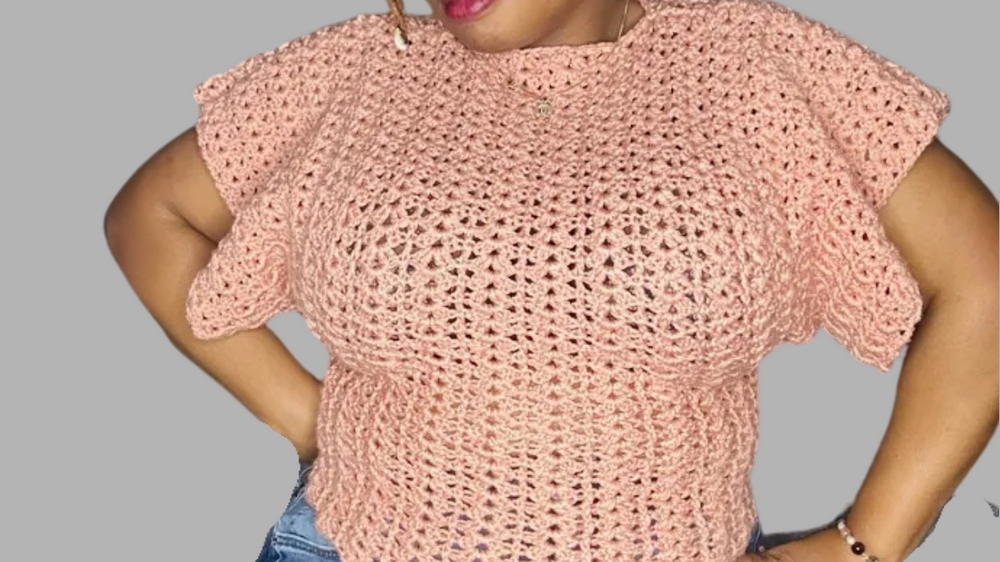
Shine in style with the Crochet Shell Top Patter that's perfect for adding a touch of elegance and fun to your wardrobe.
In the cozy corner of a bustling marketplace decades ago, a talented artisan meticulously stitched together delicate shells of yarn, creating a crochet shell top that mesmerized all who passed by. Fast-forward to today, and the concept of this timeless beauty holds the same allure, offering not just aesthetic appeal but functional versatility. Perfect for warm afternoons or layered for cooler evenings, it merges comfort with elegance in an understated yet sophisticated way.
Easy & Stylish Crochet Shell Top Pattern
Its open, airy texture ensures breathability, while the intricate design celebrates individuality and skill. Whether worn for casual outings or dressed up for special occasions, such a unique piece can transform even the simplest wardrobe into a treasure trove of charm. Beyond its visual appeal, it serves as a meditative practice for those assembling the garment inviting relaxation and a sense of achievement.
From empowering self-expression to creating quiet moments of joy, it carries an inherent magic that captivates wearers and makers alike. The flexible nature of this beautiful creation means it pairs seamlessly with jeans, skirts, or trousers, granting freedom to invent a look that's personal and stunning. Timeless yet modern, this distinctive garment promises a stitched story that continues to connect generations through elegance and art.
Materials Needed
The tutor provides a comprehensive list of materials required for the project:
- Crochet Hook: 5.5mm (US I/9 hook) – exact size recommended for the yarn.
- Yarn: “I Love This Yarn” brand, color Cherry Blossom, 100% acrylic, size 4 (medium-weight yarn). The tutor used three skeins (totaling 597g) for a size L/XL top.
- Tape Measure: Essential for measuring your body dimensions for a perfect fit.
- Stitch Markers: Used to mark key points during the joining process.
- Darning Needle: For weaving in loose ends.
- Scissors: For cutting the yarn.
Special Features of the Top
The crocheted top offers several unique characteristics:
- Customizable Fit: The project is "made to measure," meaning it can be adjusted to suit your unique body shape and preferred length.
- Flexible Design: Features two identical panels, which are easy to construct, then joined together for a seamless look.
- Bottom Detailing: After assembling the panels, the bottom of the top is worked in rounds, giving the garment a flowy, elegant finish.
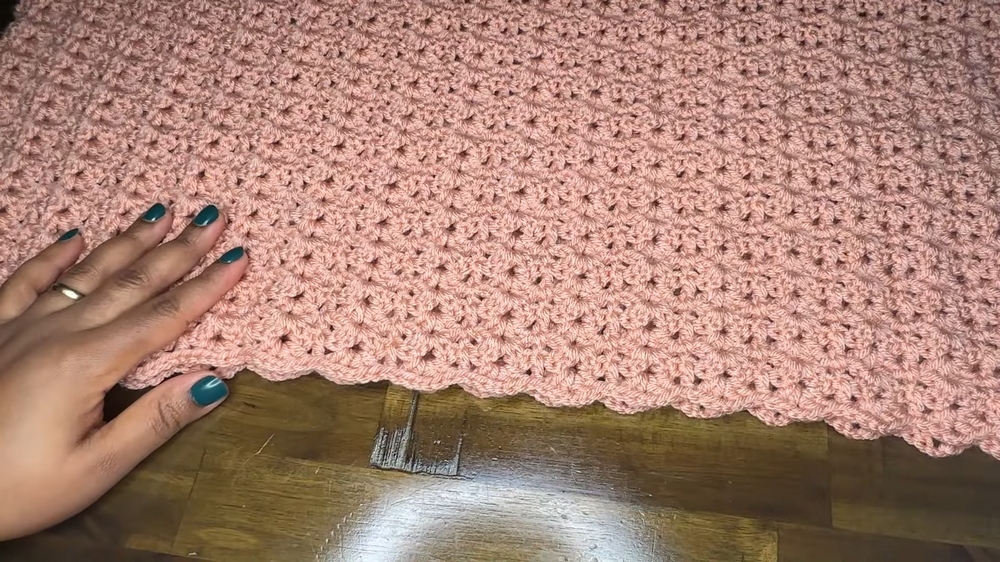
- Stretchy Fabric: The shell stitch used creates a stretchy and breathable fabric, making the top versatile for different body shapes.
Step-By-Step Process
1. Foundation Chain
- Start with a slip knot and chain in multiples of 4. The tutor created 120 chains for a size L/XL (28 inches long).
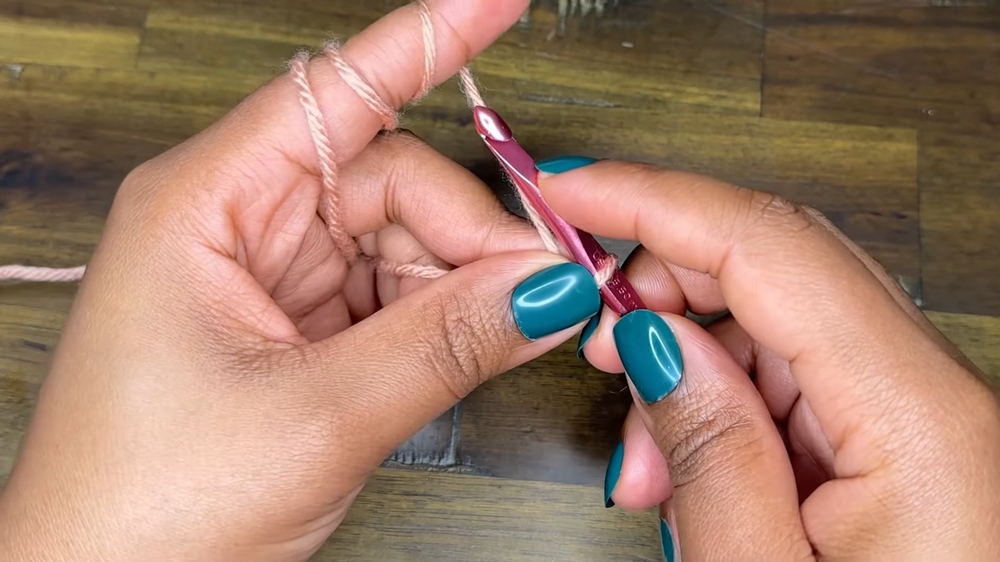
- Measure your chain against your shoulders to ensure the desired length.
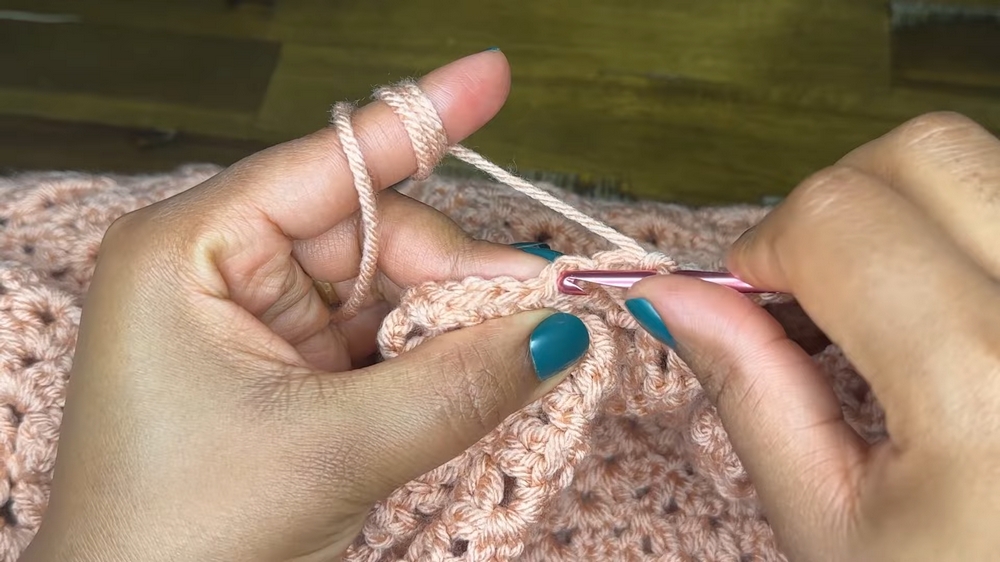
2. Row 1: Shell Stitch Setup
- Skip three chains and begin creating shells (clusters of double crochets separated by chain spaces). Alternate between double crochets and shell stitches across the row.
- End the row with a single double crochet.
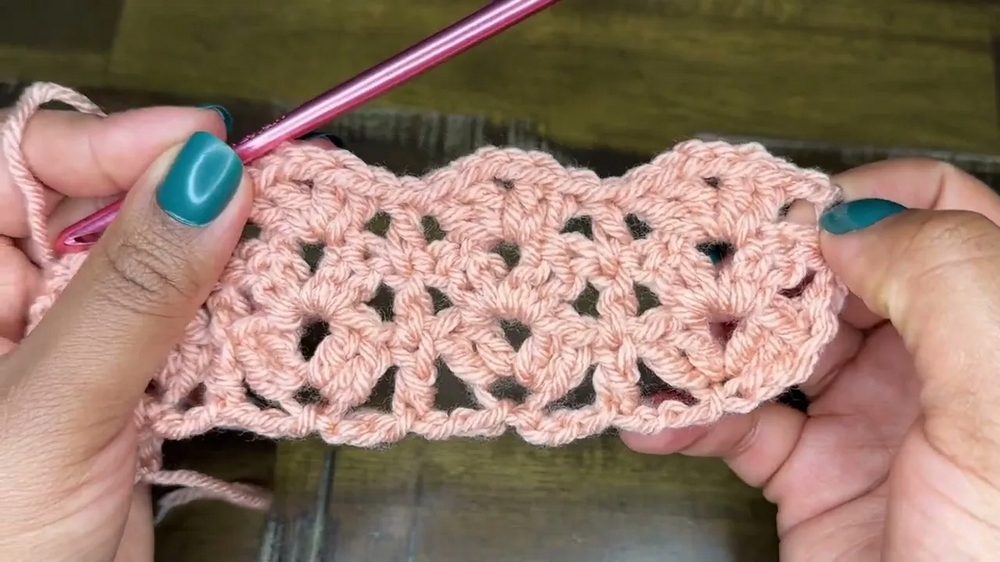
3. Row 2-Row N: Repeating the Pattern
- Turn your work and chain three at the start of every row. Create a shell in the chain-2 spaces and double crochet on top of each double crochet from the previous row.
- Repeat this row until the desired length of the panel is achieved. The user in the video completed 25 rows for each panel.
4. Joining the Panels
- Align the panels wrong side out and use a single crochet stitch to join the shoulders. The tutor leaves an opening in the middle for the neckline.
5. Working on the Bottom Part
- Starting from the bottom edge, work in rounds using the same shell stitch pattern. The tutorial includes 15 rounds for the bottom section. The increases shape the top into a more tunic-like look.
- Work around the waistline area by holding chain spaces together for seamless joins.
6. Finishing Touches
- Repeat the shell stitch pattern for the desired length of the bottom section.
- Add finishing rows of single crochet stitches around the neckline and the sleeves to neaten edges.
Level of Difficulty
The tutorial is suitable for beginners to intermediate crocheters. The repetitive shell stitch pattern is easy to master, while the need for precise measurements caters to those who want a practical introduction to creating wearable garments.
Tutor’s Suggestions and Tips
- Skin Adjustments: The tutor used three skeins of yarn and recommended calculating yarn usage based on your size.
- Stretch Consideration: The yarn has a slight stretch, so account for this in your measurements to avoid an oversized garment.
- Finished Length: You can adjust the top to be a crop top, long tunic, or even a dress by lengthening the bottom section.
- Readjustments: Keep trying on the top as you crochet to fine-tune the fit at each stage of the process.
Uses of the Crocheted Top
- Fashionable Wear: Ideal for casual outings or layering over a tank top.
- Seasonal Flexibility: The light and airy design is perfect for warm weather, but it can be layered for use in cooler months.
- Customizable Design: With changes to yarn color or weight, it can be turned into a crop top, dress, or winter sweater.
Tip for Success
When working on the neckline or edges, use single crochet stitches to create a consistent, polished finish. This step ensures that the edges do not look loose or uneven.
Conclusion
This crochet tutorial is a fantastic project if you're looking for a creative and practical handmade item. With clear instructions and ample customization options, the top is a fun and satisfying crochet project. Whether you're making it for yourself or as a thoughtful gift, its stylish design and adaptability make it a must-try.


