Design your own flair with the Crochet Triple Granny Square Top Pattern that's unique, playful, and perfect for a standout handmade look.
Once a humble pastime passed down through generations, crochet now transcends its roots to become a statement of artistry and style. The Crochet Triple Granny Square Top exemplifies this transformation, weaving nostalgia and contemporary charm into a single masterpiece. With its eye-catching symmetry and delicate construction, this top breathes life into traditional techniques, offering functionality and flair in equal measure. Perfect for layering or wearing solo, it transitions effortlessly between seasons. Its lightweight texture provides comfort during warmer days, while its intricate squares add warmth and character to cooler evenings.
Elegant Crochet Triple Granny Square Top Pattern That Shine

Beyond its aesthetic appeal, the versatility of this top shines through in its uses. Pair it with jeans for a casual outing or a flowing skirt to exude sophisticated elegance, it adapts to your mood and occasion seamlessly. Furthermore, crafting this piece becomes a meditative act, giving creators a sense of accomplishment and a wearable work of art that tells a story.
Whether gifted, worn, or showcased, the Triple Granny Square Top embodies the intersection of heritage and creativity, making it a timeless addition to wardrobes. This timeless yet modern garment showcases that crochet is not merely a skill, it’s an expressive medium capable of adding personality and charm to everyday life.
Step-by-Step Details of the Triple Granny Square Top
Materials Required
To follow along with this tutorial, you’ll need:
- Scissors
- 5mm crochet hook
- Yarn needle
- Stitch marker
- Yarn: The creator uses Red Heart Super Saver in the color Light Gray, a size 4 worsted-weight yarn. However, you can experiment with any yarn of your choice.
Step-by-Step Instructions
1. Creating the Magic Circle
- Begin with a magic circle to start every granny square.
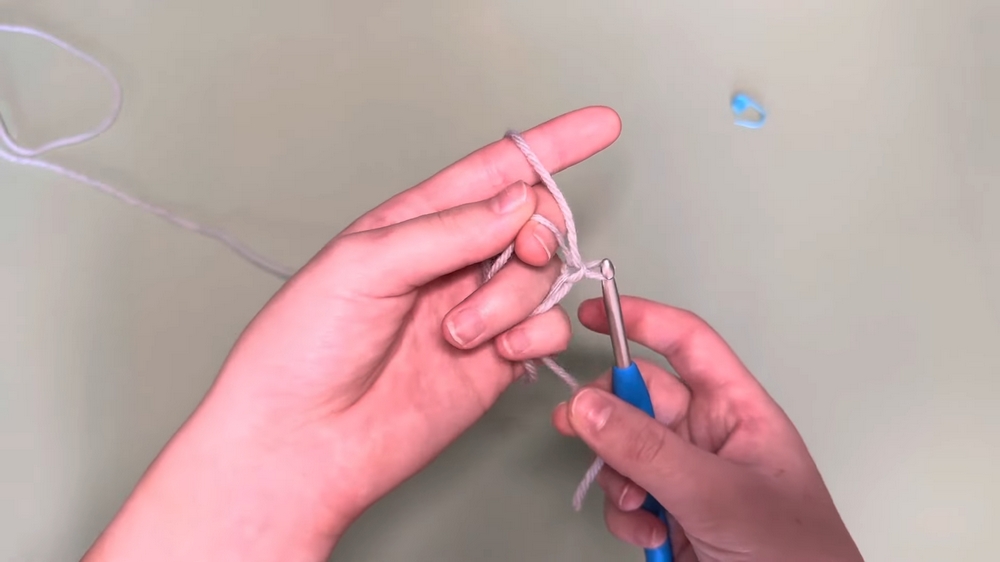
- The tutor demonstrates how to hold the yarn and loop it successfully, making it beginner-friendly.
- Tip: The creator advises against stitching over the tail to make pulling the circle tighter much easier.
2. First Row of the Granny Square
- Start by chaining two (counts as the first double crochet). Use a stitch marker to mark the second chain.

- Crochet 12 double crochets with a chain in-between every three stitches to form the first row.
- Close the magic circle by pulling the tail and slip stitch into the marked chain.
3. Second Row
- Slip stitch three times across the top, then chain two to start the next row.
- Form corners with three double crochets, chain one, three double crochets into the corner space.
- In the spaces between corners, go directly into three double crochets without chaining in-between.
- Repeat for a total of four corners.
4. Subsequent Rows
- Continue adding rows to the granny square by following the same corner and space pattern until the square reaches the desired size (large enough to cover one breast).
- Close each row with a slip stitch into the second chain, slip stitch three times to move to the next corner, and chain two to restart the process.
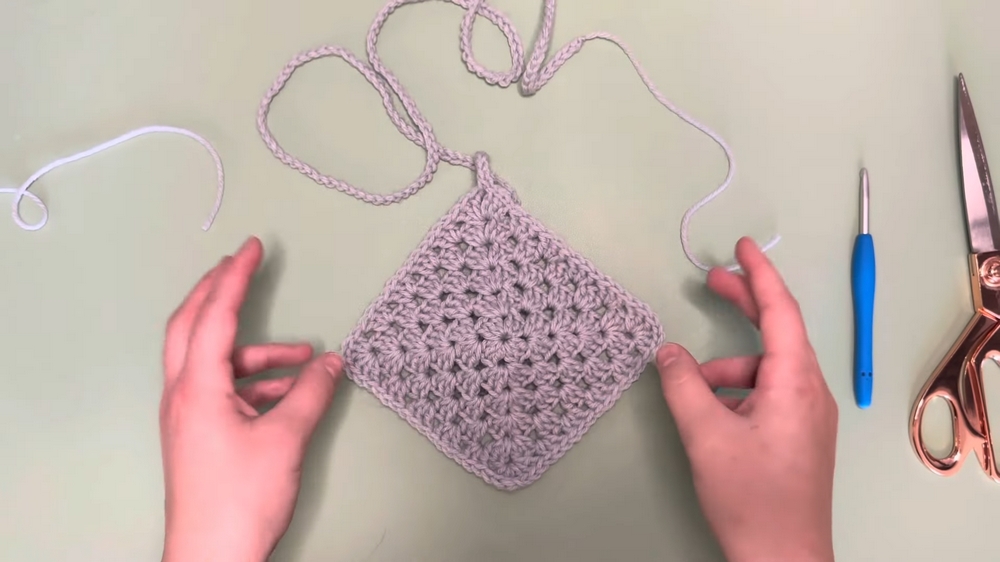
5. Adding Straps to the Cups
- For every granny square cup, create straps by chaining approximately 150 stitches (adjust based on your size).
- Cut the yarn and secure it with a tight chain one.
6. Making the Torso Square
- Create a granny square for the torso using the same method as the cups. Ensure it matches the size of the cup squares.
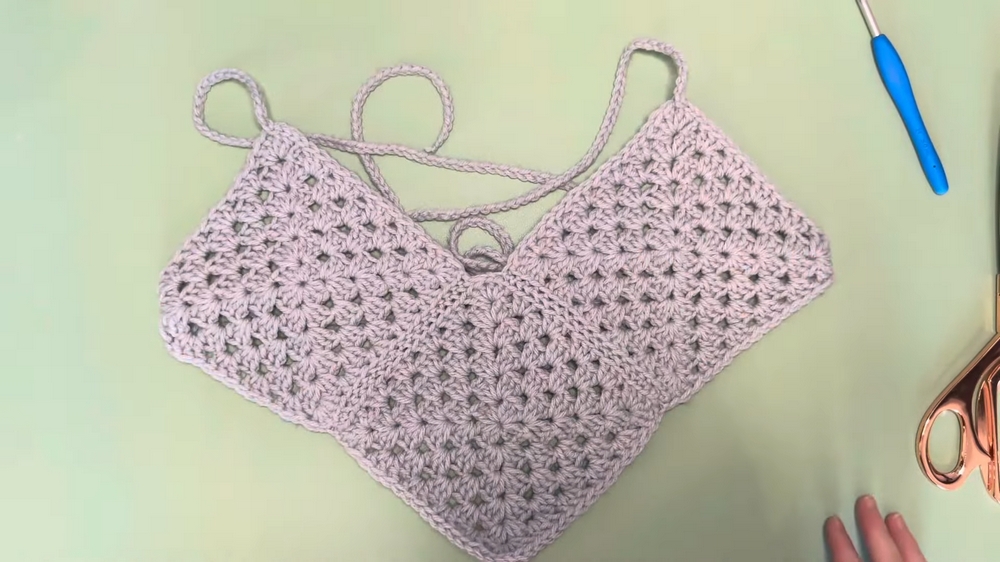
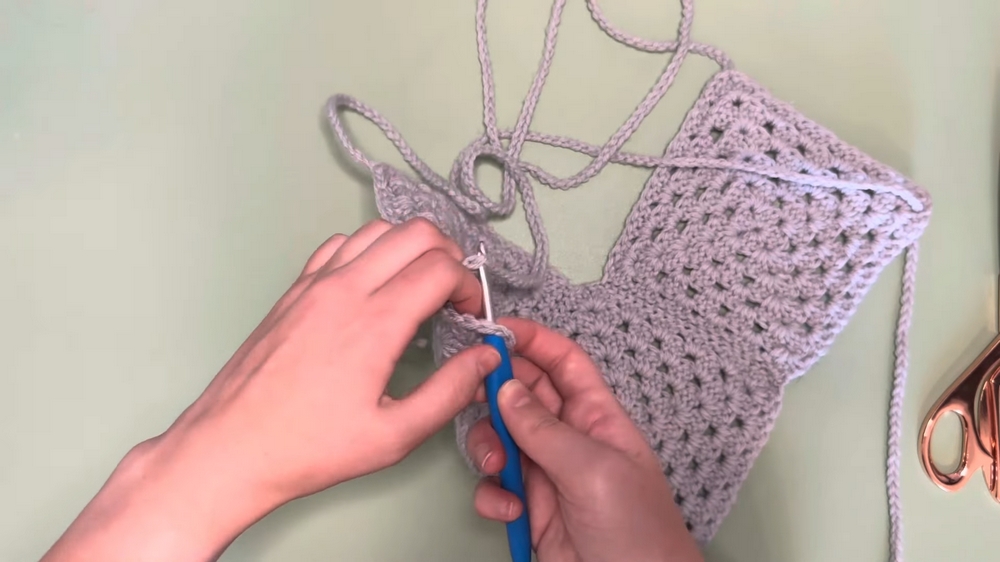
7. Connecting the Squares
- Lay all three squares in position, ensuring the straps align with the first corner on each cup square.
- Using a mattress stitch, connect the squares via the chain one spaces. The tutor provides detailed guidance on stitching through the inside loops of adjacent squares.
- Once completed, weave in all loose ends for a clean finish.
8. Lacing the Straps
- Attach the straps to the opposite corners of the torso square using a simple looping method with a crochet hook.
- Tie the straps to secure the squares and create a finished top.
Special Features
- Easy Construction: The design primarily uses granny squares, a classic pattern known for its simplicity.
- Adjustable Fit: The length of the straps and size of the squares can be customized to suit different body types.
- Quick Project: The tutor mentions this is a fast design, ideal for beginners or anyone short on time.
Difficulty Level
Beginner-Friendly:
The tutor ensures the steps are explained thoroughly, slowing down for trickier techniques like the magic circle and mattress stitch. This project is accessible for those new to crochet or granny squares.
Tutor’s Suggestions
- For Beginners: The tutor emphasizes rewatching sections if necessary and encourages the use of stitch markers for consistency.
- Material Flexibility: While specific yarn and hook sizes are recommended, the tutor encourages experimenting with different options.
- Personalization: Adjust strap length and granny square sizes to tailor the top to your measurements.
Uses of the Three Granny Square Top
- Versatile Clothing: Works as a stylish summer top for casual outings.
- Layering Piece: Pair with other clothing items such as cardigans or jackets.
- DIY Gift Idea: Great handmade gift for friends and family.
Materials Reminder
Always make sure to have the following before starting:
- Scissors
- 5mm crochet hook
- Stitch markers
- Yarn needle
- Worsted-weight yarn
Pro Tip
Double-check the positioning of the straps before sewing the granny squares to avoid uneven alignment. Proper placement ensures the top fits comfortably and looks symmetrical when worn.
Conclusion
This beginner-friendly crochet top combines simplicity and style, making it a perfect project for anyone exploring granny squares or fashion. The step-by-step pattern by the tutor ensures that crocheters of all levels can confidently complete this design. Whether a summer clothing piece or a thoughtful handmade gift, the Three Granny Square Top is a quick yet satisfying project.


