Dress up any outfit with a delightful crochet flower headband pattern that’s simple to follow and perfect for adding a touch of charm and style to your look.
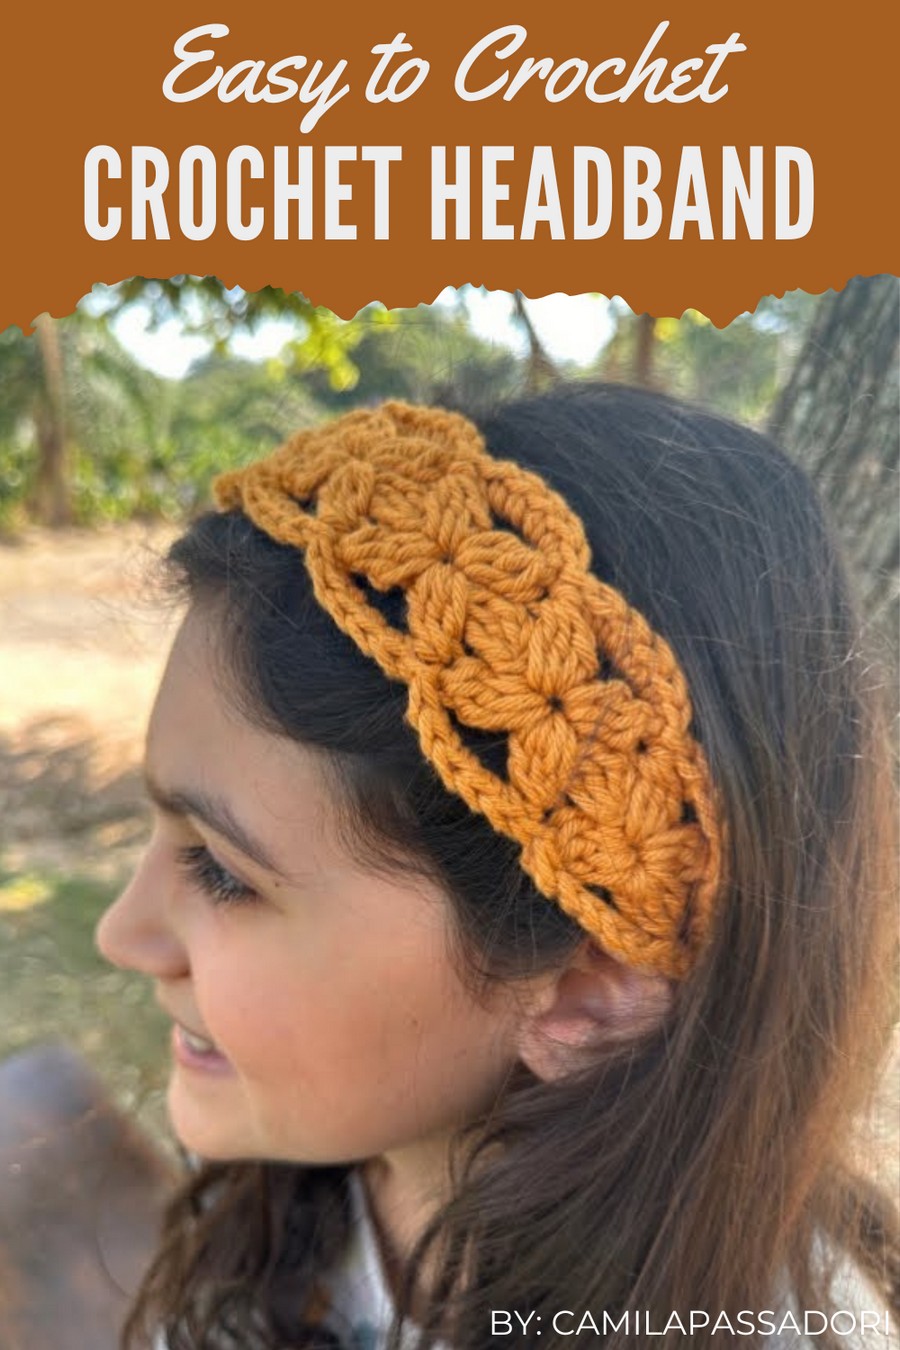
There’s nothing quite as charming as a handmade accessory, and a free crochet flower headband pattern lets you add a touch of elegance to any outfit effortlessly. Perfect for casual wear, special occasions, or even as a thoughtful gift, this headband combines style and practicality in one beautiful piece.
Crochet Flower Headband Pattern for Personal Use
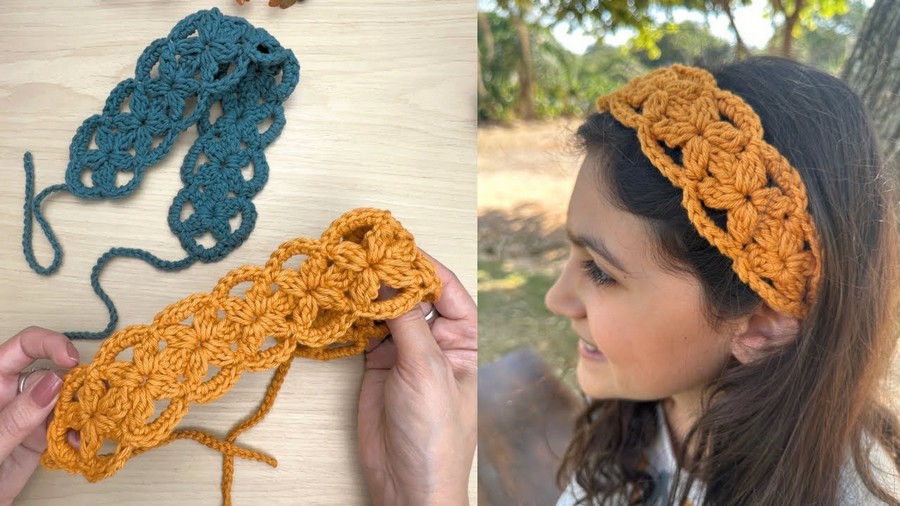
With endless customization options—choose vibrant or pastel colors, delicate flowers, or bold designs—it’s easy to make something truly unique. Beyond style, it’s a fun, stress-free project for crocheters of all skill levels. Whether for yourself or someone special, this pattern is the perfect way to create something both beautiful and meaningful.
Materials Needed
Yarn:
- Type of Yarn:
- Recommendation: Use string number 6 or equivalent medium-weight yarn for adult and teen sizes. Alternatively:
- Capio Yarn (slightly thicker for a richer texture).
- Charm Yarn, Amigurumi Yarn, or Nautical Yarn (excellent for baby and thinner straps).
- Knitted yarn offers unique finishes as well.
- Recommendation: Use string number 6 or equivalent medium-weight yarn for adult and teen sizes. Alternatively:
- Yardage: Approximately 25g of yarn needed per headband.
Crochet Hook
- Hook size: 4.0 mm (Use a smaller or larger hook depending on your yarn choice).
Additional Supplies
- Scissors.
- Tapestry Needle (for weaving ends and finishing).
- Craft Glue (optional): Use fabric-safe glue for added finishing stability.
- Optional Embellishments: Pearl beads or small charms to decorate the ends of the string.
Skill Level
Intermediate.
Key Abbreviations (US Crochet Terminology)
- ch: Chain
- sc: Single Crochet
- dc: Double Crochet
- sl st: Slip Stitch
- yo: Yarn Over
- st(s): Stitch (or stitches)
- (...): Repeat instructions inside parentheses
Special Notes
- Yarn and Hook Compatibility: Always adjust the hook to the thickness of your yarn. Finer yarns will require smaller hooks for neater results.
- Size Customization: Simply adjust the number of floral units to fit head sizes (for example, fewer units for babies).
- Creative Colors: Experiment with multiple colors or gradient/ombre yarn for striking results.
Pattern Instructions
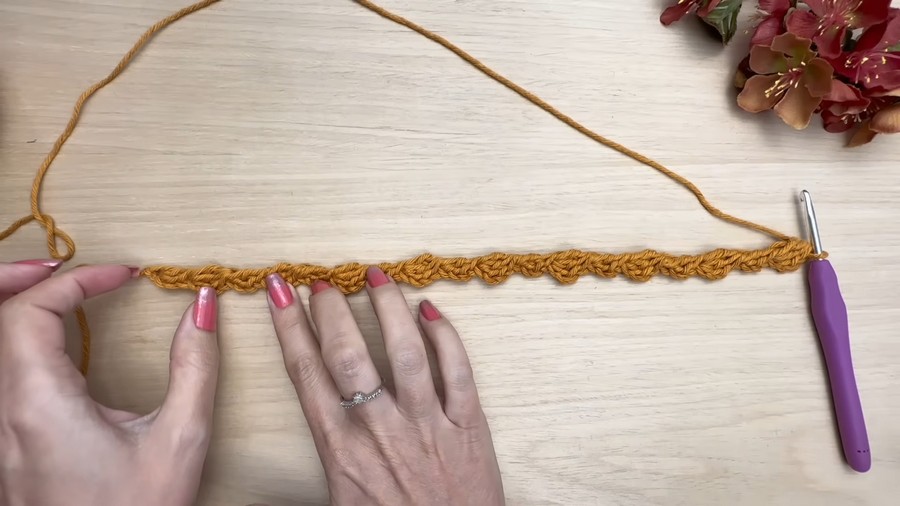
Step 1: Begin the Base Strip
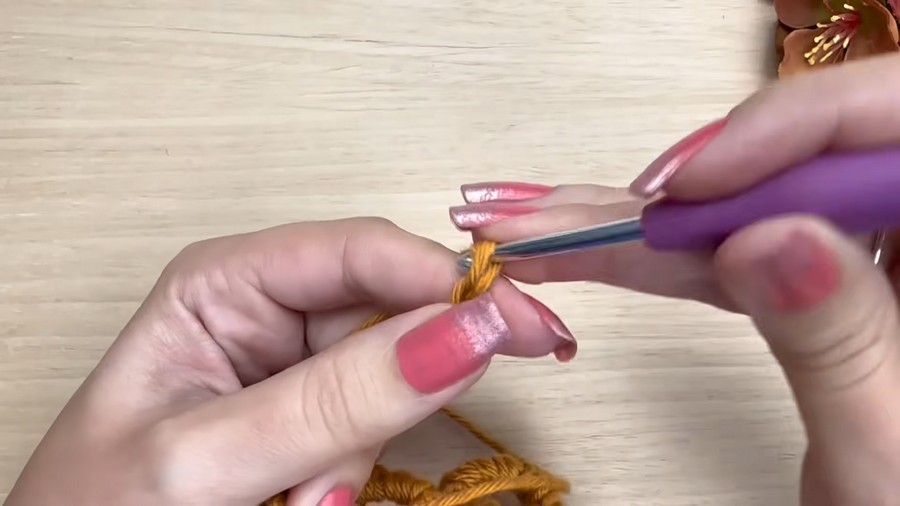
- Create a Slip Knot:
- Attach your yarn to the hook by making a slip knot.
- Foundation Chain (Base):
- Ch 3. Do not count the slip knot as part of the chain.
- Row 1: Begin with 1 dc in the first ch.
- This creates a base of 1 chain and 2 stitches.
- Row 2:
- Ch 3, then begin 2 incomplete dc into the same stitch where the chains originated:
- [yo, insert your hook, pull up a loop, yo, pull through two loops], leaving the top two loops on your hook for each incomplete stitch.
- After completing two incomplete dc, yo and pull through all loops on the hook for a single finish.
- This forms a block consisting of an incomplete pair of dc.
- Ch 3, then begin 2 incomplete dc into the same stitch where the chains originated:
- Row 3:
- Ch 3, then work into the next “foot” of the previous block.
- Create 1 dc, repeating the process of two-row flower formations alternately, such as:
- Blocks of 2 incomplete dc and 3 combined-chained units.
- Continue interlocking blocks of 2 and 3 to alternate the flower-style pattern.
- Repeat Rows – Alternating Blocks:
- Continue alternating between blocks of 2 and 3 to achieve the desired length:
- Adult Size: Work 9 blocks of 2.
- Child Size: Shorten to 6–7 blocks.
- Continue alternating between blocks of 2 and 3 to achieve the desired length:
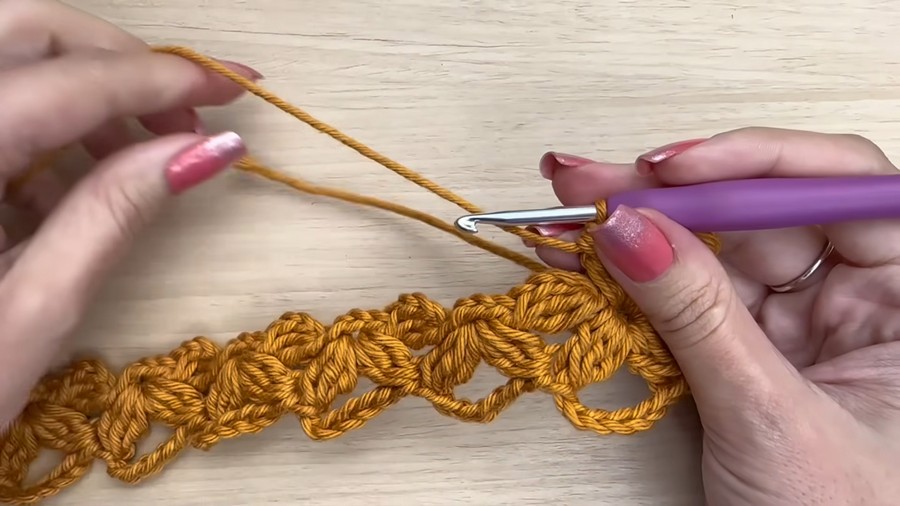
Step 2: Create Floral Fans
- Ch 6: Turn to begin forming floral tips.
- Skip over the 3-stitch block (previous row), and anchor the floral tips into the next 2-stitch block.
- Fan Formation:
- To create the fan/petal effect:
- Work 3 incomplete dc into the center of the 2-stitch block (yo, pull up a loop, yo, pull through two loops) for every edge cluster.
- Secure all petals by looping through all stitches to close.
- To create the fan/petal effect:
- Continue Across:
- Repeat fans across alternating 2-stitch blocks, leaving 3-stitch areas unworked.
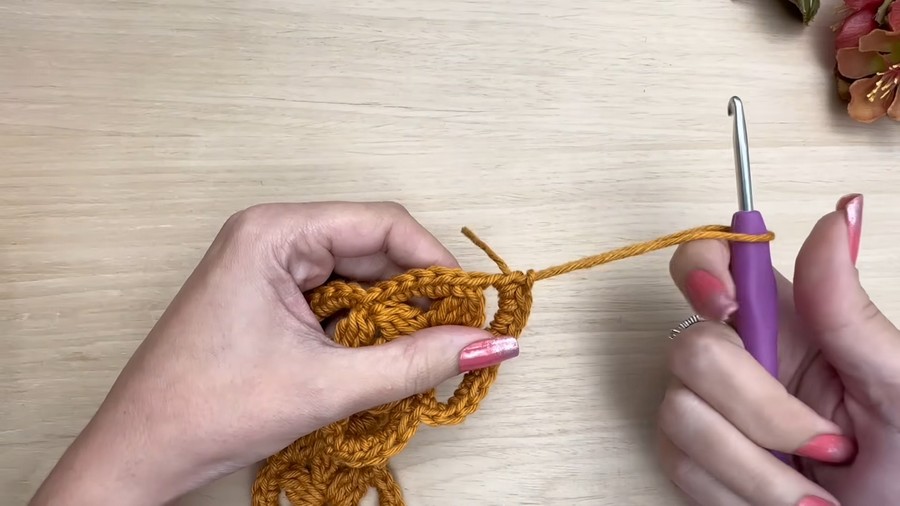
Step 3: Work the Bottom Edge
- After completing the first round of petals, flip the piece and begin working down the bottom:
- Repeat the same method of petal creation by ch 6 into the edges below.
- Match Top and Bottom Flowers:
- Ensure fans are consistent with the ones on top to mirror the look.
Step 4: Finish and Add Cord
- Edge Borders:
- To make rounded borders: ch 6, and fill spaces between flowers with 5 sc evenly distributed, locking petals into desired rounding.
- Add Cord for Secure Ties:
- From the last edge/loop, attach yarn and chain to make a 35-chain cord string.
- Repeat on the other edge.
- Knot & Finish: Apply finishing knots at the edges. Use fabric glue for subtle reinforcement and trim loose threads.
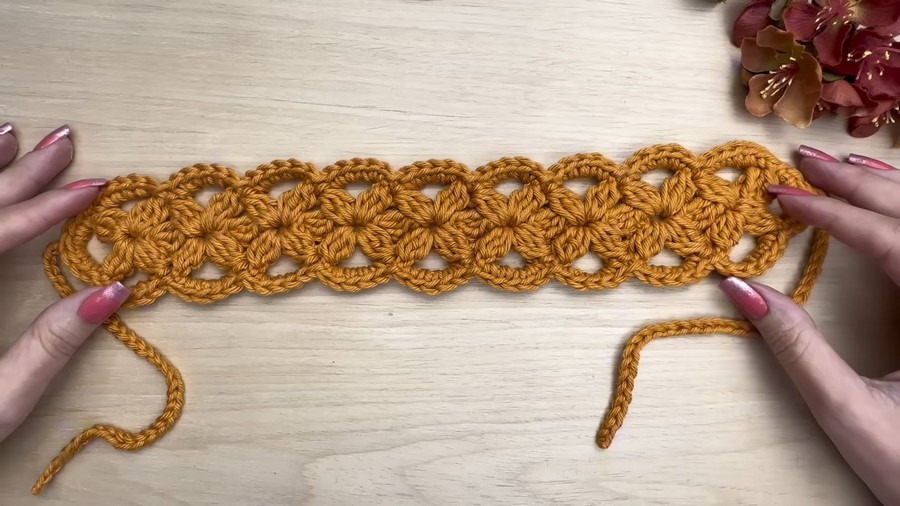
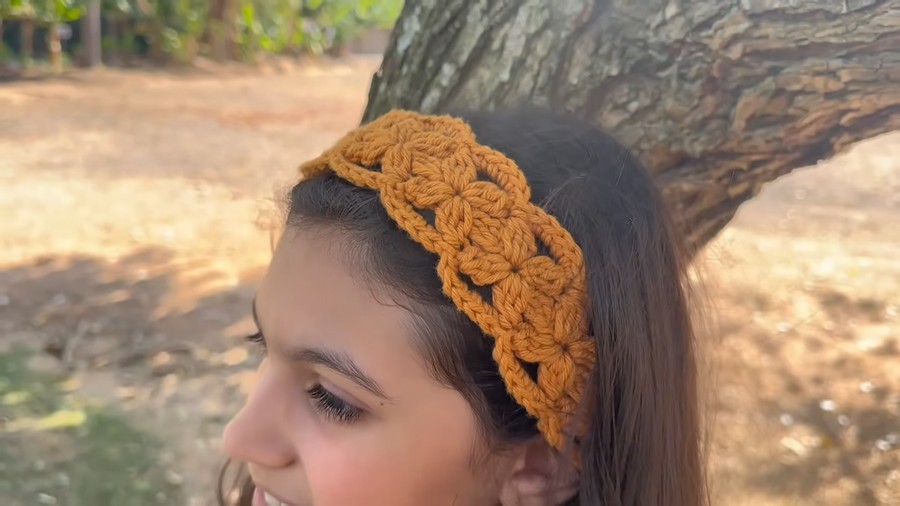
Floral Headband Measurements
- Size: Finished band measures 32.5 cm wide and 6 cm high with the suggested yarn and hook size.
Customization Ideas
- Add colors for a multi-tonal floral look.
- Embellish centers of flowers with beads or pearls to enhance detail.
- Experiment using glittery yarn or gradient thread for a unique finish.
Conclusion
This Crochet Floral Headband combines elegance with simplicity. Its lightweight, intricate design makes it suitable as a stylish accessory for gifting, casual wear, or craft sales. The straightforward steps ensure versatility while offering opportunities for creative expression.
Tips for Success
- Monitor Tension: Keep tension consistent for a neat and flat result.
- Symmetry: Always align top and bottom floral edges for a balanced appearance.
- Hide Ends Carefully: Use craft glue for professional finishing touches to securely hide thread ends.
Pattern Variations
- For Babies and Toddlers: Use lighter yarns such as baby cotton or amigurumi thread and shorten the strip by reducing the number of blocks.
- For Wide Bands: Add extra rows of alternating blocks at the base for a thicker band.
- For Head Wraps: Extend overall length and add a tied closure to wrap it fully around the head.