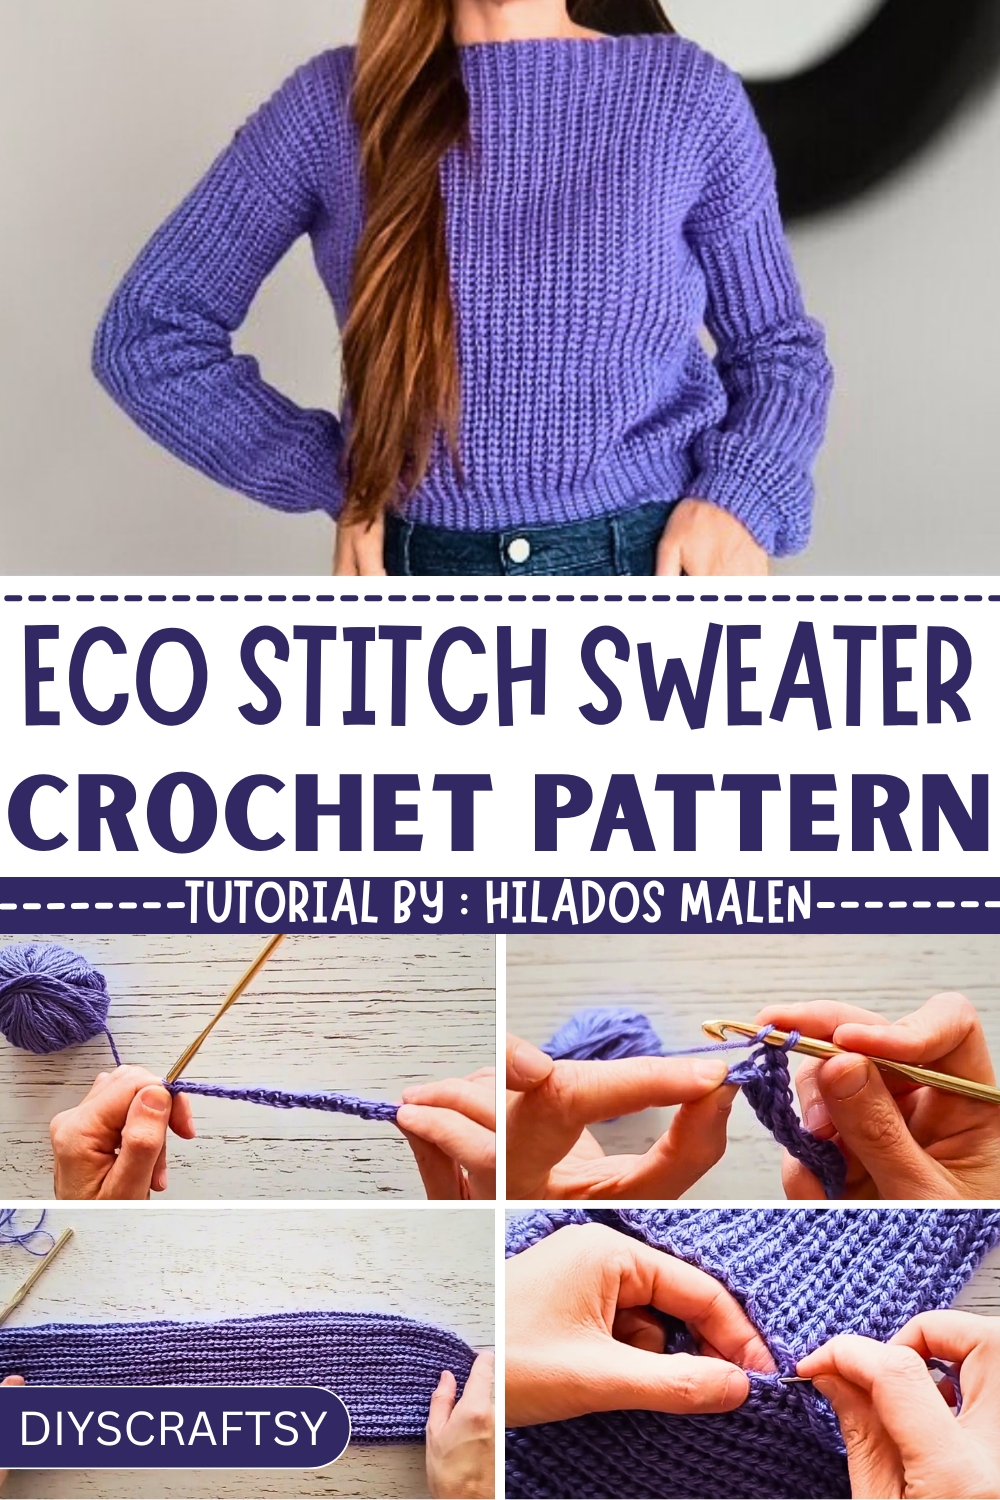
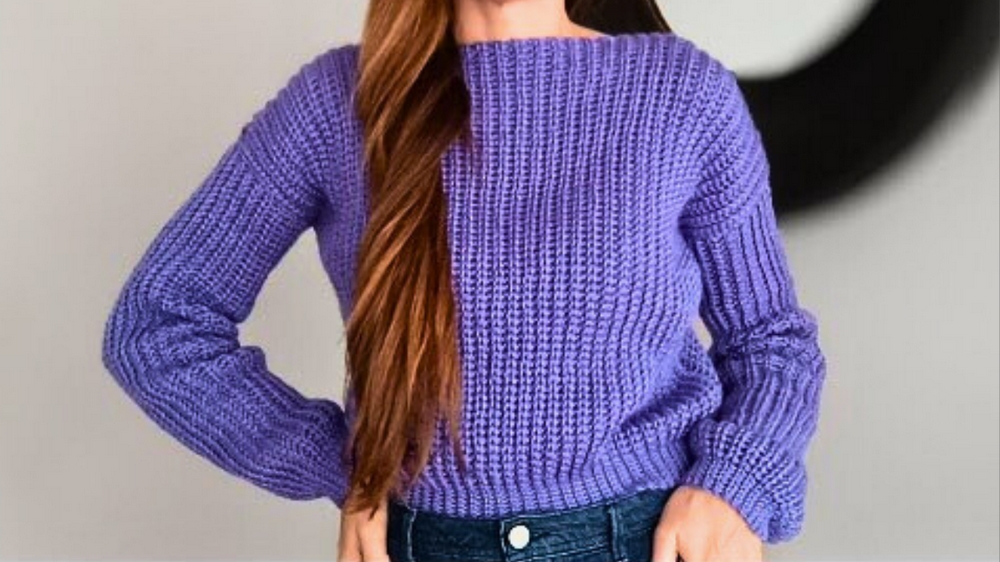
Slow stylish comfort with the Free Crochet Eco Stitch Sweater Pattern, offering breathable texture, relaxed drape, and year-round layering ease.
On a quiet morning stroll through a local market, a cozy handmade sweater caught more than a few admiring glances, not because of embellishments or flash, but for its simple charm and mindful texture. The gentle drape, the breathable weave, the feel of natural fiber against skin, all whispered the quiet luxury of slow style. The Free Crochet Eco Stitch Sweater Looks Pattern echoes that aesthetic through its relaxed fit, clean edges, and thoughtful stitchwork.
Secret to Making a Modern Crochet Eco Stitch Sweater Free Pattern
Featuring lightweight fabric and a loose silhouette, it allows year-round comfort, making it ideal for layering across changing seasons. The stitch used in this design promotes airflow and stretch, ensuring both durability and ease of movement. Whether you're lounging at home, heading out for errands, or dressing up for a casual brunch, this sweater easily adapts to different styles and moments. Its structure flatters most body types and offers a satisfying balance between comfort and visual interest.
This sweater is also perfect for gifting or updating your own wardrobe with a practical staple that speaks to both sustainability and style. With minimal shaping and straightforward rows, it’s a satisfying project for those seeking a wearable piece that doesn’t go out of season, or out of trend.
How to Make a Simple Crochet Eco Sweater (Step-by-Step Guide)
Materials Needed
- Yarn (quantities vary by size; measurements provided in the video for reference).
- A crochet hook (size mentioned in the video).
- Needle for sewing.
- Stitch markers (optional, for marking elastic parts or sleeves).
- Measuring tape (for sizing the sweater).
Special Features of the Sweater
- Beginner-Friendly Design: The garment is constructed with no complex increases or decreases, making it an excellent project for crochet beginners.
- Universal Fit: Completely customizable to fit any size or style.
- Knitted Look: The unique crochet stitch mimics the appearance of a knitted fabric, offering a polished and professional finish.
- Four-Part Construction: The sweater consists of:
- Two identical pieces for the front and back.
- Two identical pieces for the sleeves.
Step-By-Step Instructions
1. Start with the Measurement
- Measure from the shoulder to the desired length of the sweater. This measurement will determine the number of chains you need to start with.
- The model is worked sideways, meaning you will crochet the entire width of the front or back in this direction.

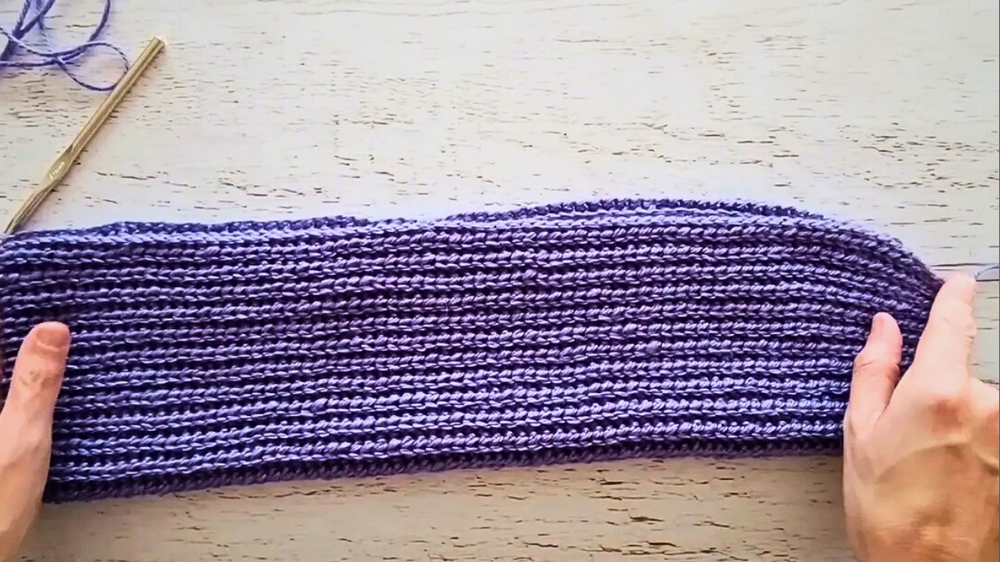
2. Crochet the Body (Front and Back)
- Chain any number of stitches (even or odd – it doesn’t matter).
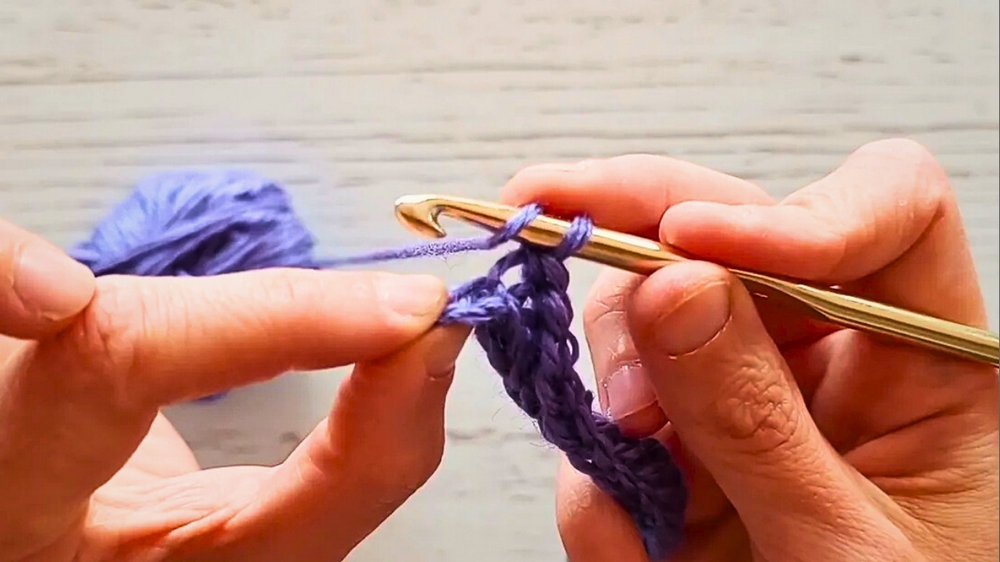
- Begin the first stitch with half a slipped double crochet (HSDC):
- Yarn over.
- Insert your hook into the fourth chain.
- Pull up a loop and pull the same loop through all on the hook (no extra yarn over is required to finish the stitch).
- Repeat the HSDC across the row.
- For each subsequent row:
- Use turning chains (two chains) at the beginning.
- Remember to crochet in the back loop only, which gives the sweater its textured knit-like appearance.
- Continue crocheting in rows until the front and back pieces are complete.
3. Adding Elastic Bands
- For added elasticity in designated portions (e.g., waistband or cuffs), use slip stitches instead of HSDC towards the end of each row:
- Insert your hook into the back loop, yarn over, and pull through.
- Do not yarn over again (this creates the flat elastic section).
- The slip stitch row transitions will create a distinct elastic section compared to the rest of the sweater.
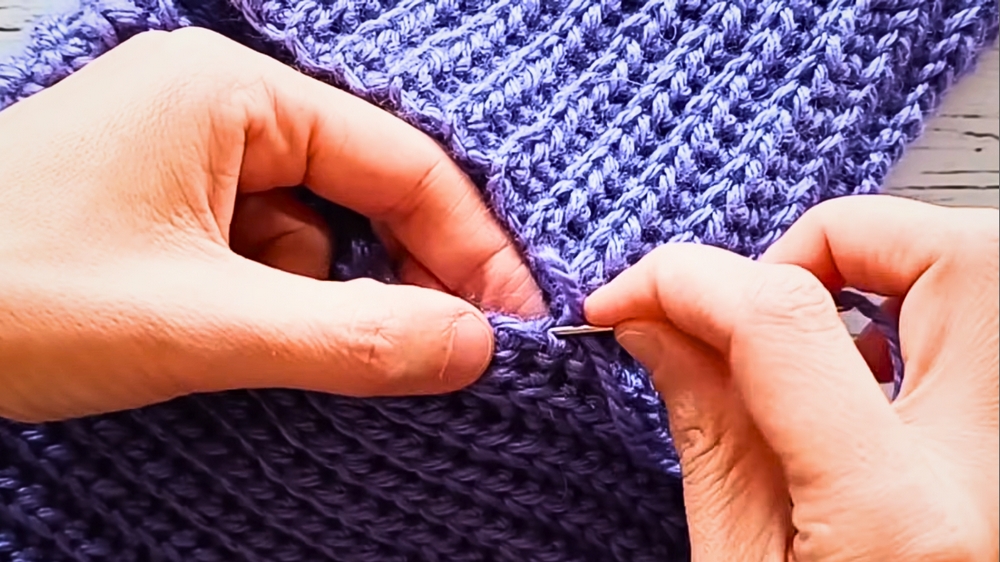
4. Assemble the Body
- Crochet or sew the front and back pieces together at the shoulders, leaving room for the neckline.
- Typical neck opening for adults = approximately 27 cm, but it can be adjusted to personal preference.
5. Crochet the Sleeves
- Measure the length of your arm from the shoulder to the wrist (or stop earlier if you prefer three-quarter sleeves).
- Use the same crochet stitch (HSDC with slip stitch rows for elastic) to create rectangular panels for the sleeves.
- Once you complete the sleeves, fold and sew them lengthwise.
6. Attach the Sleeves to the Body
- Pin or mark the center point of the sleeve to align with the shoulder seam of the sweater's body.
- Sew or crochet the sleeves to the armholes.
- Adjust and stretch as needed to ensure a seamless joint.
Tutor's Suggestions and Tips
- Adjust for Fit: Always take measurements for a proper fit. Use a measuring tape and make the necessary adjustments as you go.
- Markers for Elastic Sections: Use stitch markers to help identify where the elastic (slip stitch) sections start and end.
- Test and Try On: Assemble the sweater partially to check the length of the sleeves, body, and neckline before completing all seams.
Level of Difficulty
This project is labeled as beginner-friendly because it avoids technical increases or decreases. The consistent stitch used throughout and the straightforward construction of rectangular panels make it easy to follow, even for those new to garment-making.
Uses
- Casual Everyday Wear: The simple, classic design is versatile and can be styled for everyday use.
- Family-Friendly Crochet: The pattern is adaptable for all ages and sizes, making it perfect for making sweaters for the entire family.
- Gift Item: A handmade sweater is a thoughtful and cherished gift for loved ones.
- Seasonal Sweater: Works great for fall or spring, depending on the yarn used.
Conclusion
This crochet sweater is a beginner-friendly, versatile project that anyone can enjoy crocheting. With its knitted appearance and simple construction, it’s the perfect project to boost your confidence in garment-making. Follow the clear instructions provided in the tutorial, and in no time, you’ll have a timeless addition to your wardrobe.
Bonus Tip
For best results, block your final sweater (gently dampen and shape) to even out the stitching and ensure a professional finish.


