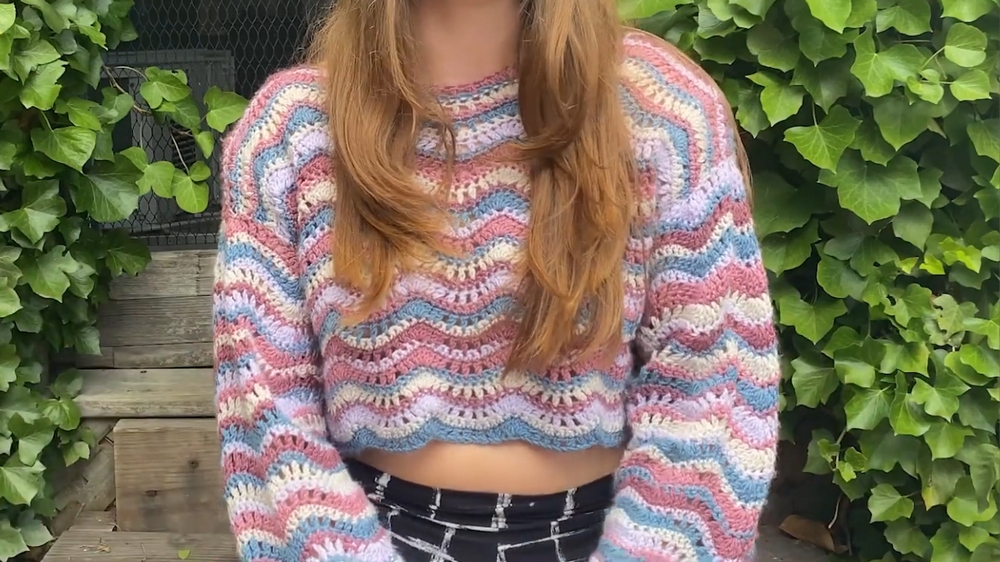
Slip into cozy charm with this Free Crochet Wavy Sweater Pattern featuring rippled texture, breathable drape, and timeless everyday comfort
Once known as a coastal grandmother’s favorite texture, the soft ripple of wavy stitches has returned with fresh appeal, this time in wearable form. The Crochet wavy sweater brings together comfort and quiet confidence with its fluid motion and relaxed silhouette. Its gentle wavework makes it breathable for warmer days yet warm enough when the temperature dips, making it a transitional must-have across seasons.
Effortless Fashion with Free Crochet Wavy Sweater Pattern and Outfit Pairing Ideas
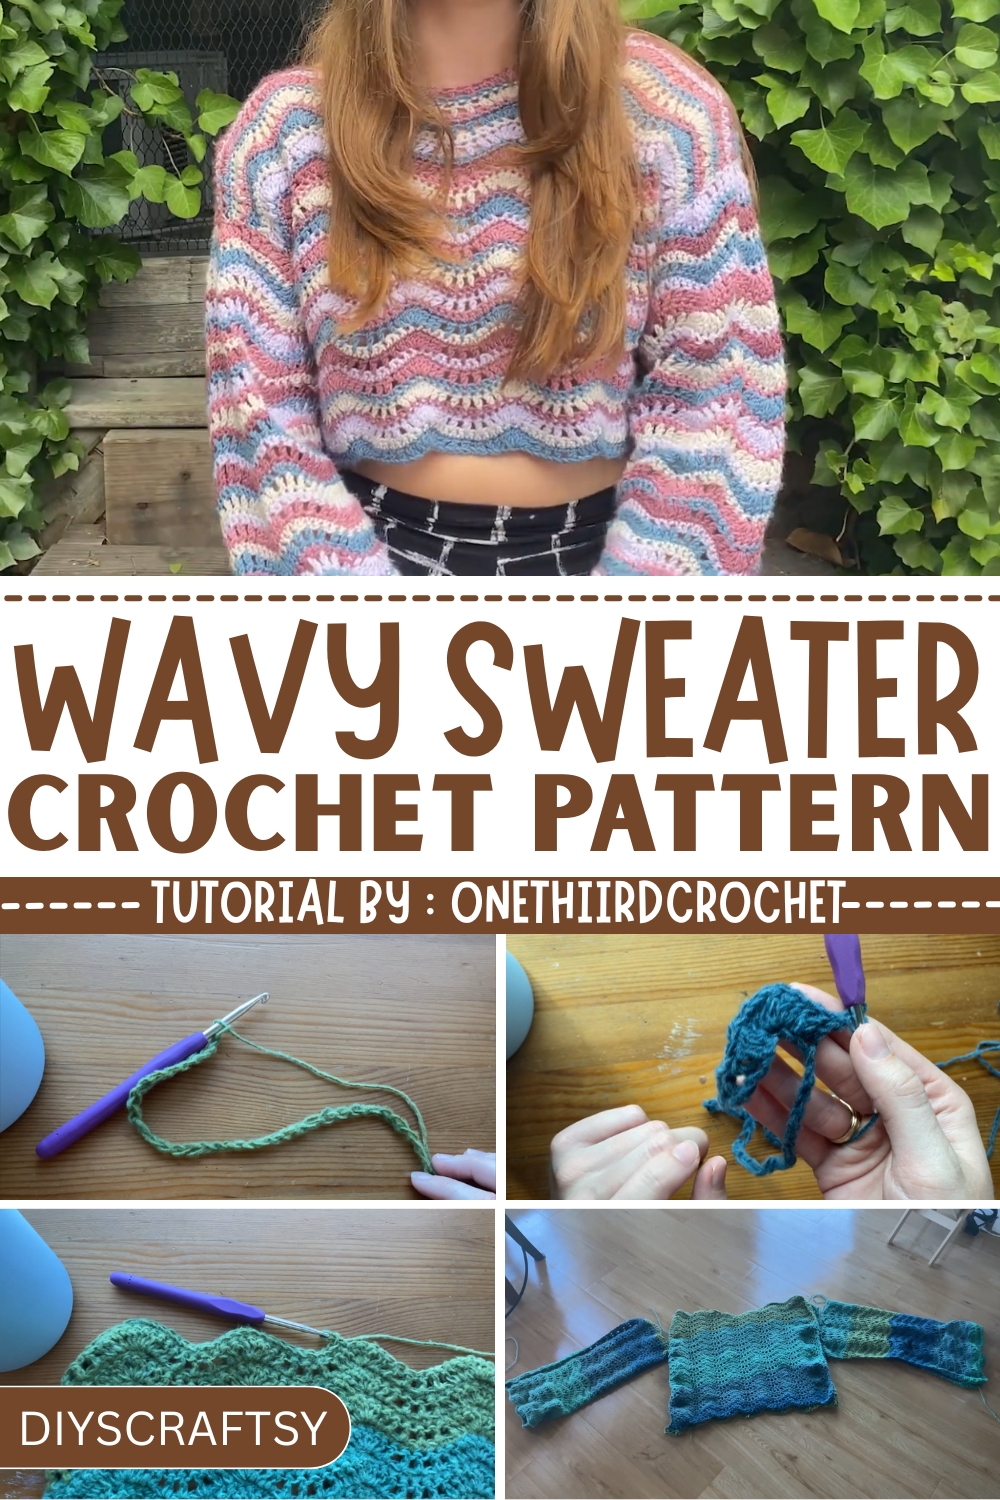
This style isn’t just beautiful, it’s practical, too. Its ripple-inspired stitchwork adds subtle stretch, giving the sweater a flattering fit on a variety of body types. Whether paired with denim for weekend brunches or layered over a slip dress for evening walks, it effortlessly adapts to your day. The slightly oversized shape wraps the body in softness while still keeping structure, allowing movement without feeling bulky.
The Free Crochet Wavy Sweater Pattern adds versatility to any handmade wardrobe, offering both texture and rhythm in every stitch. With its graceful lines and airy finish, this sweater radiates ease and intention. It’s a piece you’ll reach for time and time again, for comfort, for charm, and for the timeless joy that only a well-loved sweater can bring.
Step-by-Step Instructions
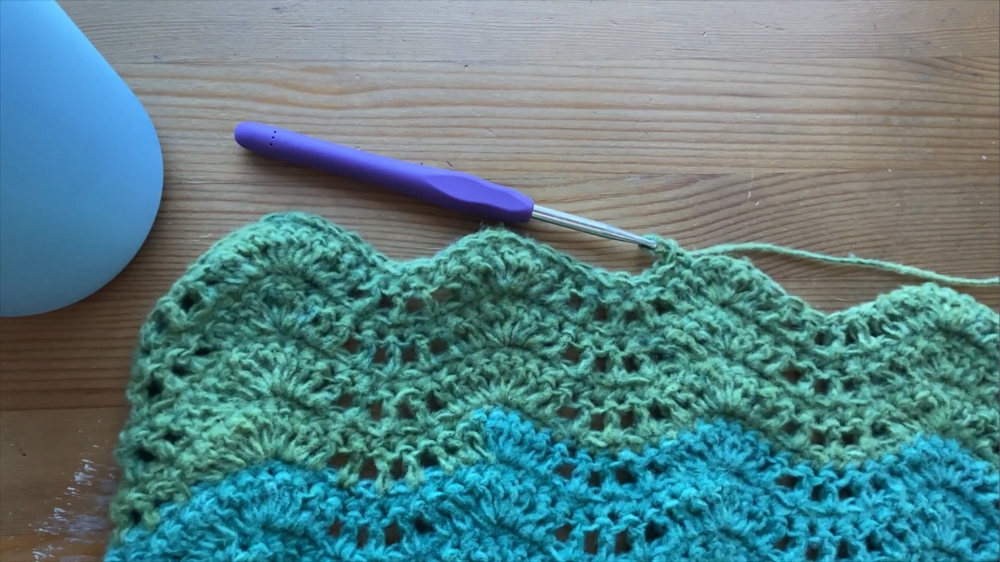
Step 1: Understanding the Stitch Patterns
The tutorial explains that there are two types of stitch patterns:
- Original Wave Pattern: Used for sweater sizes Small, Large, 2X, and 4X. Sleeves for all sizes use this stitch pattern.
- Modified Wave Pattern: Used for sweater sizes Medium, Extra Large, 3X, and 5X. These waves feature unique spacing between stitches.
Step 2: Materials
- Yarn: A medium-weight yarn such as the Karen Cloud Cake is recommended. Lightweight yarn can also be used if you meet the gauge requirements. Adjust tension if necessary.
- Hook: 5 mm crochet hook.
- Gauge Requirements: Chain of 48 with a total of 8 rows measuring 3.5 inches tall and 9.5 inches wide.
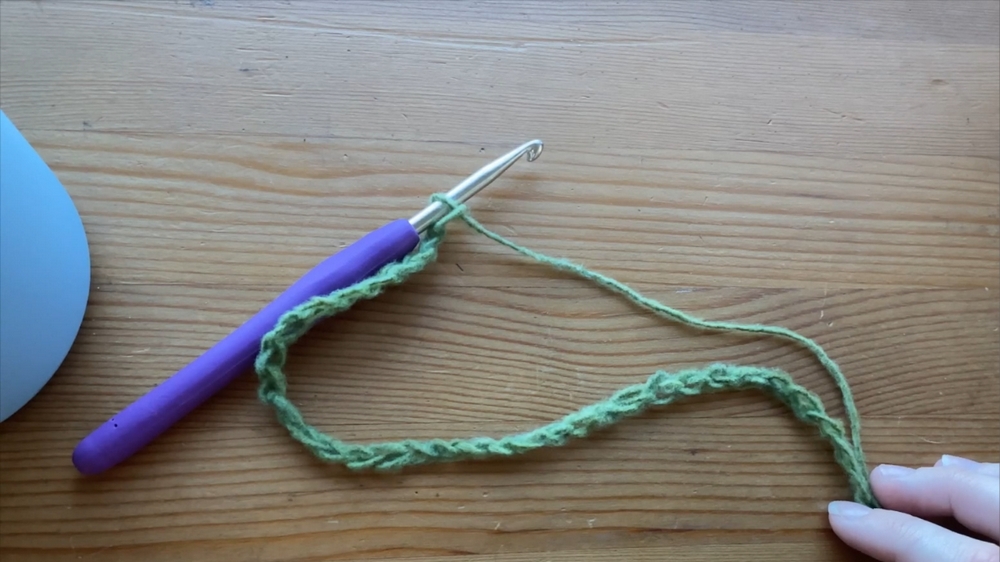
Step 3: Creating the Body Panel
- Gauge Prep: Start by chaining 79 then follow the specified stitch pattern for the sweater size.
- Wave Rows:
- Original Wave Pattern: Includes alternating double crochets, skips, followed by clusters of five double crochets.
- Modified Wave Pattern: Features variations where middle waves do not increase before or after clusters of five double crochets.
- Single Crochet Rows: Between wave rows, single crochet rows are used to create a neat texture.
- Repeat wave-single crochet rows until the desired length is achieved.
Step 4: Creating the Neckline
- Key Steps:
- Complete a double crochet row before starting the neckline.
- Begin single crocheting a section of the panel, then alternate with wave rows to shape the neckline.
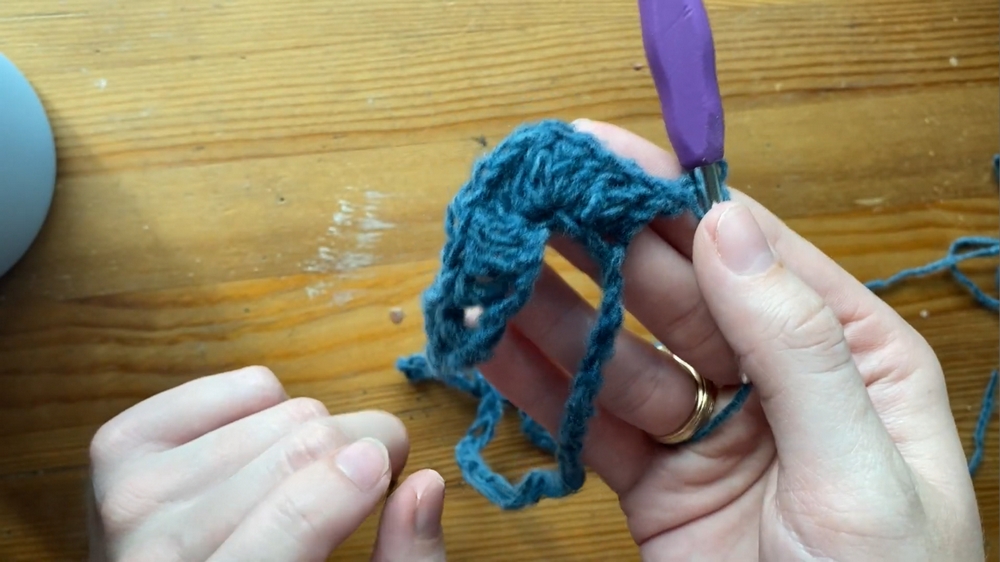
Step 5: Crafting the Sleeves
- Sleeves use the Original Wave Pattern regardless of size.
- Chain 60 for medium size. Start with window spaces and wave patterns.
- Wave pattern repeats using a standard sequence of stitches, with 1-1-5-1-1 stitch placement.
- Optional Increase (Flared Sleeve):
- Add 12 increases evenly spaced across sleeveless rows.
- Perform increases twice for significant flare (or more for exaggerated flair).
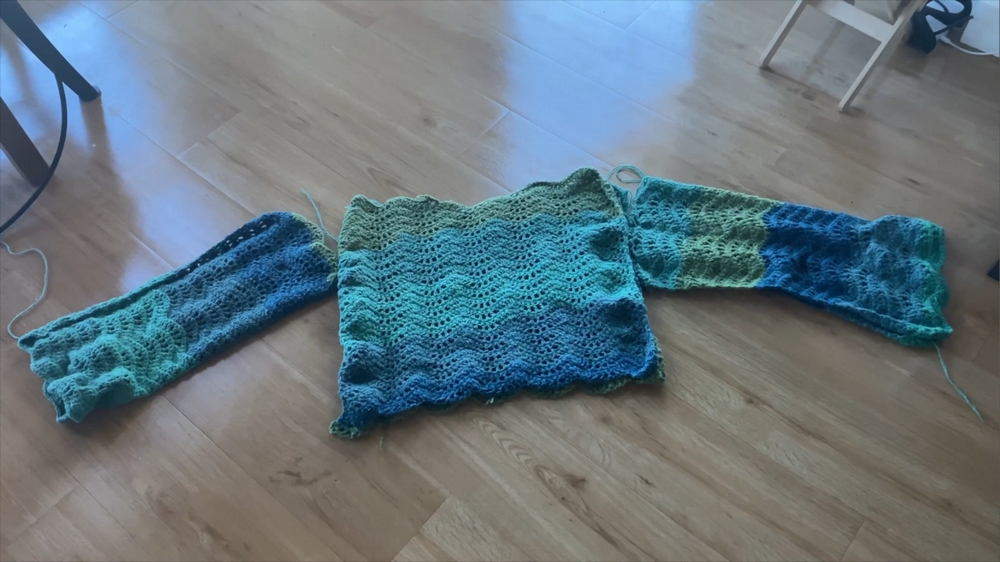
Step 6: Assembling the Pieces
- Lay out the four sweater components: front panel, back panel, and two sleeves.
- Assembly Steps:
- Sew the neckline and sides of the sweater, leaving gaps for sleeves.
- Sew sleeves into cylinders, then attach them to the main sweater while ensuring the stitches align evenly.
- Use any preferred sewing method (slip stitch, single crochet, etc.).
Special Features
- Unique Wavy Pattern: The alternating stitch designs create visual texture and complexity.
- Flexible Neckline: Can be customized to fit tighter or looser preferences.
- Optional Sleeve Flare: Practical tips for creating dramatic bell-shaped sleeves.
- Size Range: The pattern accommodates sizes from Small to 5X with tailored stitch patterns per size.
- Blocking: Finalizes the sweater's shape and smooths out uneven textures.
Difficulty Level
Intermediate
The tutorial assumes familiarity with basic crochet stitches like chains, double crochets, increases, and single crochets. Beginners may find the pattern challenging due to its complexity in managing stitch counts and transitions between patterns.
Tutor's Suggestions
- Gauge is Optional: To avoid risk, test the gauge first; otherwise, complete the first row and adjust based on fit.
- Check Missing Stitches:
- Common problem areas include wave clusters and window spaces.
- Blocking: Helps structured fibers achieve a smooth appearance.
- Increases for Sleeves: Adjust the number of rows and increases to customize sleeve flare.
Uses and Materials
- Uses: Ideal for casual wear or gifting. Can be made oversized for comfort or snug for a fitted look.
Tip for Success
If your stitches don’t align or waves look uneven after increasing, don’t worry! Post-blocking, the texture evens out considerably, and mismatched waves become less noticeable. Take your time stitching, and repeatedly count stitches to ensure accuracy.
Conclusion
The Wavy Sweater Tutorial presents a visually appealing and adaptable crochet project. With guidance tailored for both written pattern followers and visual learners, it demystifies tricky stitches and assembly procedures. Whether you’re creating a classic sweater or a statement flared sleeve, this design is a fun challenge that allows for creativity and personalization.


