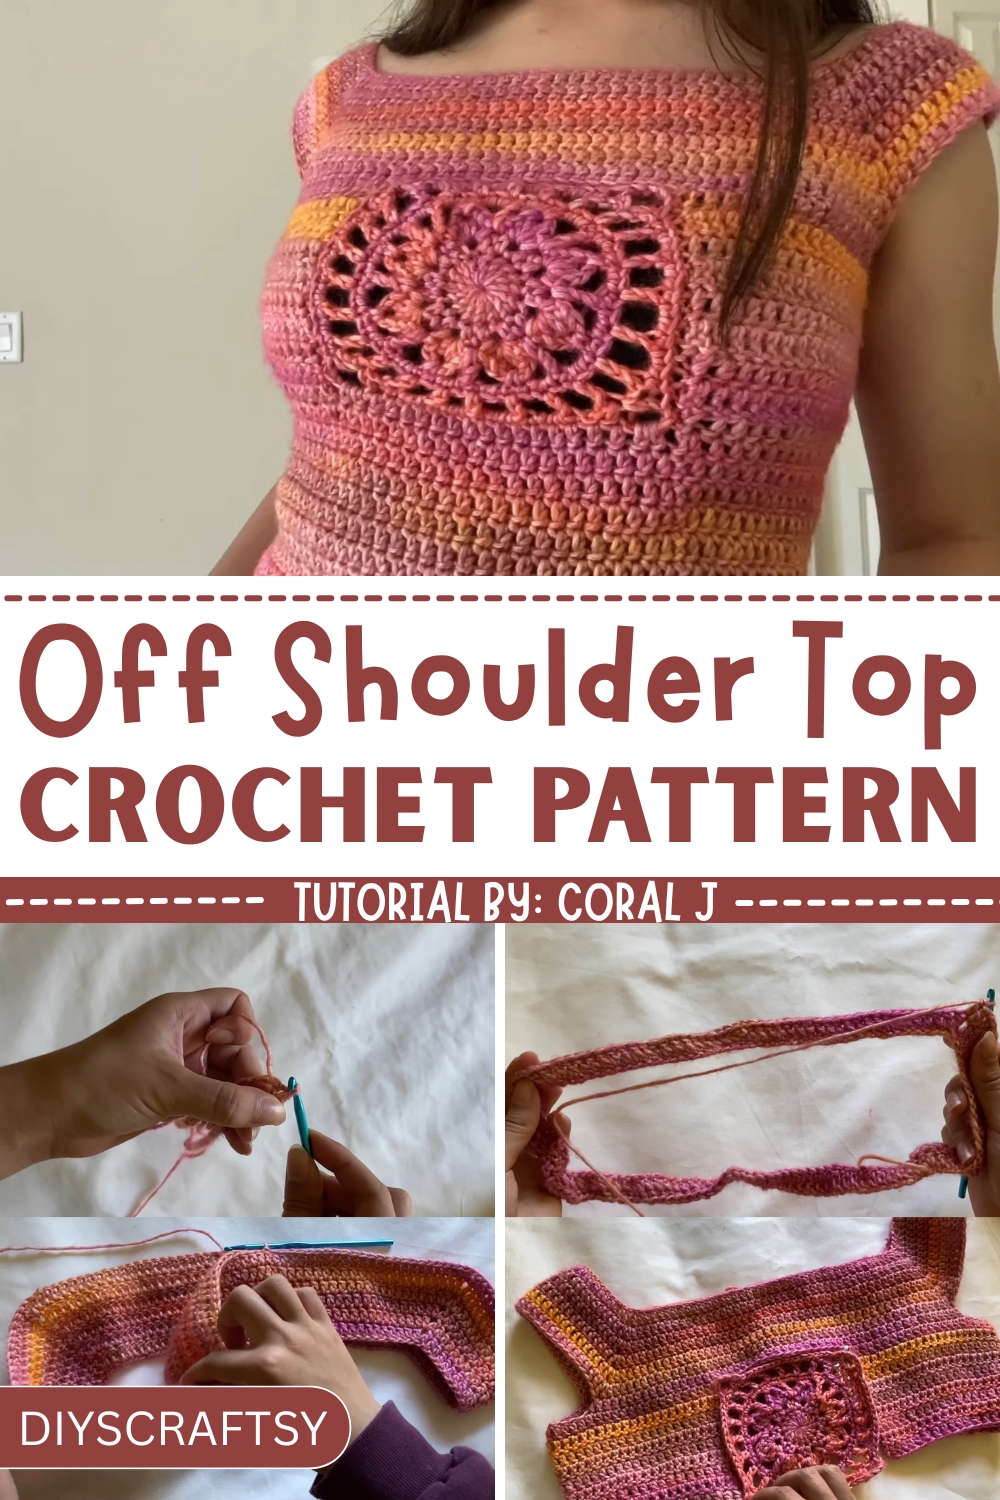
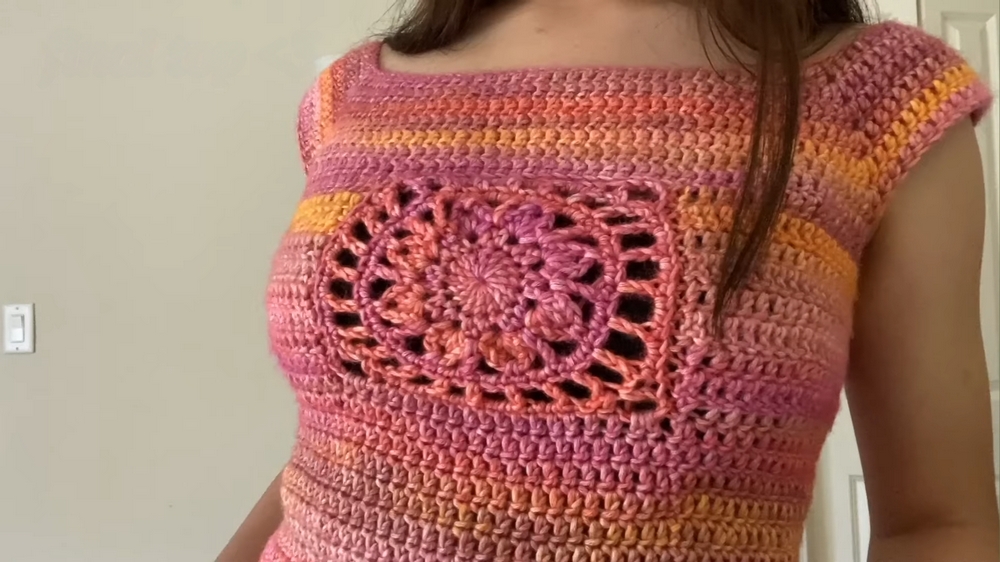
Stand out with this elegant off-shoulder crochet top pattern that's perfect for showing off your style and skills with every stitch.
Fashion often finds its charm in simplicity, and the crochet off-shoulder top is a perfect example. This versatile garment bridges the gap between casual and elegant, making it a go-to choice for various occasions. Light and airy, it’s perfect for summer days, exuding effortless sophistication while ensuring comfort. Whether paired with jeans, skirts, or shorts, it adds a stylish flair to any outfit, making it an essential piece in any wardrobe.
Crochet Off-Shoulder Tops You’ll Want to Wear Daily
What sets this pattern apart is its adaptability and personal touch. With the freedom to experiment with colors, textures, and designs, the off-shoulder top becomes a one-of-a-kind creation that reflects your style. It is also designed to suit all body types, offering an inclusive way to celebrate fashion that makes everyone feel beautiful. Beginners find joy in the accessibility of this pattern, while seasoned crocheted appreciate its endless creative possibilities.
In addition to its aesthetic appeal, there’s something deeply satisfying about making a piece with your own hands. Crocheting the off-shoulder top provides a calming break from the hustle of everyday life, acting as a meditative practice. The final result is not just a stylish addition to your wardrobe but a meaningful creation with both function and personality.
1. Materials Needed
- Yarn: Worsted cotton yarn (e.g., Caron Blossom Cake yarn from Michael’s)
- Hook: 5 mm crochet hook
- Optional: Stitch markers, scissors
- Tip: While the video uses worsted cotton yarn, other worsted-weight yarns can also work.
Step-by-Step Details
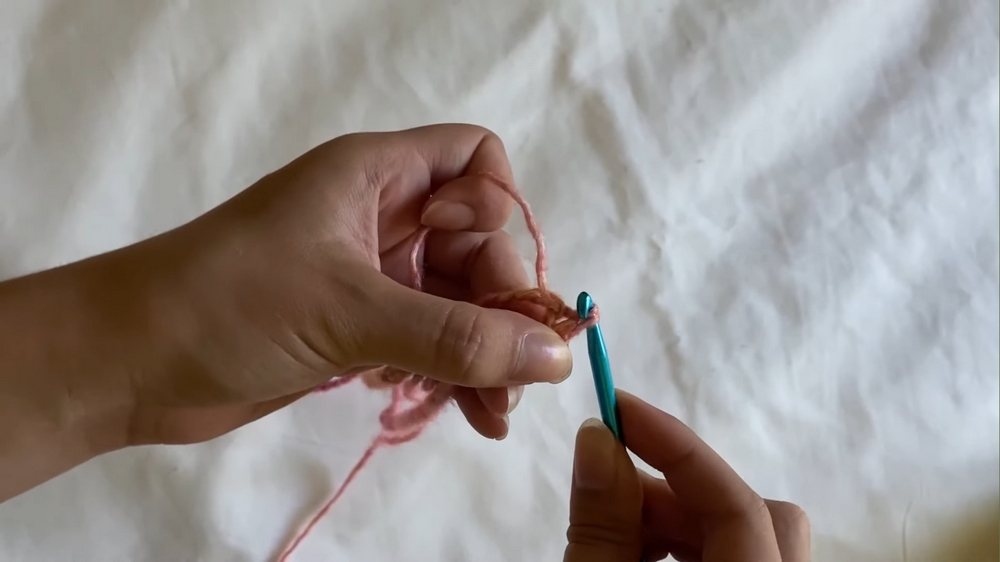
2. Starting the Neckline
- Slip Knot & Chain: Start with a slip knot, then chain the desired length for your neckline, ensuring the chain length is a multiple of 6.Example: 120 chains.
- Measurements: Fold the chain in half to ensure it fits comfortably across your shoulders.
- Joining the Chain: Insert the hook into the first chain stitch and slip stitch to form a circle (make sure the chain doesn’t twist!).
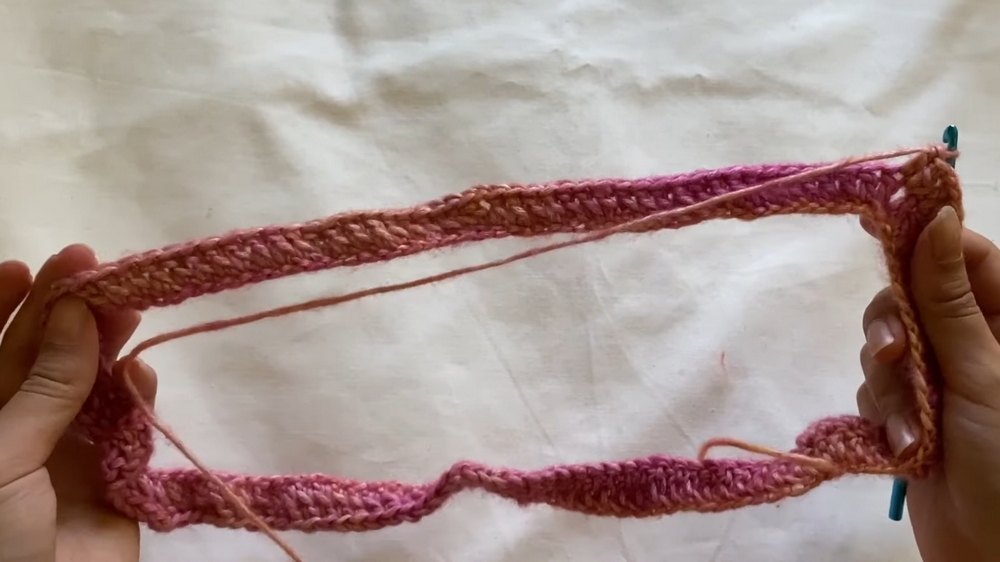
3. Dividing the Neckline for Sleeves
- Divide the chain into sections:
- One-sixth of your chain length on each side: Mark these sections for sleeves.
- Two-sixths (one-third): Mark the sections for the body front and back.
- Use stitch markers for accuracy.
4. Increasing the Circle
- Work in double crochet (DC) around the chain. Wherever there are stitch markers, add increases:
- Double crochet (DC), chain 1, and double crochet (DC) into the marked stitch.
- Continue making increases at the sleeve markers for 6 rows, with slip stitches at the end of each row.
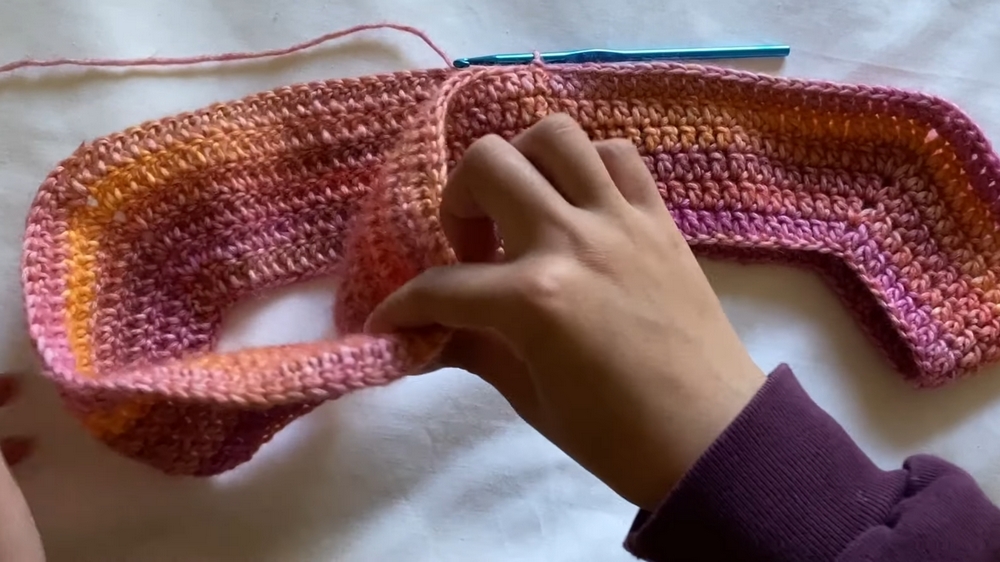
5. Creating Sleeves
- Chain to fit your arm:
- Example: Chain 8 (adjust as needed).
- Skip the sleeve section and connect the chain directly to the next marked increase stitch.
- Crochet in the round to complete the base of the top.
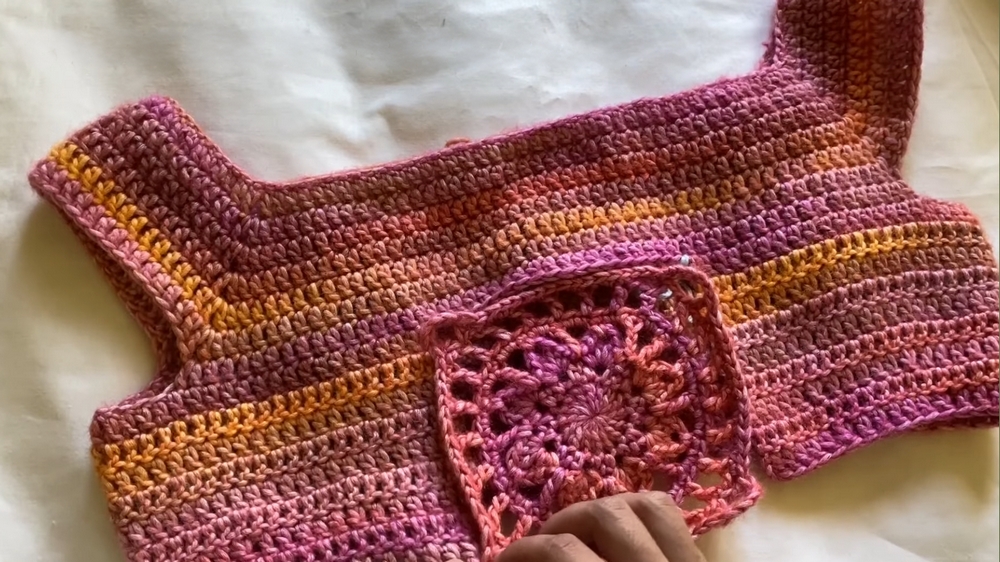
6. Adding the Granny Square
- Crochet (or prepare beforehand) a granny square of your choice. The video creator provides a reference video for the granny square tutorial.
- Place the granny square at the center front:
- Measure the width of your top and mark evenly for the placement.
- Sew the granny square neatly into place.
7. Fitting and Shaping the Body
- To shape the body, begin tapering down by decreasing:
- Decrease every sixth stitch for two rows.
- After achieving the desired fit, stop decreasing and continue to crochet rows evenly until the top reaches the desired length.
8. Final Touches
- Finish with a slip stitch.
- Weave in the ends to clean up the stitches.
3.Optional Adjustments: Add decorative elements or modify fit as needed.
Special Features
- Trendy Design: Off-the-shoulder boat neckline with a flowy fit.
- Granny Square Detail: A customizable and eye-catching centerpiece at the front of the top.
- Customizable Length: Perfect for making a cropped or full-length top.
- Beginner-Friendly: Straightforward instructions, suitable for near-beginners or intermediate crocheters.
Tutor’s Suggestions
- Use measurements to make the top as fitted or as loose as you desire.
- If you’re not a fan of using granny squares (or prefer a less see-through finish), you can skip this detail and create a plain, closed top by continuing rows of double crochet for the body.
- Be patient with sewing the granny square—take your time for a clean, professional finish.
Uses:
- Uses: A breathable, stylish summer top that is both trendy and practical for daily wear.
Level of Difficulty
- Beginner to Intermediate: The pattern assumes basic knowledge of crochet stitches like double crochet (DC) and slip stitches but caters to beginners with clear and step-by-step instructions.
Tip for Success
When working on the sleeves, try on the top before proceeding to ensure it fits comfortably around your arms. Adjust the chain length for the sleeves as needed, and always check your work after each segment to avoid unnecessary mistakes.
Conclusion
This crochet Sage Top pattern combines style, functionality, and customization into one beautiful design. With its breathable and trendy off-the-shoulder look, this top is a must-have wardrobe piece for summer. Whether you choose to include the granny square or opt for a fully closed design, this project is a great way to challenge yourself and enjoy handmade fashion. Follow the pattern step by step, and don’t forget to have fun as you create your own unique version of the Sage Top!


