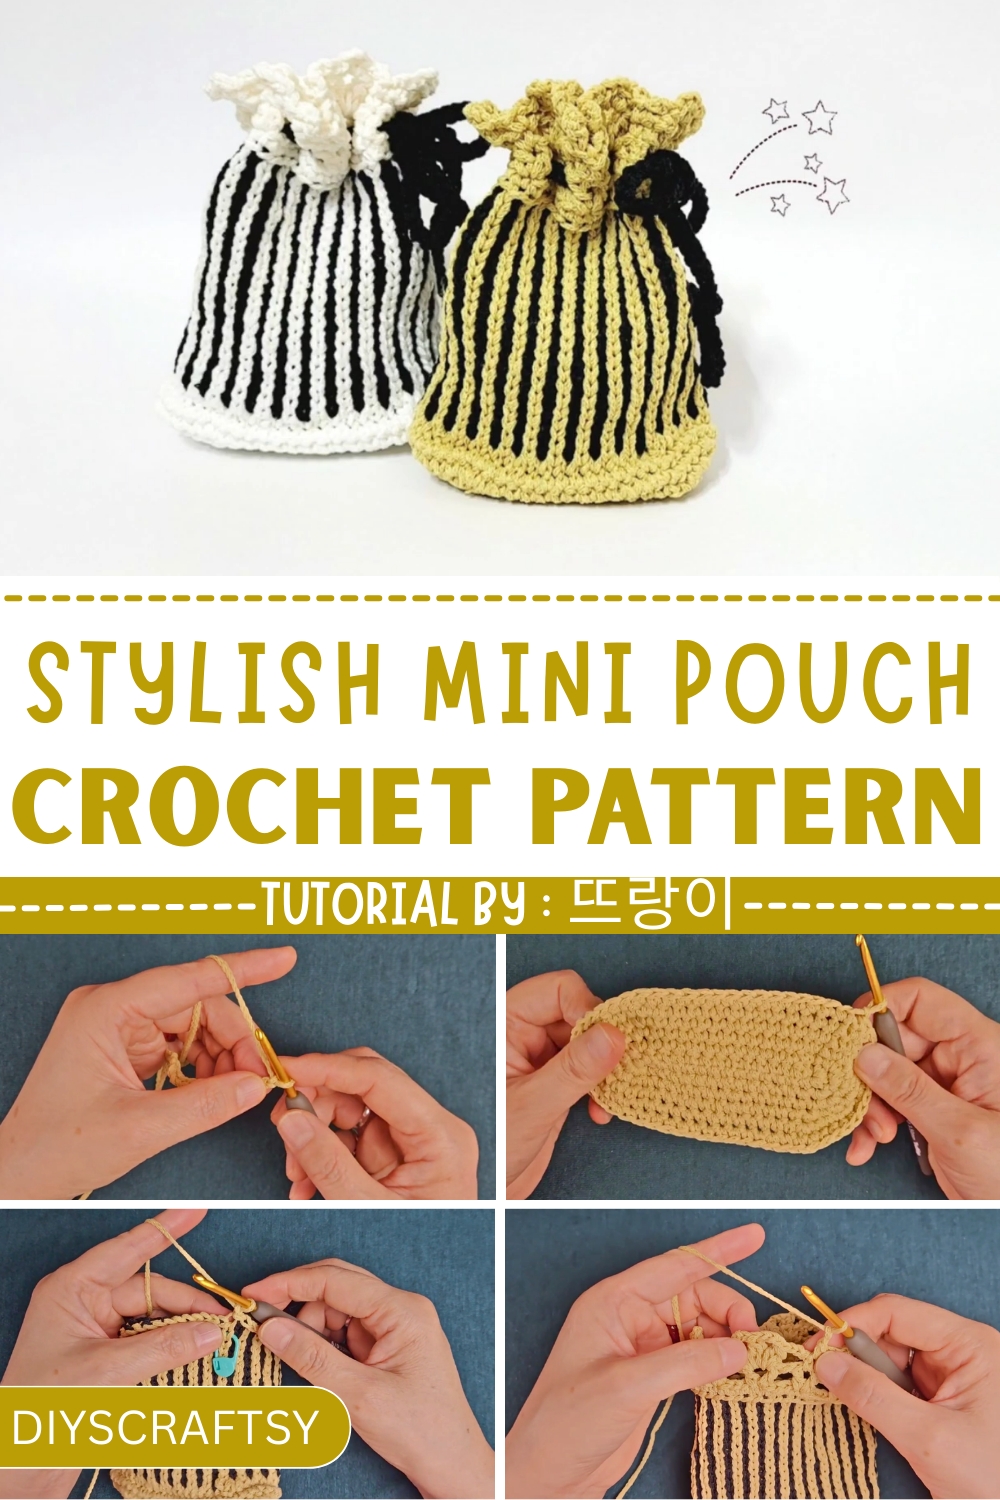
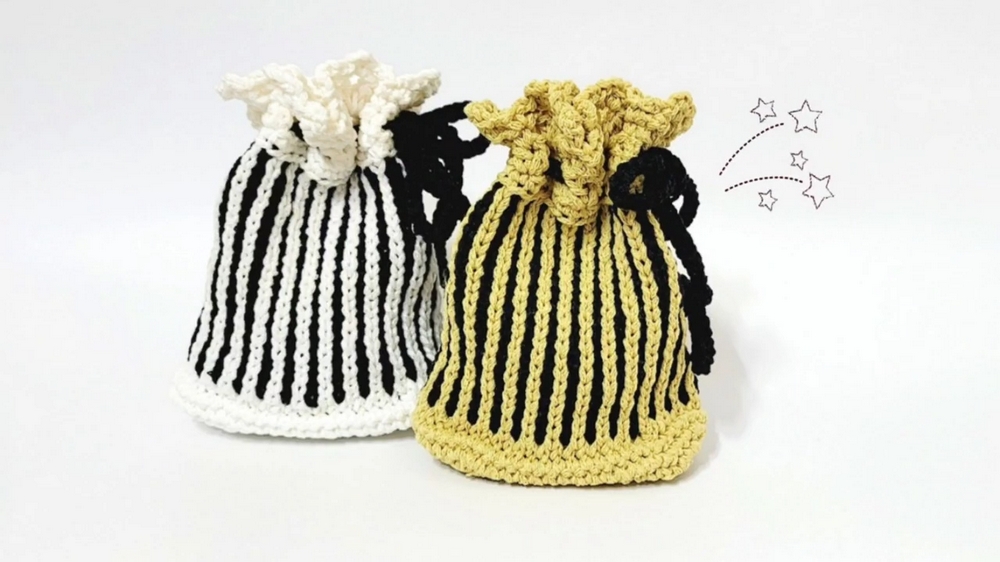
Hold charm in every stitch with the Free Crochet Mini Pouch Pattern, a stylish little essential perfect for gifting or keeping your small treasures safe.
A tiny bag can hold more meaning than its size suggests, often becoming the keeper of little essentials that make daily life easier. The Free Crochet Mini Pouch Pattern captures that very charm, offering a stylish and functional way to store earbuds, coins, keys, or other small treasures. Its convenient shape makes it simple to tuck into a larger bag, hang on a keychain, or gift to someone special with a surprise inside.
How To Crochet Mini Pouch Pattern Adds Charm
What gives this pouch its appeal is not only its usefulness but also the touch of personality that shines through in every detail. By choosing colors and textures, the Free Crochet Mini Pouch Pattern turns into an accessory that can be playful, chic, or understated, depending on preference.
Beyond practical storage, it also brings a sense of thoughtfulness and individuality, making it more than just an everyday item. Whether kept for personal organization or shared as a handmade gift, this crochet little pouch combines beauty with purpose, proving that even the smallest projects can have the biggest impact.
Step-by-Step Instructions
1. Materials Required
To make the mini pouch, you will need:
- No. 6 crochet hook
- 3.5mm double-pointed bamboo needle
- 4.5mm string needle
- Scissors
- Yarn (in two colors: yellow and black)
- An indicator ring
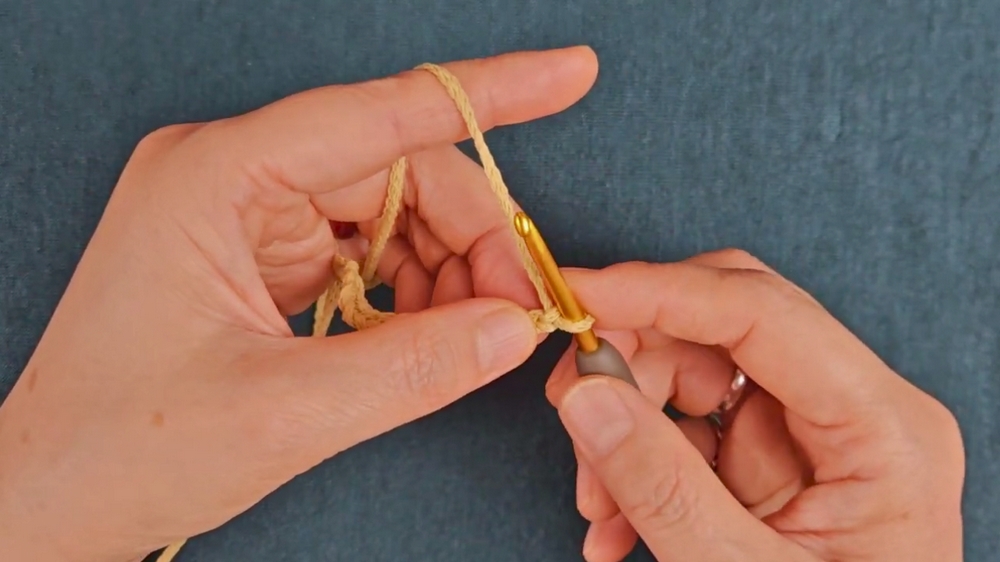
2. Creating the Base
- Start by crocheting the oval base:
- Chain 4 stitches to begin.
- Use short crochet stitches to create a ridge-like effect around the edges of the base. This involves:
- Creating 10 short stitches on the first side.
- Adding 3 short stitches into the last stitch of the row.
- Mirroring the stitch pattern on the other side of the chain, with 13 short stitches and ending with 3 short stitches into the last stitch.
- Gradually "stretch the nose" by working three repetitions in certain areas to build the oval shape evenly.
- Repeat the process several times until the base is completed.
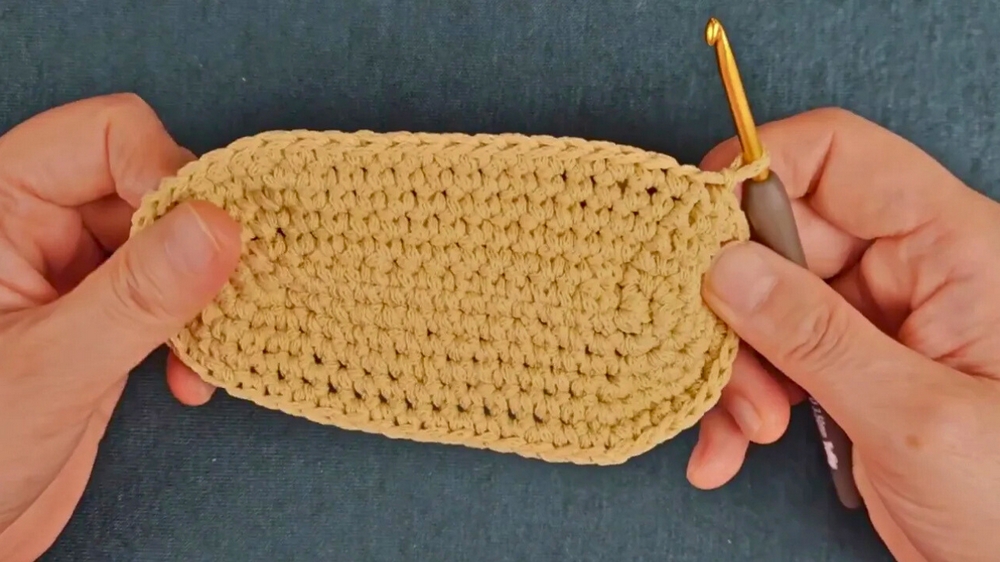
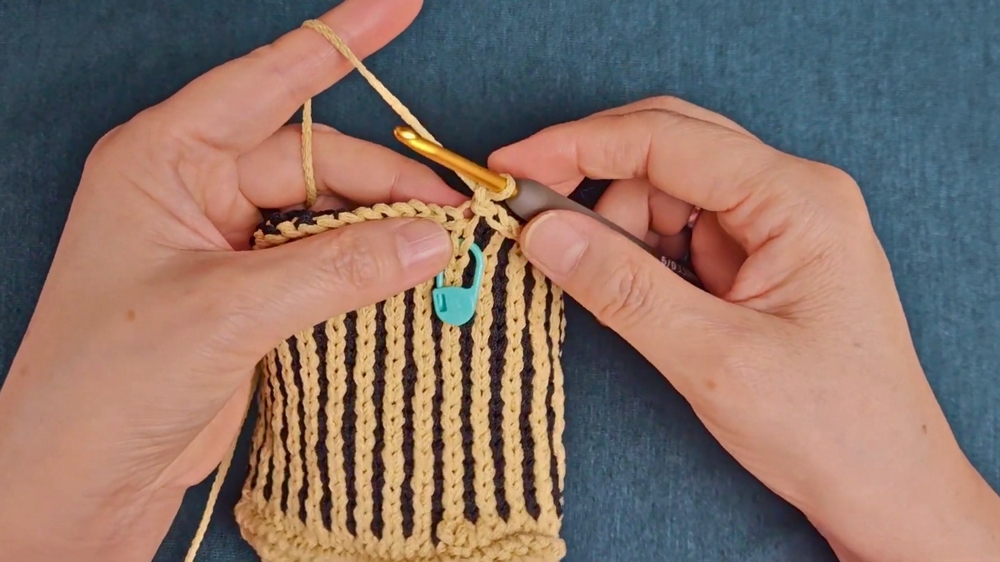
3. Crocheting the Body: Color Combination
Once the base is completed:
- Switch to a string needle and pick up approximately 56 stitches around the edge of the base.
- Use the bamboo needle to work color combinations:
- Alternate yellow and black yarn to create a striped pattern.
- The tutor demonstrates maintaining consistent tension while switching between colors.
- Continue knitting the body until it reaches a height of 9 cm.
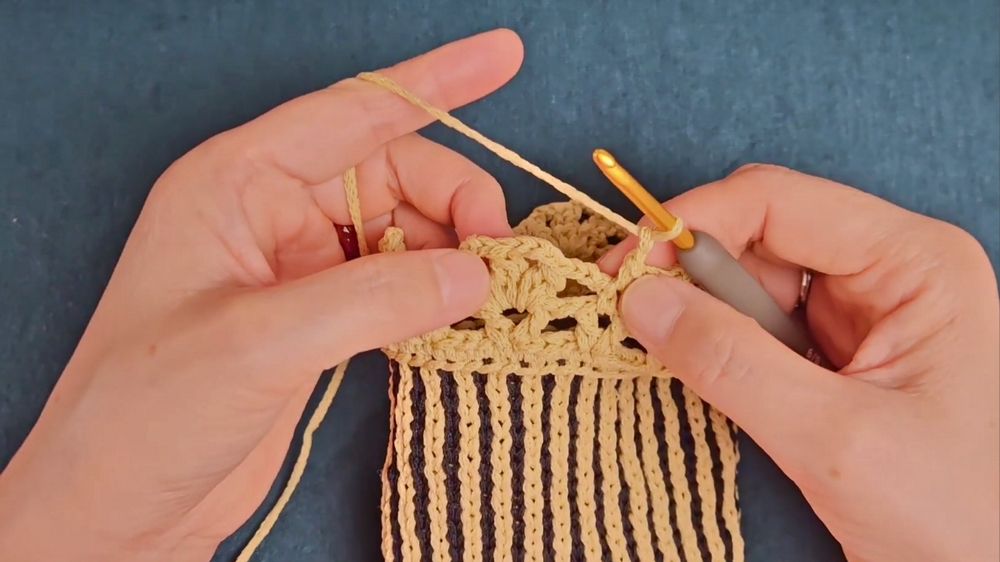
4. Adding the Lace Pattern
- Once the body is complete, cut off the black thread and secure it.
- Switch back to the crochet hook and begin adding a lace pattern:
- Crochet chains and long stitches, deliberately skipping certain gaps to form a grid-like lace design.
- Continue adding "beads" or decorative elements using the crochet hook. This involves working 2-3 stitches into each chain space to create texture.
- Repeat the lace pattern until the desired design has been achieved.
5. Finishing with the I-cord
- To finish the mini pouch:
- Create an i-cord using leftover yarn.
- This involves looping and winding the yarn to form a sturdy, cord-like structure.
- The i-cord will act as the drawstring closure for the pouch.
- Thread the i-cord into the top of the pouch, ensuring it opens and closes smoothly.
Special Features
- Dual Techniques: The pouch combines both crochet and knitting, which makes it a unique project to refine versatile crafting skills.
- Color Patterns: The striped body and lace detailing offer ample opportunity for creativity with color combinations.
- Practical Design: The pouch is not only decorative but also functional, making it useful as a storage item or a personalized gift.
Level of Difficulty
- Intermediate: This project is best suited for those with experience in both crochet and knitting. Beginners may find the transitions between techniques challenging but achievable with patience.
Tutor's Suggestions
- Work Slowly: The tutor emphasizes the importance of taking your time, especially when switching between crochet and knitting.
- Use Markers: To keep track of your stitches and rows, using an indicator ring or markers is highly recommended.
- Focus on Tension: Ensuring consistent tension when knitting the color combinations will result in a polished finish.
Uses and Applications
- The mini pouch can serve multiple purposes, including:
- Storing small items like coins, jewelry, or crochett supplies.
- Acting as a decorative piece for gifting.
- Teaching others a combination of crochet and knitting techniques.
Tip
To ensure a clean finish, always weave in the tail ends of your thread securely after completing the project. This prevents unraveling and gives the pouch a professional look.
Conclusion
This mini pouch tutorial offers a creative and functional project that combines crochet and knitting techniques. While it requires attention to detail and intermediate-level skills, the final product is a beautiful pouch that can be customized in various colors and designs.


