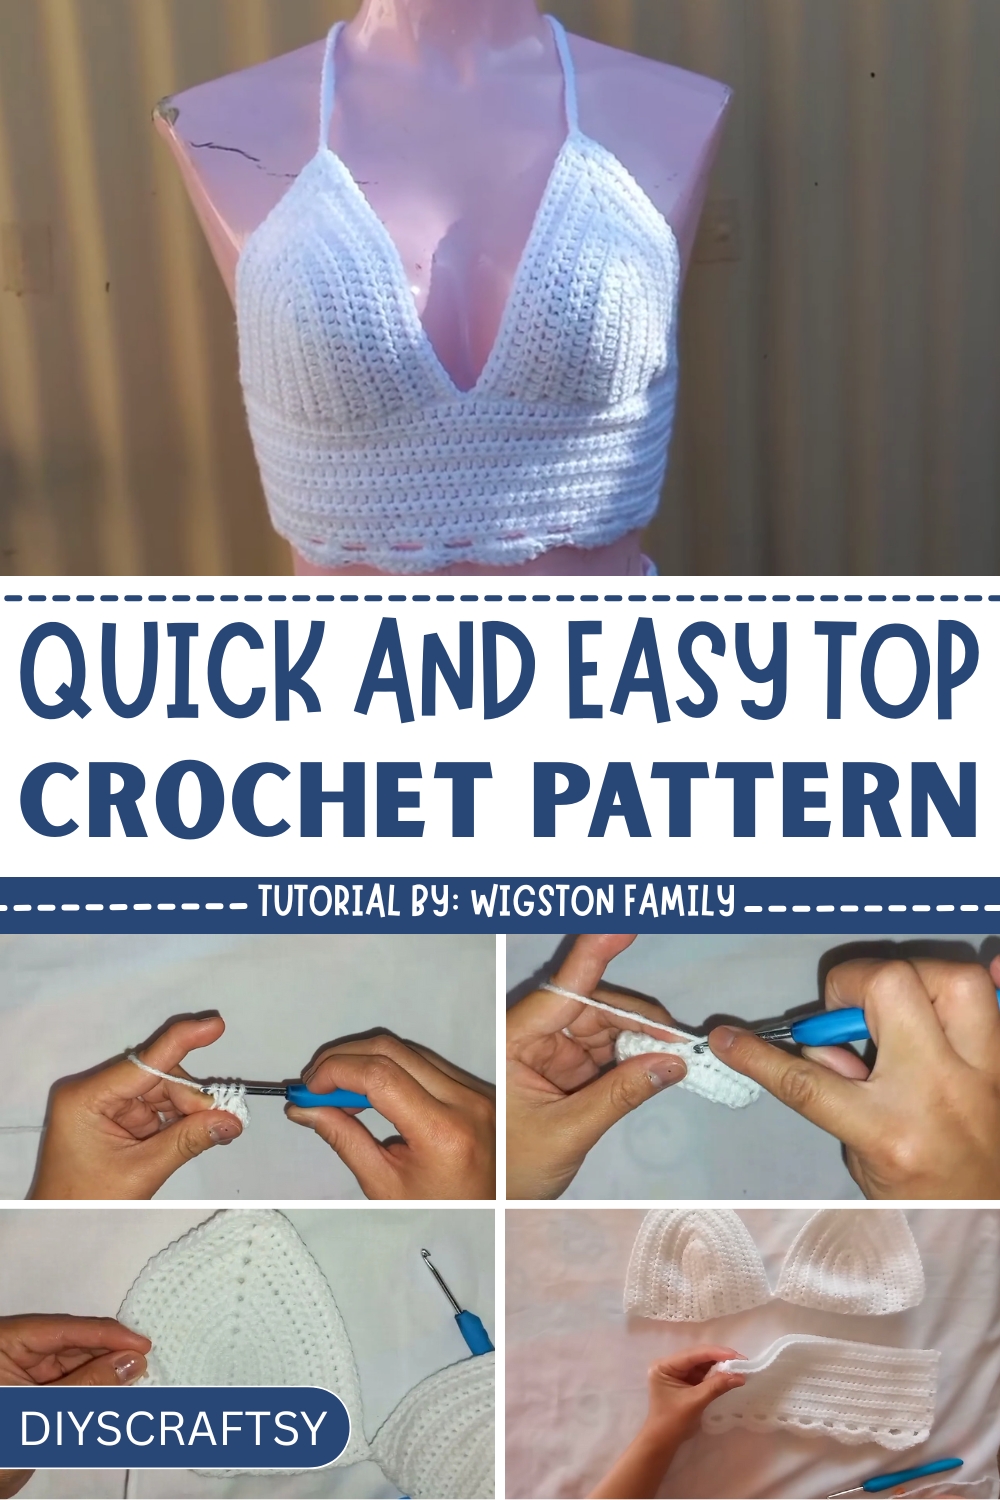
Stitch your way to chic with this fun crochet crop top pattern that's cute, comfy, and guaranteed to turn heads wherever you go.
Fashion has always been a medium of self-expression, and nothing quite captures that essence like handmade pieces. The crochet crop top is the perfect embodiment of this artistry, blending timeless crochet techniques with contemporary style. Lightweight and versatile, it’s an ideal choice for warm weather outings, music festivals, or even casual gatherings. Its breathable structure brings comfort without compromising on elegance, making it a must-have for anyone seeking a balance between practicality and flair.
Your New Favorite Crochet Crop Top Pattern for Warm Weather
One of the most delightful aspects of this garment is its customizability. From bold, vibrant hues to soft, earthy tones, every piece can be tailored to reflect individual personality and preferences. Not merely an item of clothing, the crochet crop top also resonates deeply with sustainable fashion, promoting the beauty of slow fashion and handmade craftsmanship.
Additionally, it can serve as a memorable gift for friends or family, carrying a heartfelt, personal touch. With each intricate stitch, this garment connects its wearer to an age-old tradition while meeting the demands of modern fashion. Whether paired with high-waisted skirts or laid-back jeans, it adds an effortlessly chic element to any ensemble, transforming the ordinary into extraordinary with its unique charm.
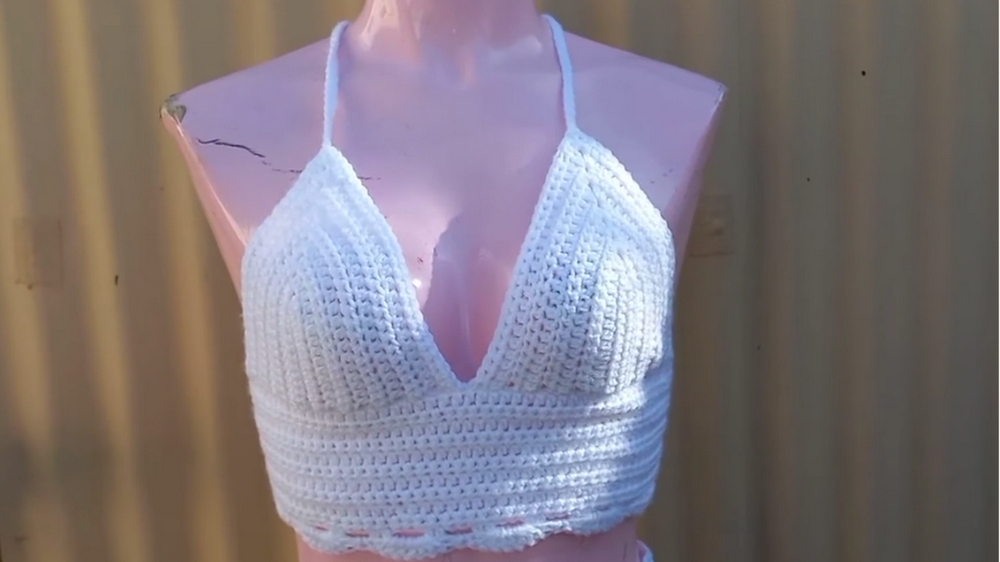
Making a Crochet Top with Crisscross Back: Step-by-Step Pattern
1. Materials
Special features of this crochet top include simplicity, lightweight design, and adaptability to sizes. Below are the essential materials required:
- 4 mm crochet hook
- 100% acrylic yarn
- Darning needle
- Stitch markers
- Scissors (for cutting leftover yarn)
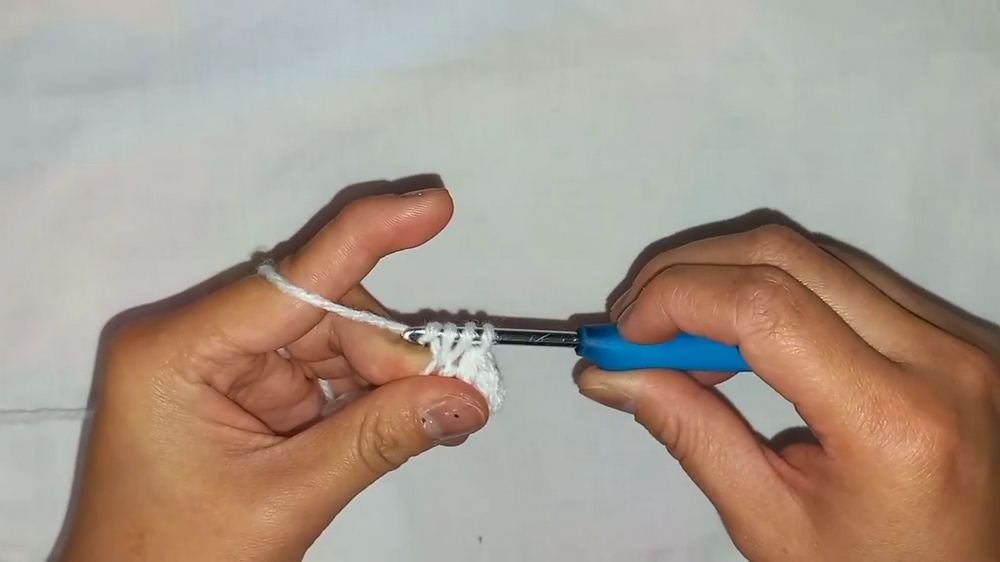
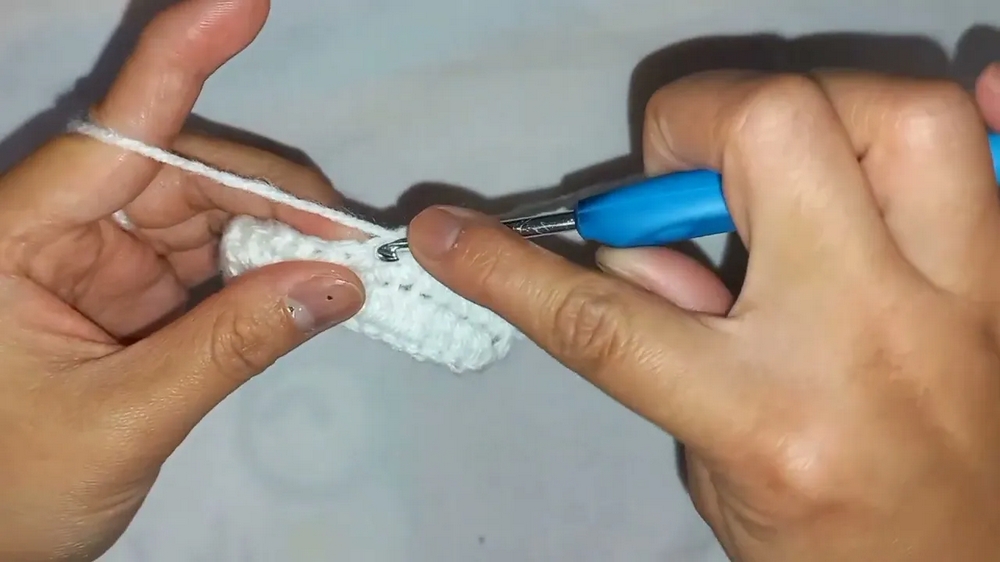
2. Making the First Cup
Level of difficulty: Beginner-friendly
- Begin with making a slip knot on the hook and create 13 chains.
- Perform a half double crochet (HDC) on the second chain from the hook and repeat across the chain.
- At the top stitch, make two half double crochet stitches, followed by chain one, and then two double crochet stitches in the same space (this forms the middle section of the cup).
- Continue making HDC across until the row ends.
- Chain two, flip the project over, and repeat the process until the cup reaches the desired dimension.
- Repeat the same steps to create a second cup.
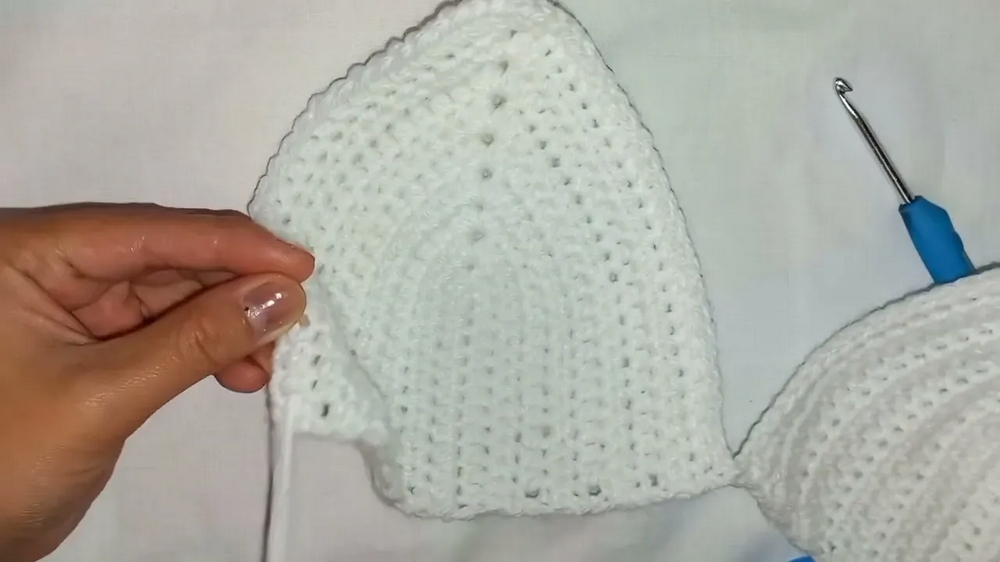
3. Joining the Cups
Tutor’s suggestion: Attach the cups from the wrong side to hide bulk.
- Position the cups side by side and secure them with stitch markers.
- Use a darning needle to connect the two pieces by weaving the yarn between the edges.
- Ensure all leftover yarn is secured by weaving and cutting, leaving the cups clean and ready.
4. Making the Bottom Section
- Start with a slip knot and create 80 chains (adjust length as needed).
- Add two extra chains for turning and make HDC across beginning from the third chain from the hook.
- Continue HDC until the desired length of the bottom part is achieved (~3-4 inches).
- Add shell-stitch decoration at the bottom by alternating between:
- Single crochet
- Seven double crochets in the same stitch
- Repeat until the row ends for a wavy, stylish design.
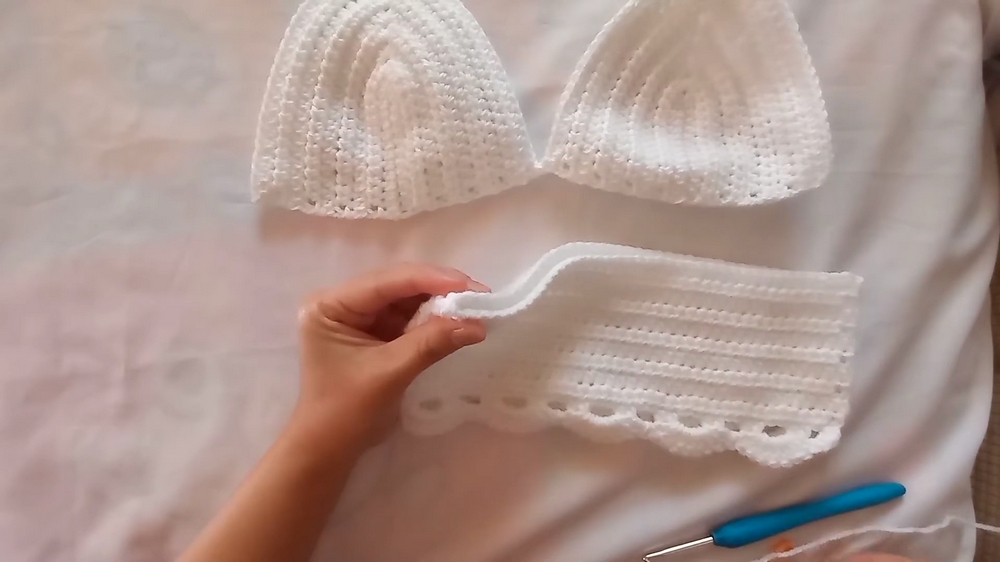
5. Attaching Cups to Bottom Section
- Fold the bottom piece to locate the middle section and mark it with stitch markers.
- Attach each cup to the bottom section using a darning needle and matching the stitches carefully.
6. Making the Straps
- Attach yarn to the prior-to-middle section of the cup (near chain one space).
- Create 150 chains (or longer, based on preference).
- Use slip stitches to work back across the chain, ensuring a smooth finish.
- Repeat the process for the second strap.
- Cross the straps at the back to form a crisscross design and secure them with stitch markers or by weaving.
7. Finishing Touches
- Cut and weave all remaining yarn to ensure the top is clean and neatly finished.
- Test the fit and ensure the straps are correctly positioned and crisscrossed at the back.
Special Features
- Stylish and Adjustable: The crisscross back offers both style and adjustment options for wearability.
- Beginner-Friendly: Simple stitches like half double crochet and slip stitches are used, ideal for those new to crochet.
- Lightweight: Perfect for casual outings or summer wear.
- Customizable: Size and length can be adjusted to fit various body types.
Tutor’s Suggestions
- Do not skip stitches to avoid uneven edges.
- Use stitch markers during attachments to keep the work precise.
- Work slowly when weaving yarn for a clean and professional finish.
Uses
- Can serve as a crop top, bralette, or bikini top.
- Suitable for casual summer wear, beach outings, or layering with jackets.
Tip
For beginners, slow down while doing shell stitches or weaving the yarn using the darning needle. Adding stitch markers as you progress will reduce mistakes and save time for corrections.
Conclusion
By following these detailed steps, you can create a beautiful crochet top with crisscross straps that is both comfortable and trendy. With patience and practice, this project helps enhance crochet skills while producing a stylish piece that can be worn or gifted.


