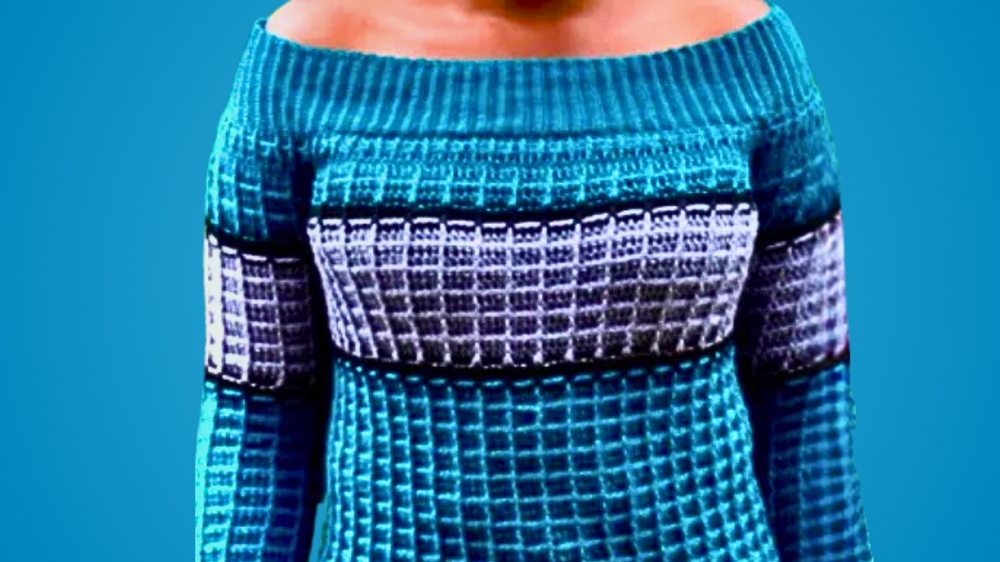
Effortlessly chic with this Crochet Off Shoulder Sweater Pattern brings comfort, style, and a touch of allure to your handmade wardrobe.
A crisp breeze drifts through the air, carrying the first whispers of the changing season. Soft textures and relaxed silhouettes suddenly feel like the perfect answer to cooler days, offering warmth without compromising style. The crochet off shoulder sweater pattern captures this balance beautifully, combining a graceful neckline with the comfort of a loose, breathable weave. Its off-the-shoulder style lends a subtle allure, allowing it to be both cozy and effortlessly feminine.
Feminine Crochet Off Shoulder Sweater
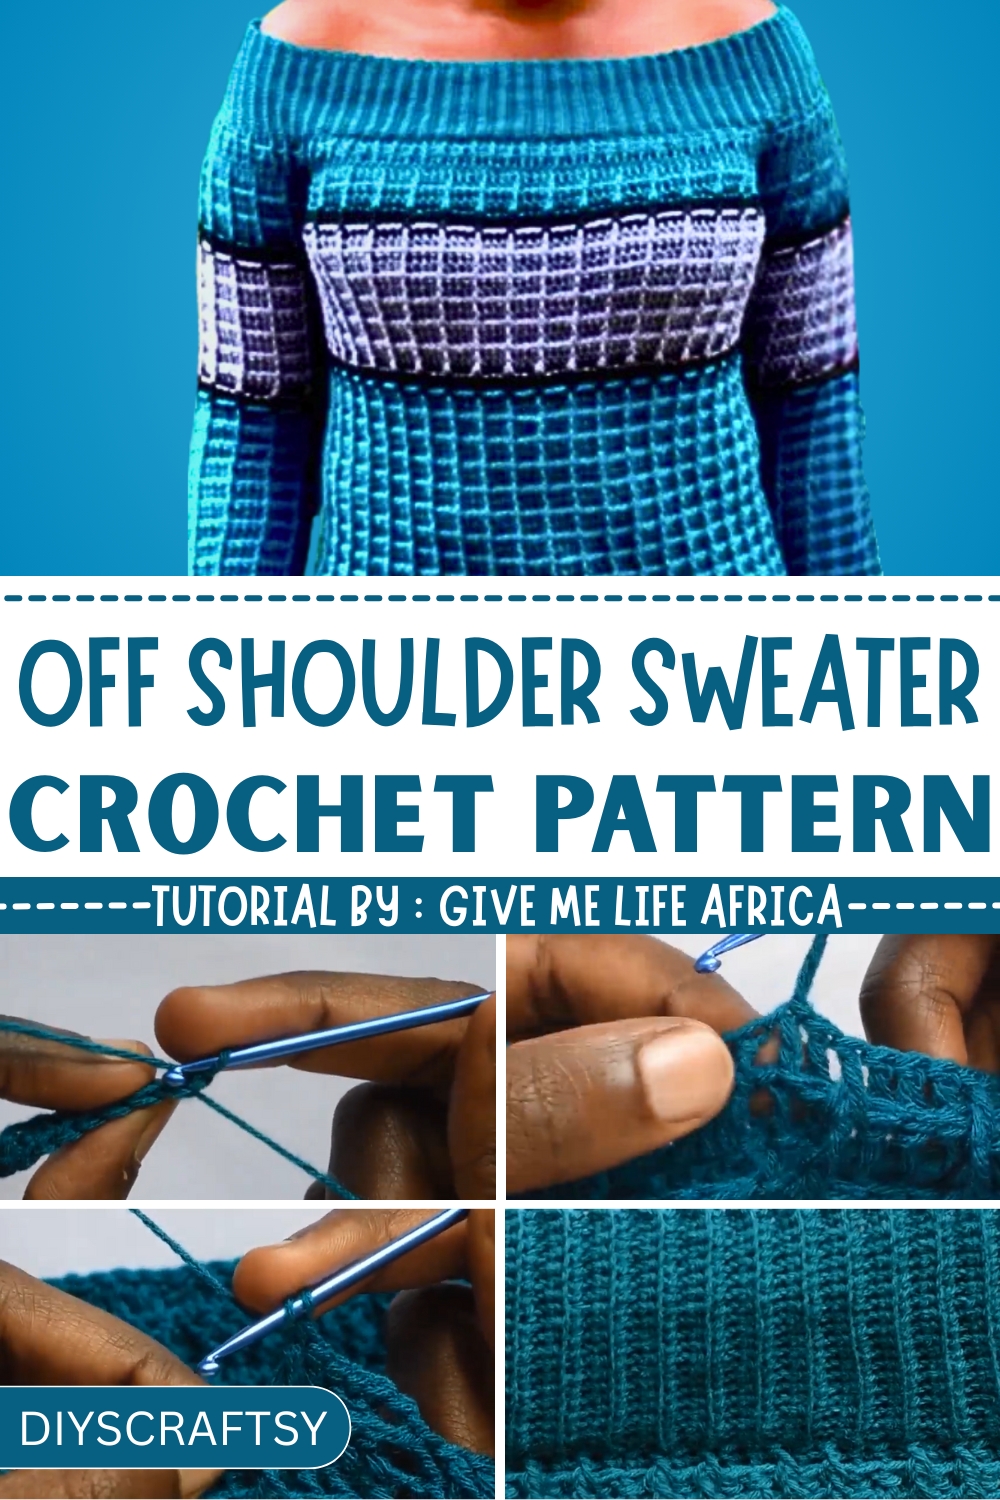
The structure provides a relaxed fit that flatters various body types, while the airy stitchwork ensures it remains lightweight enough for transitional weather. Its versatility shines through—worn casually over a camisole for weekend outings, paired with high-waisted skirts for a chic statement, or layered for a laid-back evening look. The combination of structure and softness makes it a timeless piece that transitions seamlessly between seasons.
Every stitch adds not just texture but also character, making the sweater a garment you’ll reach for again and again. Beyond style, it offers the benefit of durability and comfort, making it ideal for daily wear. Whether for personal use or as a thoughtful handmade gift, this sweater pattern offers a perfect blend of warmth, beauty, and sophistication.
Materials Needed
To make this crocheted off-shoulder top, you'll need:
- Tape measure: For ensuring accurate measurements.
- Turning needle and scissors: For finishing touches.
- Crochet hook: A 3 mm hook is recommended.
- Yarn: Robin 100% acrylic in three colors: white, green, and gray (colors 1001, 2061, and 1030). This is a lightweight yarn, slightly on the thinner side.
Step-by-Step Process
Part 1: Starting the Ribbing
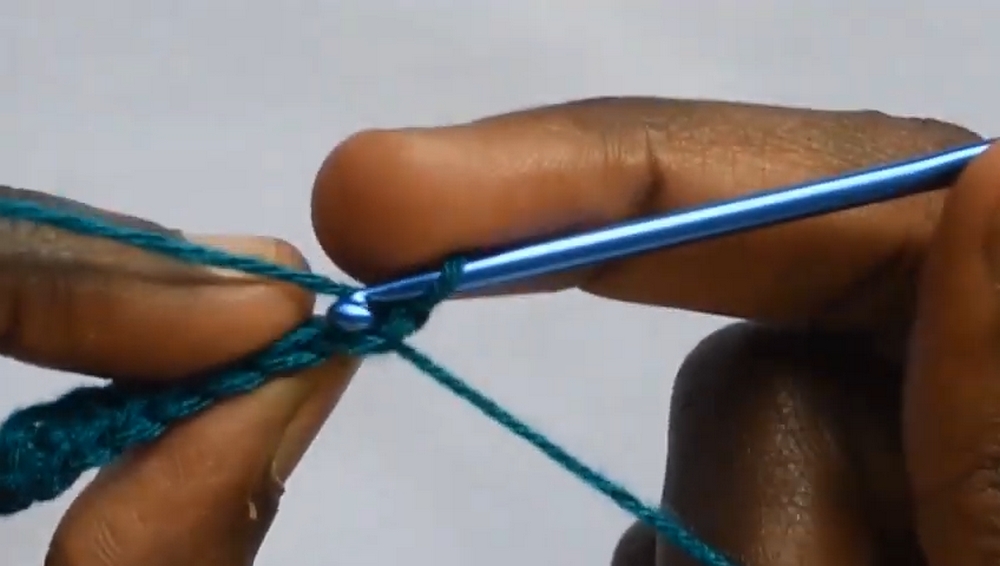
- Make a Slip Knot and Chain:
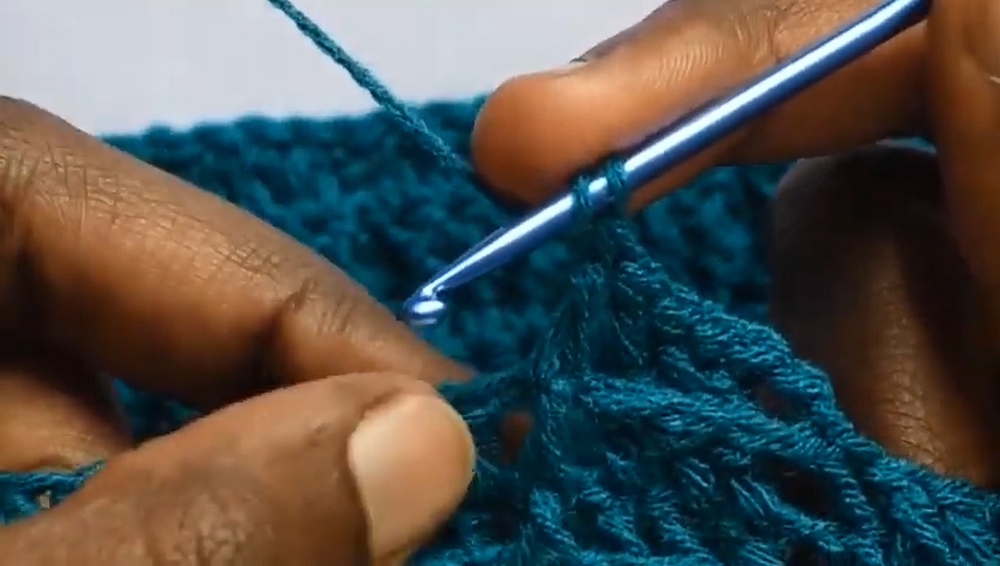
Begin with a slip knot followed by a chain of 21 stitches. - Crochet Single Stitches:
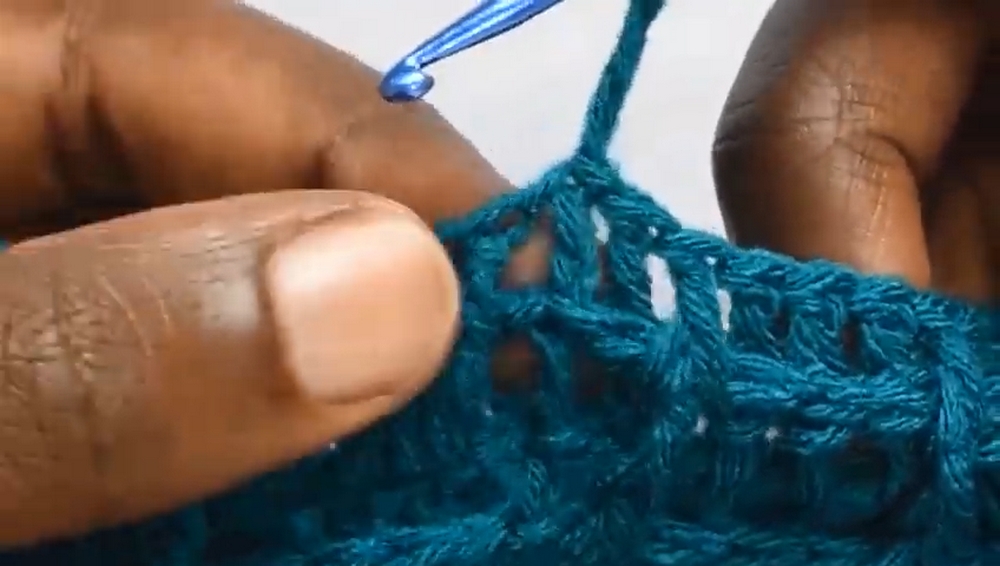
Work single crochets into the second chain from the hook and continue to single crochet until the end of the row. - Back Loops Technique:
For subsequent rows, turn your work and make single crochets into the back loops of previous stitches. This creates a stretchy ribbing texture. - Repeat Until Length is Achieved:
Continue this process until your ribbing measures 38 inches (or 190 rows, as shared by the tutor). Keep in mind the ribbing will stretch, so adjust accordingly.
Part 2: Joining the Ribbing and Body Construction
- Join the Ribbing in the Round:
Use single crochets to join the band, ensuring the edges align well. - Add the Base Row of Single Crochets:
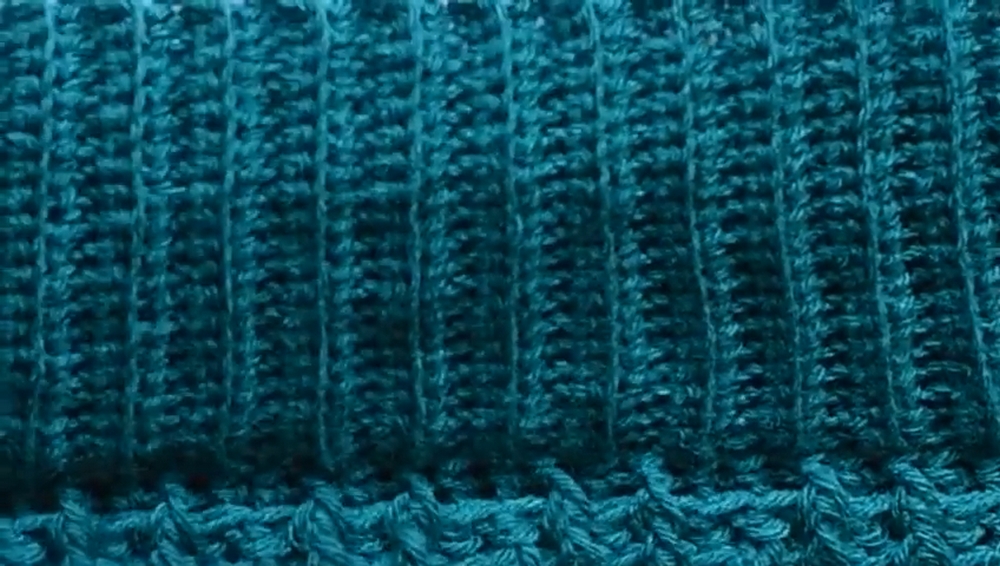
Make single crochets around the entire band, working evenly into the rows. Ensure you have 190 single crochets when finished. - Double Crochets and Waffle Stitch Pattern:
- Chain 3. This works as the first double crochet.
- Alternate rows of front post double crochets and back post double crochets to create a waffle stitch.
- Repeat this pattern until the body section of the top measures 15 inches (including ribbing).
- Color-Change Technique:
- Begin with green: Crochet 20 rounds.
- Switch to gray: Add 12 rounds.
- Alternate with black: Add 2 rounds.
Part 3: The Arms
- Start with Ribbing for the Arms:
Chain 21, single crochet across, and work 36 rows of single crochets in back loops for the ribbed section. - Join the Ribbing:
Use single crochet to join the ribbing in the round. - Create Double Crochets and Waffle Stitch:
- Begin double crochets as done in the body section.
- Incorporate increases every fourth row to shape the sleeve properly.
- Adjust Length:
Follow the color pattern: 20 rounds of green, 2 rounds of black, and 12 rounds of gray. Stop increasing after the gray section depending on the desired size.
Part 4: Assembling the Top
- Attach the Arms to the Body:
Use stitch markers to align and join the arms accurately to the body of the top using single crochets. - Create the Shoulder Ribbing:
- Chain 21 and follow a similar ribbing process.
- Crochet a strip with 160 rows, matching the number of stitches in the shoulder section.
- Join the strip to finish the off-shoulder design seamlessly.
Special Features
- Waffle Stitch: This textured pattern adds depth and character to the design, making it visually interesting and stylish.
- Stretchy Ribbing: Ensures a snug yet comfortable fit around the arms and shoulders.
- Custom Arm Design: Increases allow for personalized fitting.
Level of Difficulty
- Beginner/Intermediate: The processes involve basic single and double crochets, making it beginner-friendly. The waffle stitch and increases require slightly more attention, making it suitable for beginner to intermediate-level crochet enthusiasts.
Tutor’s Suggestions
- Adjust the number of rows based on desired size and fit (e.g., fewer increases if you have slim arms).
- Use a tape measure to ensure all ribbing and body measurements match perfectly.
- Color changes are flexible, allowing creativity and personalization.
Uses
This crocheted sweater top is not only versatile but fashionable! You can wear it casually with jeans or pair it with dresses or skirts for a more chic look.
Tip for Success
When counting rows and stitches, keep a notepad to track your progress. This can save you time and avoid mistakes, especially during increases and waffle stitch repetitions.
Conclusion
Creating this crocheted off-shoulder top is a rewarding process, blending simple techniques with an intricate finish. Ideal for beginners and above, this project lets you crochet something beautiful and wearable while refining your crochet skills.


