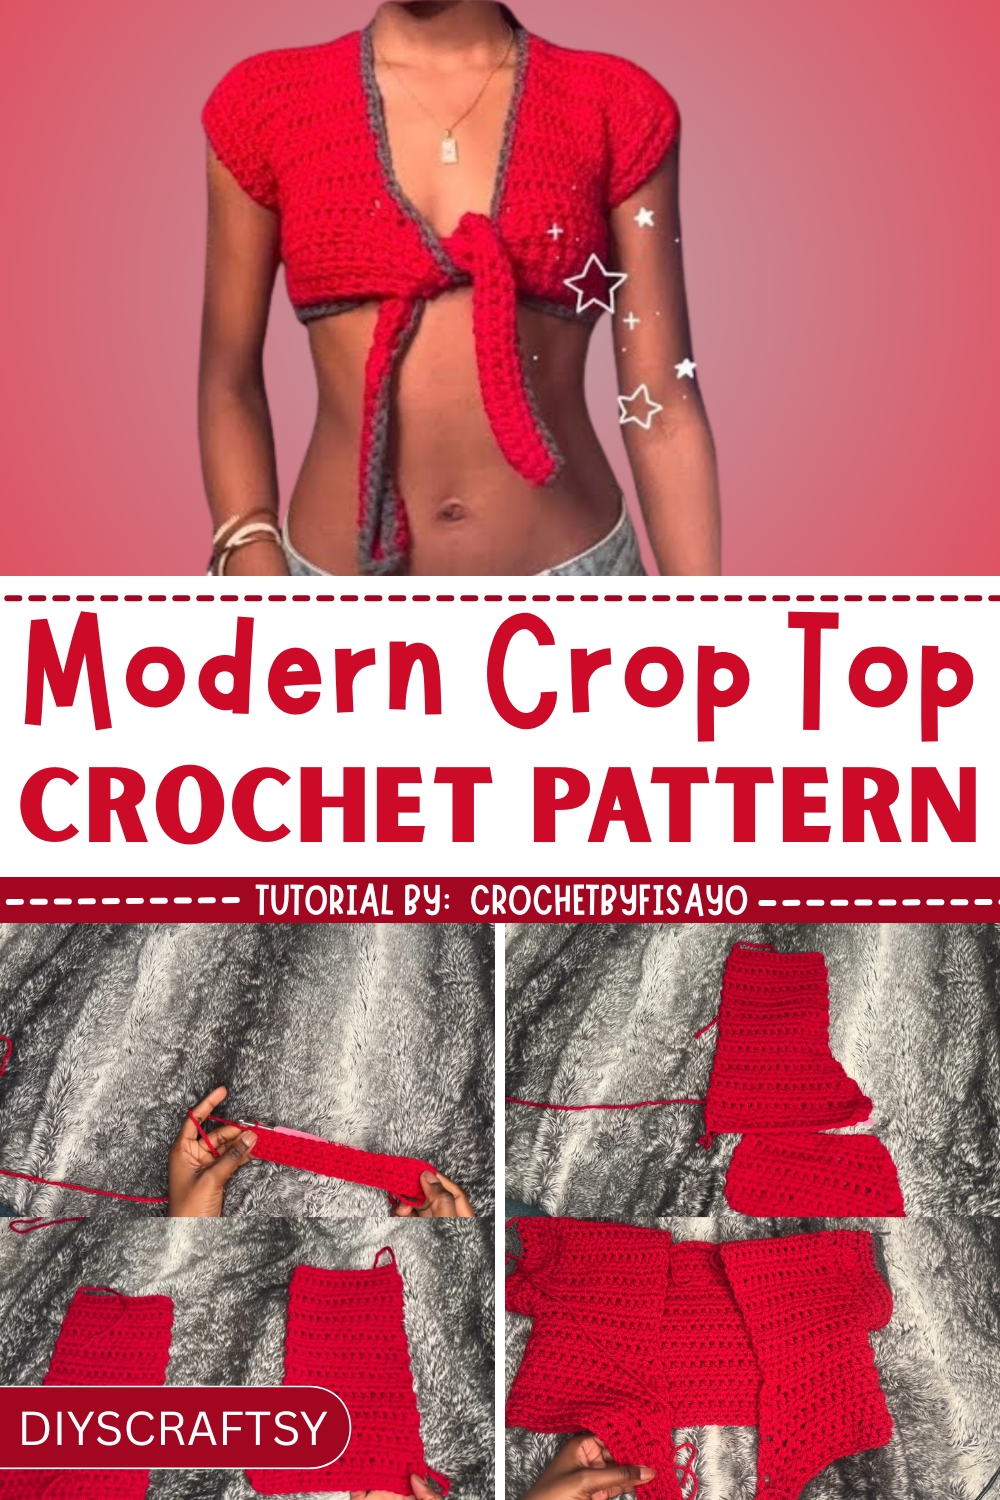
Turn heads with a playful Crochet Crop Top Pattern where comfy vibes meet chic style, and every stitch brings a dash of fun to your wardrobe.
In the realm of timeless fashion, the crochet crop top emerges as a captivating blend of texture and charm. Born from the fusion of tradition and individuality, this handmade garment serves as both a stylish statement and a functional wardrobe essential. Its intricate design speaks to the labor of love behind every stitch, transforming simple thread into a lightweight masterpiece that effortlessly enhances any outfit. Whether paired with high-waisted skirts for bohemian flair or layered over a swimsuit for relaxed summer vibes, it adapts to countless occasions with grace and ease.
Stunning Crochet Crop Top Pattern to Create Now
The benefits extend beyond aesthetics; its breathable construction ensures comfort on warm days, while the unique shapes and patterns make it a wearable reflection of personal creativity. Additionally, the crochet crop top offers an eco-friendly alternative to fast fashion, encouraging sustainability through mindful artistry. Versatile and endlessly customizable, it celebrates individuality in a way that mass-produced clothing simply cannot replicate.
For those seeking a thoughtful gift, this handmade creation radiates sentiment, making it as meaningful to give as it is to wear. Whether stylishly casual or dressed up for a more polished look, the crochet crop top embodies a harmonious balance of softness, beauty, and personal connection a timeless piece that celebrates both artistry and expression.
Step-by-Step Guide Described in the Video
Headings and Detailed Steps
Materials Needed
- Two different-colored yarns: one chunky and one less chunky
- Chunky yarn for some sections
- Thin yarn for details
- 5.5 mm crochet hook
- Stitch markers
- Yarn needle
- Yarn cutter (scissors)
Special Features
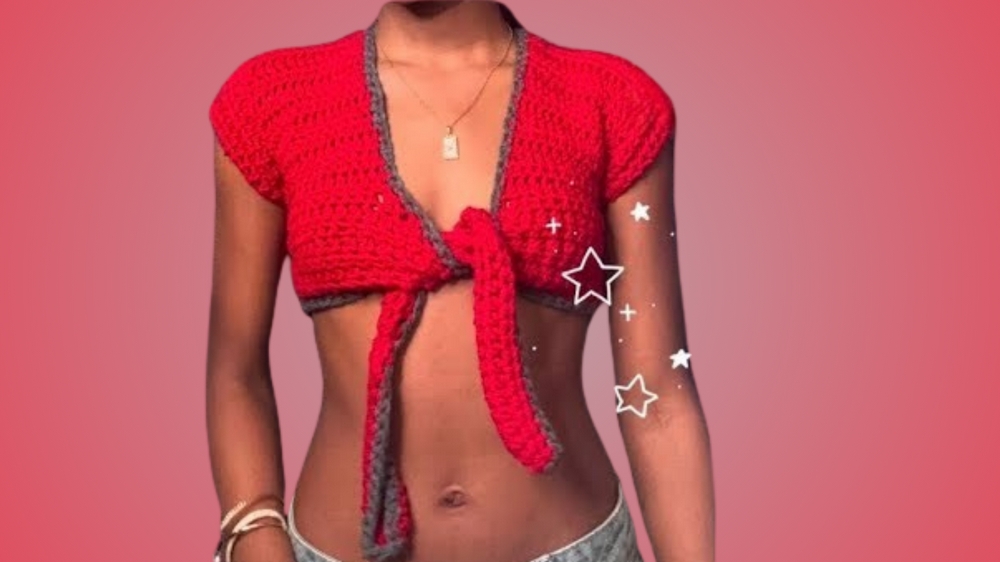
- Tie-front design for adjustability and style.
- Customizable sizing to fit different body shapes.
- Easy half double crochet stitches used throughout.
- Flexible pattern adaptable for creativity.
Level of Difficulty
- Beginner to Intermediate: While the stitches are straightforward, the project requires attention to stitch counts and measurements for custom fitting.
Step-by-Step Process
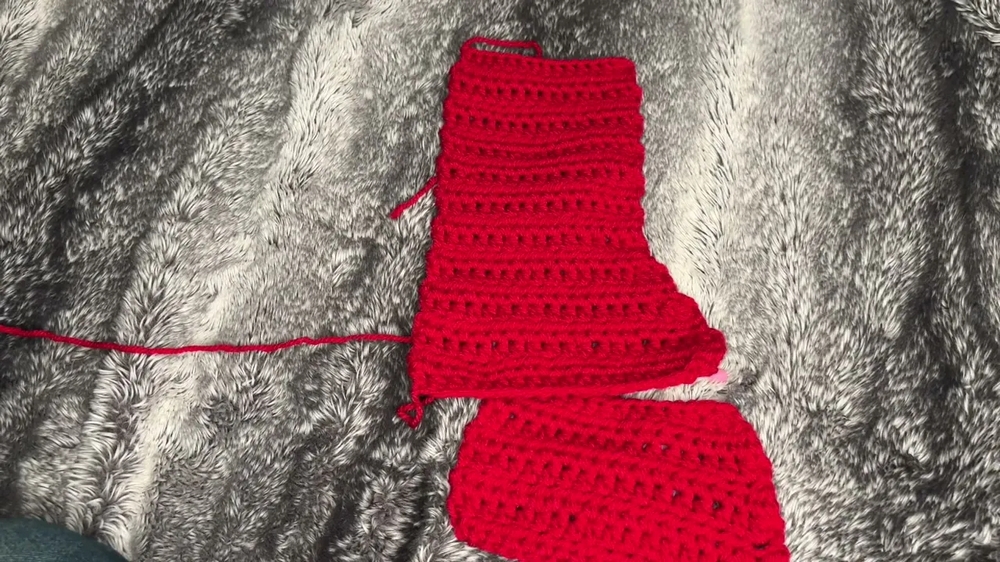
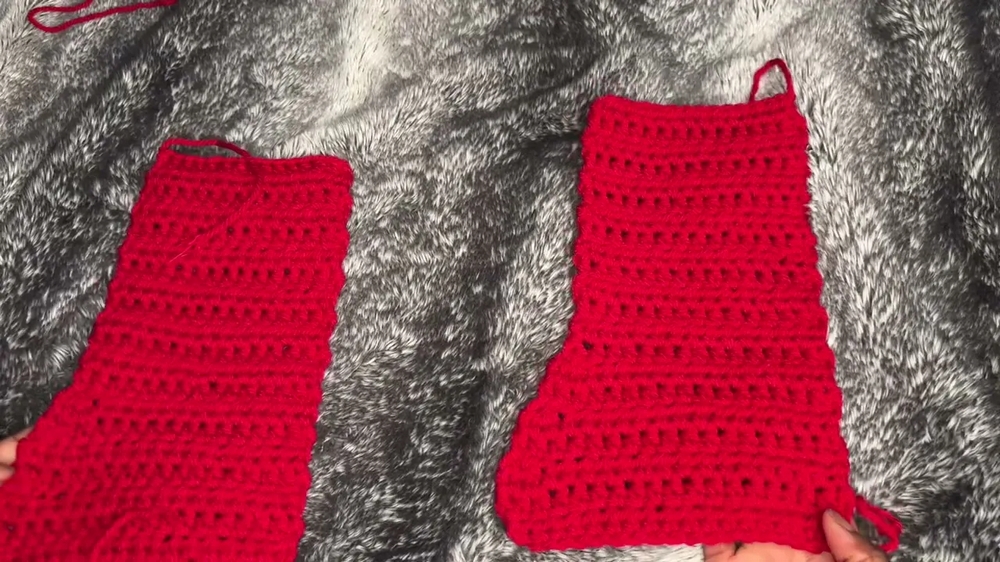
1. Creating Front Panels
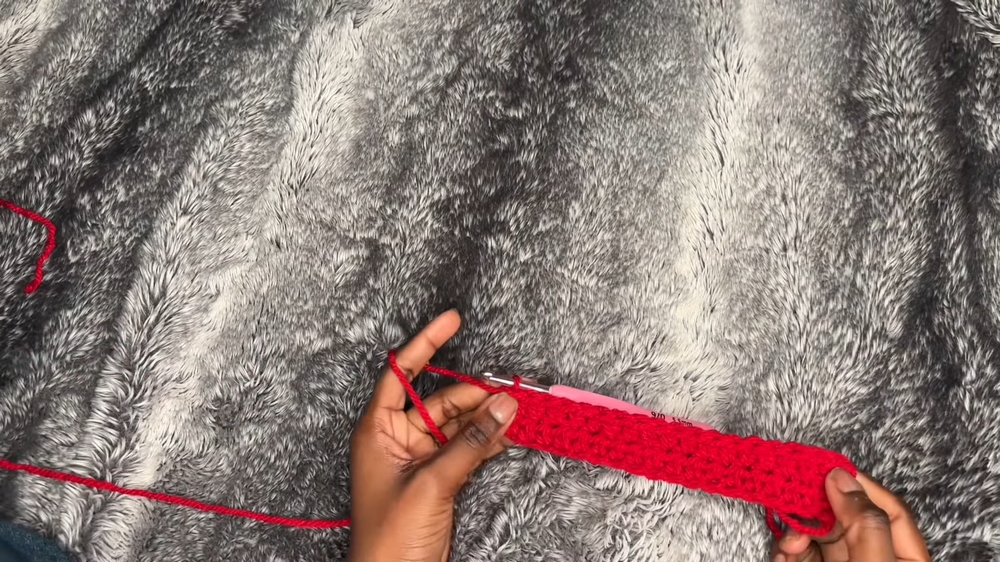
- Step 1: Make a slip knot and chain 18 (adjust chain count to fit your measurement). Add an extra chain for turning (19 total).
- Step 2: Work half double crochets (HDC) in each chain, keeping a stitch count of 18. Chain 2 at the end of each row and turn your work.
- Step 3: Alternate rows of even stitching with rows that involve decreasing on one side for a slanting effect. Decrease on odd-numbered rows only.
- Step 4: Stop decreasing once you reach the desired openness. Work straight rows until reaching the top of your shoulder measurement.
- Step 5: Repeat the process to make a second front panel.
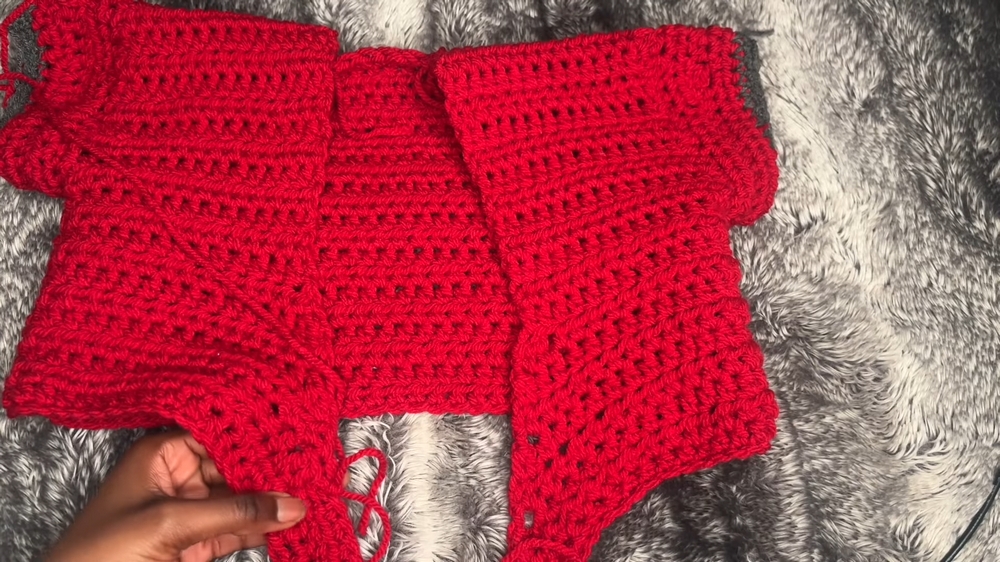
2. Creating the Back Panel
- Step 1: Chain enough stitches (about 32–33 chains for the chunky yarn) to form a wider panel that fits across your back.
- Step 2: Work even rows of HDC (no increases or decreases) for the same number of rounds as the front panels (approximately 21).
- Step 3: Finish the back panel and prepare for joining.
3. Connecting Panels
- Align the front panels with the back panel.
- Slip stitch the stitches along the shoulders to connect the panels, leaving the neck area open.
4. Adding Sleeves
- Step 1: Attach yarn to the armhole (outside edge). Chain 2 and work HDC around the edge.
- Step 2: Continue working rounds of HDC to create the sleeve. Adjust the length to fit your preference.
- Step 3: Finish with 1–2 rows of single crochet (SC) for a clean edge.
5. Finishing Edges
- Add optional border details to the edges, such as contrasting color single crochets.
- Add longer ties for the front closure by creating small chain extensions and stitching them onto the front edge.
Tutor’s Suggestions
- Adapt the chain counts and panel sizes to suit your body measurements.
- Always try the garment on during the process to ensure proper fitting.
- Use stitch markers to maintain symmetry and monitor stitch counts.
- Don't wait for perfection; embrace mistakes as part of the learning process.
Uses
- Ideal for casual wear or layering over other outfits.
- Highly customizable—can be made in various colors to match your style.
- Perfect for gifting, as it can be tailored to fit any recipient.
Materials Recap
- Chunky yarn for sturdy structure
- Thin yarn for detailed accents
- 5.5 mm crochet hook
- Stitch markers, needle, and scissors
Conclusion
This project is a fun and customizable crochet design suited for beginners and intermediate crocheters. The tutorial demonstrates how to adjust the piece to personal preferences, ensuring that the tie-front crochet top fits comfortably while remaining stylish. By following repetitive HDC patterns and focusing on accurate fitting, you can create a versatile garment that reflects your creativity.
Final Tip
Measure frequently while working on the panels and sleeves to avoid mismatched sizing. Don’t hesitate to tweak stitch counts, lengths, or openness based on your comfort and personal style preferences. This will result in a top that's uniquely tailored to you.


