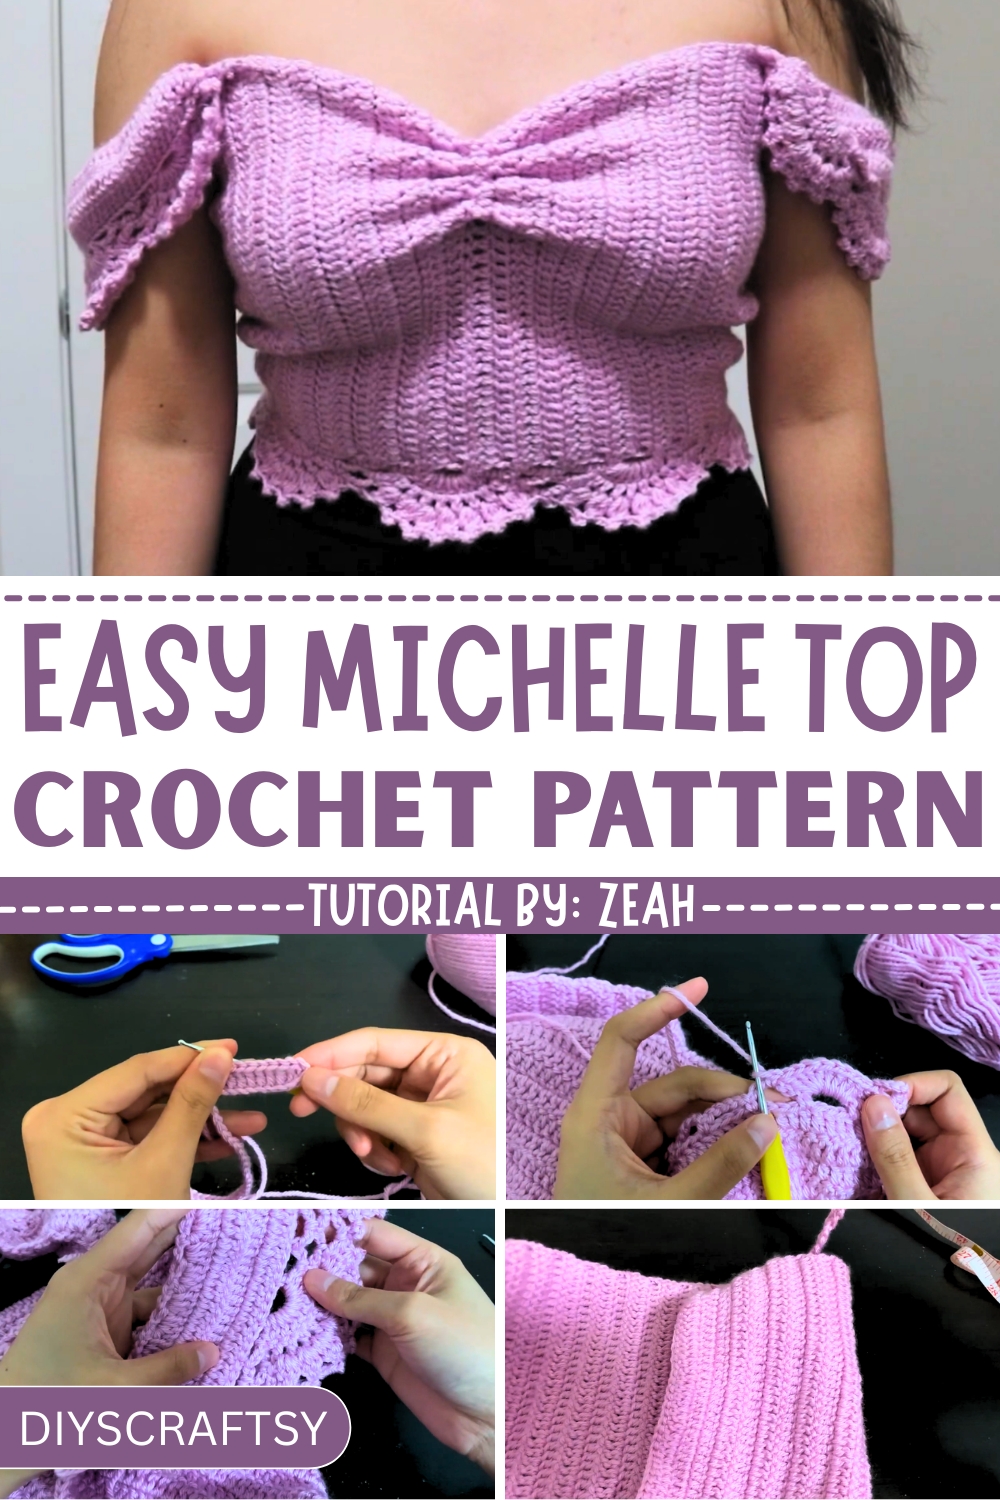
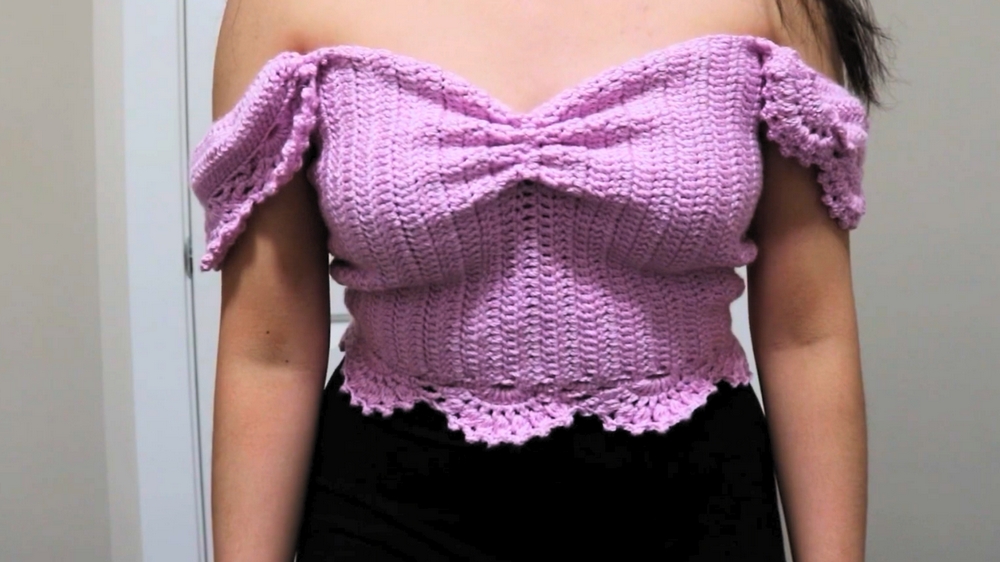
Redefine a modern twist with the Crochet Michelle Top Pattern, which is an elegant creation perfect for casual outings, and thoughtful gifting.
In a world where tradition meets modern flair, crochet has blossomed into a canvas for timeless artistry. The Crochet Michelle Top stands as a radiant example of how understated elegance can harmonize with everyday functionality. Its lightweight structure offers a breath of ease during sunny days, while its versatility lends itself to layering in cooler seasons effortlessly transitioning between casual outings and sophisticated gatherings. Whether styled for a weekend brunch or treasured as a thoughtful, handmade gift, this wearable piece bridges the gap between creativity and practicality.
stylish Crochet Michelle Top Pattern To Build Your Fashion
Far more than a simple garment, the Michelle Top captures the essence of mindful craftsmanship. Each stitch becomes a meditative act, offering a sense of calm in the process while yielding a piece brimming with personality and charm. Its approachable design welcomes creators of varied skill levels, inspiring confidence and creativity with every knot tied.
What emerges is not just a beautifully wearable item but a celebration of patience, care, and lasting artistry. By combining purpose, style, and the satisfaction of handmade accomplishment, the Crochet Michelle Top highlights the beauty and depth that comes with crafting something truly personal and unique—an ode to slow fashion and cherished creativity.
How to Make a Crochet Bustier Top – Step-by-Step Guide
Materials Needed
To get started, gather the following materials:
- Yarn: Approximately 200 grams of weight #4 yarn in the color "Cherish Pink" (the type and color can be customized). The tutor used Patons brand.
- Crochet Hook: A 2.5mm crochet hook.
- Other Tools: Scissors and a tape measure.
Level of Difficulty
The tutorial is beginner to intermediate level. Basic knowledge of stitches like chains, double crochets, and slip stitches is required.
Step-by-Step Instructions
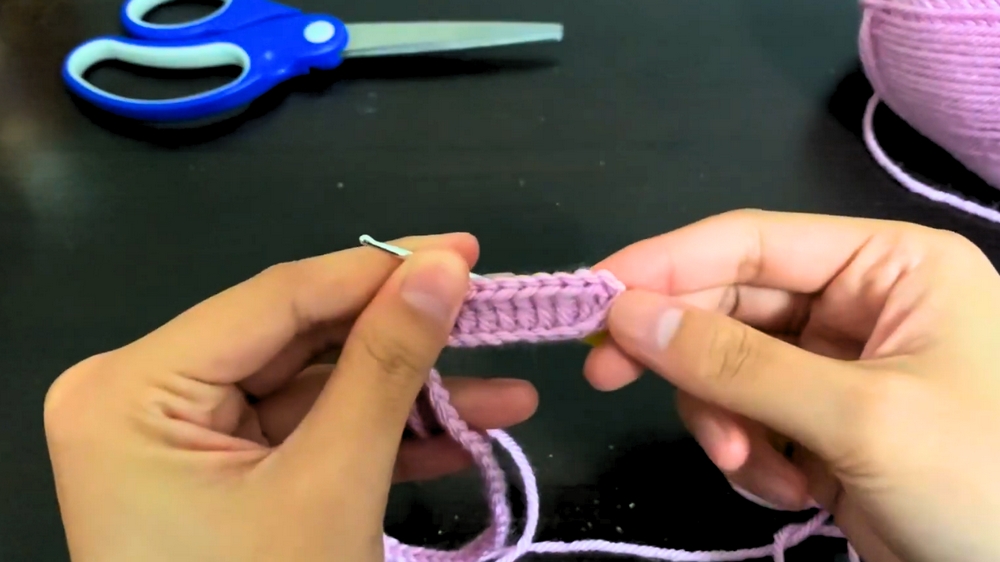
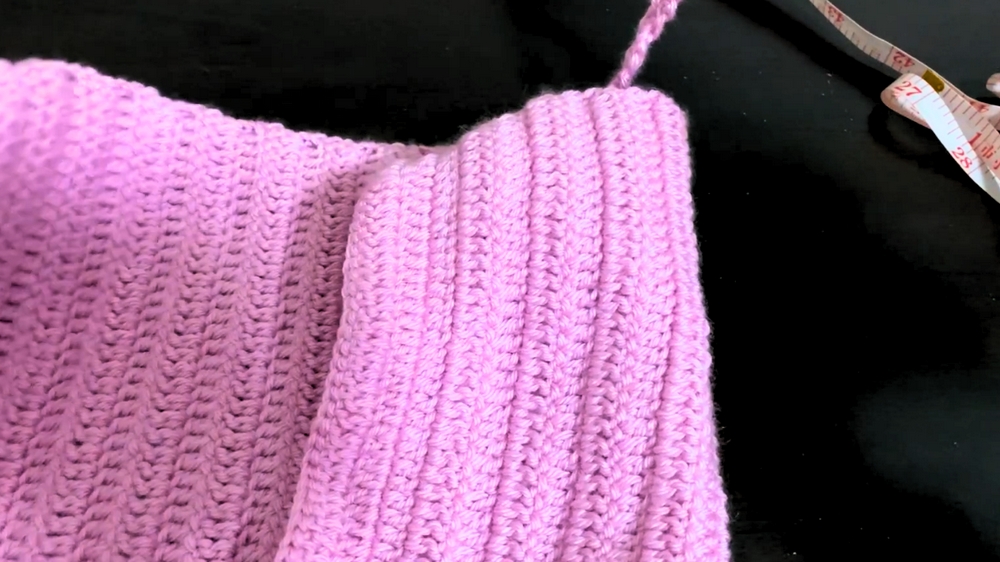
Step 1: Crochet the Body of the Bustier
- Start with Chains:
- Begin by making a chain long enough to wrap around your chest snugly. Adjust the number of chains based on your chest measurement.
- Add 3 extra chains at the end for turning.
- Double Crochet Rows:
- Make your first double crochet in the 4th chain from the hook and complete double crochets across the row.
- At the end of each row, chain 3, turn your work, and repeat double crochets across.
- Continue this pattern until the piece fits comfortably around your chest snugly. The tutor completed 45 rows.
- Cut and Fasten Off:
- Once you’re satisfied with the length, chain 1, cut the yarn, and secure it with a knot.
Step 2: Create the Bust Straps
- Mark Strap Positioning:
- Fold the bustier in half to determine where to attach the straps. Symmetry is key, so start by attaching the first strap and use it as a reference for the second.
- Attach the Strap:
- Insert your hook at the chosen attachment point, tie the yarn securely, and chain 3.
- Build the Strap Pattern:
- In the next loop, create a double crochet. Then, repeat this sequence:
- Chain 3.
- Turn your work.
- Double crochet in the next space.
- Continue alternating this pattern until the strap reaches your desired length. The tutor recommends a strap length of 25 centimeters (10 inches).
- In the next loop, create a double crochet. Then, repeat this sequence:
- Secure the Strap to the Back:
- Attach the completed strap to the back side of the top using slip stitches.
- Double-check that the strap is not twisted before securing.
- Repeat for the Second Strap:
- Follow the same steps to create the second strap and attach it symmetrically.
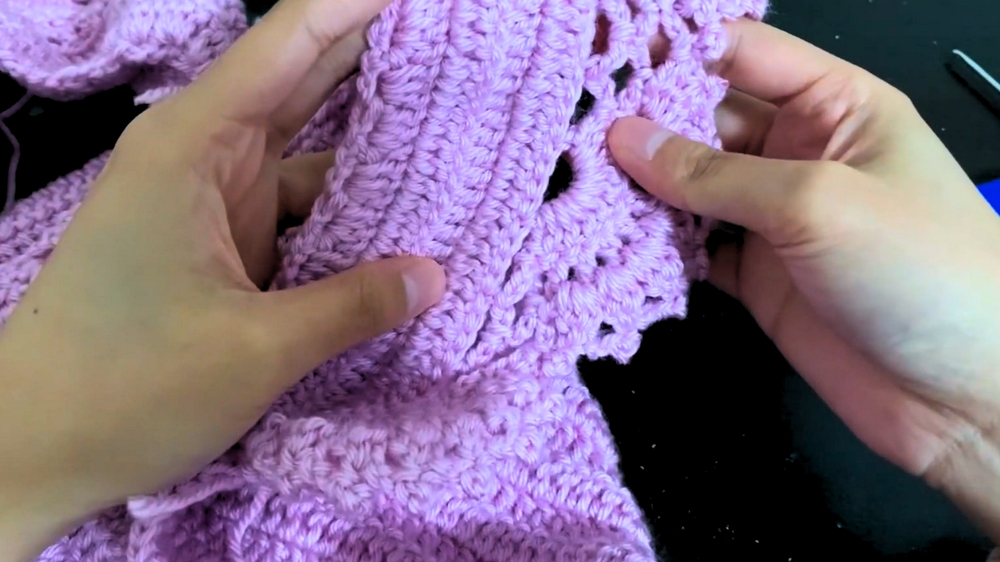
Step 3: Add Decorative Features (Optional but Stylish)
The tutor adds a patterned detail to enhance the top’s aesthetic appeal:
- Create mini decorative motifs along the bottom of the bustier and on the straps (e.g., clusters of double crochets, chain loops, etc.).
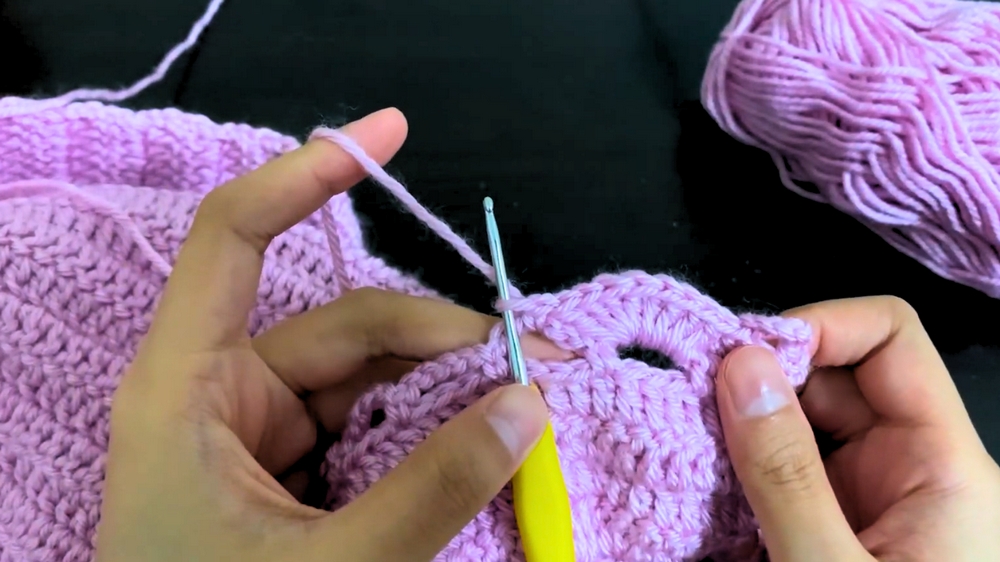
- Use slip stitches to secure the designs.
Step 4: Add the Front Ruched Tie
- Prepare the Tie Cord:
- Crochet a chain of 90 stitches to make the ruching tie cord.
- Cut and secure the yarn.
- Attach the Cord:
- Thread the cord through the middle section of the front panel by weaving it up and down through the stitch gaps.
- Pull tight to create a cinched, ruched look. Secure the tie with a knot at the end.
Step 5: Create and Attach Back Straps
- Make a Long Chain:
- For adjustable back straps, crochet a chain of 350 stitches or adjust the number to your preference.
- Complete the Strap:
- Slip stitch down the entire chain to create a sturdy strap.
- Attach the Strap:
- Securely attach the strap to the back of the bustier, ensuring it is evenly positioned.
Special Features of the Bustier Top
- Customization: The top can be tailored to fit any body size and shape. Adjust the length, strap positioning, and decorative details.
- Adjustability: Ruching ties at the front and long back straps allow for an adjustable, snug fit.
- Stylish Design: The addition of decorative edges and a ruched front elevate the top's overall look.
Tutor's Suggestions
- Use a tape measure frequently to ensure the top fits properly around your chest and straps are the desired length.
- Choose a sturdy yarn with slight elasticity to ensure the bustier holds its shape.
- If the ruching is not even, feel free to go back and adjust the weave of the tie cord.
Possible Uses
- Beachwear or summer outfits.
- Lounge or casual day tops.
- Layered looks with jackets, cardigans, or shirts.
Tip for Perfecting Your Crochet Bustier Top
To prevent the bustier from slipping or becoming misshapen, wash your finished top gently by hand and let it air dry flat. This maintains the yarn’s integrity over time.
Conclusion
Congratulations! You’ve completed a stunning crochet bustier top that’s both stylish and comfortable. This project is fun, versatile, and a great test of your crochet skills. Add your final touches, like beadwork or custom colors, to make it uniquely yours.


