Imagine a necklace with a beautifully molded wire, wrapping a stunning stone pendant, glowing softly on your chest. The Wire Wrapped Stone Pendant we brought today offers this and much more. Designed for both beginners and expert artisans, this DIY necklace project brings together the raw beauty of naturals stones and the delicate artistry of wire wrapping. You will find the complete step by step making with the visuals and in written form just below. It features a 12mm round cabochon encased in a delicate and stylish wire-wrapped design in copper color. An elegant and modern jewelry for formal events, personalized gift or for mindfulness and meditation practices.

Designer: @ellieshandcrafted
Making DIY Wire Wrapped Stone Pendant
Materials Needed:
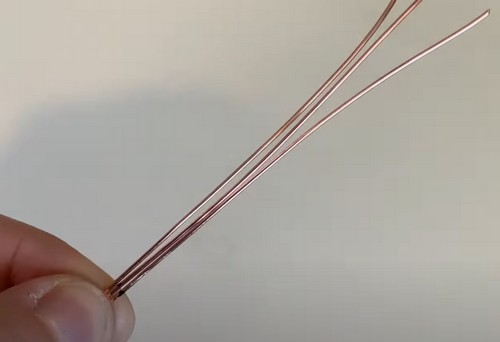
- A ruler
- Three 6-inch segments of 20 gauge wire
- 28 gauge round wire for weaving
- A 12 millimeter round cabochon
- Chain nose pliers
- Round nose pliers
- Flush Cutters
Step by step Making
Prepare Base Wires:
-
- Mark the center of each 20 gauge wire at the 3-inch mark. Make sure the wires are parallel to each other.
Start Weaving:
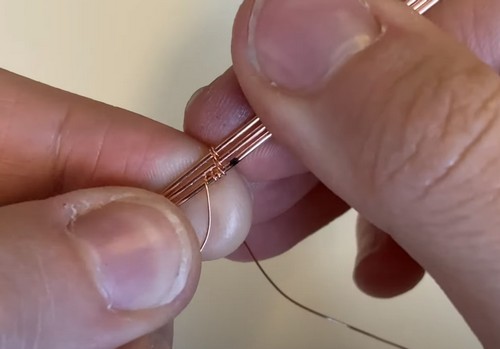
-
- Begin weaving by wrapping the 28 gauge wire around the bottom base wire three times.
- Wrap once around the bottom two base wires, ensuring they sit nicely together.
- Proceed to weave using a modified sumac weave technique: alternating wraps around two wires, then between them, and finally around the single top wire, with a total of five rotations around the base wires.
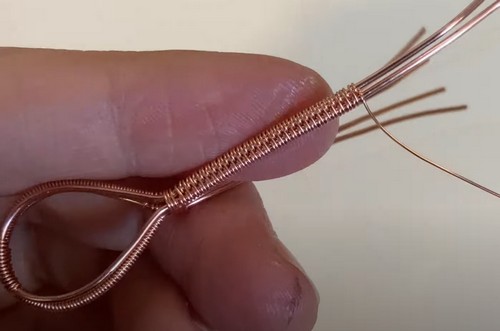
Weave Compression:
-
- Slightly compress the weave using chain nose pliers.
- Secure the weave by wrapping the weaving wire three more times around the bottom base wire and trim off the excess.
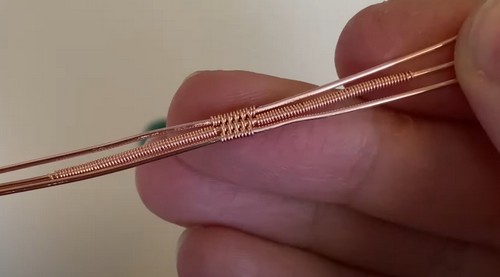
Forming the Frame:
-
- Coil around the middle base wire for about half an inch to three quarters of an inch.
- After coiling both sides to a total of three and three-quarters inches, use the stone to shape the wire frame around it.
- Bend the wires straight up where the coil ends to prepare for setting the stone.
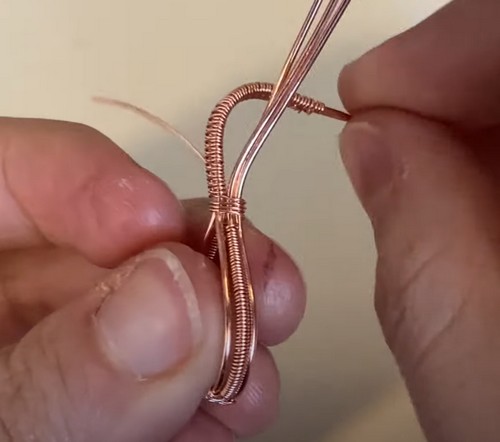
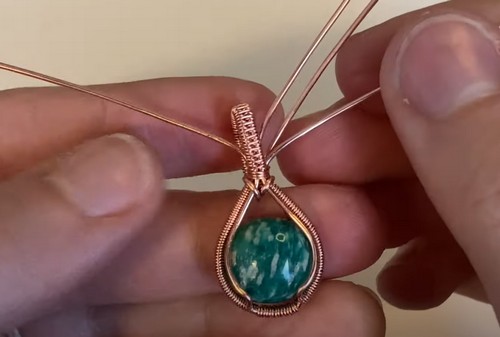
Weave the Setting:
-
- Wrap the weaving wire around the back base wire on the right side three times to start.
- Begin wrapping around all of the wires, binding them together three times, ensuring they sit nicely.
Create the Front Weave:
-
- Move to the front and start another modified sumac weave using the front two wires. Continue this weave for about three quarters of an inch to an inch to create the bail.
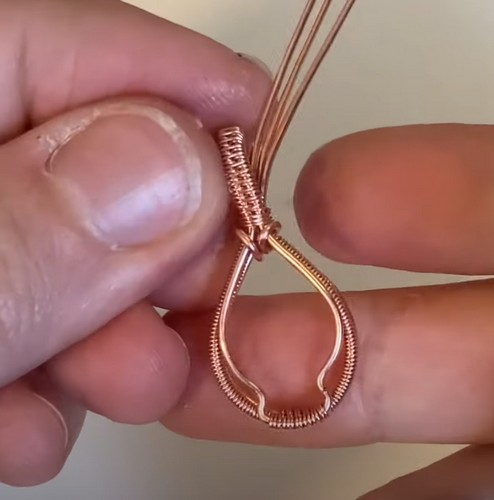
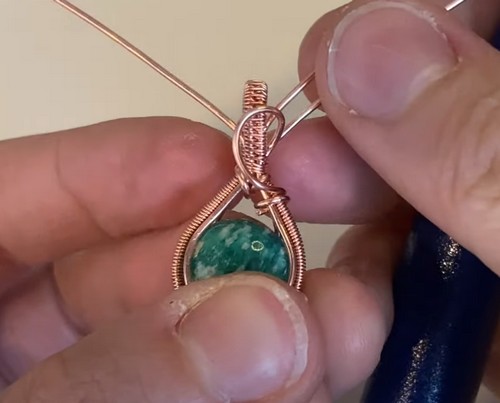
Securing the Bail:
-
- Complete the sumac weave around the bottom base wire three times to secure it, finishing the weave.
- Pull three wires to the right and one to the left, shaping the bail over these wires.
Attach and Secure Wires to Frame:
-
- Use the remaining base wires from the weave and thread them through the frame, securing the bail in place. Trim any excess wire.
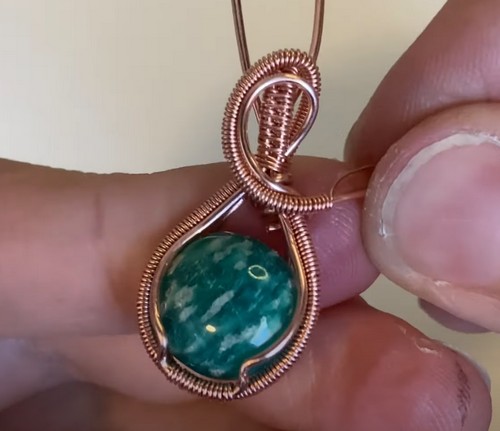
Adjusting the Frame:
-
- Bend the front of the frame to fit the stone snugly, adjusting the prongs for a secure fit.
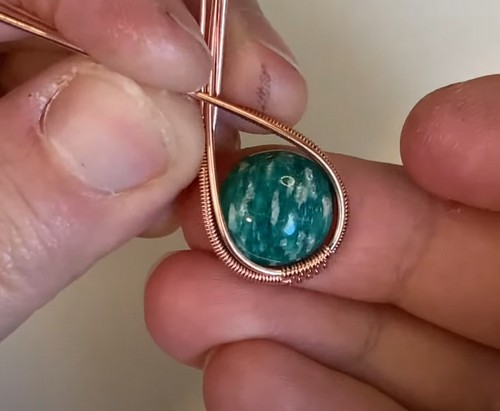
Final Touches:
-
- Insert the cabochon into the frame, adjusting wires to ensure it sits securely.
- Create swirls or additional decorations with the remaining wires as desired and secure them to the frame for additional support and aesthetic.
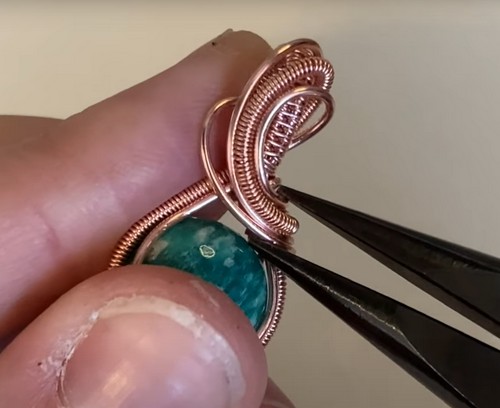
Complete the Pendant:
-
- Make any final adjustments to ensure the pendant holds its shape and the stone is secure.
Finishing Up:
Congratulations! You've now finished your wire weave pendant. Feel free to customize your pendant by adding more decorative elements with the remaining wires based on your personal style.
Attaching with the cahin:
Once you've completed constructing the pendant, the next step would be to attach it to the chain.

Also see the video tutorial for further assist: