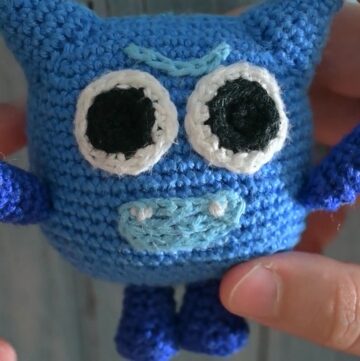
Bring playful charm with this Free crochet Hello Kitty Eggplant Pattern, making cute, whimsical creations that bring joy, fun, and a unique handmade touch.
Crocheting charming and playful designs has become a beloved creative outlet for many, offering the perfect blend of relaxation and artistry. One such delightful creation is the "Crochet Hello Kitty eggplant pattern," which combines the whimsy of Hello Kitty with the unique, quirky shape of an eggplant.
Crochet Hello Kitty Eggplant Pattern To Brighten Any Room
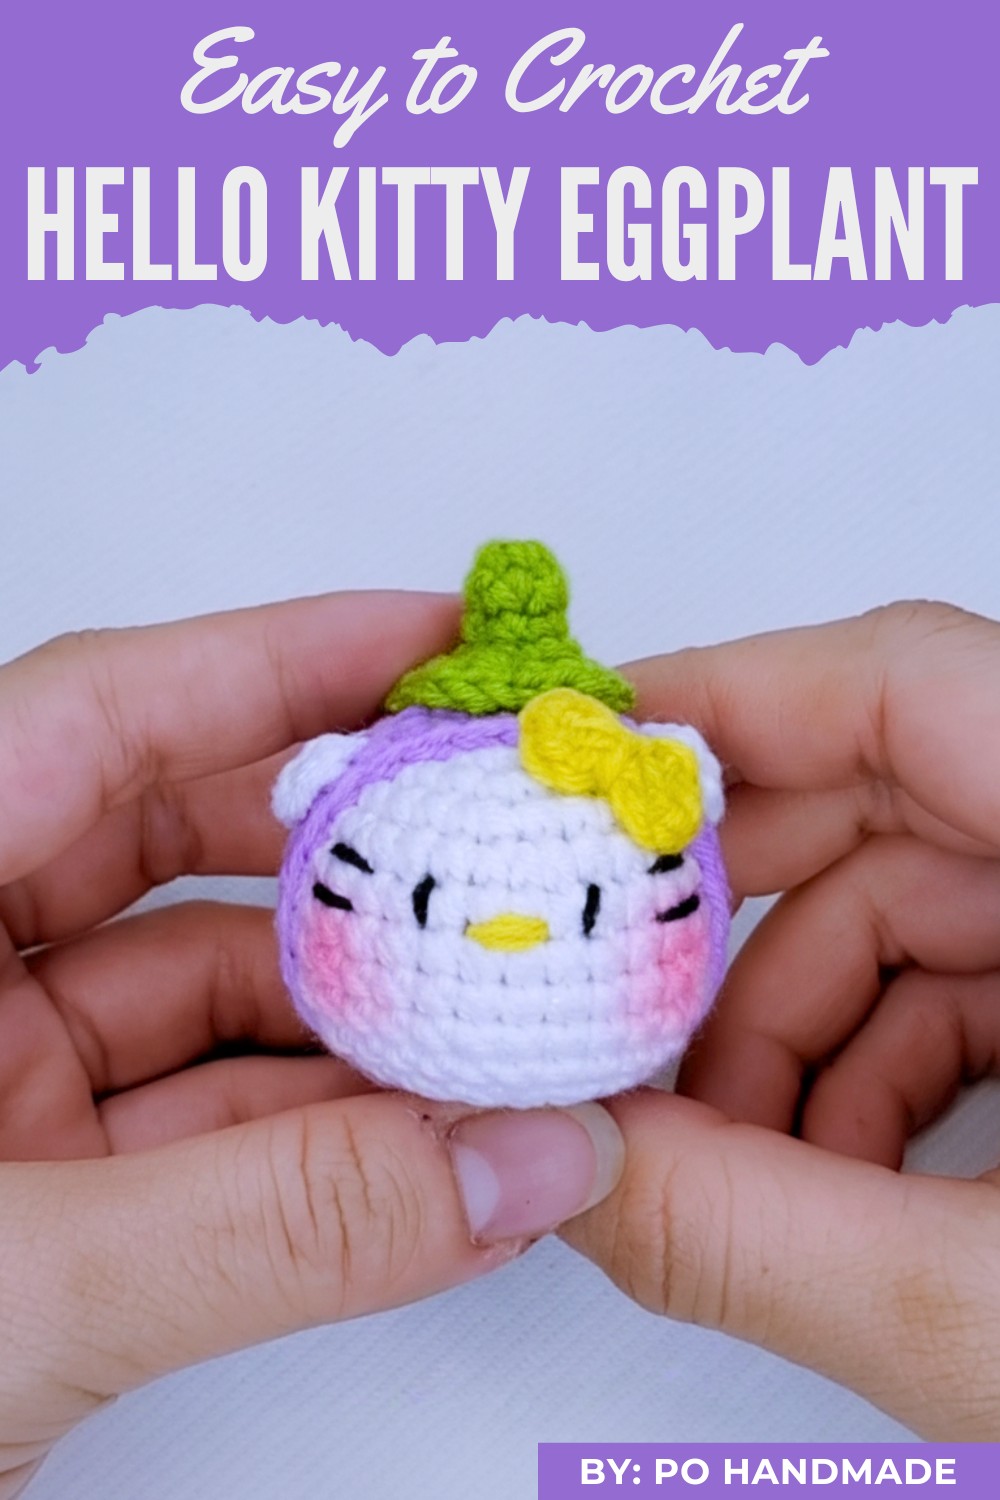
This pattern not only stands out for its imaginative character but also makes for a wonderful handmade gift, desk companion, or nursery decoration. Its cheerful design holds universal appeal, perfect for fans of all ages and those who adore cute and cartoon-inspired crafts.
Amigurumi Hello Kitty Eggplant
Create this uniquely adorable Amigurumi: a charming Hello Kitty figure nestled inside a crocheted eggplant. This project involves assembling multiple small parts, perfect for honing your amigurumi skills and resulting in a cute, vegetable-themed character toy.
Uses
-
Make a whimsical Stuffed Toy or collectible Amigurumi figure.
-
Create a unique Decorative Item for a shelf or desk.
-
Produce a distinct Handmade Gift for Hello Kitty fans.
Materials
-
Yarn:
-
White yarn for the head and ears.
-
Purple yarn for the eggplant body/shell.
-
Green yarn for the stem and calyx.
-
Yellow yarn for the bow and nose.
-
Black yarn for the eyes and whiskers.
-
-
Tools:
-
A crochet hook (size not specified in video, but typically 2.0mm - 3.0mm for amigurumi).
-
Tapestry needle for sewing and embroidery.
-
Scissors.
-
Stuffing (polyester fiberfill).
-
Optional: Fabric glue for the stem, pink blush for cheeks.
-
Special Features
-
2-in-1 Design: You create a separate Hello Kitty head and then insert it seamlessly into a larger eggplant-shaped shell, resulting in the unique final look.
-
Simple Shaping: You achieve the round head and tapered eggplant shape using standard amigurumi increase (V) and decrease (A) formulas.
-
Detailed Embroidery: You use thin strands of black and yellow yarn to meticulously embroider the classic Hello Kitty facial features (eyes, whiskers, and nose).
-
Distinct Calyx/Stem: The stem features a row of double crochet stitches that fan out, giving the calyx a realistic, jagged edge.
Level of Difficulty
This project is Intermediate. You need to execute standard Amigurumi techniques (Magic Ring, SC, Inc, Dec) across multiple small, separate pieces and accurately join them. The difficulty increases with the precise facial embroidery and the crucial step of nesting and decreasing the outer shell around the inner head.
Tutor's Suggestions
-
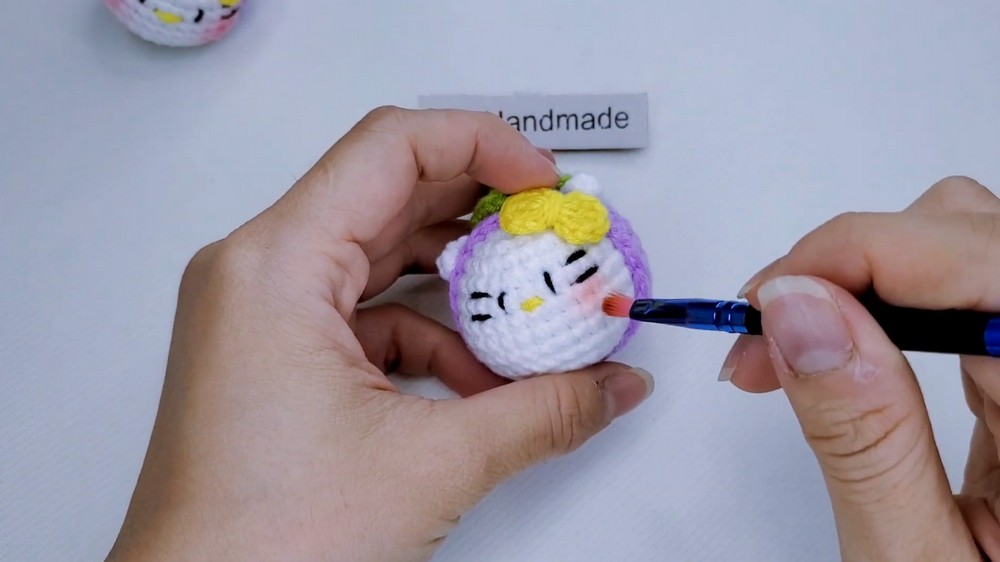
Tight Tension: Maintain a firm, consistent tension in your Single Crochet (SC) stitches to prevent stuffing from showing through.
-
Flatten Whiskers: Use only 2 strands of black yarn for the facial details. This ensures the whiskers lay flat and appear neat.
-
Cinching the Head: After stuffing the head, you must weave the needle through the front loops of the final 12 stitches and pull tight to completely close the opening before inserting it into the eggplant shell.
Step-by-Step Details
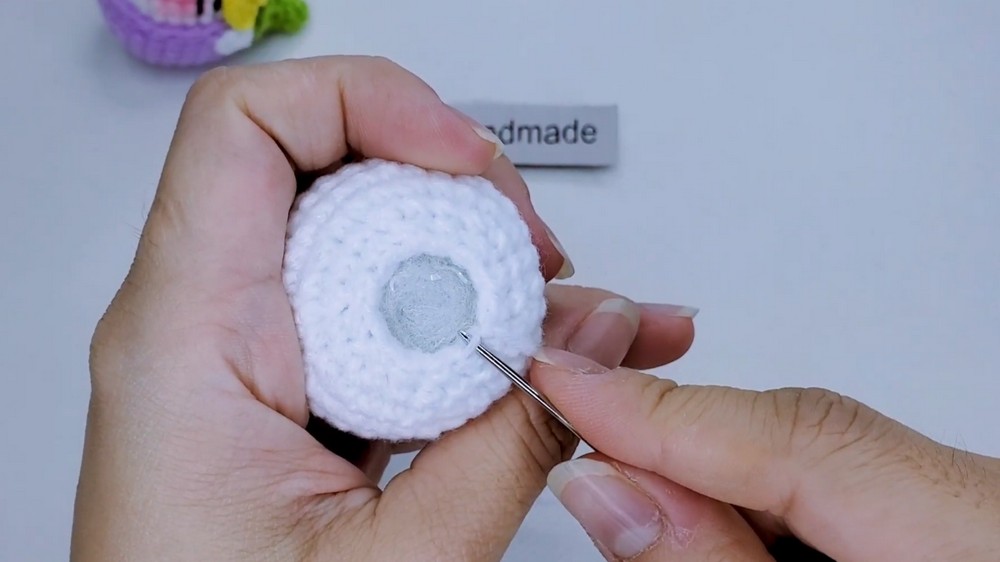
Part 1: Crochet the Hello Kitty Head (White Yarn)
-
R.1 (Start): Make a Magic Ring and work 6 SC.
-
R.2 (Increase): Work 6 increases (2 SC in each st) to get 12 SC.
-
R.3 (Increase): Repeat (1 SC, 1 Inc) x 6 to get 18 SC.
-
R.4 (Increase): Repeat (1 SC, 1 Inc, 1 SC) x 6 to get 24 SC. The increases are scattered.
-
R.5 (Increase): Repeat (3 SC, 1 Inc) x 6 to get 30 SC.
-
R.6-10 (Height): Work 5 rounds of 30 SC.
-
R.11 (Decrease): Repeat (3 SC, 1 Dec) x 6 to get 24 SC.
-
R.12 (Decrease): Repeat (1 SC, 1 Dec, 1 SC) x 6 to get 18 SC. The decreases are scattered.
-
R.13 (Decrease): Repeat (1 SC, 1 Dec) x 6 to get 12 SC.
-
Close: Stuff the head firmly. Cut the yarn, leaving a long tail. Use a tapestry needle to sew through the remaining 12 stitches and cinch the opening closed. Weave in the tail.

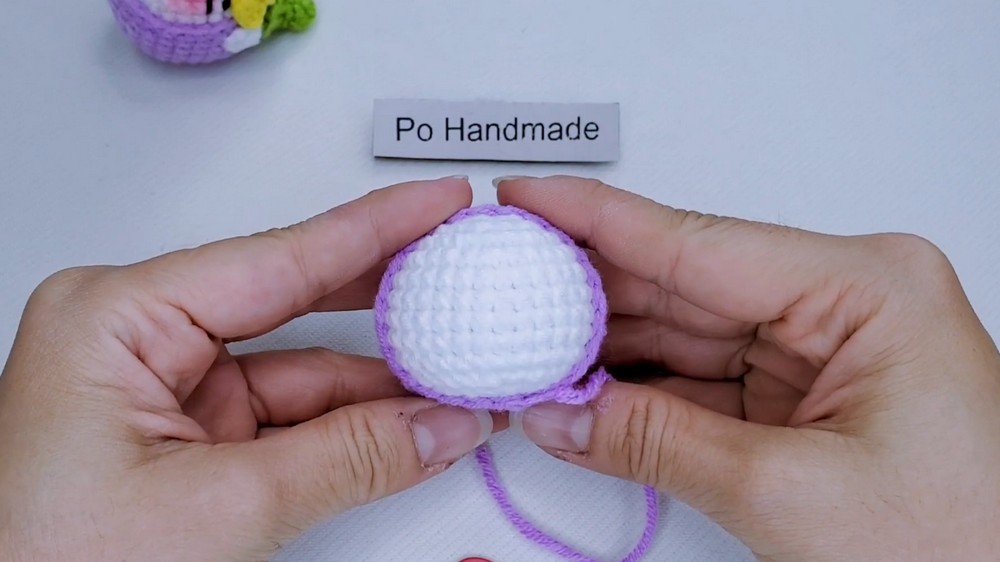
Part 2: Crochet the Eggplant Body/Shell (Purple Yarn)
-
R.1 (Start): Make a Magic Ring and work 6 SC.
-
R.2-5 (Increase): Follow the same increase pattern as the head (R.2-5) to reach 30 SC.
-
R.6-10 (Height): Work 5 rounds of 30 SC.
-
R.11 (Joining/Decrease): Insert the finished white head into the purple shell. With the white head inside, work (3 SC, 1 Dec) x 6 to get 24 SC. This round joins the white head to the purple shell.
-
Fasten Off: Cut the yarn and weave in the end.
Part 3: Crochet the Stem/Calyx (Green Yarn)
-
R.1 (Start): Make a Magic Ring and work 6 SC.
-
R.2-3 (Height): Work 2 rounds of 6 SC.
-
R.4 (Increase): Work 6 increases (2 SC in each st) to get 12 SC.
-
R.5 (Leaf Edge): Work the leaf clusters around:
-
(1 SC, Ch 1, 1 Double Crochet, Ch 1) in the first stitch.
-
Skip the next stitch.
-
Repeat the leaf cluster sequence around.
-
-
Fasten Off: Cut the yarn and bring the tail to the underside.
Part 4: Crochet the Ears (White Yarn - Make 2)
-
Shape: Chain 3.
-
Turn: Skip the first chain from the hook.
-
Work: Work 1 SC in the next chain. Work 1 Double Crochet (DC) in the last chain.
-
Fasten Off: Leave a tail for sewing.
Part 5: Crochet the Bow (Yellow Yarn)
-
Form: Make a Magic Ring.
-
Side 1: (Chain 2, 3 Double Crochet, Chain 2, Slip Stitch) into the ring.
-
Side 2: (Chain 2, 3 Double Crochet, Chain 2, Slip Stitch) into the ring.
-
Finish: Pull the starting tail tight to cinch the ring. Wrap the remaining yarn end around the center of the bow 2-3 times to secure the shape.
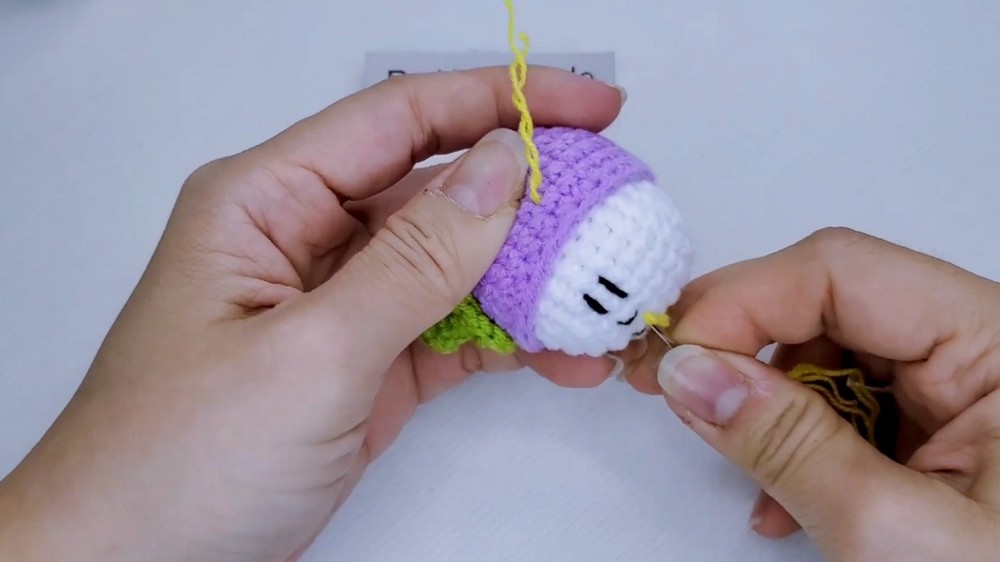
Part 6: Assembly and Finishing
-
Embroider Face: Use 2 strands of black yarn.
-
Embroider the eyes on R.5 of the white head, separated by 3 stitches.
-
Embroider 3 whiskers on each side of the face.
-
Use 2 strands of yellow yarn to embroider a small horizontal stitch for the nose between the eyes.
-
-
Attach Ears: Sew the ears onto the head between R.2 and R.3.
-
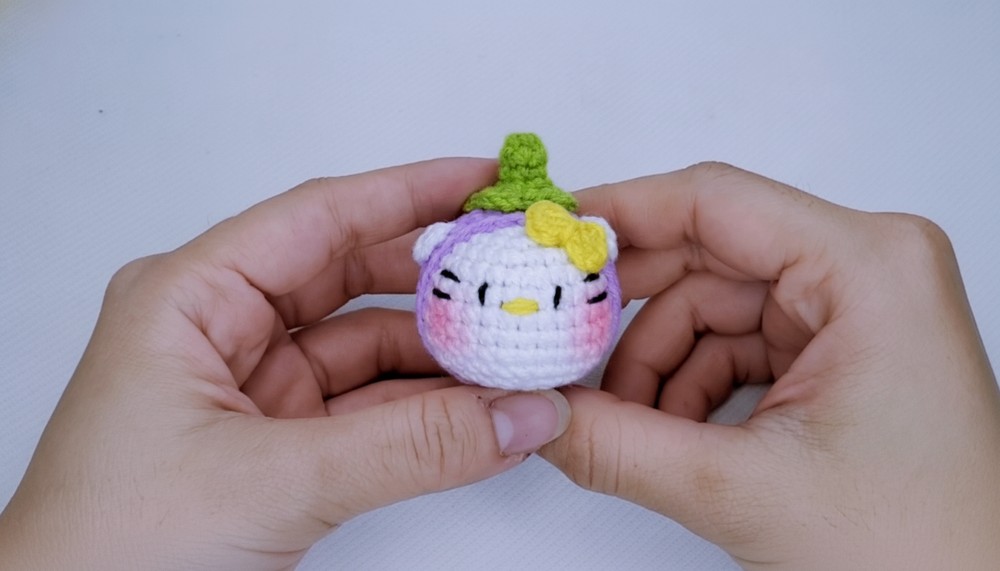
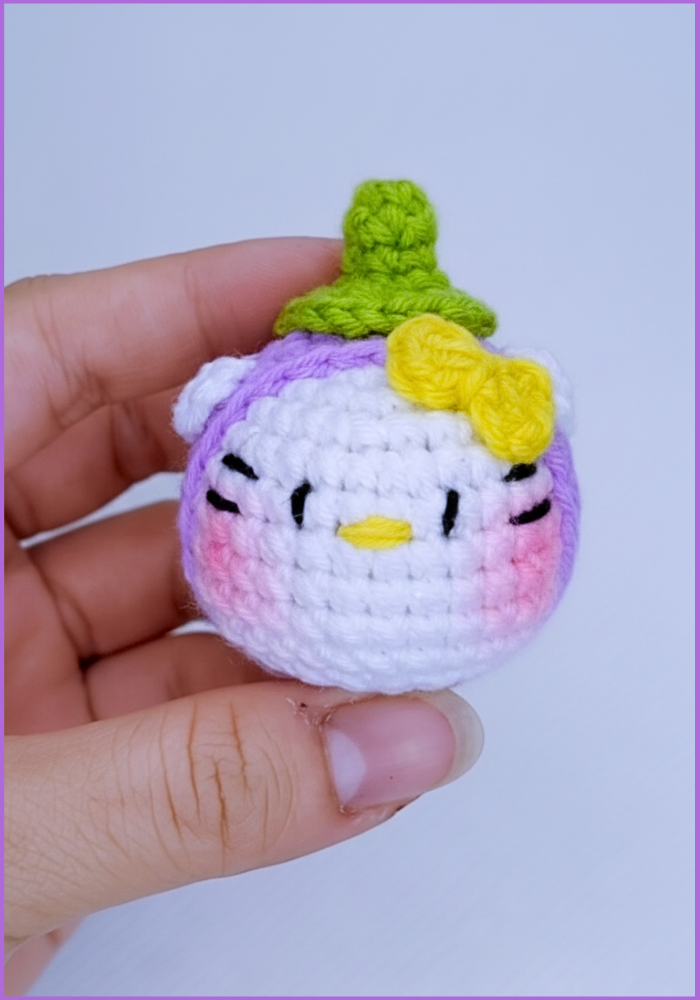
Attach Stem: Sew or glue the green calyx/stem onto the very top of the purple eggplant body.
-
Attach Bow: Glue or sew the yellow bow next to one of the ears.
-
Add Cheeks: Use a small amount of pink blush or chalk to gently add rosy cheeks beneath the eyes.
Conclusion
You have finished the unique Hello Kitty Eggplant Amigurumi! You used basic crochet techniques to combine two separate forms into one adorable, whimsical toy, ready for display.
Tip
Use Thin Yarn for Embroidery: When detailing the face, separate your 4-ply yarn into two thinner strands. This prevents the features (especially the eyes and whiskers) from looking too thick or bulky and keeps the face neat and defined.
The pattern allows crafters of varying skill levels to produce something beautiful, with clear instructions that encourage both creativity and skill building. Whether you're an advanced crocheter or a beginner seeking a fun challenge, this pattern offers an engaging project. The "Crochet Hello Kitty eggplant pattern" ensures that the end result is both functional and decorative, ideal for enthusiasts or collectors of unique crochet novelties.
By working on this project, you not only improve your crocheting techniques but also create a distinctive piece that sparks joy. The combination of Hello Kitty's iconic charm and the playful shape of an eggplant adds a delightful twist to traditional crochet patterns, making it a standout addition to any handmade collection.