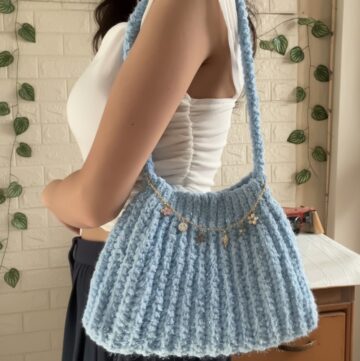
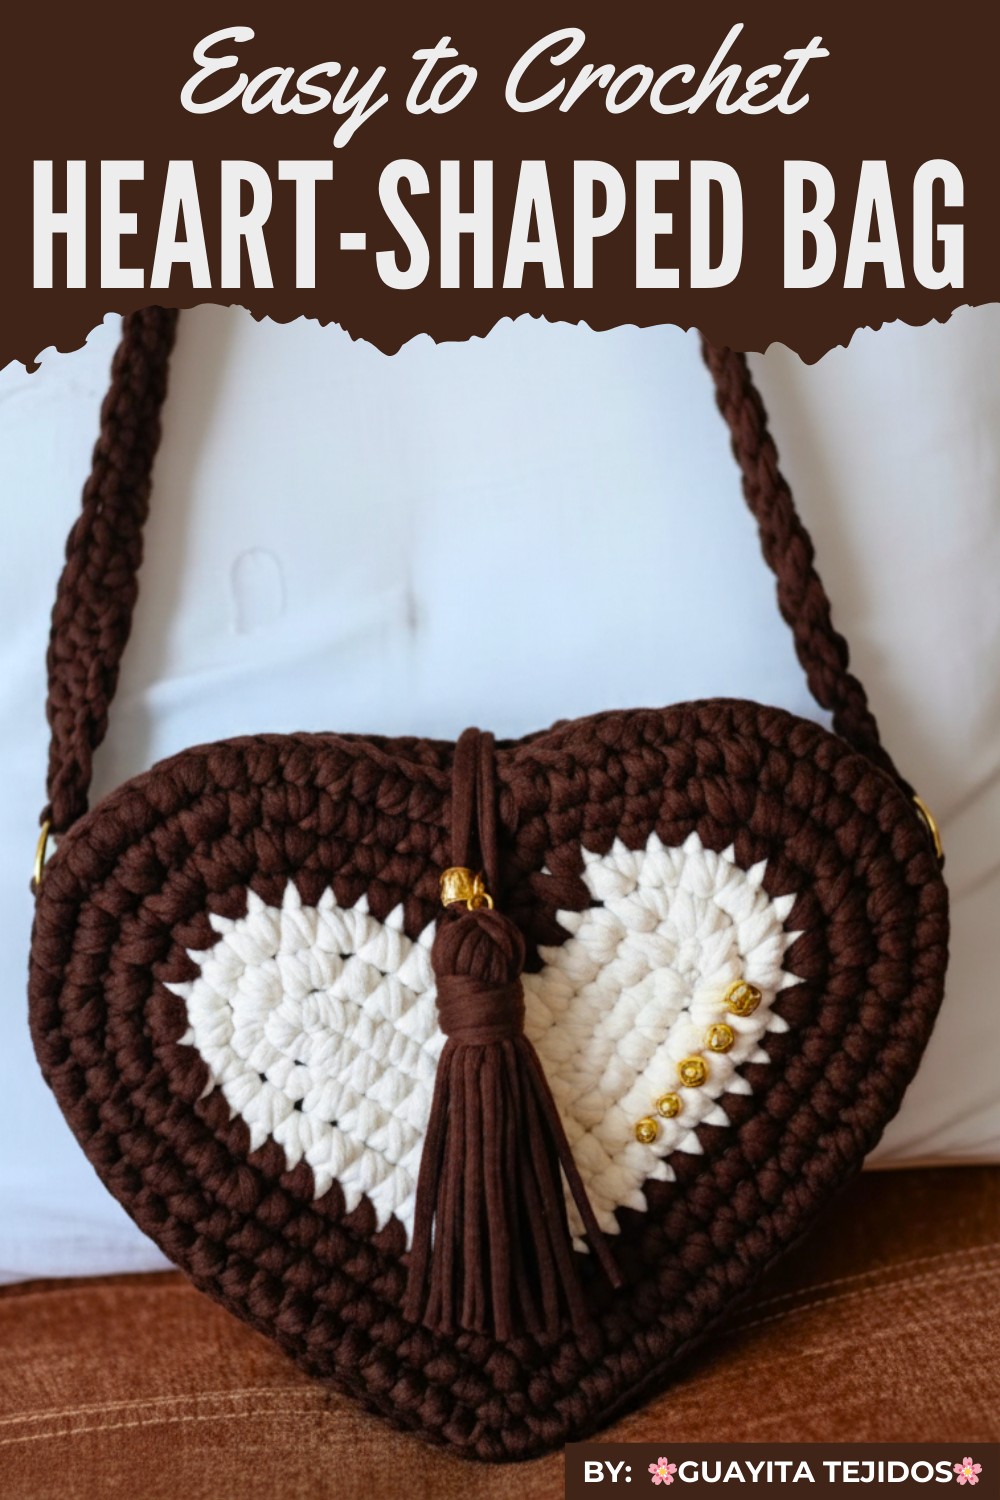
Enjoy making a beautiful crochet heart shape bag with this easy-to-follow guide that’s perfect for all skill levels and add a charming accessory to your collection.
Celebrate creativity with a delightful crochet project perfect for Valentine's Day or any special occasion. This heart-shaped bag combines charm and functionality, crafted with an elastic thread approximately 5.5mm thick for flexibility and durability. The design incorporates details like precise stitch alignment and woven handles for added elegance.
Crochet Heart Shape Bag Pattern to Try
Following the step-by-step guide ensures a uniform, polished result while teaching techniques like slip knots, interspersed increases, and thread transitions. The spacious yet compact bag offers a stylish solution for carrying essentials. Complete with a custom tassel and sturdy hardware, this project highlights artistry and skill, making it an enjoyable and rewarding craft.
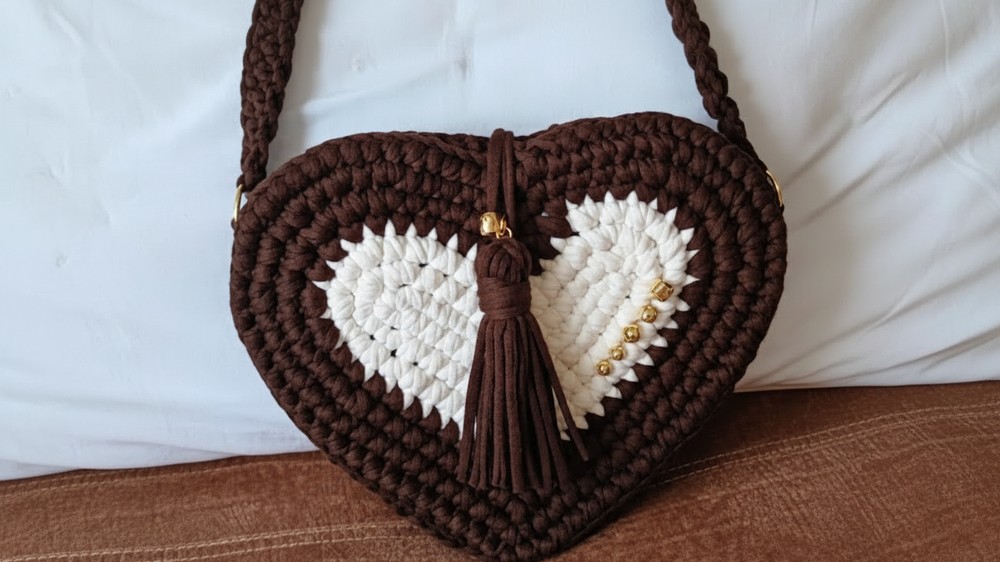
This captivating Valentine's Day bag features charming detailing, a sturdy and elegant handle, and a professional finish. With its heart-shaped design and tassel finishes, this bag is both stylish and functional.
This pattern is written with clear instructions to ensure a smooth crocheting experience.
Materials
Required Supplies
- Yarn:
- Cotton jersey (rag) yarn, two thicknesses used:
- Elastic yarn, approximately 5.5 mm thick.
- Slightly stiffer yarn, approximately 1 cm thick.
- Approximately 12 strips of rag yarn (for tassels), cut to your desired length.
- Cotton jersey (rag) yarn, two thicknesses used:
- Crochet Hooks:
- 5 mm crochet hook (main section).
- 3 mm crochet hook (for details and finishing work).
- Stitch Markers: To mark key spots (such as the center and corners).
- Liquid Silicone Glue: Strengthen connections or fix loose ends securely.
- Tape Measure: Ensures accurate dimensions for the handle and bag.
- Embroidery/Sewing Needle: For seaming and attaching details.
- Scissors: For cutting yarn and trimming excess.
- Alcohol Spray: Optional, to relax the yarn and make the fabric more even.
Skill Level
Intermediate to Advanced: A good understanding of US crochet terminology, basic stitches (slip knot, chain, single crochet, increases), seaming, and how to work with special yarns (e.g., stretchable or thick).
Key Abbreviations (US Terminology)
- ch – Chain
- sc – Single Crochet
- st(s) – Stitch(es)
- inc – Increase (2 single crochets in the same stitch)
- sl st – Slip Stitch
Special Notes
- Yarn Stretch: Some yarns may be stiff. If needed, stretch the yarn slightly before starting the project to relax it for smoother work.
- Symmetry & Alignment: Use stitch markers to maintain symmetry and alignment for both sides of the bag.
- Handle Adjustment: Customize your handle length and adjust to your preferred size.
- Tension: Keep medium tension throughout to ensure the design retains its heart shape and structural integrity.
Detailed Pattern Instructions
Part 1: Making the Bag Base
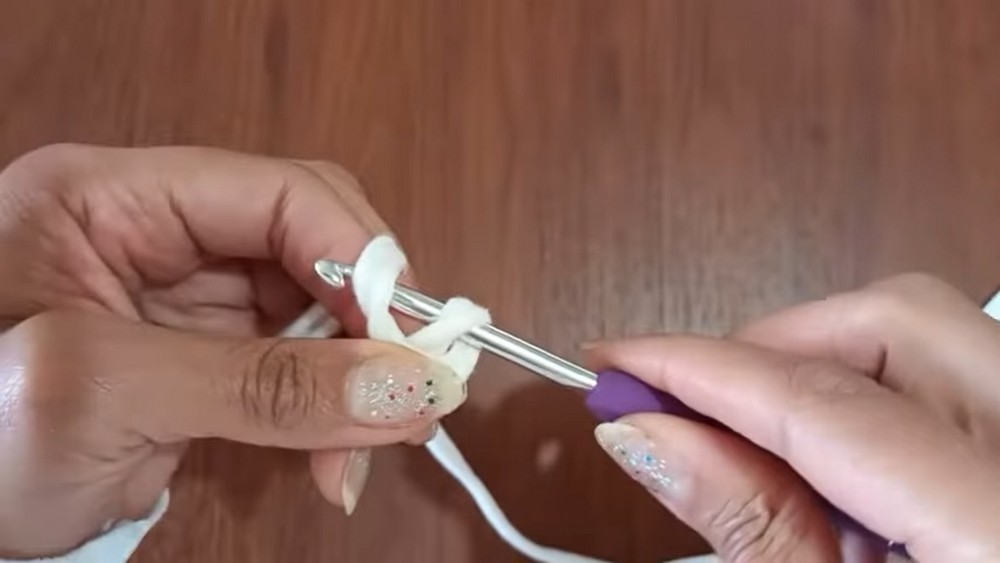
Step 1: Foundation Chain
- Create a slip knot on your 5 mm hook.
- Chain 16 (ch 16), ensuring all chains are uniform in size.
- Double-check your chain count (counting from the slip knot) to ensure you have exactly 16 chains.
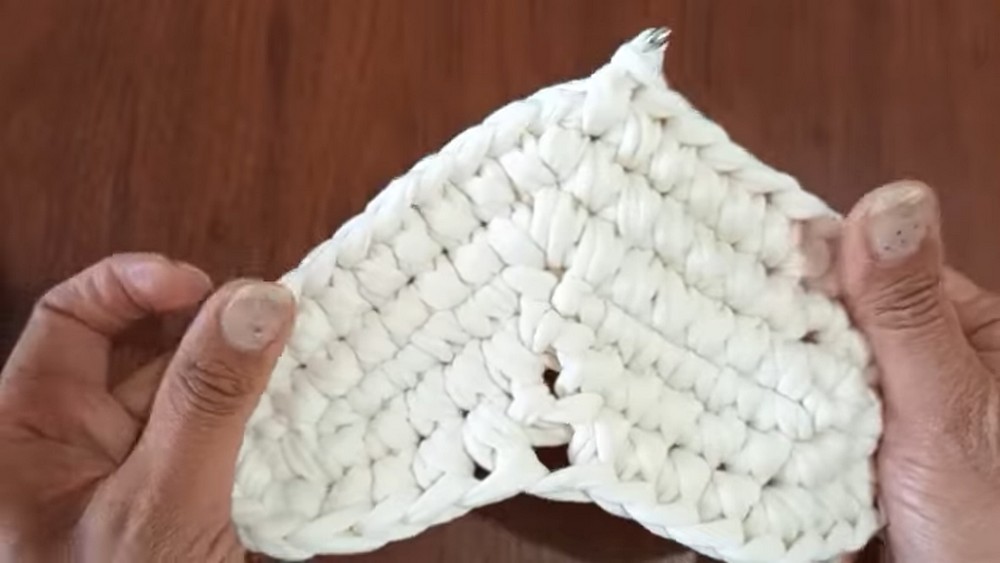
Step 2: Starting the Base
- Skip the first chain (used as a turning chain).
- Begin in the second chain from the hook and work 6 single crochets (sc) along the next 6 chains (this forms the first section of the base).
- Skip the next 2 chains. Continue by making 6 single crochets (sc) in the following 6 chains.
Step 3: Increasing at the Curve
- In the last chain, work 3 single crochets (3 sc inc).
- This creates the rounded corner.
- Rotate your work, turning to the opposite side of the foundation chain.
Step 4: Working the Opposite Side
- Crochet 6 single crochets (sc) into the opposite side of the chain, ensuring proper alignment.
- In the last chain, work another 3 single crochets (3 sc inc).
Step 5: First Round Complete
- Slip stitch (sl st) into the first single crochet of the round, ensuring the base forms an oval-like shape.
- Pull the starting tail to tighten the beginning slip knot. If desired, unfasten the slip knot to prevent extra bulk, and weave the tail into the stitches.
Part 2: Building the Bag Body
Step 6: Second Round
- Chain 1 (ch 1) to start a new round.
- Work 10 single crochets (sc) evenly along the long edge of your base.
- In the next corner (at the rounded end), make 3 single crochets (3 sc inc) in the same stitch to maintain the curve.
- On the short side, make 6 single crochets (sc).
- In the second corner, repeat 3 single crochets (3 sc inc).
- Continue working single crochets around, following the same sequence:
- Long Side: 10 sc.
- Shortcut Corner: 3 sc inc.
- Short Side: 6 sc.
- Shortcut Corner: 3 sc inc.
Step 7: Continuing the Rounds
- Repeat the same increases at each rounded corner in the following rounds:
- Work 7 single crochets (sc), then an increase (2 sc) in the corner zones. Follow this for several rounds.
- Keep track of total stitches in each round.
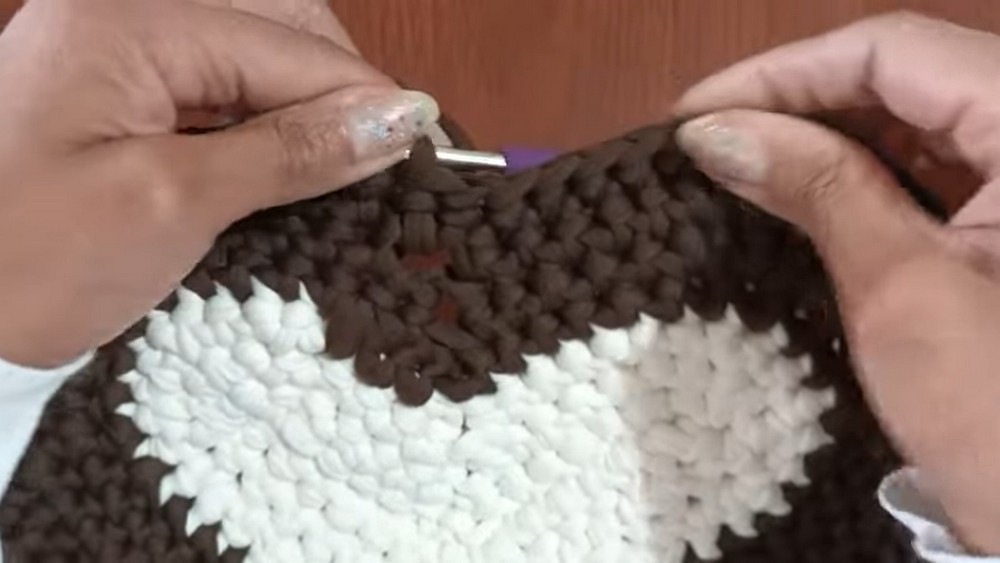
Step 8: Creating the Heart Curve
- Identify the designated center between the two short end corners.
- Begin shaping heart dip points:
- Skip two stitches at the designated center bottom.
- Continue working the pattern evenly across stitches, maintaining single crochets in-between skipped stitches.
- This creates a soft heart curve shape at the middle base of the bag.
Part 3: Adding the Handle
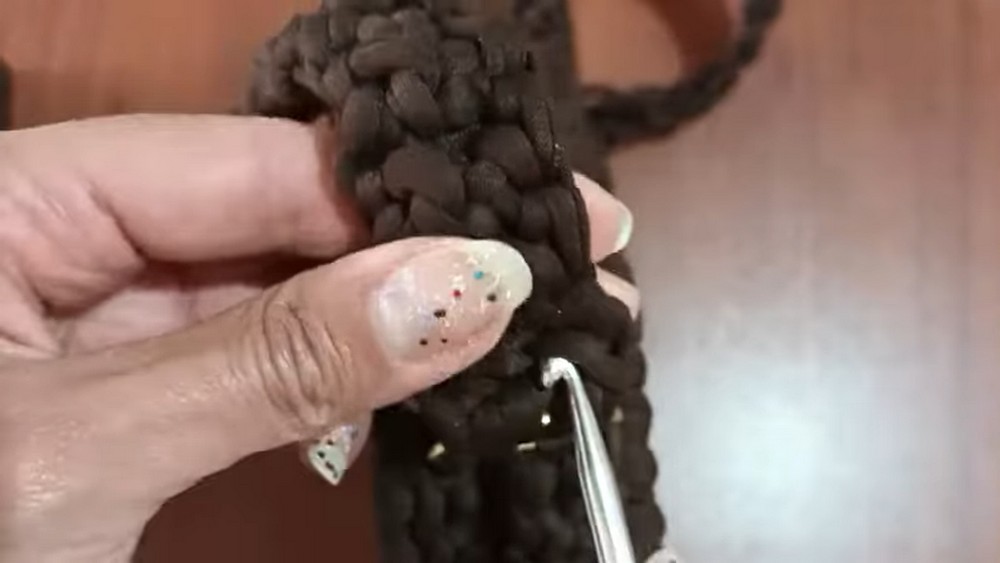
Step 9: Creating the Handle
- Use a 3 mm crochet hook for the handle for a tighter, more secure strap structure.
- Chain to your preferred length (e.g., 91 cm for a longer handle).
- Work 2 or more rows of single crochets (sc) over the chains for strength.
- Attach the handle securely to both sides of the bag with a tapestry needle, ensuring symmetry.
Part 4: Adding a Tassel
Step 10: Tassel Construction
- Cut 12 strands of rag yarn to uniform lengths (slightly longer than the desired tassel length).
- Cut a longer piece of yarn (about 3 times the length of standard strands). Fold it in half and use this for tying the tassel's top.
- Bundle the 12 strands together, fold them in half, and tie the longer strand around the folded midpoint.
- Attach the tied section to the tip of the heart shape using the tapestry needle or hook.
Part 5: Final Finishes
Step 11: Securing the Bag Edges
- Use liquid silicone glue to secure loose ends and hidden threads for extra firmness.
- Apply a small amount of glue to the tassel and handle ends for added durability.
Step 12: Sewing & Finishing
- Use the yarn tail to close any remaining loose sections neatly.
- Attach any additional hardware or decorations before sealing the edges completely.
- If necessary, lightly spray the bag with alcohol and hang it to relax the fibers for a smooth finish.
Conclusion
This bag is an exceptional handmade accessory with a lovely heart-shaped design, making it ideal for Valentine’s Day or as a chic gift. The interplay of flexible and sturdy yarns provides a durable structure while maintaining a soft, appealing aesthetic.

Pattern Correction
- Heart Definition: Ensure that skipped stitches at the center create an even dip on both sides.
Tips
- Maintain Stitch Count: Always double-check your stitch counts to keep alignment consistent across rounds (e.g., 74 total stitches for even edges).
- Secure Hardware: Reinforce hardware or handles with multiple passes of the yarn or with glue for long-lasting use.
- Symmetrical Placement: Always locate center points and use stitch markers to guarantee symmetrical positioning.