
Revamp your accessory drawer with the Free Crochet Scrunchie Pattern for vibrant, handmade scrunchies fit for any occasion.
Adding a splash of color and fun to your hair routine is a breeze with this vibrant crochet scrunchie inspired by the lively shades of Brazil. Crocheted with a mix of yarn types like amigurumi, this scrunchie pattern showcases how beautifully different yarns can blend together to create a soft, stretchy, and eye-catching accessory. You'll get to practice basic yet versatile stitches such as single crochet, double crochet, half double crochet, and even triple crochet, which together form a lovely textured and ruffled look that wraps snugly around your hair.
Free Crochet Scrunchie Pattern for Fashionable Everyday Style
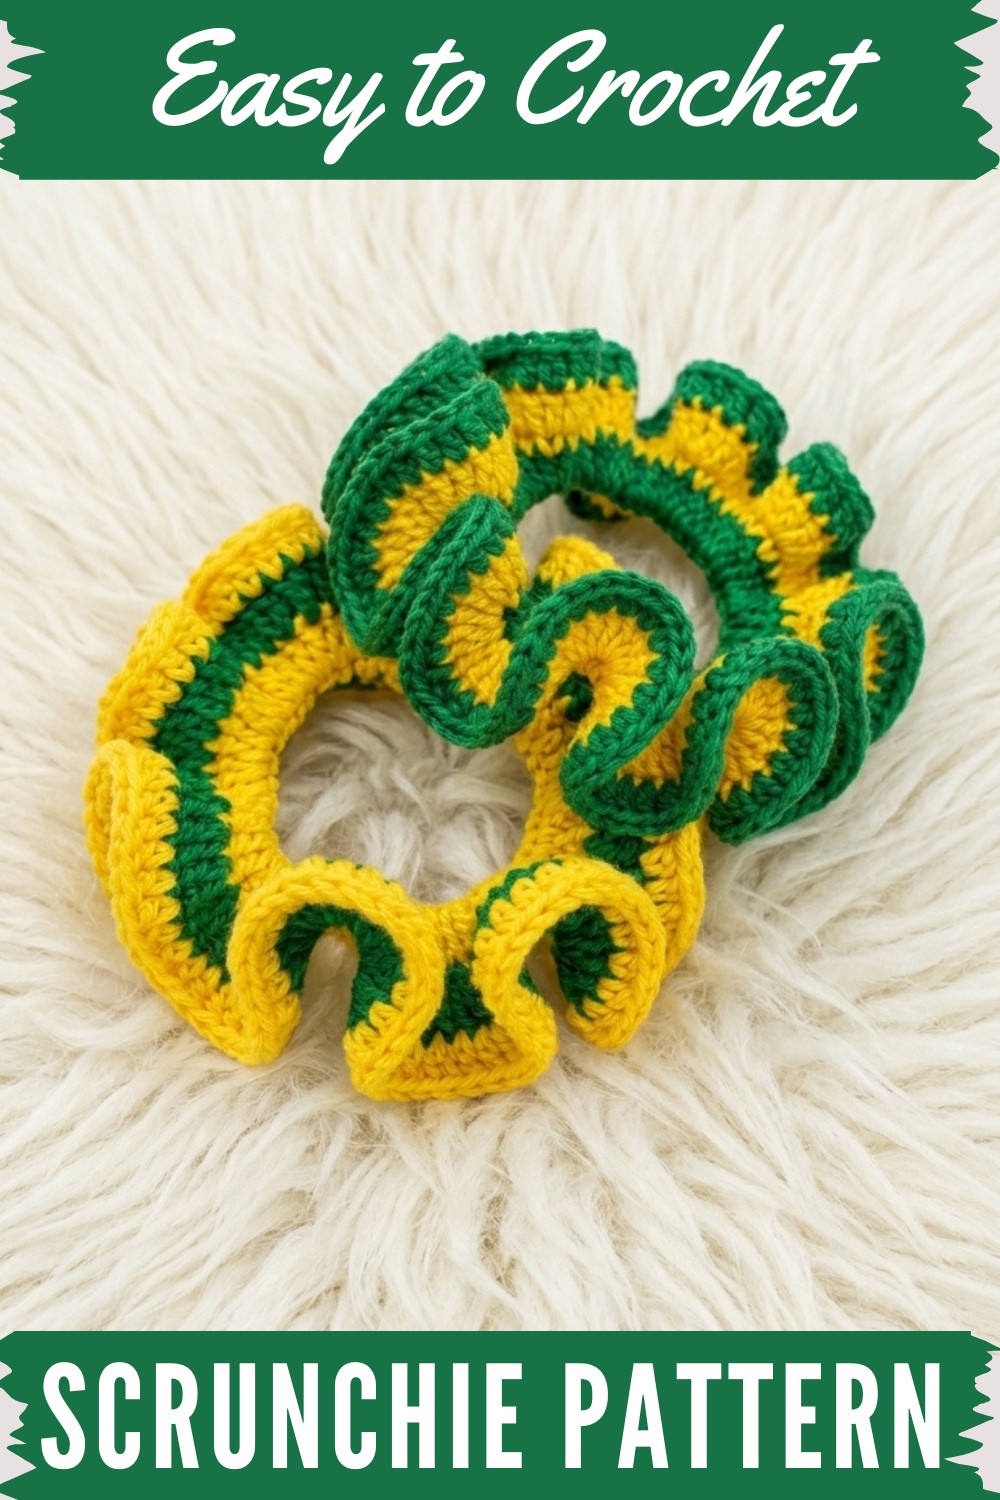
The process starts by stitching snugly around a basic elastic hair tie, covering it with neat single crochet stitches for a firm base. Then, the magic happens as you add layers of triple and half double crochet stitches, creating those signature fluffy ruffles that give the scrunchie its wonderful volume and charm. These stitches are excellent for beginners because they build confidence in changing stitch heights and working in rounds while keeping the project fast and fun.
One of the best parts about this pattern is how adaptable it is. You can mix yarn colors to match your personal style, celebrate special events, or even repurpose leftover yarn from other projects. Plus, you’ll learn handy finishing techniques like securing knots neatly and adding a bit of glue for durability.
More to create with this pattern
Mastering this pattern opens up exciting possibilities for many crochet accessories. Using the same stitches and techniques, you can crochet matching headbands, wristbands, or even cozy bracelets. The skill in combining different crochet stitches and managing tension is great preparation for making textured scarves or decorative trims on bags and clothing. This pattern is a colorful gateway into a world of creative and joyful crochet projects!
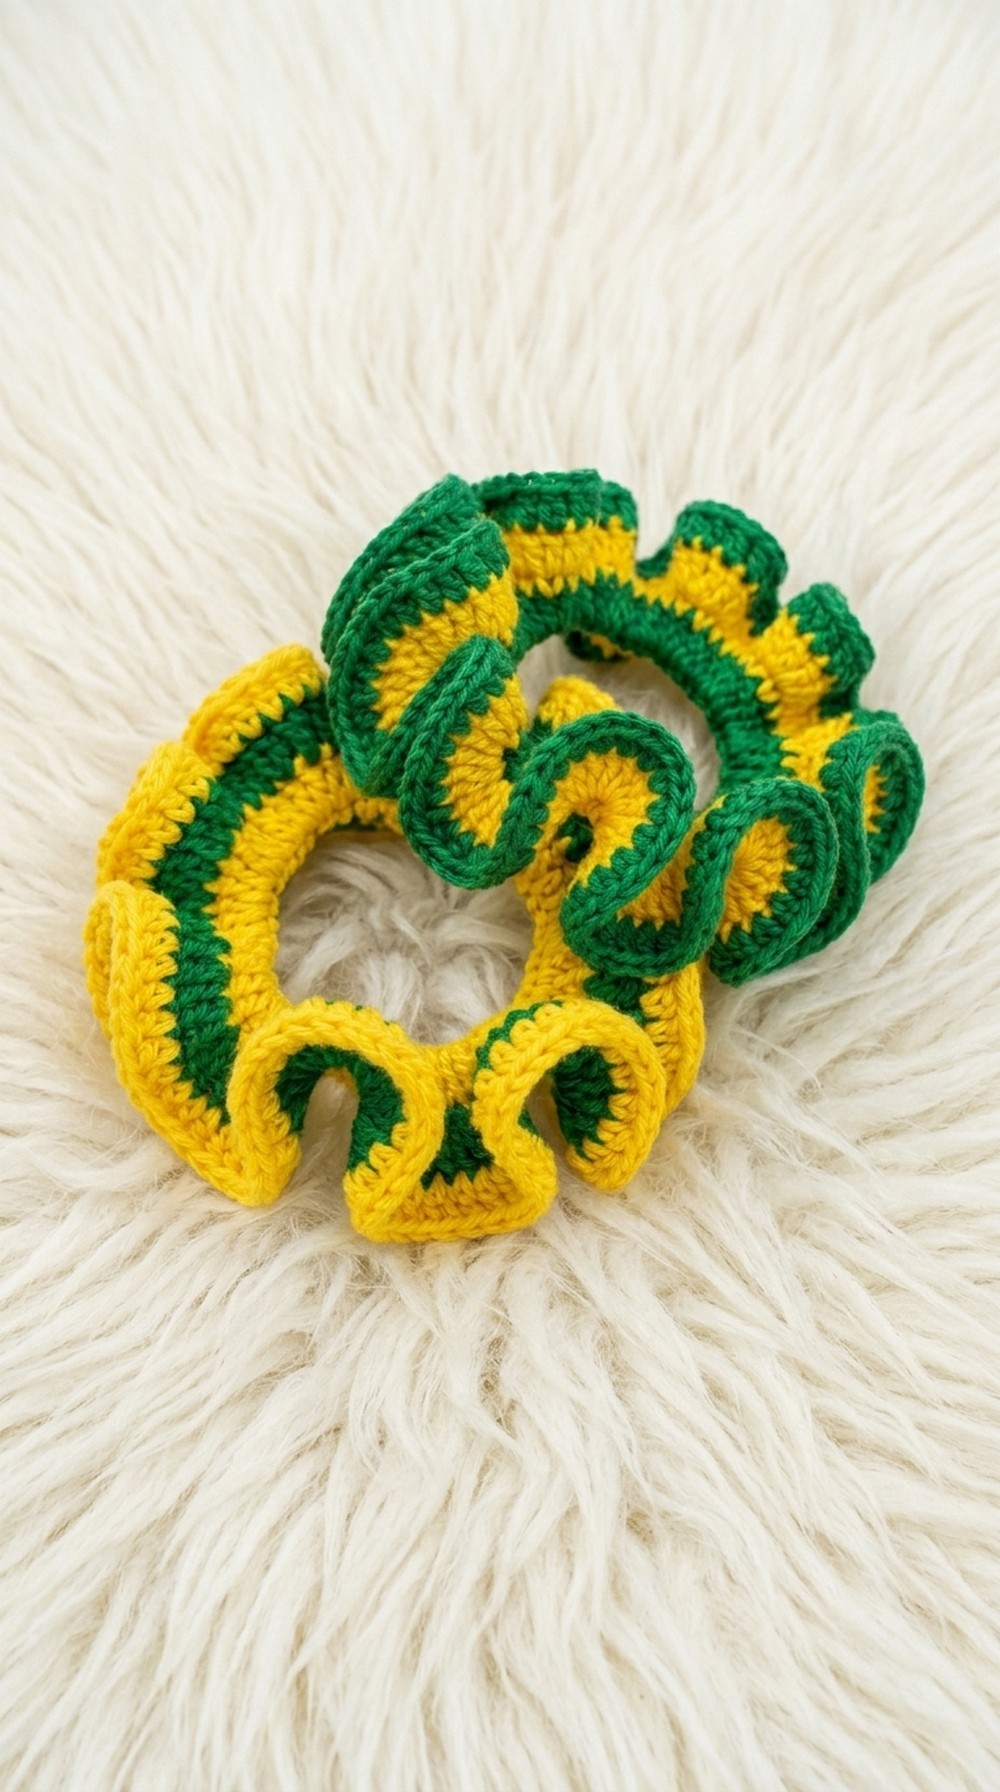
Crochet Pattern: Brazil-Inspired Ruffled Hair Tie (Scrunchie)
Skill Level & Terminology
- Skill Level: Confident Beginner / Intermediate
- Terminology: US crochet terms
You should be comfortable with working in the round and using basic stitches like single crochet, double crochet, and half double crochet.
Materials & Tools
- Yarn Options (similar thickness):
- Amigurumi yarn (for example, for yellow sections)
- Cléa Duplo (double strand of Cléa 1000)
- Anne yarn
- Any other yarns of similar TEX (around 295–300)
- Optional: size 4 cotton yarn for a slightly thicker version
- Suggested Colorway (Brazil style):
- Base / inner ruffle: Yellow (e.g., Amigurumi)
- Outer edge ruffle: Green (e.g., Cléa Duplo)
- Hooks:
- 3.0 mm–3.5 mm for thinner yarns (Anne / Cléa / Amigurumi)
- 2.5 mm hook is mentioned in the class for the green round
- Other:
- 1 basic elastic hair tie (simple, round, no metal)
- Tapestry needle for weaving ends
- Scissors
- Optional: T6000 glue or similar for securing knots
Gauge
Gauge is not critical for this project because it fits around an elastic and is very forgiving. However, for reference:
- With approx TEX 295 yarn and 3.0 mm hook:
- Around the elastic: You will typically fit enough single crochets tightly side by side to completely cover the elastic (often 60–80 sc, depending on elastic size and yarn).
Focus more on:
- Covering the elastic fully with snug but not overly tight single crochets.
- Maintaining consistent tension so the ruffles are even.
Abbreviations (US Terms)
- ch – chain
- sl st – slip stitch
- sc – single crochet
- hdc – half double crochet
- dc – double crochet
- yo – yarn over
Special Stitch Instructions
There are no unusual or advanced stitches, but here are the basics clearly:
- Single Crochet (sc):
Insert hook into stitch, yo, pull up a loop, yo, pull through both loops on hook. - Double Crochet (dc):
Yo, insert hook into stitch, yo, pull up a loop, (3 loops on hook).
Yo, pull through 2 loops, yo, pull through remaining 2 loops. - Half Double Crochet (hdc):
Yo, insert hook into stitch, yo, pull up a loop (3 loops on hook).
Yo, pull through all 3 loops at once.
Finished Size
- Fits a standard-size hair elastic.
- Outer diameter: approximately 10–12 cm depending on yarn and tension.
- Ruffle depth: approx 2–3 cm.
You can use thinner yarn for a more delicate look or thicker yarn for a more pronounced ruffle.
What Stitches Are Used in This Pattern?
Throughout the pattern you will use:
- Single crochet (sc) for covering the elastic.
- Double crochet (dc) for the first large ruffle layer.
- Half double crochet (hdc) for the second, slightly shorter ruffle layer.
You will work mostly in the round, around the elastic and then around the stitches from previous rounds.
What You’ll Learn from This Pattern
- How to cover an elastic hair tie neatly with single crochet.
- How to create ruffles using increases in double crochet and half double crochet.
- How to combine different yarns of similar thickness harmoniously.
- How to finish crochet accessories professionally for personal use or sale.
The Pattern Itself
Part 1 – Covering the Elastic with Single Crochet
- Step 1:
- Tie your base color (e.g., yellow) onto the elastic hair tie with a small knot.
- Position the knot so it stays on the inside of the elastic (toward the scalp) for a neat look.
- Step 2:
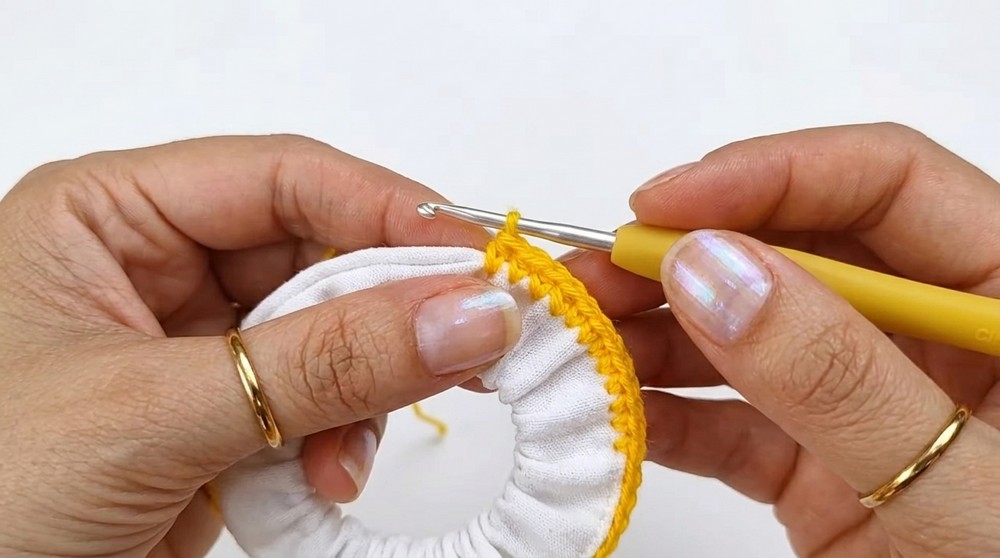
- Insert your hook under the elastic, yo, pull up a loop, and begin making single crochet (sc) stitches around the elastic.
- Work snug, even sc, placing them side by side so that the elastic is fully covered.
- Slide the stitches along as needed to fill in any gaps.
- Step 3:
- Continue working sc all the way around until the elastic is tightly covered, with no elastic visible.
- Join to the first sc with a sl st.
If you don’t read patterns:
In this first part, you simply wrap the elastic with single crochets. Start by tying your yarn to the elastic, then go around in small, tight stitches until you can’t see the elastic anymore. Close the round by joining the last stitch to the first.
Part 2 – First Ruffle Layer in Double Crochet (Base Color)
- Step 1:
- From the joined sc round, ch 3 (this counts as your first dc).
- In the same stitch: work 2 more dc.
- You now have 3 dc in the same base stitch.
- Step 2:
- Yo, move to the next sc from the previous round.
- Work 3 dc in that stitch as well.
- Step 3:
- Repeat around:
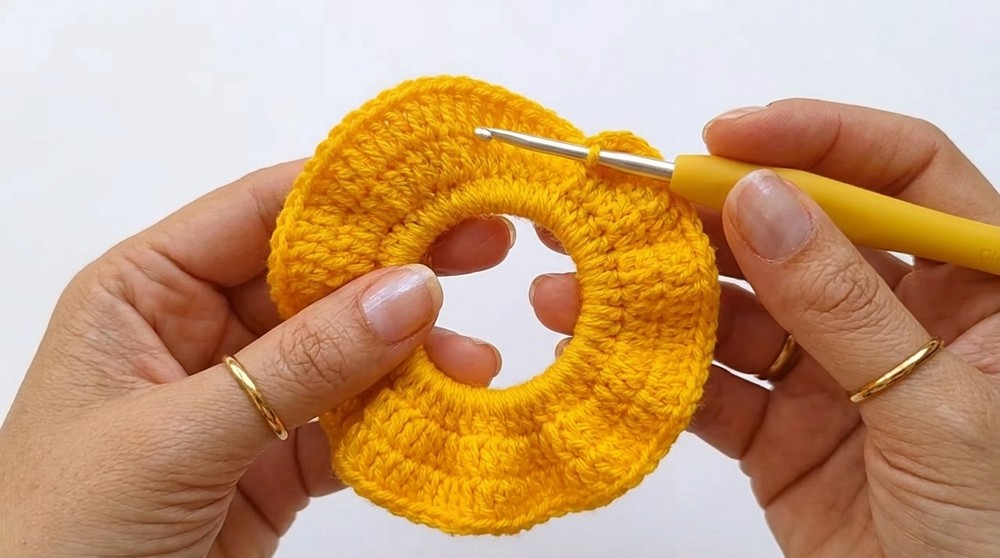
- 3 dc in each sc around the entire ring.
- Be careful not to skip any single crochet stitches; they are close together, so watch that each base stitch gets its own group of 3 dc.
- Repeat around:
- Step 4:
- When you reach the last stitch, finish with 3 dc, then join to the top of the beginning ch-3 with a sl st.
- Ch 1 and cut the yarn, leaving a small tail. Do not weave in yet; it will be secured later with the green layer.
If you don’t read patterns:
In this part, you are making the big ruffle. For every single crochet you made before, you now place three double crochets in it. This makes the fabric flare out and frill. Go all the way around like this and close the circle by joining the last group to the start.
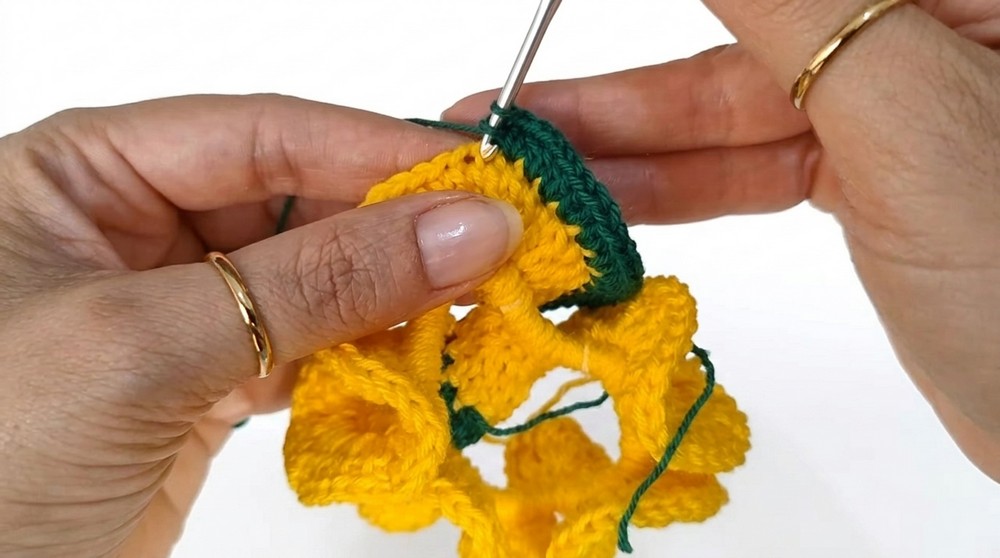
Part 3 – Second Ruffle Layer in Half Double Crochet (Contrast Color)
- Step 1:
- Join your second color (e.g., green) to any dc stitch from the previous round.
- Insert the hook into the chosen dc, pull up the yarn loop, and secure with a sl st.
- Step 2:
- Ch 2 (this counts roughly as your first hdc or half high stitch).
- In the same stitch, work 1 more hdc.
- Step 3:
- Move to the next dc stitch from the base round.
- Work 2 hdc in the same stitch (an increase).
- Step 4:
- Repeat around:
- For each dc, work 2 hdc in that stitch.
- Continue until you have placed 2 hdc in every dc from the base round. This creates a second, slightly smaller ruffle layer over the first.
- Repeat around:
- Step 5:
- At the end of the round, join into the 2nd chain of your starting chain-2 with a sl st.
- Ch 1, cut the yarn, and pull the tail through.
If you don’t read patterns:
In this part, you join a second color and make another ruffle on top of the first one. For every double crochet of the yellow row, you make two half double crochets in it with the green yarn. This soft second ruffle gives more volume and contrast to your scrunchie.
Assembly & Finishing
- Step 1 – Weaving in Ends:
- Use your tapestry needle to weave in the starting and ending tails of both colors.
- Weave them into the inside side of the scrunchie so they won’t show.
- Step 2 – Optional Glue Securing:
- For extra security (especially if selling them), apply a small amount of T6000 glue or similar on the knots and where you finish weaving in ends.
- Allow it to dry completely before use.
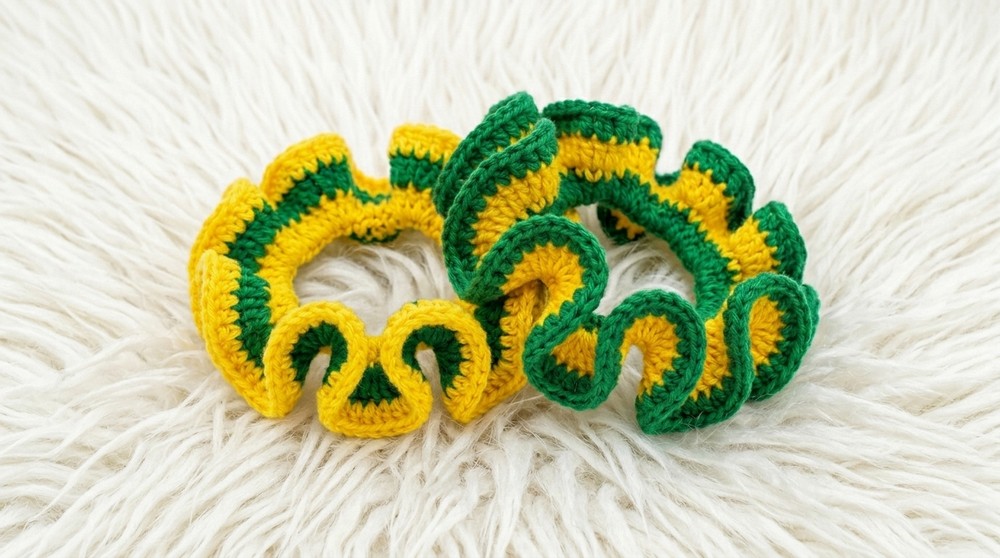
- Step 3 – Shape the Ruffles:
- Gently stretch the scrunchie and spread out the ruffles with your fingers so that they cover the elastic evenly and look balanced.
If you don’t read patterns:
After finishing the crocheting, hide all loose ends with a needle. You can also add a tiny bit of fabric glue on the knots so they never loosen. Then, stretch the scrunchie lightly and arrange the frills by hand to make it look full and even.
Why I Love This Pattern
This hair tie is:
- Quick and economical: Perfect for using leftover yarn and small scraps.
- Versatile: Works in any color combination for school teams, holidays, or everyday wear.
- Sellable: It’s a small, attractive piece ideal for craft fairs and orders, especially during big events like the World Cup.
You can easily adapt this pattern with different yarn weights and colors, or even finish with only one ruffle layer for a more subtle look.



