
Adorn yourself with a chic crochet vest pattern that radiates timeless elegance and effortless versatility perfect for layering on any occasion seamlessly.
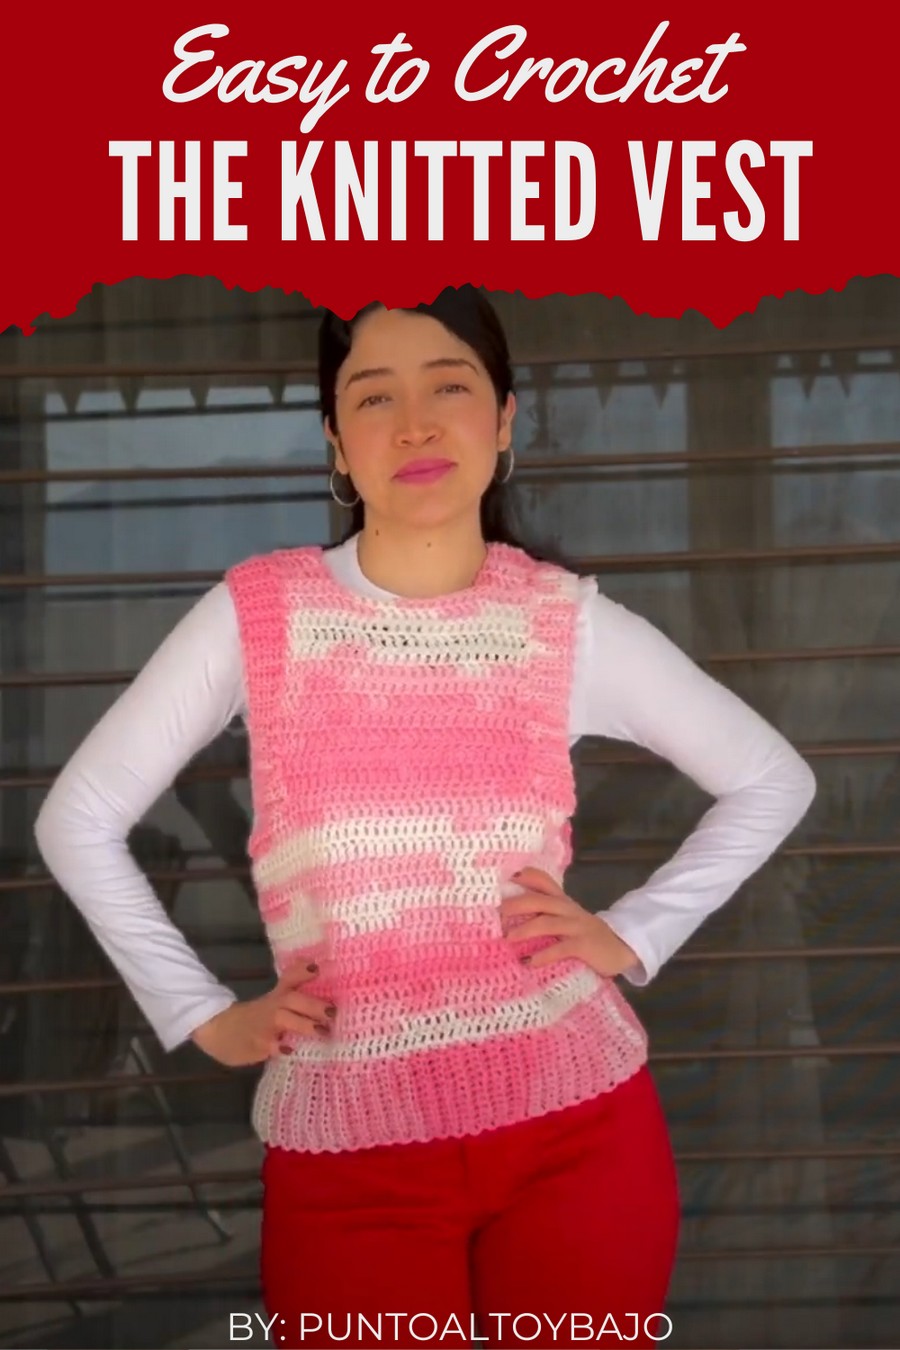
This piece effortlessly boost your wardrobe with its intricate textures and handmade charm. Ideal for layering, it transitions beautifully between casual everyday looks and more polished styles. Whether paired with jeans, shorts and skirts for a relaxed vibe or worn over a dress for added sophistication, it adapts to every occasion.
Perfect Crochet Vest Pattern to Complete Your Look
Lightweight yet visually striking, it provides comfort while showcasing a unique, artistic flair. Perfect for all seasons, this wardrobe staple blends functionality with unmistakable style, making it a must-have for anyone looking to add a touch of class and creativity to their outfits.
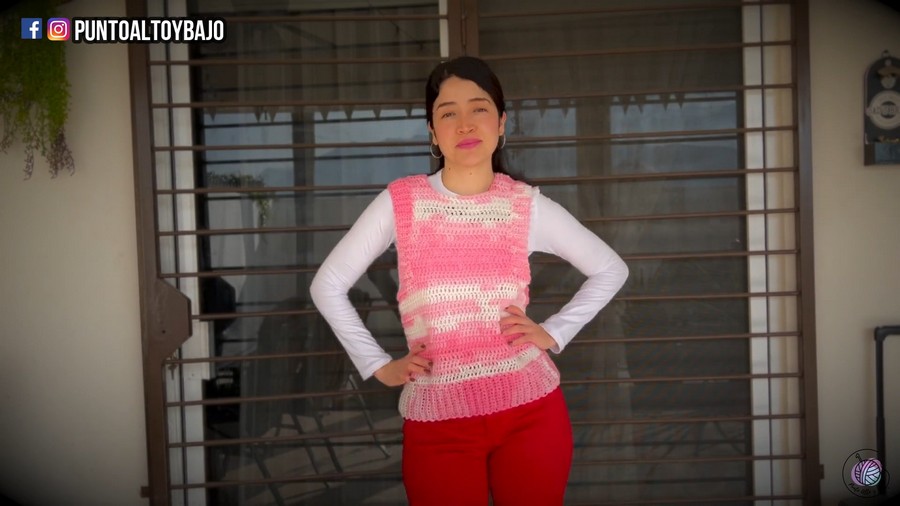
This delightful crochet vest is designed to be a medium size but can be easily adapted for other sizes. It features a ribbed waistband, panels of double crochet stitches, and optional hearts to add a playful and seasonal touch.
The project is simple yet elegant and is ideal for casual wear or special occasions.
Materials Needed
- Yarn:
- 2mm acrylic yarn (approximately 130 g for medium size).
- Optional: Thicker yarn or double strands for hearts (e.g., red yarn).
- Other yarn types: Using cotton or wool will give the garment a different texture or warmth.
- Hook Size:
- 6 mm crochet hook (use a larger hook for a looser fit or smaller hook for a tighter stitch).
- Other Supplies:
- Stitch markers.
- Scissors.
- Tapestry needle (for weaving in ends and sewing decorations).
Skill Level
Beginner to Intermediate
Key Abbreviations (US Crochet Terminology)
- ch: Chain
- sc: Single Crochet
- dc: Double Crochet
- sl st: Slip Stitch
- st(s): Stitch(es)
- hdc: Half Double Crochet
Special Notes
- Crocheting a waistband first ensures a snug but stretchy fit before continuing to the body.
- The vest can be customized to your preference for length, width, or decoration. Adjust stitch counts or rows based on your desired fit and size.
Pattern Instructions
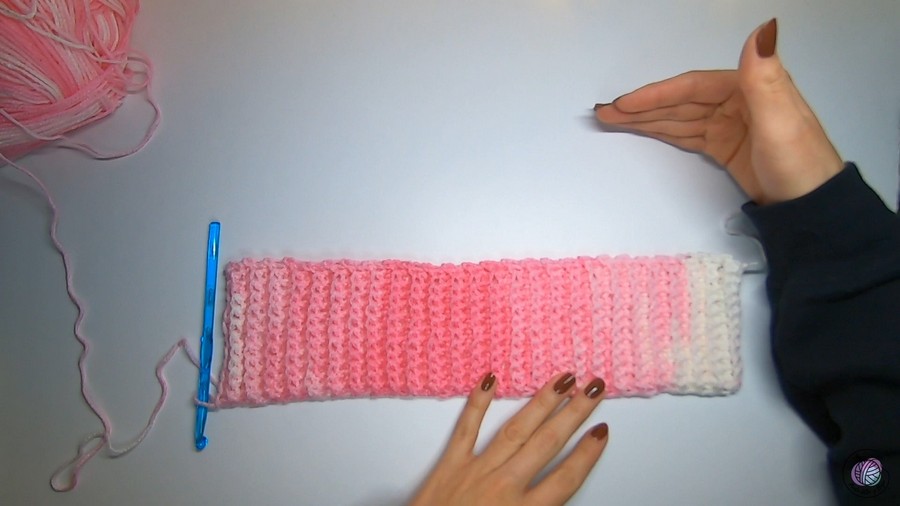
Step 1: Waistband (Ribbing)
- Create the Foundation Chain for Ribbing:
- Start with a slip knot and chain 12 for an 8 cm wide waistband (adjust width by adding or subtracting chains).
- Chain 1 extra chain for turning.
- Work Back Loop Single Crochet:
- Insert the hook into the 2nd chain from the hook and crochet 1 sc in each chain across.
- You should have a total of 12 sc (or the same number as your foundation chain).
- Repeat Rows:
- Chain 1, turn, and crochet sc across, but pick up only the back loop of each stitch.
- At the end of every row, crochet the last stitch in both loops to ensure a neater edge.
- Repeat this process until you’ve completed 52 rows for 44 cm in width (or adjust based on desired waist circumference).
- Note on Stretching: Keep in mind that the ribbing may stretch an additional 3–5 cm.
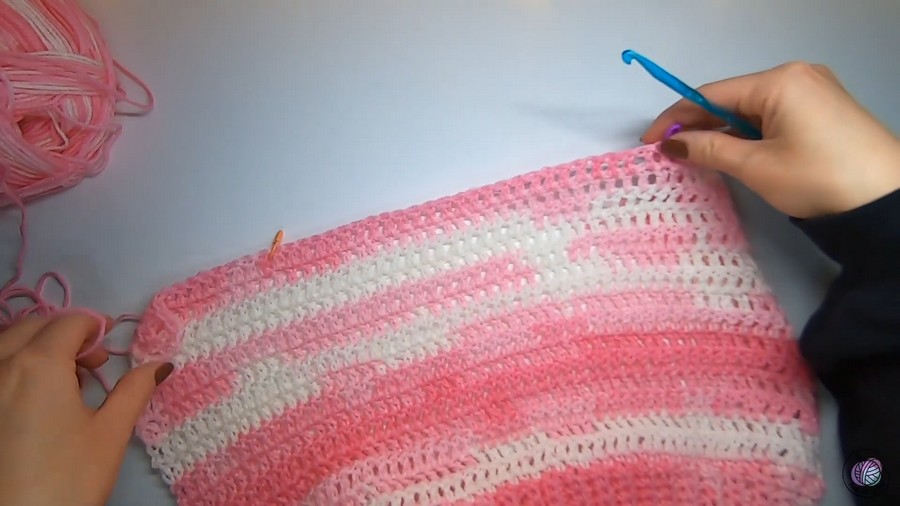
Step 2: Body (Double Crochet)
- Create a Row of Single Crochet Above Ribbing:
- Once the waistband is complete, chain 1 and turn your work.
- Crochet 1 sc per row along the edge of the ribbing (e.g., 52 sc for 52 rows).
- Start the Double Crochet Rows:
- Chain 2 to begin and turn.
- Work 1 dc in each sc across (52 dc in total).
- Always crochet the last dc into the turning chains from the previous row for a straight edge.
- Continue Building the Body:
- Repeat rows of double crochet until you reach 15 rows in total.
- This section should now measure approximately 29 cm in height.
Step 3: Center Panel for Neckline and Armholes
- Divide the Body:
- From the body of 52 stitches, leave 13 stitches unworked on each side (for armholes).
- Work only the center 26 stitches for the next section.
- Use stitch markers to identify the portions you’re working on and those to leave unworked.
- Crochet Rows for the Center Panel:
- Chain 2, turn, and crochet 1 dc in each of the 26 stitches.
- Repeat rows until you’ve completed 12 rows (adjust length as desired).
- This section should now measure approximately 18 cm.
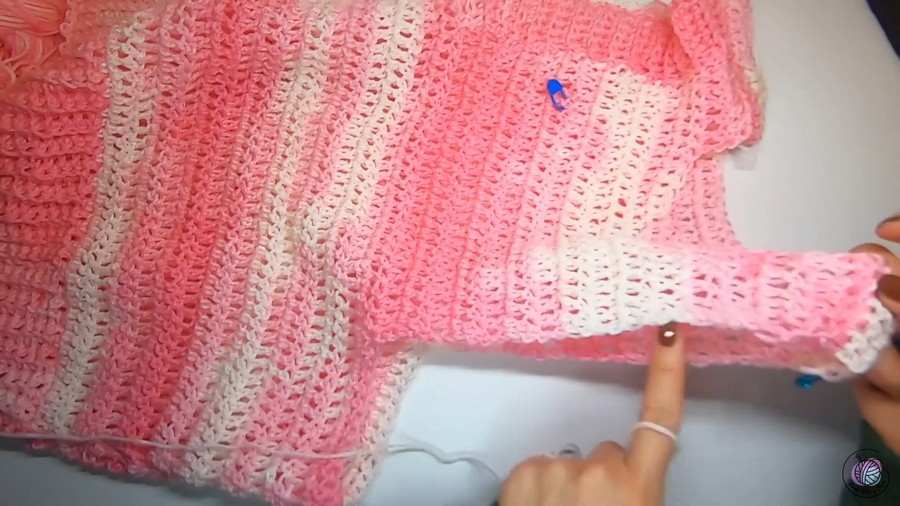
Step 4: Shoulder Pieces
- Create Shoulder Straps:
- On either side of the center panel, crochet 7 stitches to form the shoulder straps.
- Work 3 rows of dc or sc for each strap.
- Example measurements: 6.5 cm wide x 5.5 cm tall.
- Repeat on Both Sides:
- Repeat for the second shoulder strap, ensuring straps are of equal size and positioned correctly.
Step 5: Assembly
Step 5.1: Join the Shoulder Straps
- Place the two vest pieces right side facing inward.
- Use sc or sl st to join the shoulder straps. Insert the hook through the stitches on both layers and secure them together.
- Ensure that both sides are joined evenly and securely.
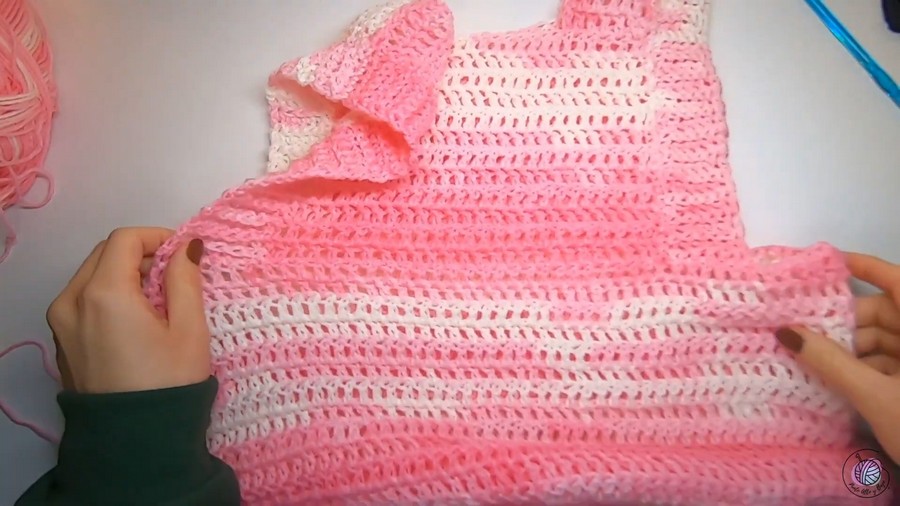
Step 5.2: Join the Sides
- Align the two body panels, ensuring even edges.
- Leave the armhole openings (as marked earlier) unsewn and join the sides below the armholes.
- Use single crochet, slip stitches, or sewing with a tapestry needle to join the seams.
Step 6: Decorative Waistband and Edging
- Bottom Waistband: Crochet a ribbed waistband for the bottom edge by picking up stitches along the base, similar to the first waistband. Use 6 sc wide ribbing or adjust width as preferred. Work in back loops only for texture.
- Side and Armholes Edging (Optional):
- For extra detail, add 2–3 rows of sc or hdc around the armholes and the open sides of the vest. This creates a polished border.
Optional Step 7: Crochet Hearts (Decorative Touch)
- Use red yarn (double-stranded).
- Create a magic ring:
- Chain 3, and into the magic ring:
- Crochet 2 dc, 2 tr, chain 1, 1 tr, chain 1, 2 tr, 2 dc, chain 3.
- Close with a slip stitch.
- Chain 3, and into the magic ring:
- Fix hearts to your vest:
- Sew them on permanently or use pins to make them removable for seasonal flair.
Pattern Variations
- Colors: Use a vibrant or striped yarn to make the vest stand out. Alternatively, neutral tones provide a more classic look.
- Sizes:
- Small: Use fewer stitches for ribbing and body (e.g., 48 rows instead of 52).
- Large/Extra Large: Add rows to the ribbing and proportionally adjust body sections. Work additional rows for added length.
- Lace or Shell Detail: Add a decorative stitch pattern in the body section for a more textured or sophisticated design.
Tips for Success
- Maintain Accurate Stitches: Consistently count stitches in each row to avoid uneven sections.
- Customize Length: Try on the vest during the process to ensure it fits properly, especially under the arms.
- Blocking: Wet block the completed vest for a uniform and polished finish.
- Be Creative: Add embellishments like buttons, tassels, or fringe for a bohemian look.
Conclusion
This crochet vest is a versatile wardrobe piece suitable for all seasons. Its flexible structure makes it easy to pair with endless outfits while offering the opportunity for creative personalizations. The final look is soft, elegant, and functional.



