
Stitch Crochet Daphne Bridgerton Pattern to create an elegant doll that captures charm and sophistication perfect for gifts collectors and decorative displays.
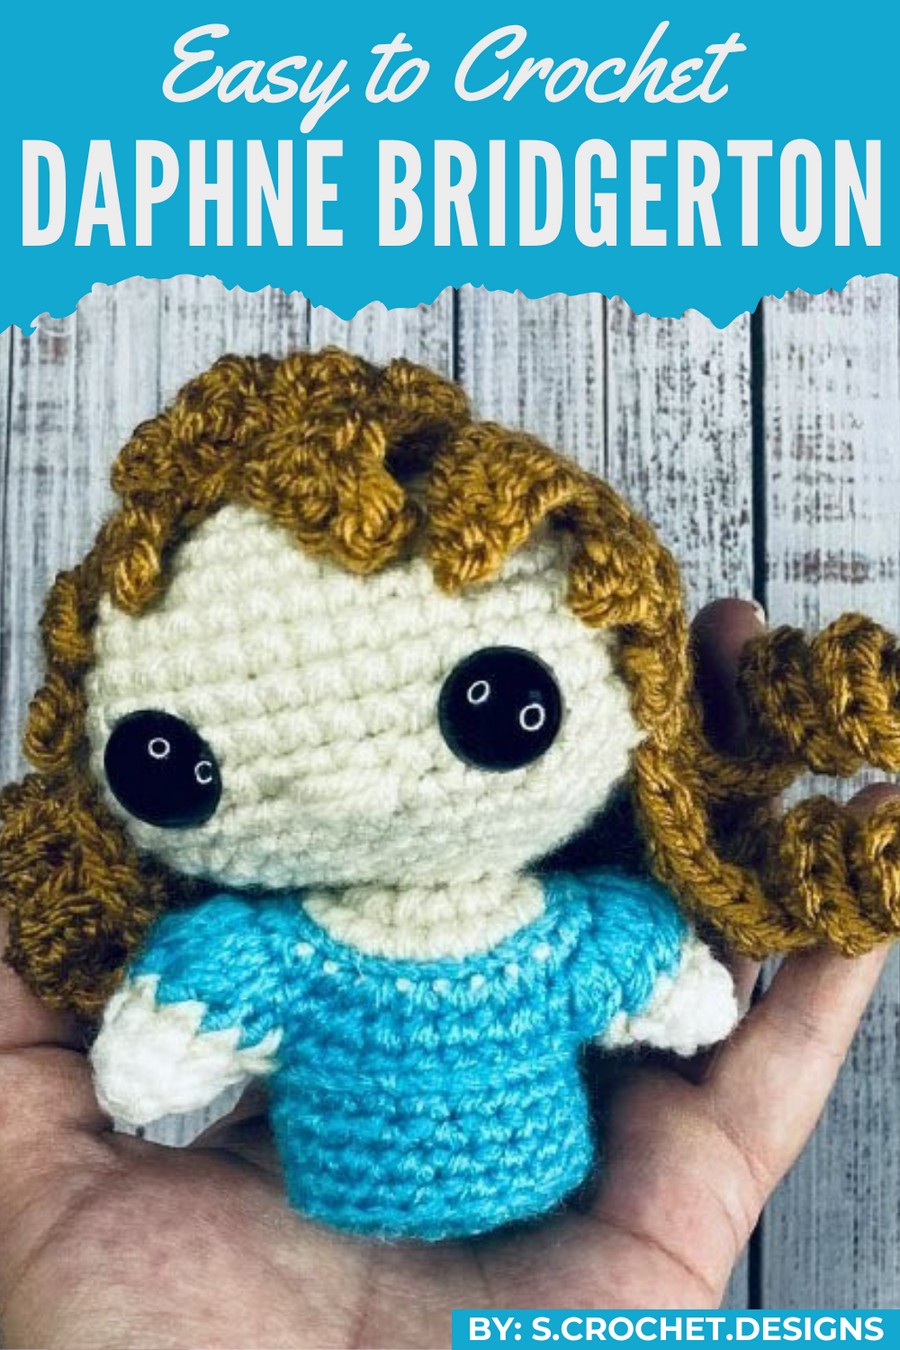
Have you ever wanted to create something truly elegant and timeless? This stunning design is inspired by refined beauty and graceful charm, making it perfect for creating delicate shawls, vintage collars, or sophisticated accessories. Its intricate details and flowy appearance bring a luxurious and classy feel to every piece you make.
Sweet & Stylish Crochet Daphne Bridgerton Pattern for Display
Ideal for occasions that call for a touch of elegance, this pattern combines tradition with style effortlessly. Whether you're crafting for yourself or a loved one, the design's soft and sophisticated look ensures every creation stands out as something beautiful and unforgettable.
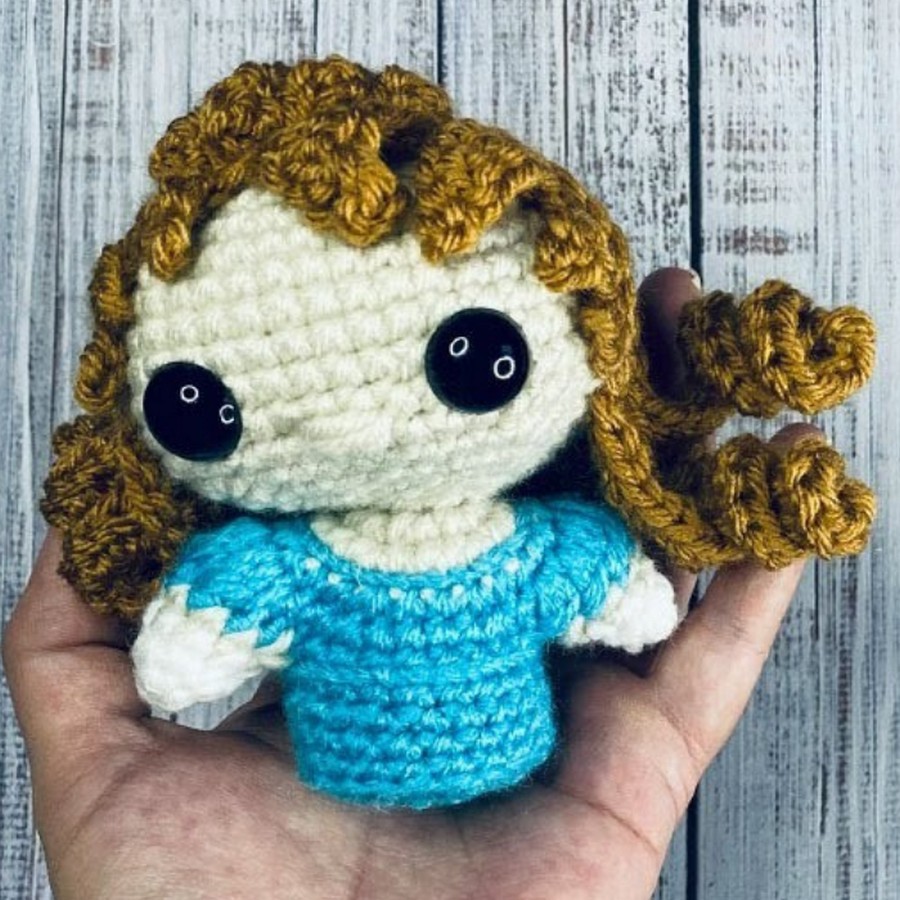
This crochet tutorial will guide you step-by-step to make a detailed figure of Daphne Bridgerton, inspired by the Netflix series. From the intricately curled hairstyle to the puff-sleeved dress, this project is brimming with attention to detail and provides plenty of opportunities to add your unique twist.
Skill Level
Intermediate to Advanced
This project involves working in continuous rounds, changing colors, creating curls, assembling multiple pieces, and light embroidery for facial details.
Materials Needed
Yarn:
- Light Flesh Tone (Worsted Weight) – For the head, arms, neck, and details.
- Light Brown (Worsted Weight) – For hair.
- Blue (Worsted Weight) – For the dress. (Select any shade of blue. Use multiple shades to match the Bridgerton theme if desired.)
- White (Worsted Weight) – For detailing and trim.
Additional Supplies:
- 16 mm Safety Eyes – Two pieces for the face.
- Stuffing – For shaping the head, body, and arms.
- Hooks:
- 5 mm crochet hook – For the primary construction.
- Optional: Smaller hooks for more precise detailing.
- Tapestry Needle – For sewing pieces together and embroidery.
- Pins – Assists in positioning pieces before sewing to avoid shifting.
- Scissors – For clean trims.
Key Abbreviations (US Crochet Terminology)
| Abbreviation | Meaning |
|---|---|
| ch | Chain stitch |
| sc | Single crochet |
| hdc | Half-double crochet |
| dc | Double crochet |
| tr | Triple crochet |
| sl st | Slip stitch |
| inc | Increase (two stitches in the same stitch) |
| dec | Decrease (single crochet two stitches together) |
Special Notes:
- Tight Tension: Use a hook size that ensures tight stitches to prevent stuffing from showing through.
- Stitch Markers: Mark the beginning of each round to avoid losing your starting point. This is especially important since we’ll work in continuous rounds.
- Parts Assembly: Pin all pieces before sewing to keep them secure and aligned.
- Customization Opportunities: Adjust colors, hairstyle placement, or accessories for different looks.
Step-by-Step Pattern
Head
- Start: Flesh Tone Yarn
- Begin with a magic ring or *ch 2 and work into the second chain from the hook*.
- Round 1:
- Work 8 sc into the ring. Tighten the loop. (8 sts total)
- Round 2:
- Inc in each stitch around. (16 sts total)
- Round 3:
- Alternate 1 sc, 1 inc around. (24 sts total)
- Round 4 (Rectangular shaping begins):
- 1 sc, inc in the next 2 stitches, 6 sc, inc in the next 2 stitches, 2 sc, repeat to the end. (32 sts total)
- Round 5:
- 2 sc, inc in the next 2 stitches, 8 sc, inc in the next 2 stitches, 4 sc, inc in the next 2 stitches, 8 sc, inc in the next 2 stitches, and finish with 2 sc. (40 sts total)
- Rounds 6–12:
- Sc in each stitch around. (40 sts)
- Round 13: Start decreases to shape the neckline.
- 2 sc, 2 dec, 8 sc, 2 dec, 4 sc, 2 dec, 8 sc, 2 dec, 2 sc. (32 sts total)
- Round 14:
- 1 sc, 2 dec, 6 sc, 2 dec, 2 sc, 2 dec, 6 sc, 2 dec, 1 sc. (24 sts total)
- Round 15:
- Alternate sc and dec. (16 sts total)
- Stuff the head firmly as you continue working.
- Round 16:
- Dec in every stitch. (8 sts total)
- Finish by slip stitching to the next opening. Leave the top open for filling.
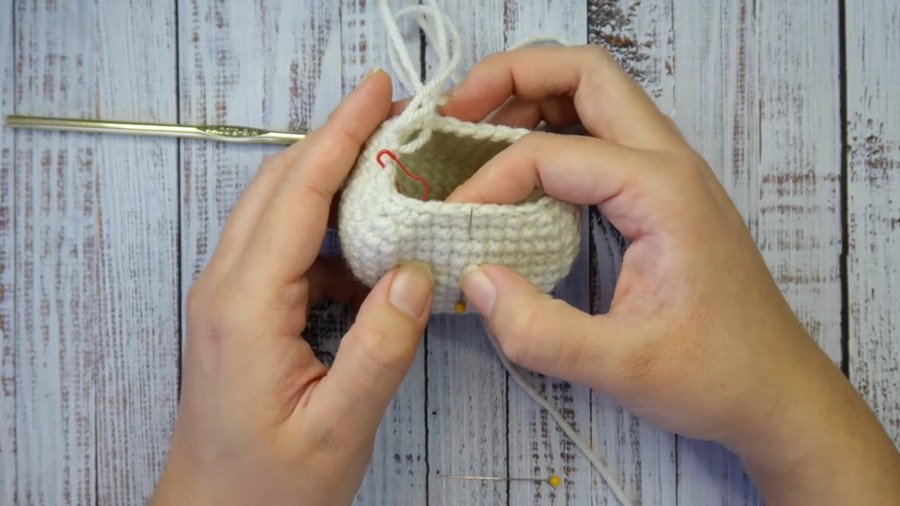
Eyes
- From the first stitch of the last round worked, count 6 stitches across to locate the center of the face.
- Mark Eye Placement: Count 4 rounds up and place the eyes 6 stitches apart. Use pins to test placement before attaching the safety eyes.
- Attach Eyes: Secure the safety eyes with fasteners.
Nose (Optional)
- Take a long piece of light flesh-toned yarn and thread your tapestry needle.
- Placement: Use the two middle stitches between the eyes at the level of the bottom of the eyes.
- Embroider Nose: Create a small triangle by repeatedly threading back and forth between the center two stitches.
- Tie the yarn securely inside and trim excess.
Body
Switch to blue yarn after completing the head.
- Round 1 (Neck and Start of Body):
- Inc in each stitch (16 sts).
- Round 2:
- Alternate sc and inc. (24 sts total).
- Round 3:
- Sc, inc, 2 sc around.
- Puffed Sleeves (Round 21):
- Add modified bobble stitches of 2 dc in every other stitch to create puffed sleeves.
- Continue working the body with sc in continuous rounds for the desired height.
- Complete open rounds for the armholes using skipped stitches.
- Decrease evenly for two rounds to close the body at the bottom. Finish with sl st to bind off.
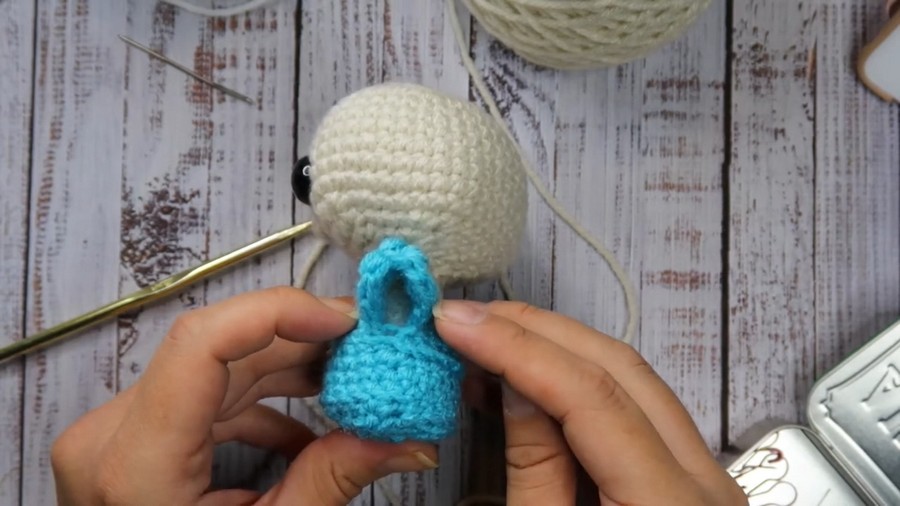
Arms
Use skipped stitches to crochet each arm directly to the body:
- Attach yarn to the second skipped stitch on the back of an armhole.
- Work 8 sc into the armhole for 2 rounds.
- Flatten the opening, and use sl st through the outside loops to close.
- Stuff the arms with fiberfill before closing.
Repeat for the other arm.
Hair
Base Hair Cap
- Work a base circle with light brown yarn:
- Round 1: 8 sc in a circle.
- Round 2: Inc in every stitch. (16 sts)
- Round 3: Sc, inc around. (24 sts)
Curls
- For each strand: Ch 26.
- Work the curl:
- Start at the second chain from the hook.
- In the first 10 chains: Work hdc inc in every stitch.
- In the last 15 chains: Work 1 hdc.
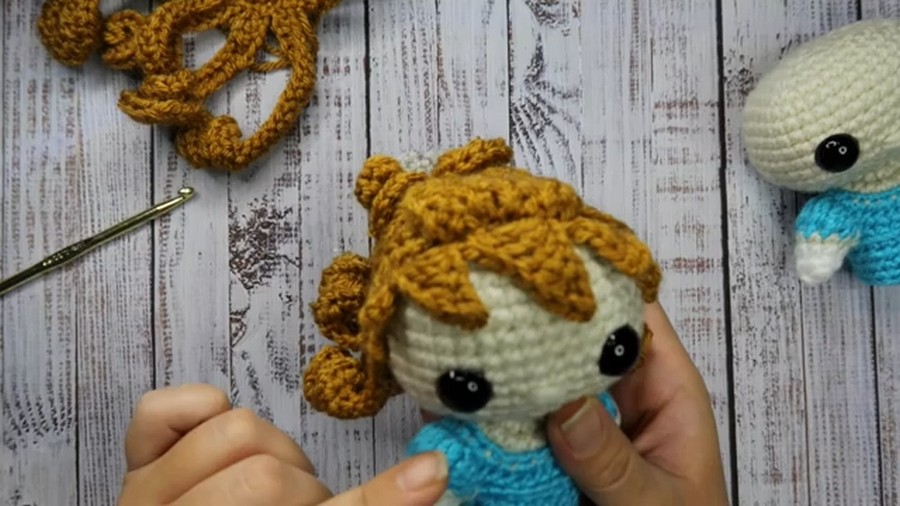
Alternate curls with slip stitches into the next stitch of the base cap. Continue until you’ve made 12 full curls.
Bangs
- Work seven spikes (bangs) as described in the transcription: Utilize varying lengths of chains with sc, hdc, dc, and tr increases to form wavy spikes.
Assembly
- Use pins to secure the bangs to the front of the head first.
- Position the hair cap on the head, pinning the curls behind the bangs in a layered arrangement.
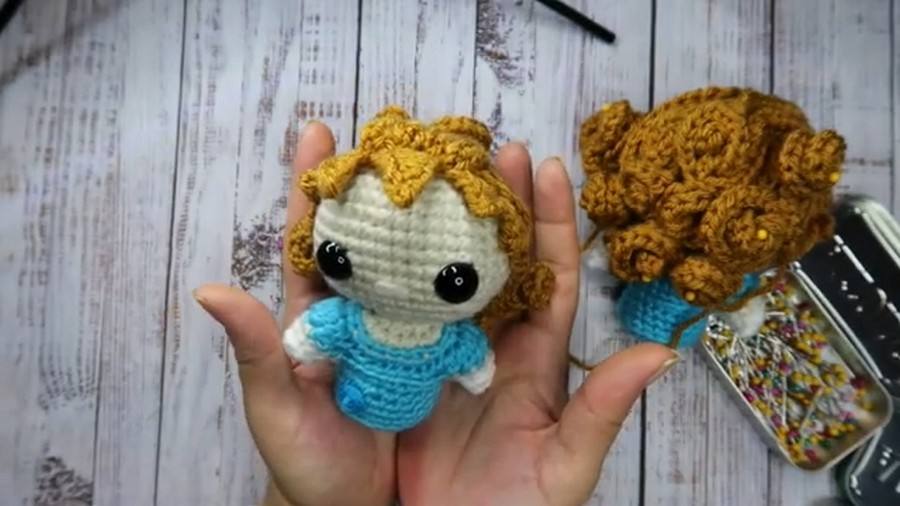
- Use the extra-long tail from the hair cap to sew the cap to the head, securing each curl to the cap.
- Create a bun with the front 4 curls, forming a circle or rose-like appearance at the back of the head. Secure to the head.
Tips for Success
- Use Pins: Ensure precise placement of each piece before sewing to avoid misalignment.
- Take Your Time: The finer details (hair and curls) take patience, but the results are worth it.
- Experiment with Styles: Modify or adjust the hairstyle to represent different characters or looks.
Pattern Variations
Color Customization
- Change the hair color to reflect different Bridgerton characters. Blonde for Queen Charlotte or darker shades for other characters.
- Adjust dress colors to match Daphne's many outfits in the show or reflect your personal preference.
Size Adjustments
- Use thinner yarn and a smaller hook for a smaller version.
- For a larger doll, use chunkier yarn and a larger hook.
Conclusion
Congratulations on creating your Little Daphne doll! This project provides a beautiful introduction to dynamic detailing like hair curls, puffed sleeves, and embroidered features. You now have a little Bridgerton-inspired figure that is perfect for gifts, display, or simply a lovely addition to your crochet collection.
Final Tip
Enjoy experimenting with the accessories and hair styles. Whether pinned-up curls or flowing locks, this doll provides tremendous creative freedom to give Daphne her own flair.



