
Style your wardrobe with Crochet Motif Scarf Pattern that features eye catching textures and cozy warmth perfect for gifts seasonal looks and everyday elegance.
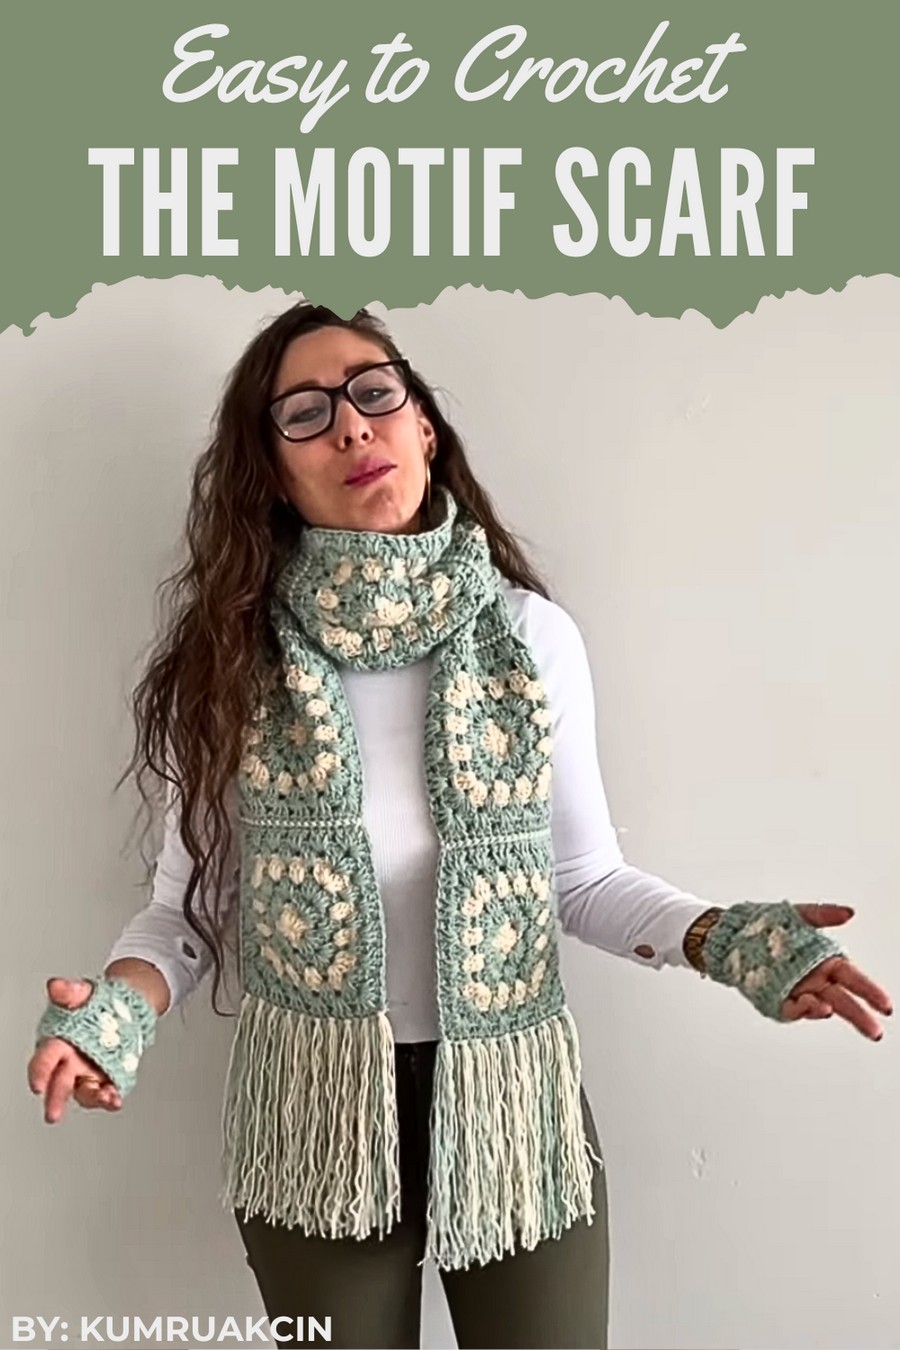
Beautifully designed, this scarf adds charm and elegance to any outfit. Featuring intricate motifs stitched together, it showcases delicate patterns that catch the eye and bring a touch of uniqueness to your style. Soft and lightweight, it is perfect for both chilly days and as a fashionable accessory, whether you're heading out casually or dressing up for a special occasion.
Handmade Croche Motif Scarf Pattern That Feels Special
The cheerful colors and textured design make it stand out, creating an accessory that’s versatile and practical. Whether wrapped around your neck or draped over shoulders, this scarf works effortlessly to add warmth and style to your wardrobe.
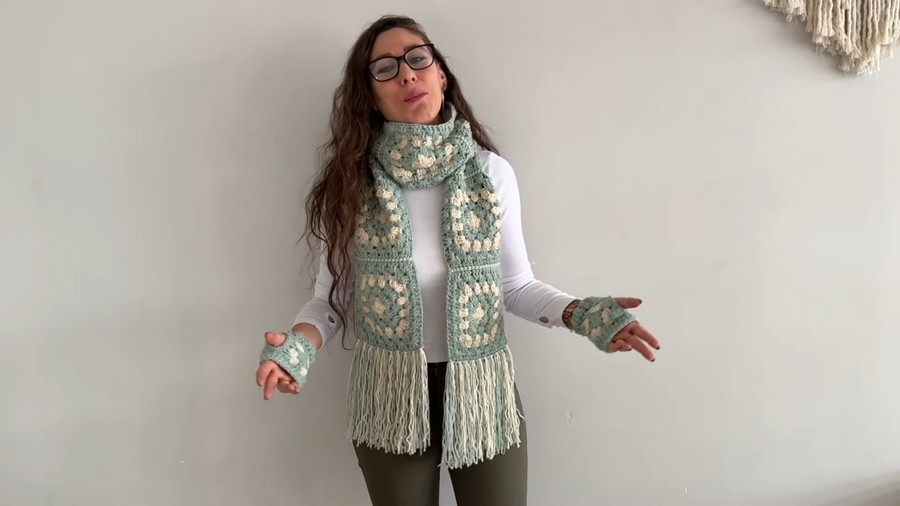
This guide provides step-by-step instructions for creating a stunning fringed scarf and a complementary glove set. The scarf incorporates elegant motifs and tassels for a stylish finish, while the gloves complement the look for a complete winter accessory kit.
Let's get started!
Skill Level
Intermediate
The pattern involves basic crochet stitches (e.g., single crochet, double crochet). It also incorporates motif construction and simple assembly techniques. Be prepared to sew or attach motifs and manage two colors.
Materials Needed
Yarn:
- Anatolia Series Yarn: A soft, thin yarn, 100 grams (300 meters) – in mint green and cream white for the scarf and gloves.
- For winter wear, double up the yarn when crocheting. If working single-ply, use a smaller hook for a lighter piece (see details below).
Hook:
- 4 mm crochet hook: Use for double-layered yarn to achieve a looser and thicker winter fabric.
- 3 mm crochet hook: Use for single-layer yarn or lighter versions.
Additional Supplies:
- Tapestry needle – For sewing motifs and weaving in ends.
- Scissors – For trimming yarn and tassels.
- Measuring tape – To customize the size of the scarf and gloves.
Optional:
- Fringe tassel maker or ruler – For creating even tassels.
Key Abbreviations (US Crochet Terminology)
| Abbreviation | Meaning |
|---|---|
| ch | Chain stitch |
| sc | Single crochet |
| dc | Double crochet |
| sl st | Slip stitch |
| st(s) | Stitch(es) |
| yo | Yarn over |
| rep | Repeat |
General Notes
- Double-Stranded Yarn: If using a single-ply yarn, prepare two strands by pulling the yarn from both the inside and outside of the ball.
- Loose Tension: Work loosely to keep the motifs open and flexible. Tight stitching can diminish the drape and aesthetic of both the scarf and the tassels.
- Motif Arrangement: The scarf is made from individual square motifs connected edge-to-edge.
Fringed Scarf Instructions
Step 1: Materials and Preparation
Before starting, ensure that your yarn is double-layered and your 4 mm hook is ready. For single-ply yarn, switch to a 3 mm hook to create firmer stitches for a lighter scarf.
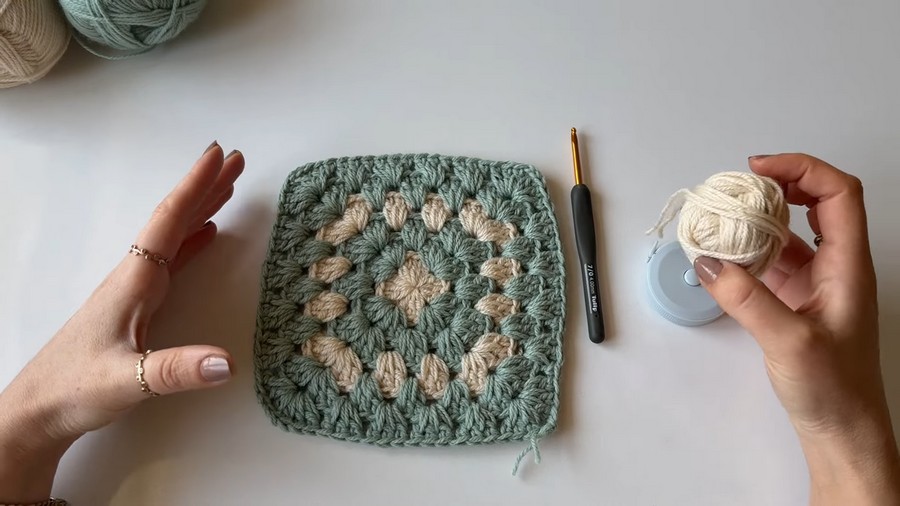
Step 2: Motif Construction
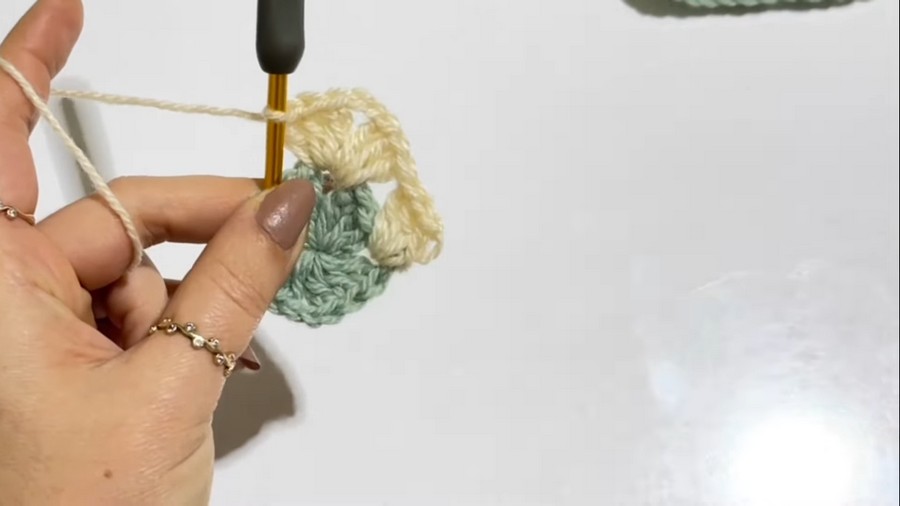
- Magic Ring:
- Create a magic ring by placing the yarn over your middle finger and wrapping it once around.
- Insert your hook into the center of the ring, yo, pull up a loop, and chain 1 to secure.
- Round 1 (Forming the Base Square):
- Ch 3 (counts as dc), work 2 dc into the ring. Ch 2 (forms the corner).
- Work 3 dc, ch 2, four times, forming four sets of “3 dc + ch 2”.
- Pull the magic ring tail tight to close the circle.
- Join with a sl st to the top of the starting chain-3.
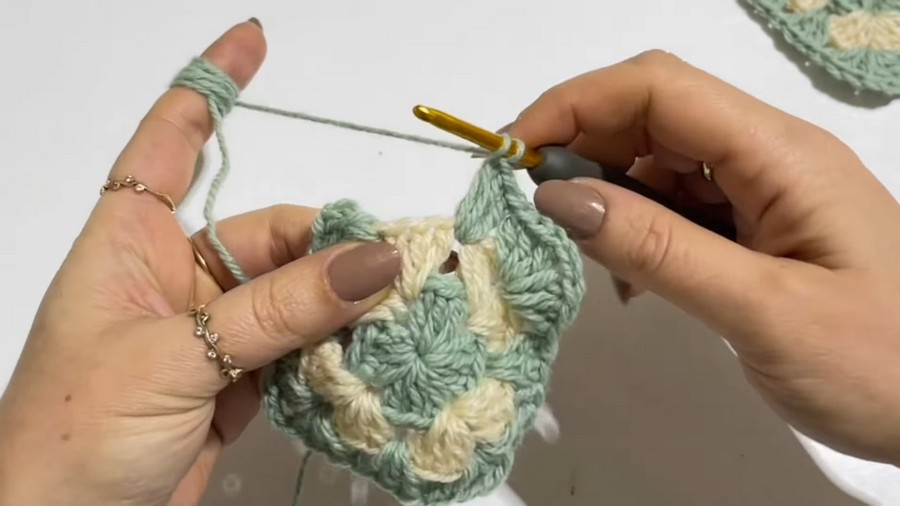
- Round 2 (Corners and Expanding the Square):
- Sl st into the ch-2 space at the first corner.
- Work the Corner: Ch 3, then work 2 dc into the ch-2 space. Ch 2, and work 3 more dc into the same space. (1 corner group made).
- No chains between corner groups. Jump into the next ch-2 space and repeat the corner group (3 dc, ch 2, 3 dc). Work this for all four corners.
- Sl st into the top of the starting chain-3 to complete the round.
- Note: Each corner contains 3 dc, ch 2, 3 dc.
- Round 3 (Adding More Layers):
- Sl st into the next ch-2 space. Work the corner group (3 dc, ch 2, 3 dc) in each corner.
- Between corners, work 3 dc into each non-corner space (these spaces increase as the square grows).
- Sl st to the starting point to complete the round.
- Continue Repeating Rounds:
- Add as many rounds as you like to adjust the size of each motif. The example uses 3 rounds per motif.
- Cut the yarn and weave in the ends after completing each motif.
Step 3: Motif Assembly
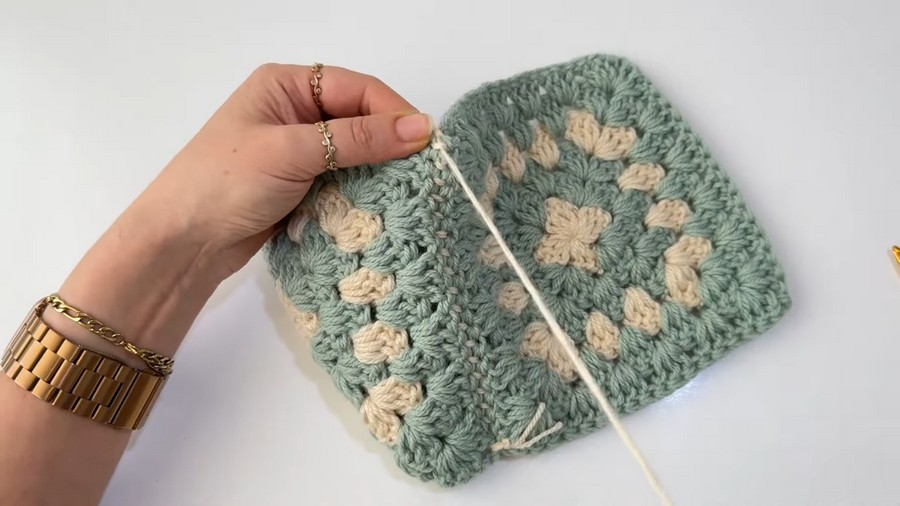
- Lay each motif right side up. Arrange them side by side to visualize the final scarf layout.
- Sew the Motifs:
- Use a tapestry needle and the matching yarn color. Align the corners and edges of the motifs and sew them together from the wrong side using a whipstitch or slip stitch.
- Alternate between cream white and mint green motifs for a two-tone effect.
Step 4: Adding the Tassels
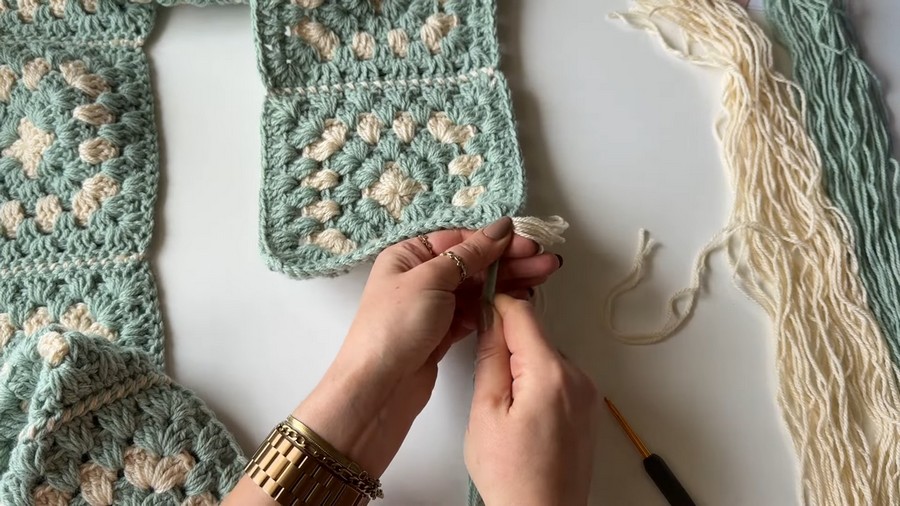
- Cut yarn strands measuring approximately 40 cm (16 inches).
- For each tassel, take 4 strands of yarn (2 cream + 2 green for two-tone effect). Fold them in half.
- Attach at the corners and along the edges:
- Insert your hook into the desired spot, fold the tassel yarn in half, and pull it through to form a loop.
- Draw the free ends through the loop and pull snugly to secure the tassel.
- Alternate cream and mint green tassels along the edges.
Optional Final Step:
Use a ruler or tassel maker to trim the tassels evenly for a polished look.
Matching Gloves Instructions
- Foundational Round:
- Ch enough to form a loose loop around the wrist (approximately 20 cm/8 inches). Join with a sl st to form a foundation ring.
- Rounds for Wrist:
- Work 1 sc in each st around for several rows to form a cuff, or until the wristband is snug.
- Hand Rounds:
- Switch to dc, gradually increasing stitches to match the size of the hand.
- Leave a small gap for the thumb by chaining a few stitches instead of working in the round, then rejoining the round after the space.
- Finishing:
- Work a few more sc rows around the thumb opening.
- Weave in ends and add fringe or decorative details matching the scarf if desired.
Customization Ideas
- Variation in Yarn Thickness:
- For a lighter, spring-like accessory, use a single-layer yarn with a smaller hook size.
- Color Customization:
- Use contrasting colors for the motifs and unify them with a neutral fringe.
- Size Customization:
- Adjust the number of motifs for a longer or shorter scarf. The width can be changed by adding more rows.
- Personal Touch:
- Add metallic threads or small beads to the tassels for a unique look.
Tips for Success
- Check Alignment:
- Ensure proper alignment when sewing the motifs together for a polished finish.
- Tassels:
- Trim tassels neatly for a symmetrical and professional look.
- Experiment with Colors:
- Alternate colors evenly for a balanced aesthetic or opt for a gradient effect.
Conclusion
Your fringed scarf and glove set is now complete—a sophisticated, warm, and stylish addition to your winter wardrobe! This project beautifully combines function and fashion with its elegant motifs and playful tassels. Whether gifted or kept, these accessories are sure to turn heads and keep you warm.
Pattern Variations
- Monochrome Elegance:
- Use the same color for motifs and tassels for a sleek, uniform look.
- Mini Scarf:
- Reduce the number of motifs for a smaller, lightweight scarf ideal for kids or as a chic neck accessory.
- Chunky Design:
- Use super bulky yarn and a larger hook for a cozy and dramatic look.



