Unlock a free crochet baby hat pattern that works up in 20–30 minutes, with puff stitches, soft DK yarn, and easy size options from newborn to 12 months.
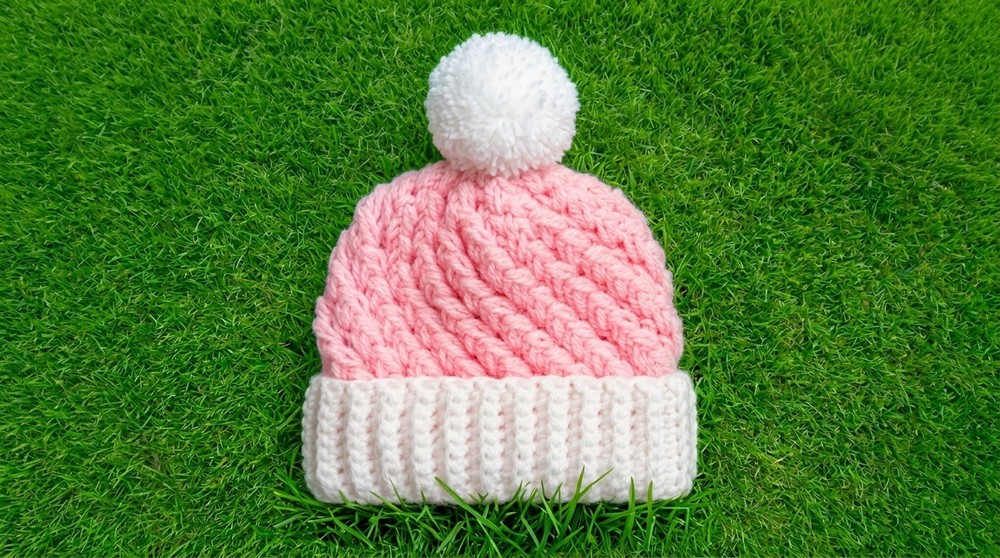
Not every beginner project has to feel scary or confusing, especially when the result is a tiny hat that looks as sweet as a baby’s smile. Soft yarn, gentle texture, and a neat rounded shape come together to form a cozy little piece that sits snugly on a baby’s head. The tidy ribbed brim, smooth top, and simple look suit any color choice—pastel, bright, or neutral—so it fits easily with favourite baby outfits and blankets. Whether it’s for daily wear, a baby shower gift, or those first photos, this small hat looks special while staying practical and comfortable.
Adorable Crochet Baby Hat Pattern: Perfect for Little Heads
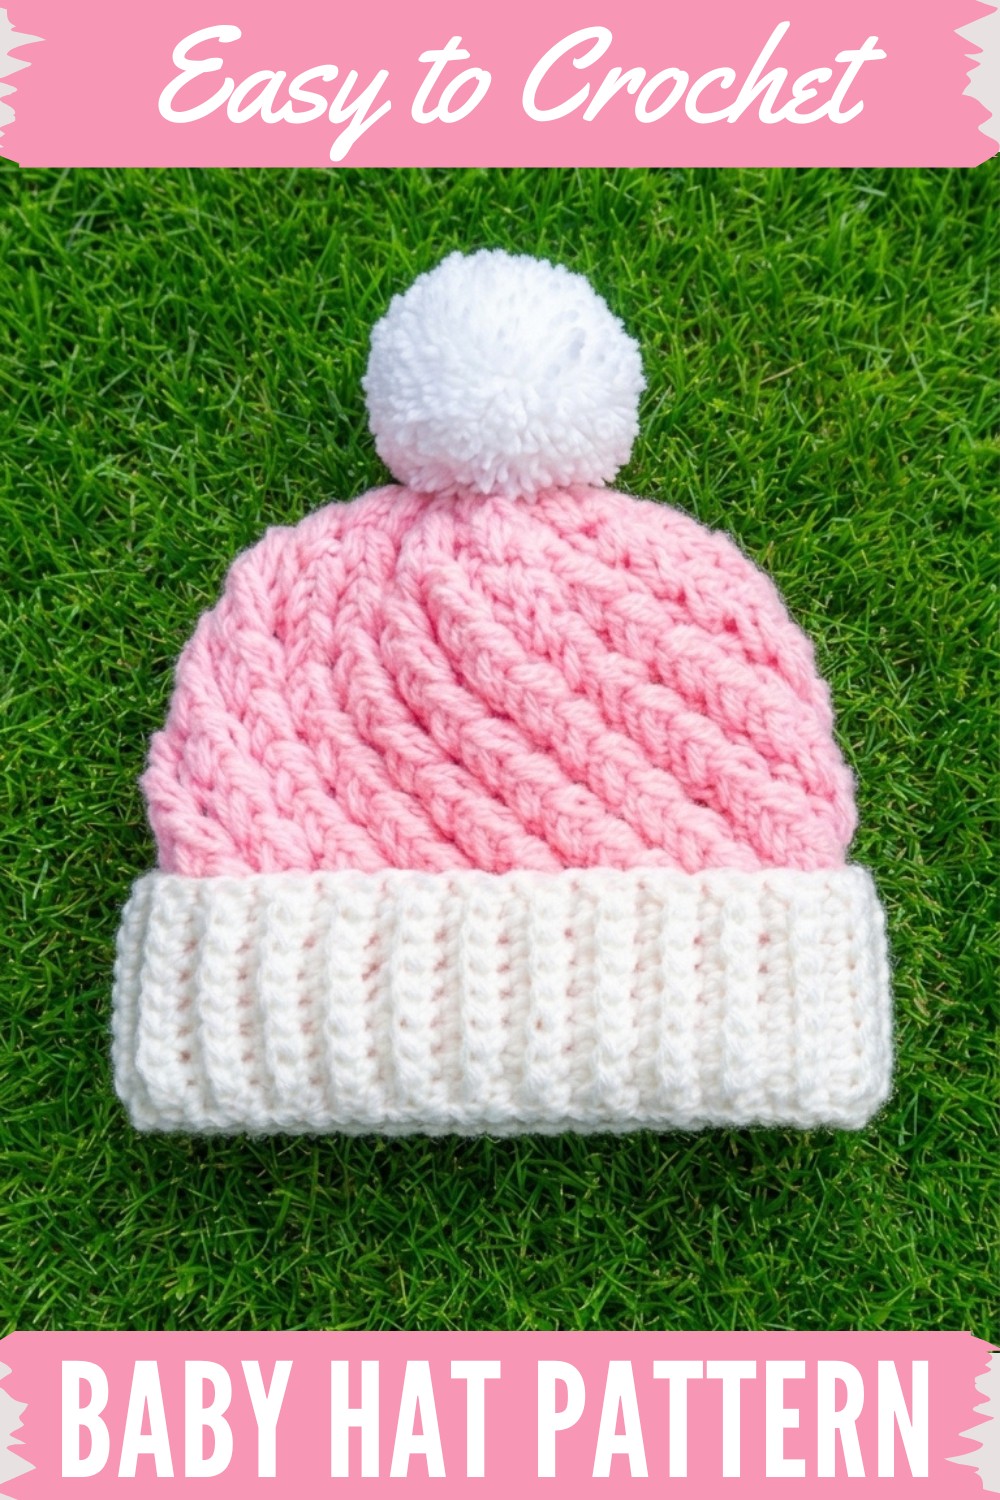
This Crochet Baby Hat pattern suits beginners who worry about counting, tension, or complicated steps. Basic stitches are repeated in easy rounds, so the hat slowly grows in your hands without any stressful shaping. Clear instructions guide you through forming a soft, stretchy band, building the main section, and closing the top neatly. Size changes for newborns up to about one year are handled simply by adding or reducing a few rounds. The project works up quickly, doesn’t use much yarn, and helps build confidence, making it a gentle starting point for anyone new to crochet.
Baby Puff Stitch Beanie Crochet Pattern
Skill Level
Beginner to Intermediate
Materials
- Yarn: Double knit (DK) yarn (recommended: 100g/330 meters per skein)
- Main color: 30–50g (depends on hat size)
- Contrast (ribbon/edge/pom pom): ~10g
- Hook: 4.0 mm crochet hook
- Optional: Yarn needle (for joining, weaving, and closing the top), scissors, stitch marker, pom pom maker
Key Abbreviations (US Terms)
- ch: chain
- sc: single crochet
- dc: double crochet
- sl st: slip stitch
- st/sts: stitch/stitches
- BL: back loop only
- rep: repeat
- puff st: (Front post puff stitch) [Yarn over, insert hook around st indicated, yarn over, pull up loop] 2 times (5 loops on hook), yarn over, pull through 4 loops, yarn over, pull through last 2 loops
- FO: fasten off
Special Notes
- The hat is worked flat (back-and-forth rows) for the brim, then joined into a ring, and the body is built in rounds.
- Always check your stitch count—consistency results in a perfectly fitted hat for baby.
- Sizes given: Newborn (30–40 weeks), 0–3 months, 3–6 months, 6–12 months
- Numbers in ( ) at the end of each instruction show counts for the four sizes.
Sizes & Stitch Counts
| Size | Ribbing Rows | Stitches/Rounds | Double Crochets (body round 2) | Puff Stitches (body rounds) | Final sc (top) |
|---|---|---|---|---|---|
| Newborn | 24 (48 rows) | 48 | 16 | 11 | 8 |
| 0–3 months | 27 (54 rows) | 54 | 18 | 12 | 9 |
| 3–6 months | 30 (60 rows) | 60 | 20 | 13 | 10 |
| 6–12 months | 33 (66 rows) | 22 | 14 | 11 | 11 |
Pattern Instructions
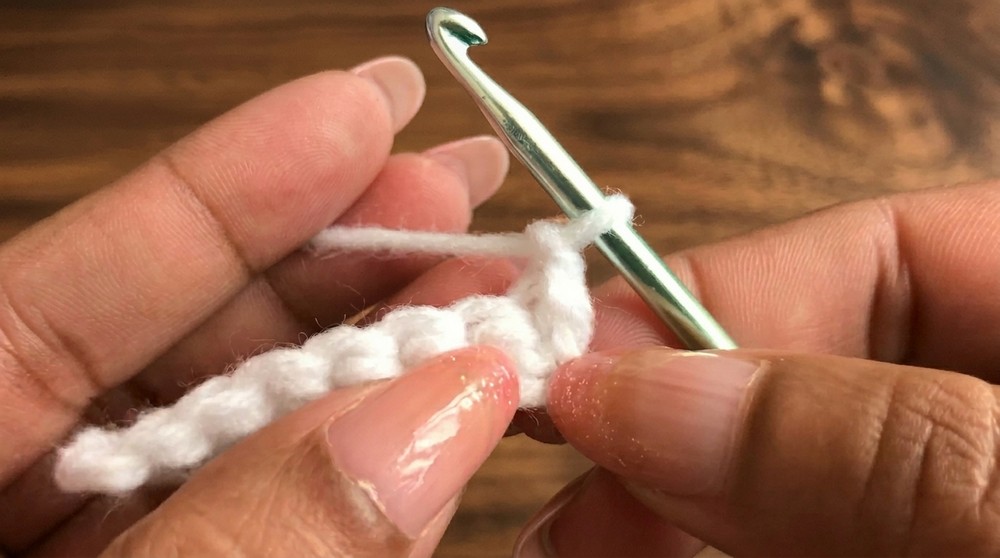
1. Ribbed Brim (worked flat)
With accent/ribbon color:
- Leave a tail (~15 cm) for sewing later.
- Ch 9.
- All sizes start with 9 ch for height of brim.
- Row 1:
- Turn, sc in 2nd ch from hook and each ch across (8 sc).
- Rows 2–[rows per size]:
- Ch 1, turn, sc in BL only in each st across (8 sc per row).
- Continue until you have the correct number of rows for your size (see table above):
- Newborn: 48 rows (24 lines)
- 0–3 months: 54 rows (27 lines)
- 3–6 months: 60 rows (30 lines)
- 6–12 months: 66 rows (33 lines)
Tip: Each two rows makes one rib or 'line'. Count lines if you find it easier.
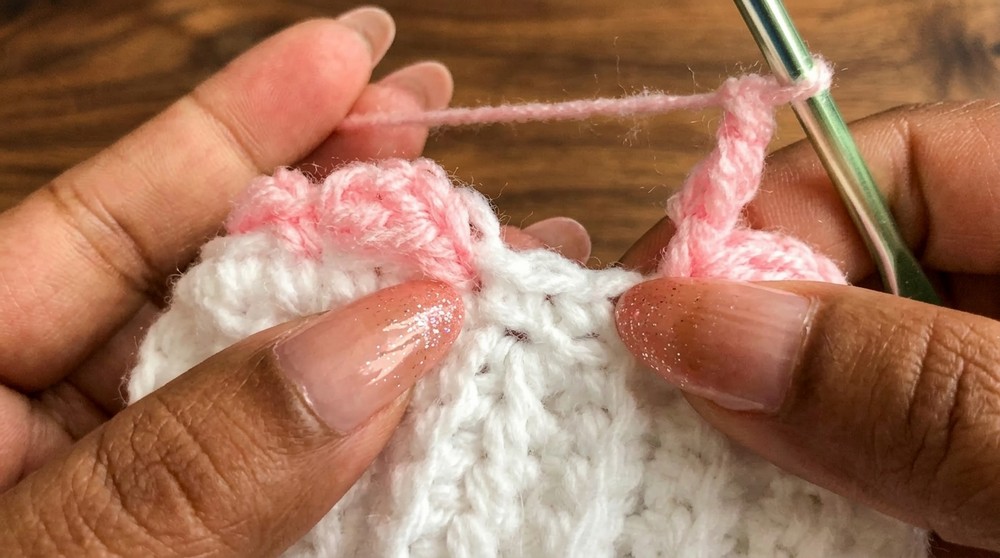
- Join brim into a ring:
- Fold ribbing so ends meet; whipstitch or sl st one edge through both loops, the other only through BL (for a nearly invisible seam).
2. Set up for Hat Body
Round 1 (with accent or main color):
- Ch 1.
- Place 1 sc in the end of every row around the top edge of the ribbed brim (1 sc per row).
- You should have as many sc as rows worked.
- Join with sl st to first sc.
- Newborn: 48 sc
- 0–3 months: 54 sc
- 3–6 months: 60 sc
- 6–12 months: 66 sc
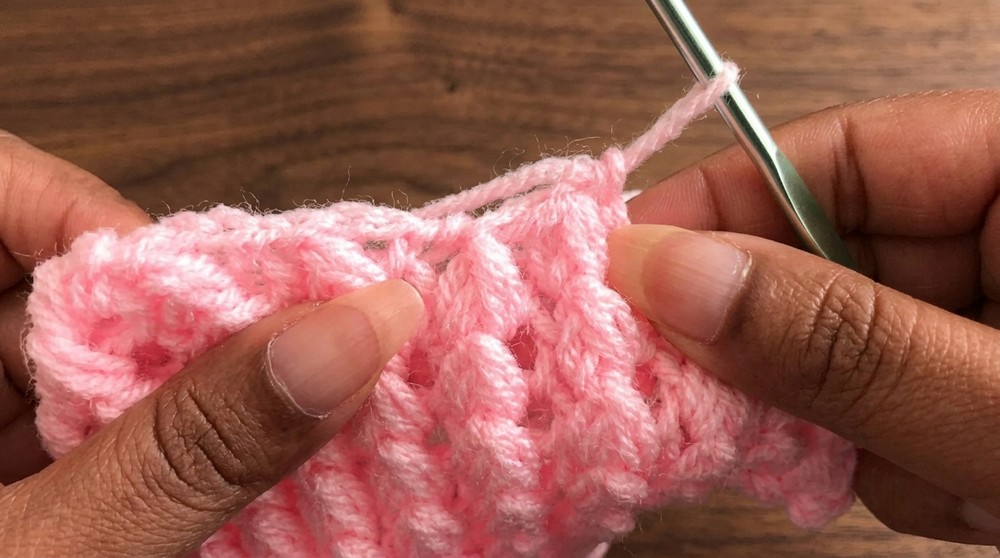
3. Puff Stitch Body
Change to main color.
Body Round 1 (Mesh round):
- (In first sc) Sc, ch 2, dc in same st.
- Skip 2 sc, sc in next sc, ch 2, dc in same sc.
- Repeat from * to * around. You will end up with (size appropriate) number of mesh points (the dc).
- At end, skip 2 sc, join to first sc with sl st.
- Newborn: 16
- 0–3 months: 18
- 3–6 months: 20
- 6–12 months: 22
Body Round 2–[Body Height by Size]:
Repeat this round for the height needed for your size:
- Newborn: 8 rounds
- 0–3 months: 9 rounds
- 3–6 months: 10 rounds
- 6–12 months: 11 rounds
Each round:
- In each ch-2 sp between mesh, sc, ch 2, dc in same sp.
- Repeat around, join with sl st.
Body Height Tip
- The 3D puff stitch effect comes in next rounds. If you want a flat hat, substitute the mesh with simple dc stitches instead.
4. Puff Stitch Decrease Rounds (Top Shaping)
Proceed for the last 3 rounds as follows, continuing in joined rounds:
First decrease round:
- (In ch-2 space) sc, ch 2, Front post puff stitch (FP puff) around next dc.
- Skip next chain space, in following ch-2 space repeat (sc, ch 2, FP puff).
- Continue around, working two sections together at every decrease (i.e., decreasing count).
Second decrease round:
- sc in each ch-1 sp or decrease point, fewer puffs.
Final round:
- Work 8, 9, 10, or 11 sc around the remaining "holes" at top.
- Pull tight, fasten off, weave in end through all top stitches, gather closed, and secure.
5. Finishing
- Close the top neatly with yarn needle as above.
- Optional: Attach a pom pom to the top, using remaining accent yarn.
- Weave in all ends.
- Block gently if desired.

Conclusion & Final Tips
- This beanie is super soft, quick to stitch, and suitable for all baby sizes.
- For best results, use the right yarn weight and keep to the recommended hook size.
- Correction: Watch your tension with DK yarn and puff stitches; keep stitch counts correct at rim and each mesh round.
- Tip: If following the pattern for multiple sizes, mark your increase rows and body rounds to match the size chart and get a perfectly fitted beanie.