Fall in love with a crochet heart sweater pattern that’s easy to follow fun to make and perfect for adding a touch of warmth and charm to your favorite outfits.
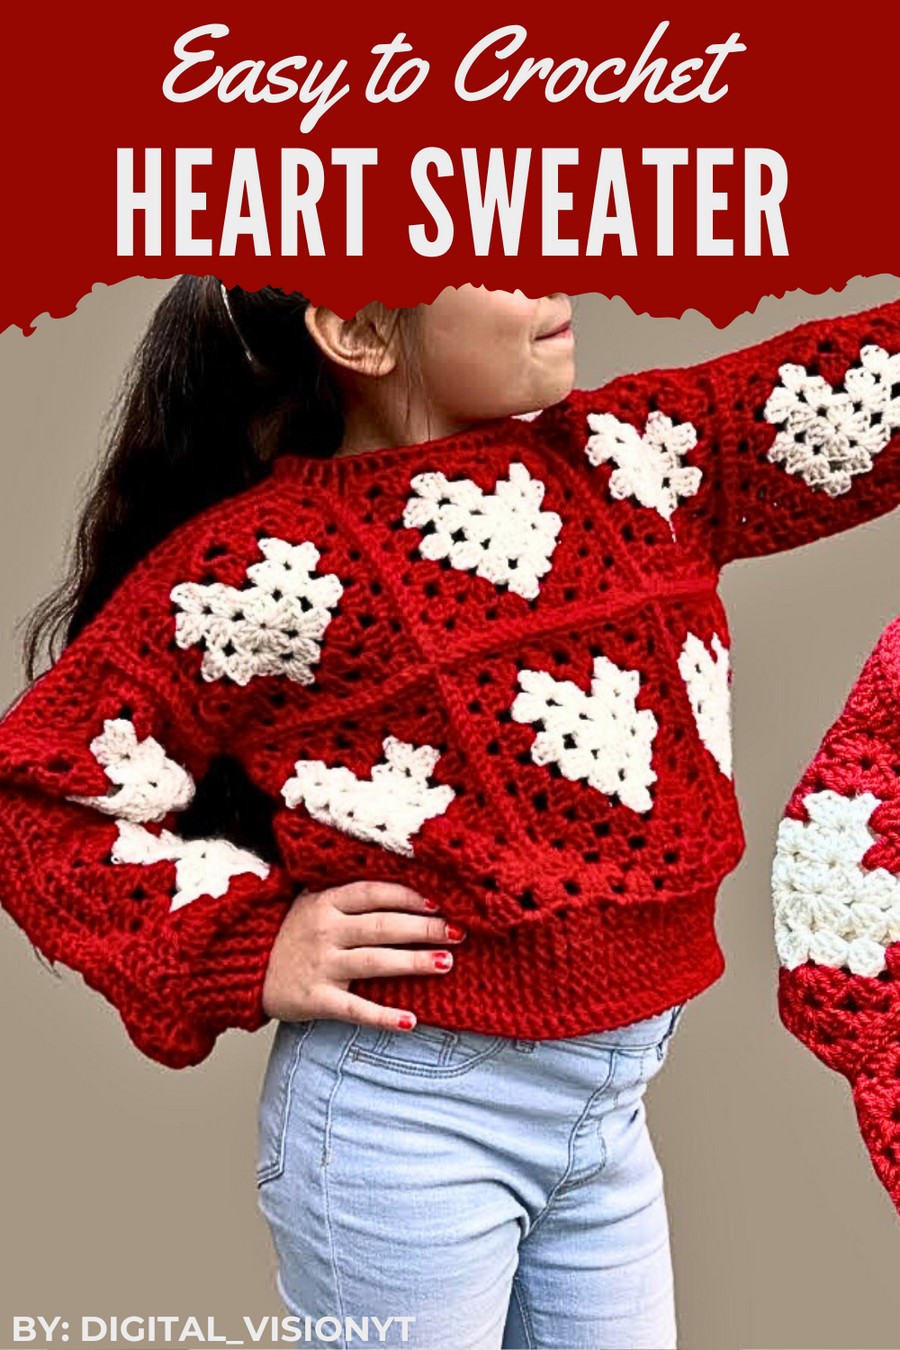
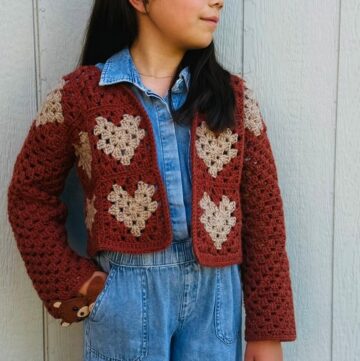
A stunning sweater that features lovely heart-shaped designs adds a touch of charm and warmth to any outfit. With its soft texture and intricate yet simple look, it’s perfect for cozy evenings, casual outings, or thoughtful handmade gifts. This stylish piece offers a unique way to express your creativity and love through clothing, blending comfort with eye-catching details.
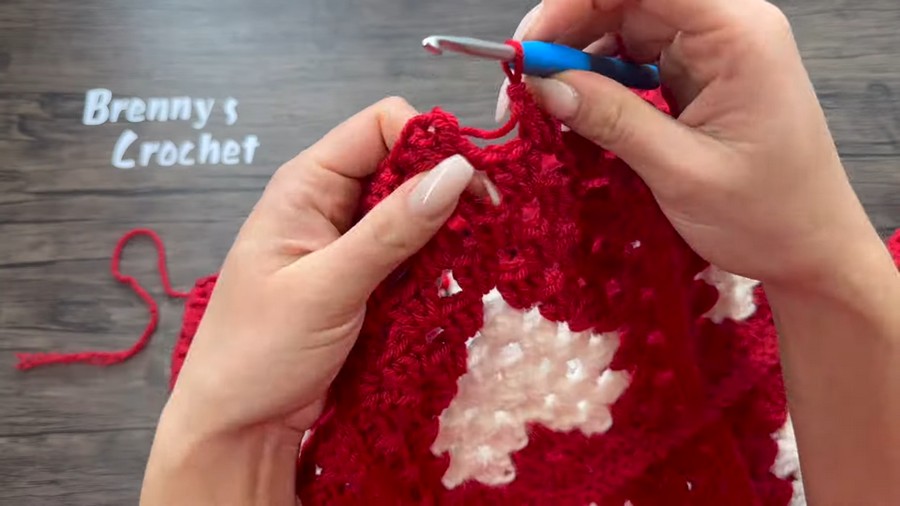
Crochet Heart Sweater Pattern You'll Ever Wear
Whether paired with jeans, skirts, or layered for colder weather, it adds sweetness and personality to your wardrobe. Its timeless and heartfelt design makes it suitable for all ages, allowing you to wear or gift it for special moments or everyday wear.

Materials Needed
- Yarn:
- Medium-weight yarn (Category 4, 100% acrylic or similar). Choose a main color or multiple colors for granny squares and sweater accents.
- Approx. 1000–1500 yards, depending on size.
- Medium-weight yarn (Category 4, 100% acrylic or similar). Choose a main color or multiple colors for granny squares and sweater accents.
- Crochet Hook:
- 4.5mm (G-7).
- Tapestry Needle:
- For sewing seams and weaving in ends.
- Scissors.
- Stitch Markers:
- Optional, for marking and aligning parts during assembly.
Skill Level:
Intermediate to Advanced – Requires familiarity with granny squares, joining techniques, double crochet (dc) stitches, creating relief stitches, and customizing garment sizing.
Key Abbreviations (US Terminology)
- ch: Chain
- sc: Single Crochet
- dc: Double Crochet
- fpdc: Front Post Double Crochet (relief double crochet)
- sl st: Slip Stitch
- yo: Yarn Over
Special Notes
- Granny Squares: This pattern builds on pre-made granny squares (from Part 1). Ensure all squares are identical in size and orientation.
- Customization: With these instructions, you can modify the sweater’s size and dimensions by adding or subtracting granny squares or increasing rows in the cuffs, neck, and hem.
- Sweater Fit Considerations: To ensure proper sizing, use a similar-sized sweater as a reference for the arrangement of squares.
Pattern Instructions: Sweater Assembly and Final Details
Step 1: Joining Granny Squares
- Lay Out the Squares:
- Arrange granny squares for the front and back pieces according to the size chart from Part 1.
- Example: For size 8–10 years, the front and back will each consist of four rows of three granny squares.
- Vertical Seams:
- Align squares with right sides facing each other.
- Join squares vertically by inserting the hook into the back loop only of the corner chain from both squares.
- Work a sl st to join. Continue by joining every chain along the edges of the squares.
- Tip: Continuously check alignment during this process to avoid crooked joins.
- Horizontal Seams:
- Join horizontally across completed vertical seams. Use slip stitches to join edges in the same manner (back loop only).
- Stop sewing where the neckline will remain open.
- Sleeve Openings:
- Leave openings on both sides for sleeves, measuring to match the width of your arm. Use stitch markers to define and secure these spaces.
- Check Before Proceeding:
- Once all vertical and horizontal joins are complete, check that you have two identical pieces (front and back) before moving to the next stage.


Step 2: Joining Front and Back Pieces
- Align the Pieces:
- Place the front and back pieces with the right sides facing inwards.
- Sew Shoulders:
- Use the tapestry needle to sew across the top edges of the front and back pieces to create the shoulders.
- Ensure both sides are sewn evenly.
- Sew Sides Up to Sleeves:
- Work from the bottom hem upwards towards the sleeve openings. Ensure both sides are sewn with equal openings left for the arms.
- Neckline:
- Leave the neckline open as shown in the layout from Part 1.
- Turn Right Side Out:
- Once all joins are complete, turn the sweater right side out to prepare for cuffs, neck, and other details.

Step 3: Adding Sleeves
Foundation Rounds for Sleeves:
- Attach Yarn:
- Join yarn to the armhole opening where the seams meet at the bottom of the armhole (underarm point).
- Round 1:
- Work 1 dc into each available chain space across the armhole opening, skipping over the chain gaps created during the joining process.
- For the corners where seams meet, work additional dc stitches to ensure smooth transitions and avoid gaps.
- Round 2–5:
- Continue adding rounds of dc for a smooth and tapered sleeve.
Creating the Cuff (Post Stitch Rounds):
- Relief Stitches (Round 6):
- After the foundational rounds, transition to fpdc (front post double crochet) stitches to structure the cuff.
- Work as follows:
- Alternate fpdc and regular dc for the first round to create texture and slight tightness.
- Work as follows:
- After the foundational rounds, transition to fpdc (front post double crochet) stitches to structure the cuff.
- Continue Cuff Rounds:
- Work fpdc around each relief double crochet (fpdc) from the previous row. Continue to repeat for a total of 5 cuff rounds or until you reach the desired cuff length.
- Finish:
- Seal the final cuff round using a slip stitch into the starting post stitch. Cut the yarn, leaving a tail for weaving in.
- Repeat for the Other Sleeve:
- Repeat the sleeve process for the second armhole, ensuring both sleeves are identical in length and number of stitches.
Step 4: Extending the Sweater Hem
- Attach Yarn:
- Begin at any point along the bottom edge with a slip stitch.
- Group Stitches:
- Work 3 dc clusters (groups of 3 dc stitches) in each granny square space.
- For chain spaces where squares join, evenly distribute three dc stitches across the gap.
- Subsequent Rounds:
- Continue working rounds of three dc clusters, adding a chain between each cluster for traditional granny square style.
- Optional Post Stitch Finish:
- Add 2–3 rounds of fpdc to mirror the cuff structure at the hem.
Step 5: Neckline
- Attach Yarn:
- Start at one shoulder seam.
- Relief Stitches:
- Work fpdc around the existing chains/stitches at the neckline.
- Rounds:
- Continue working in rounds of fpdc for 3 total rounds, or until the desired collar height is reached.
- Finish:
- Use a tapestry needle to close the round seamlessly, as done for the cuffs and hem.
Conclusion
The finished Ali Sweater is a seamless and customizable garment, perfect for casual wear and layering. Its structured design combines timeless granny square motifs with modern post-stitch details, making it both classic and on-trend.
Pattern Corrections
- Always verify that granny squares align perfectly when joining seams. This will prevent unevenness in the final garment.
- Count stitches after each sleeve round to ensure symmetry between both sleeves.
Tips for Success
- Stitch Consistency: Pay close attention to tension when sewing granny squares to maintain even stitches and prevent puckering.
- Size Variation: Modify sweater size by altering the number of granny squares or adding rows in the hem, sleeves, or neckline.
- Yarn Management: Choose high-quality yarn with good stitch definition to highlight the raised details of the cuffs and neckline.