Deck your favorite corner with this Free Crochet Santa Claus Pattern, featuring a handmade decoration full of festive personality and charm.
Nothing says holiday cheer quite like a cheerful Santa Claus ornament made with love. This Free Crochet Santa Claus Pattern is a charming project that lets you bring a bit of festive fun to your home or gifting. With its timeless, round shape and iconic red hat, this Santa design incorporates soft textures for the beard and clean, defined stitches for the face, giving it a perfectly cozy and polished look. From the playful pom pom hat tip to the fluffy beard, every detail aligns seamlessly to create a joyful holiday accent.
Free Crochet Santa Claus Pattern to Spruce Up Your Tree Decor
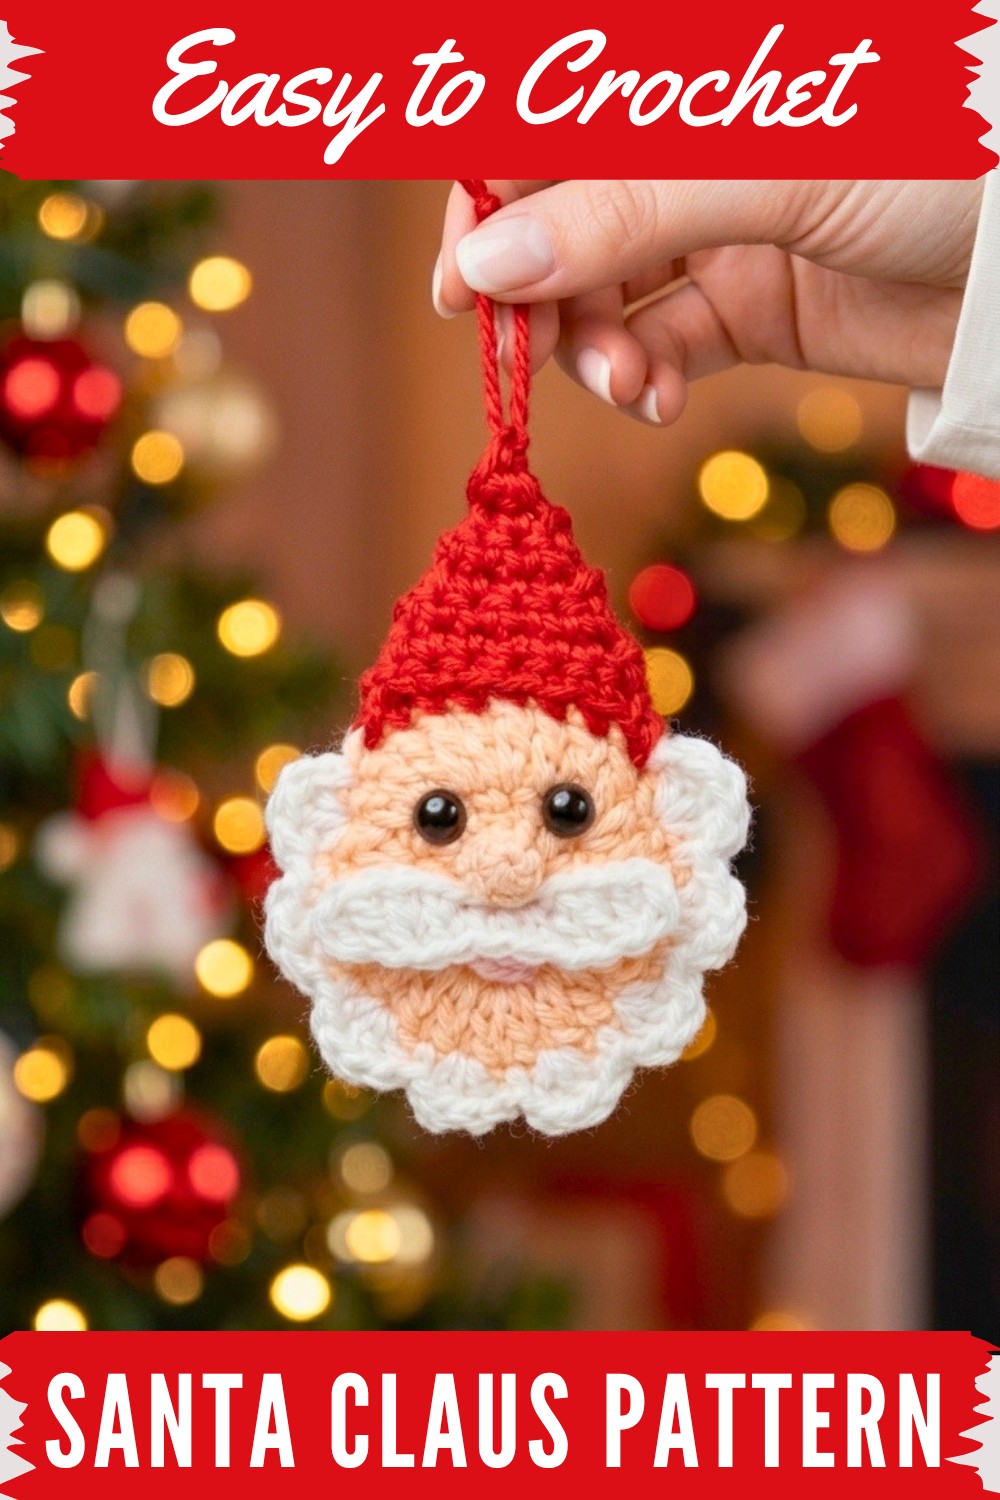
Built on a simple round base for the face, the pattern includes layering separate elements like the hat, beard, and nose for added dimension without making it bulky. The stitches are accessible, using basics such as single crochet, half double crochet, and double crochet, making it a great project for beginners with some experience or anyone looking for a quick and satisfying holiday task.
This project not only works well as a Christmas tree decoration but also makes a thoughtful gift embellishment, a unique holiday garland piece, or even a whimsical addition to personalized stockings. Experiment with colors, yarn textures, or even placement of the facial features to customize your Santa just the way you like it.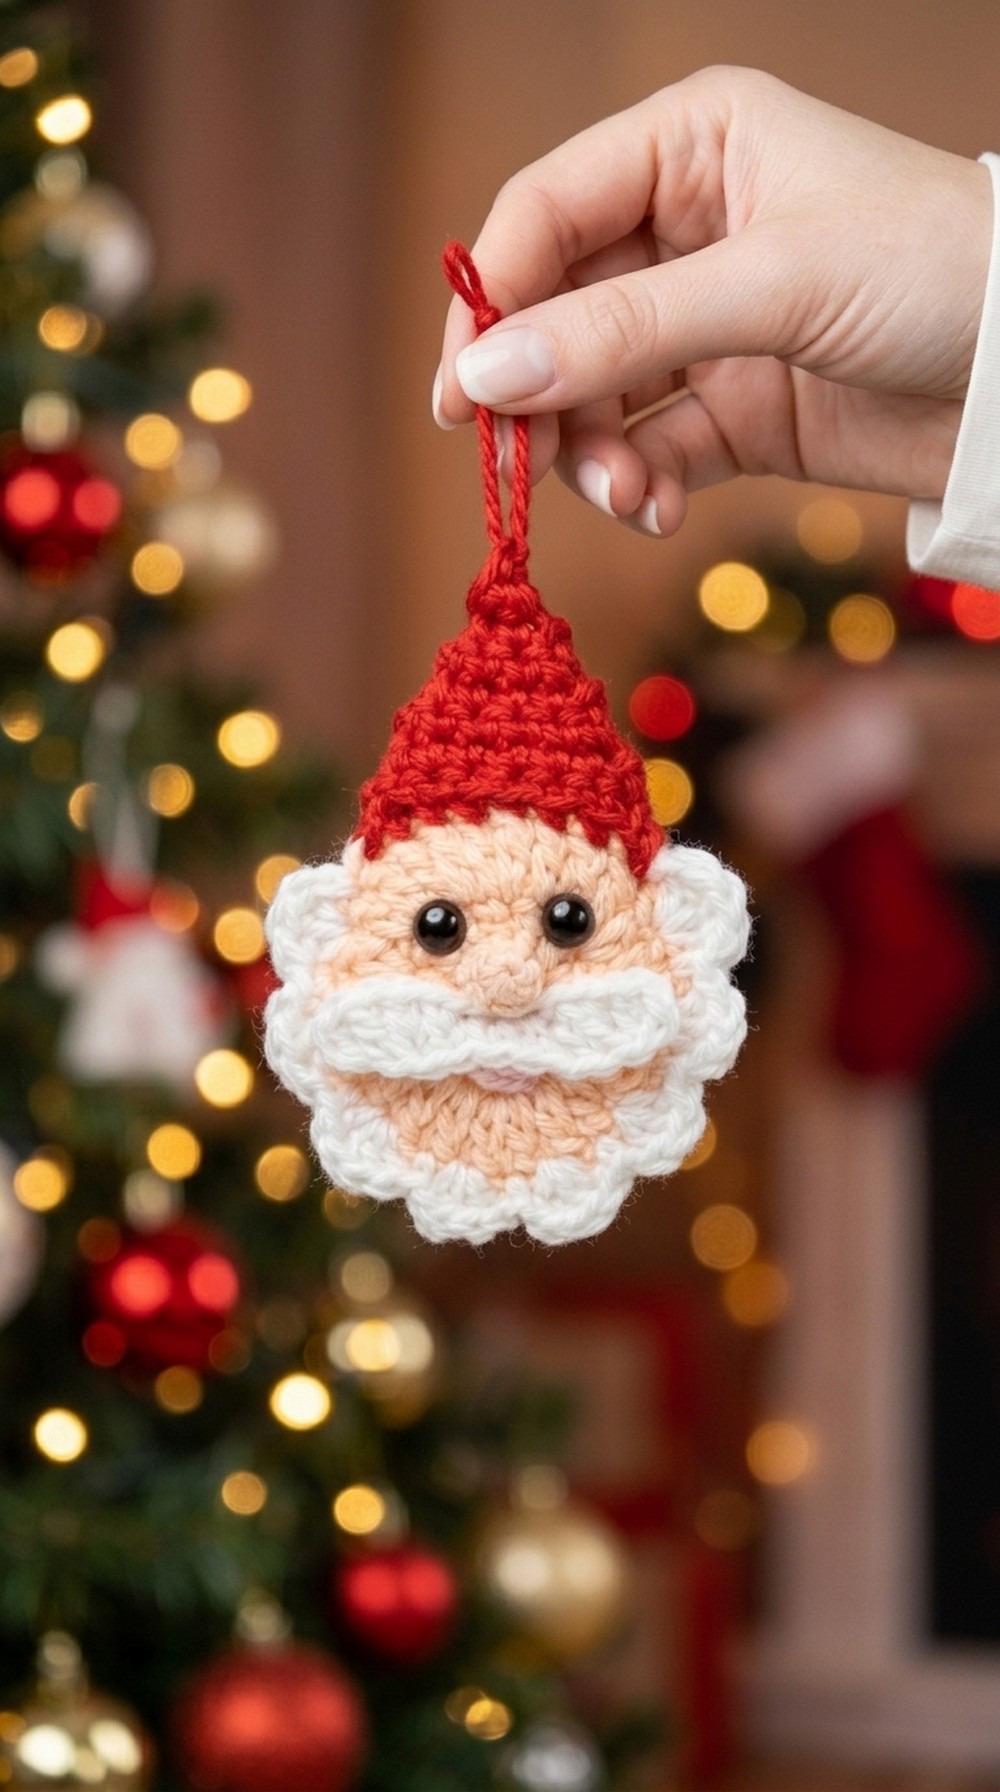
Crochet Santa Claus Pattern
Introduction
I’m excited to share another beautiful creation: a Crochet Santa Claus Pattern. It’s a simple and festive piece that you can hang on your Christmas tree or use as a charming applique for clothing or stockings. Follow along with this step by step pattern to crochet this delightful holiday decoration. Let’s get started and bring Santa to life.
Quick Overview of Pattern
Key Features:
- Face Base: Two identical flat circles in flesh toned yarn for a sturdy, double layered base.
- Large Beard: A scalloped white border crocheted through both face panels to create a fluffy beard.
- Pointed Hat: Worked in rows with red yarn, tapering into a single point, and finished with a long hanging loop.
- Moustache: A delicate standalone lace piece to define Santa’s iconic look.
- Nose: A small, cute button nose worked in a magic ring for a rounded 3D look.
Assembly:
The applique is pieced together using a hot glue gun and finished with:
- Hand embroidered mouth details
- Flat back pearl eyes
- A built in hanging loop
Notes
- Double Layer Structure: The double layered face adds stiffness, ensuring the ornament doesn't curl or lose its shape.
- Magic Ring: Pull the yarn tail firmly to ensure a clean and compact magic circle—especially for the nose.
- Hanging Loop: Leave a long red yarn tail when finishing the hat to form a seamless hanging loop.
Skill Level
Easy / Advanced Beginner
This pattern is suitable for crocheters familiar with:
- Working in the round
- Joining pieces together with crochet
- Basic shaping (sc2tog decreases)
Materials
- Yarn:
- Flesh tone (face)
- Bright white (beard & moustache)
- Festive red (hat & hanging loop)
- Light pink (mouth—small scrap)
- Hook: 2.5 mm crochet hook
- Eyes: Two 5 mm black flat back half pearls
- Notions:
- Hot glue gun
- Blunt tipped yarn needle
- Scissors
Measurements / Sizing
- Finished size: Approximately 3 inches long (from hat tip to beard). Perfect for tree ornaments or applique decorations.
Gauge
Gauge is not critical for this pattern. Focus on maintaining consistency across the layers and components for proportional scaling.
Stitch Abbreviations
| Abbreviation | Stitch |
|---|---|
| ch | Chain stitch |
| sc | Single crochet |
| hdc | Half double crochet |
| dc | Double crochet |
| sl st | Slip stitch |
| sk | Skip |
| st(s) | Stitch(es) |
| sc2tog | Single crochet two together (decrease) |
Special Stitches
Magic Ring:
An adjustable loop to start circular crochet projects; pull the tail tightly to close the center hole.
Scallop Shell Stitch:
3 dc into one stitch, bounded by sl st on either side, to create a scalloped, wavy texture.
SC Decrease (sc2tog):
Insert hook into the first stitch, pull up a loop, insert hook into the second stitch, and pull up another loop. Then yarn over and pull through all three loops on the hook.
Pattern Instructions
Part 1: The Face Panels (Make 2)
Use flesh tone yarn to create the circular face base.
- Round 1:
- Make a magic ring.
- Ch 2 (does not count as a stitch).
- Work 12 dc into the magic ring.
- Pull the yarn tail tightly to close the circle.
- Sl st to the top of the 1st dc to close the round. [12 dc]
- Round 2:
- Ch 2.
- Work 2 dc into each stitch around. [24 dc]
- Sl st to the top of the 1st dc to close the round.
- Fasten off and cut yarn.
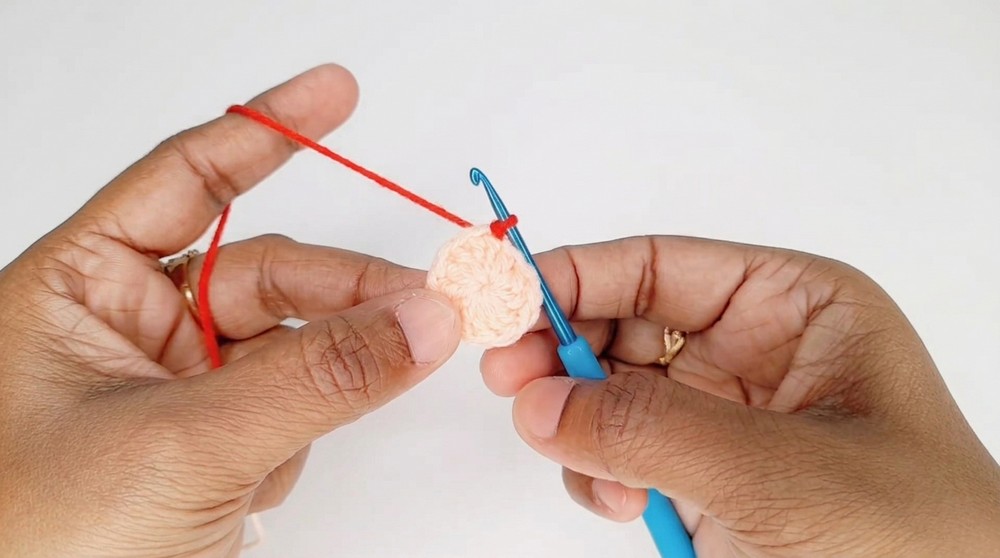
Repeat to make two identical circles. Place the two finished circles with their clean sides facing outward, ready for assembly.
Part 2: The White Fluffy Beard
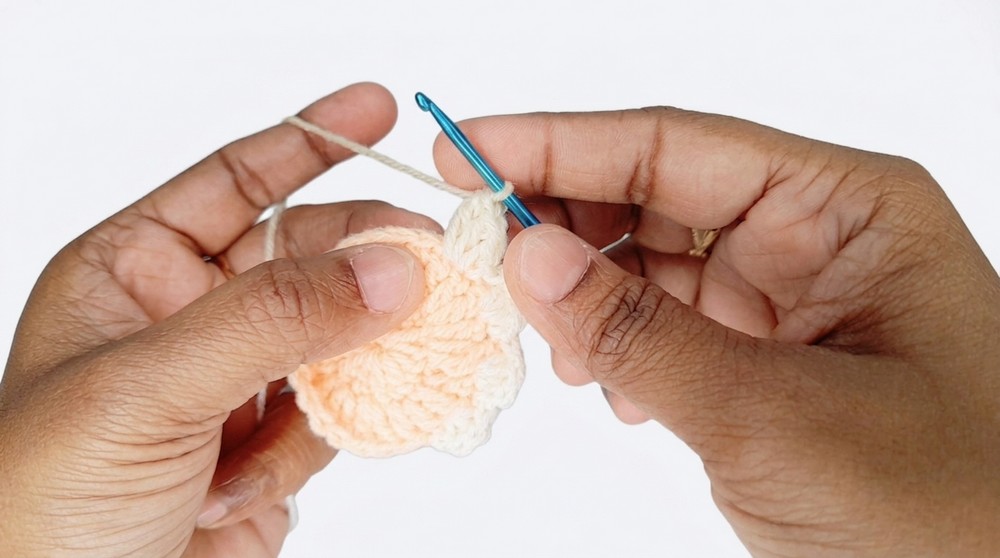
Attach the bright white yarn and work through both face panels to assemble the head and create the beard.
- Round 1:
- Form a slip knot with white yarn and insert it into a stitch of the front circle AND the corresponding stitch on the back circle.
- Ch 1 to anchor the yarn.
- Skip the next stitch, then work 3 dc into the next stitch (through both layers of fabric).
- Sl st into the next stitch, skip the following stitch, work 3 dc into the next stitch.
- Repeat this sequence 8 times around the bottom half of the circle.
- Fasten off and cut the yarn.
Part 3: The Pointed Red Hat
Create the pointed hat on the top edge of the head.
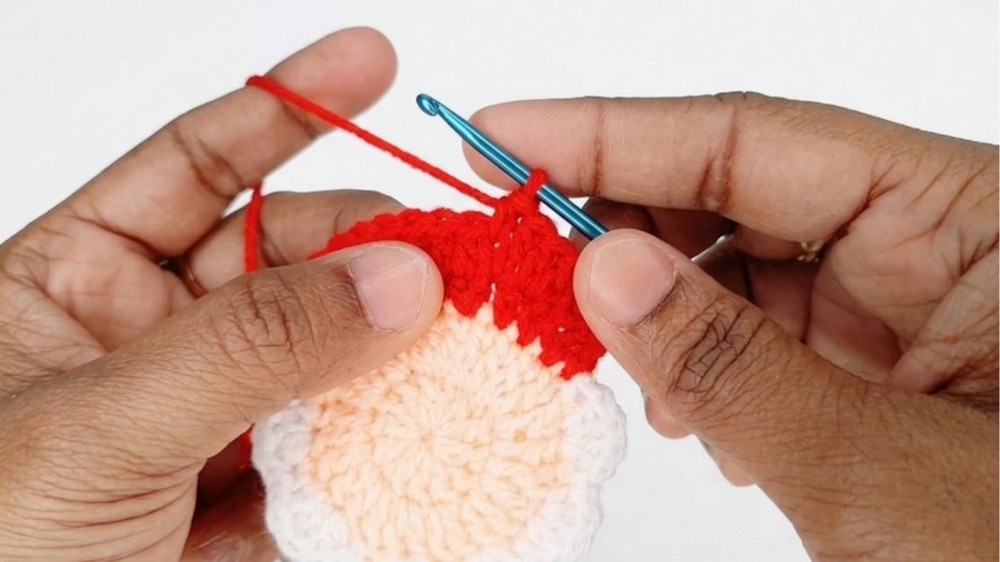
- Row 1:
- Join red yarn to the top edge of the face where the beard ends.
- Ch 1.
- Work 1 sc into each of the next 8 sts. [8 sc]
- Row 2 to Row 8:
- Ch 1, turn.
- Skip the 1st sc and work sc across the row.
- Decrease stitches in each row as follows:
- Row 2: 7 sc
- Row 3: 6 sc
- Row 4: 5 sc
- Row 5: 4 sc
- Row 6: 3 sc
- Row 7: 2 sc
- Row 8 (Final row):
- Ch 1. Skip 1st sc. Work sc2tog in the final 2 sts to finish the tip.
- Hanging Loop:
- Ch a long strand (as desired).
- Form a loop by tying a secure knot.
Part 4: The Moustache
Use white yarn to create a lacy standalone moustache.
- Row 1:
- Ch 12.
- Work the following:
- 1 sc in 2nd ch from hook.
- 1 hdc in the next ch.
- 1 dc in the next 2 ch.
- 1 sc in the next ch.
- 1 sl st in the next ch (creates the middle dip).
- 1 sc in the next ch.
- 1 dc in the next 2 ch.
- 1 hdc in the next ch.
- 1 sc in the final ch.
- Sl st into the same final space to complete.
- Fasten off and weave in tail.
Part 5: The Miniature Button Nose
Use flesh toned yarn to crochet a tight, rounded nose.
- Round 1:
- Make a small magic ring.
- Work 4 sc into the ring.
- Pull the yarn tail tightly to close.
- Sl st to the 1st sc to finish.
Assembly Instructions
- Weave Ends:
- Use a yarn needle to weave in all yarn tails from the face, beard, hat, moustache, and nose.
- Attach Components:
- Use a hot glue gun to glue the moustache in the center of the face.
- Attach the nose on top of the moustache dip.
- Add Eyes:
- Glue two 5 mm flat-back black pearls above the moustache, leaving a small gap between them.
- Embroider Mouth:
- Thread light pink yarn into the needle and embroider a small horizontal stitch under the moustache for the mouth.
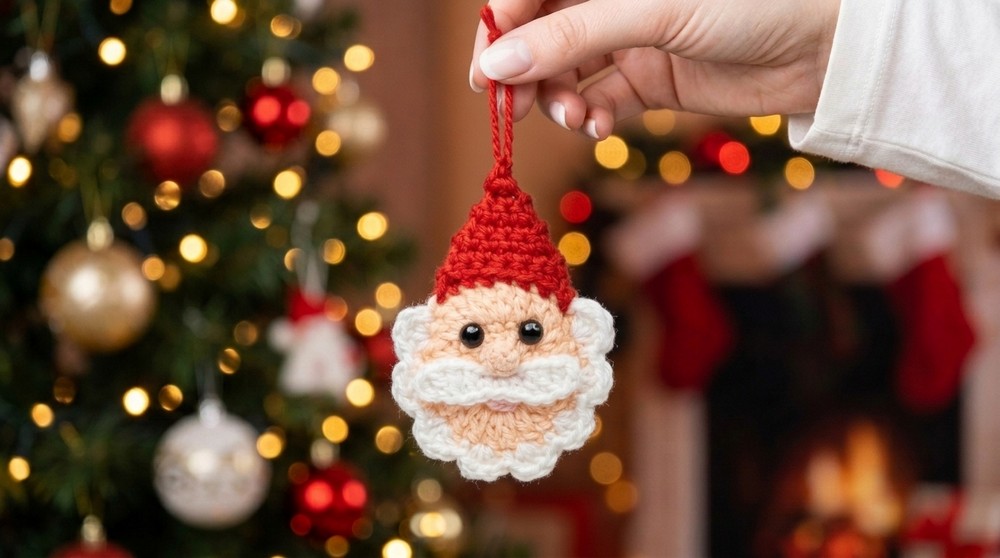
Finished Size
- The completed Crochet Santa Claus Pattern measures approximately 3 inches from the tip of the hat to the bottom of the beard.
Conclusion
Congratulations, Your Crochet Santa Claus Pattern is ready to display. Whether you hang it on your Christmas tree, use it as a garment applique, or add it to holiday stockings, this cheerful decoration is a fun and creative addition to your festive collection.