Keep your headphone game strong with this beautifully designed crochet headphone bag pattern, crafted to complement any outfit or mood.
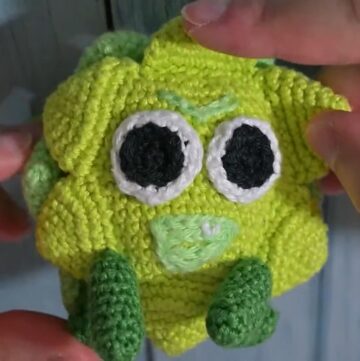
The headphone bag offers versatility and charm for various needs. Designed to carry small essentials, like headphones, coins, or charging cables, it balances both practicality and beauty. With delicate patterns resembling floral motifs, it adds a touch of handmade elegance to your accessories. Perfect for on-the-go use, it provides a convenient means to keep items safe and tangle-free, proving to be an invaluable companion for neat and creative storage purposes.
Crochet Headphone Bag Pattern

Crochet Pattern for Headphone/Cable Storage Bag
This guide outlines step-by-step instructions to create beautiful storage bag ideal for organizing headphones, cables, coins, or other small items. The process involves creating two circular pieces, joining them to form a pouch, and adding decorative details to complete the pattern. This pattern is beginner-friendly and customizable depending on your choice of colors and stitches.
Materials Needed
- Yarn: Approximately 12 grams of #4 medium-weight yarn (color combinations are adjustable as per preference).
- Hook: 3.75 mm aluminum crochet hook.
- Wool needle: Used for sewing together the two pieces.
- Scissors: To trim excess yarn.
Abbreviations of Stitches
For simplicity, the following abbreviations will be used:
- ch: Chain
- sl st: Slip stitch
- dc: Double crochet
- hdc: Half double crochet
- magic ring: Magic loop or hoop used to start the base
- st: Stitch
Step-by-Step Instructions
1. Create the Base Ring (First Piece)
- Wrap yarn around your finger to form a magic ring.
- Make a slip knot and adjust to create a circle.
- Ch 2 (these do not count as stitches).
- Work 12 dc into the magic ring. Ensure the stitches are neither too tight nor too loose.
- Count the stitches to confirm there are 12 dc. (Do not count the starting chains.)
- Join with a sl st into the first stitch.

2. Close the Magic Ring and Change Color
- Tighten the magic ring by pulling the loose yarn end.
- Hide and trim the loose yarn by weaving it in the back of the stitches.
- Change yarn color (e.g., white). Make a knot and attach the new yarn to the same place where you finished the previous round.
3. Create Flower Petals
- Begin with ch 3 (counts as first dc).
- In the same space, work 5 dc to form a fan-shaped petal.
- Skip 1 st at the base and repeat the petal pattern in the next stitch (5 dc in one stitch).
- Repeat the above step around, ensuring there are a total of 6 petals.
- Join with a sl st at the first stitch to close the round.

4. Work the Third Round (Base Stitch Foundation)
- Change back to the original yarn color (e.g., blue). Attach yarn where the previous round ended.
- Work hdc stitches into each stitch of the 5 petals from the previous round.
- Example: Work 5 hdc atop each petal to cover all the base double crochets.
- For added design: After completing hdc across 5 stitches of the petal, yarn over and create a long dc (down to the skipped stitch from the previous round’s base).
- Continue alternating between hdc and the longer dc stitches for added texture.

5. Create the Bag Handle or Strap
- Begin with ch 40 (for the larger ring). Ensure the chain is straight and does not twist.
- Join the chain with a sl st at the starting point to form a loop handle/strap.
- Cut the yarn, and weave in any loose ends.
For the smaller ring: Repeat the strap process but only make ch 5 to form the second smaller loop.

6. Assemble the Bag
- Position the two circular pieces with their backs facing each other—one with the smaller chain ring and one with the larger chain ring.
- Use a wool needle and your yarn to sew the edges of the two pieces together.
- Begin stitching from one point of the petal, ensuring consistency in securing each stitch on both pieces.
- Stitch only the inner loops of the edge stitches (or as desired for stitching style).
- Continue stitching until the pieces are securely joined, leaving no gaps.
- Knot the yarn securely and weave in any loose ends.
Final Details
- Pass the larger chain ring through the smaller ring to form a closure mechanism.
- Test the bag for use to store headphones, coins, or small cables.

Conclusion
This crochet storage bag is a creative way to use small amounts of yarn while practicing foundational crochet techniques, such as magic rings, double crochet, and half double crochet stitches. The use of contrasting colors adds visual interest, and the small size makes it both functional and decorative. This pattern is suitable for beginners and provides flexibility for variations in design, color, and use.