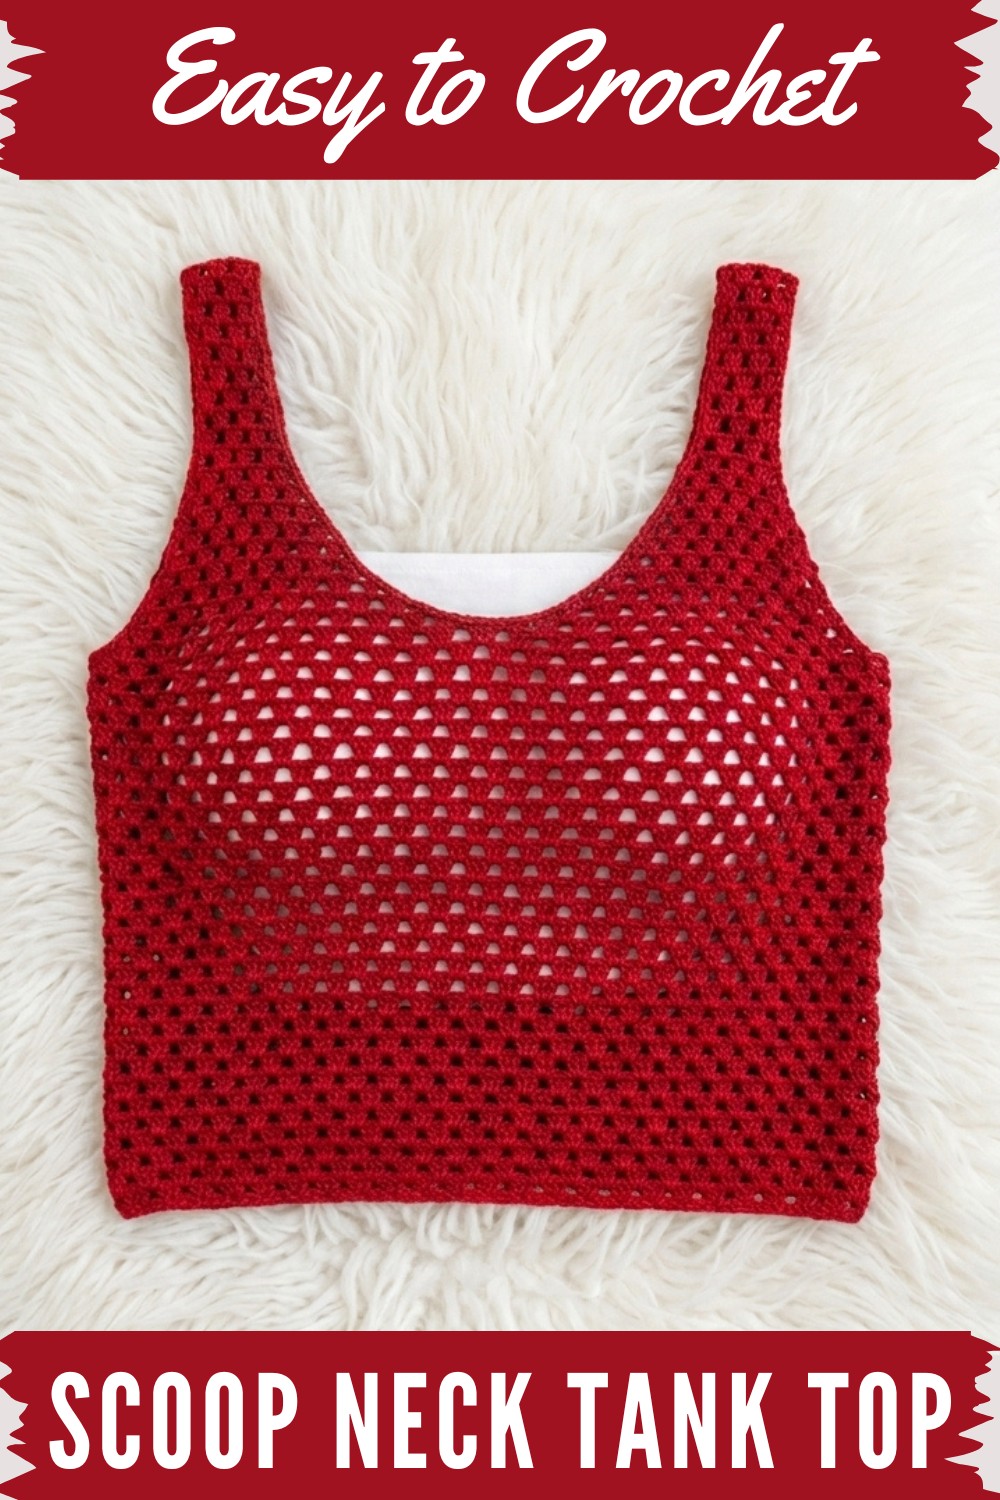
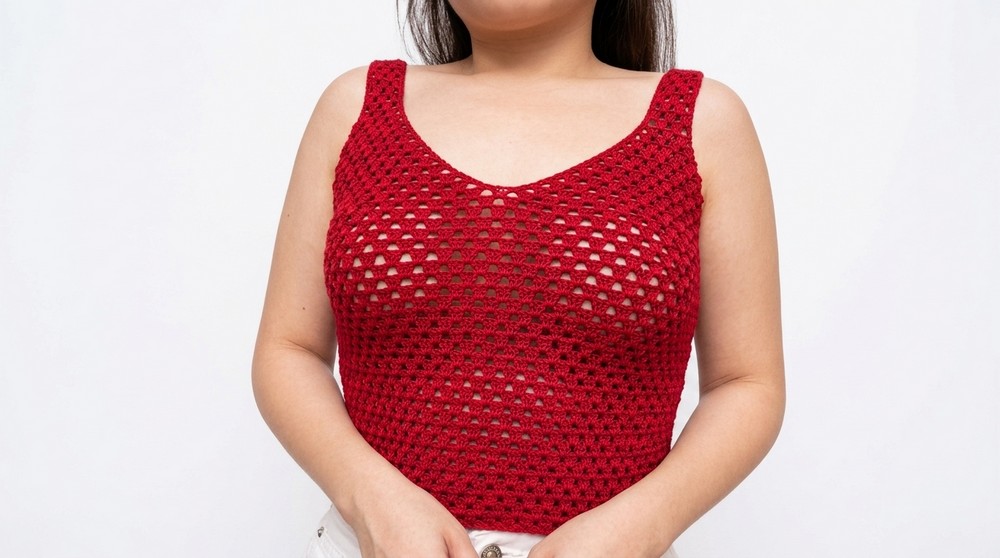
Shine in a stylish crochet scoop neck tank top with this simple pattern and clear instructions that's for casual, lightweight summer outfits.
Wearing a soft top feels so breezy and stylish on sunny days. With its gentle neckline and smooth lines, this crochet Scoop tank top stands out for its relaxed look and simple charm. The straps are wide enough to stay in place, making the top comfortable for everyday wear. The lovely open stitch gives the fabric an airy texture, so it feels light and cool against the skin.
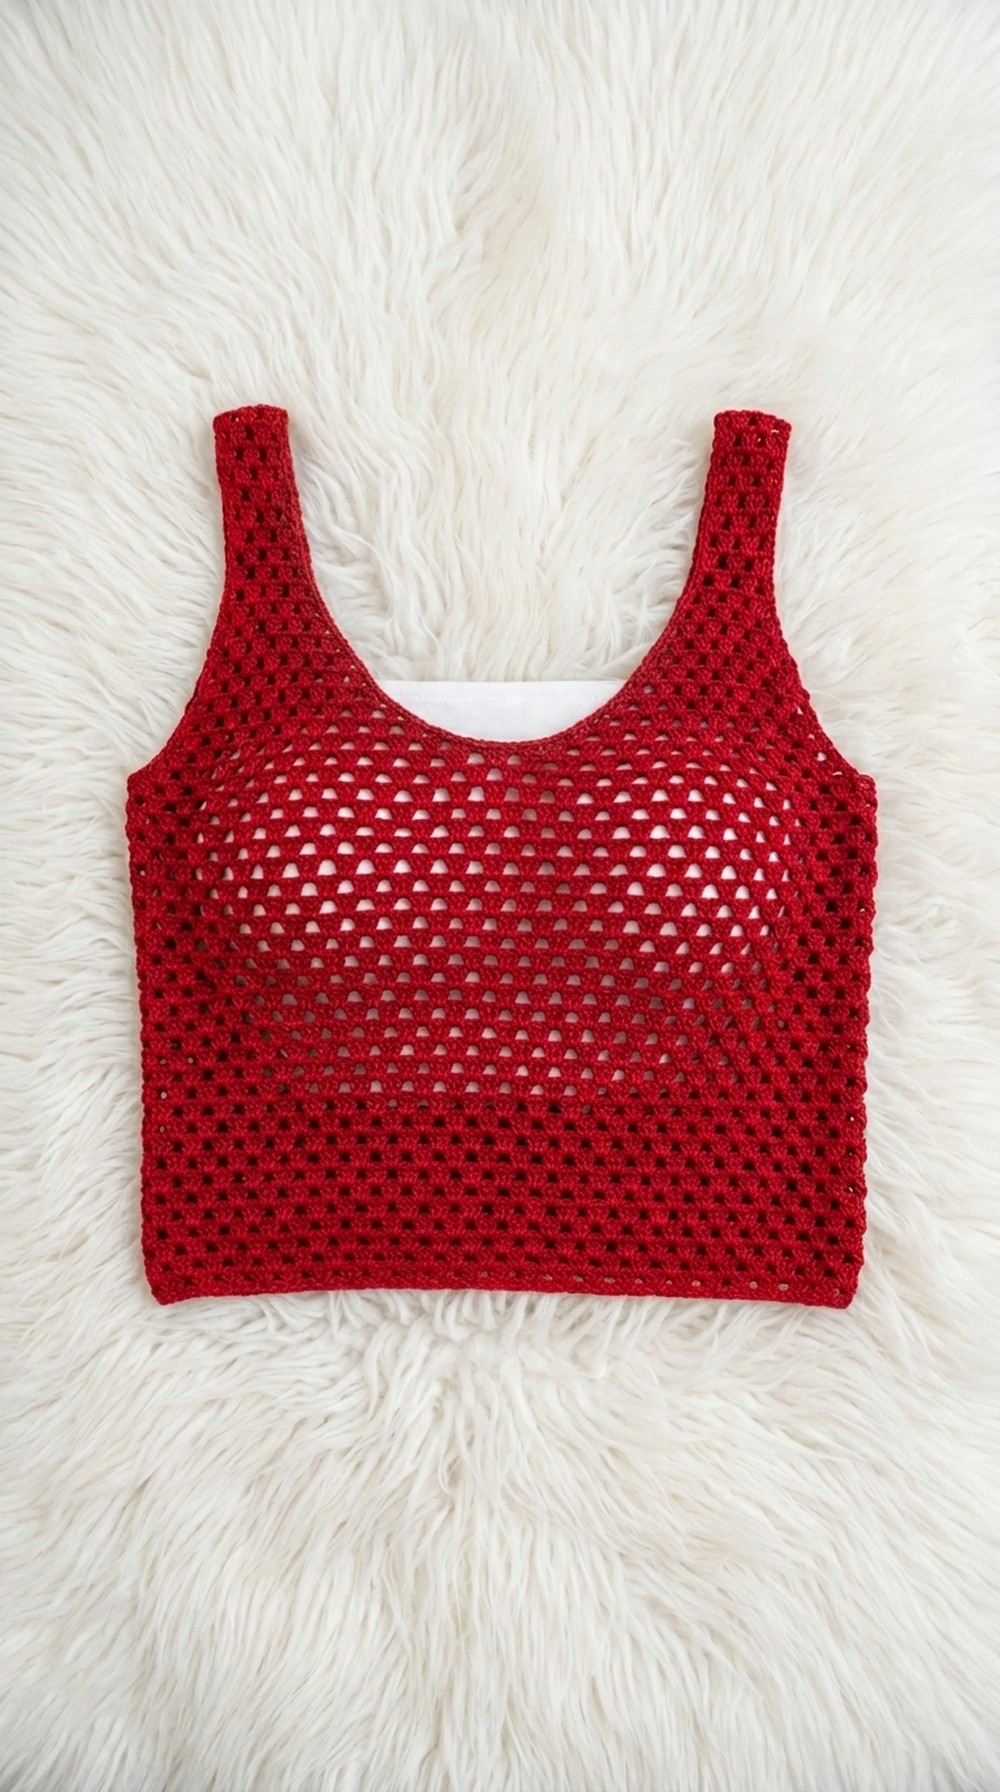
The construction of this tank top is straightforward, with two panels that are joined neatly at the sides and straps. The neat stitches give the whole piece a clean appearance. Light and soft yarn works well for this project, letting the tank top drape nicely over the body.
Stylish Crochet Scoop Neck Tank Top Pattern for Summer
Choosing colors is a fun part of the process—solid shades look classic, while stripes or bold colors can add a playful touch. Adjusting the length is possible by adding or removing rows, so the tank top can be made as a cropped top or longer for more coverage.
This tank top pairs well with jeans, shorts, or skirts and also layers nicely under a jacket or sweater for a casual look. It's useful for a walk in the park, a beach day, or even just relaxing at home. The scoop neck design stays flattering and neat, giving your outfit a fresh touch every time you wear it. With so many ways to match it and a comfortable fit, this crochet scoop neck tank top can be a staple in any warm-weather wardrobe.
Granny Stitch Crop Top Pattern
This breezy, classic Granny Stitch Crop Top is worked from the top down in rectangle panels, using shells of double crochets to form a lacy and timeless fabric. The instructions below are clear for all skill levels and include plain-language summaries at every stage.
Skill Level & Terminology
Skill level: Easy / Adventurous Beginner
Terms: US Crochet Terms
If you are new to reading patterns, just remember you’ll be making groups of double crochets, chains, and some single crochets.
Materials & Tools
- Yarn: 200g of 1mm thick crochet yarn (e.g., Alize Diva, light DK)
- Hook: 2.5mm
- Yarn needle, scissors, 2 stitch markers
For the best result, use a soft, lightweight yarn and a small hook for nice stitches.
Gauge
- 4 granny groups (each group = 3 double crochets) = 10cm (4") wide
- 8 rows in pattern = 10cm (4") high
Make a small swatch to meet gauge, adjusting your hook as needed.
Abbreviations List
| Abbreviation | Meaning |
|---|---|
| ch | chain |
| dc | double crochet |
| sc | single crochet |
| sl st | slip stitch |
| sp | space |
| st(s) | stitch(es) |
Special Stitch Instructions
Granny Stitch/Shell:
3 dc in the same place/space.
Decrease Rows:
Start or end a row with fewer shells, as described.
Granny stitch = 3 double crochets together in a space (gap).
Finished Size
- Width: Approximately 44cm/17" for half-bust (adjust with initial chain length).
- Length: About 25cm/10" from top edge to hem.
- Strap width: About 10cm/4".
- Custom fit: Your chain should measure half your bust, in multiples of 3.
The Pattern
1. Foundation Chain
- Make a slip knot and ch (chain) a multiple of 3 until your chain measures half your bust.
- Example: ch 90 (for 44cm), you may need more or fewer chains.
- Add 1 extra chain (for turning): ch 1 more (ch 91 in this example).
Summary: Make a chain to fit around half your chest. Make sure you can divide the number by 3, then add one more chain.
2. Row 1 (Right Side)
- Dc (double crochet) in the 4th ch from the hook (counts as first dc of a group).
- Dc 2 times into the same ch (3 dc in total in this stitch).
- Skip 2 ch, then 3 dc in next ch—repeat across to end.
- Example: [Skip 2 ch, 3 dc in next ch] repeat to end.
- Turn.
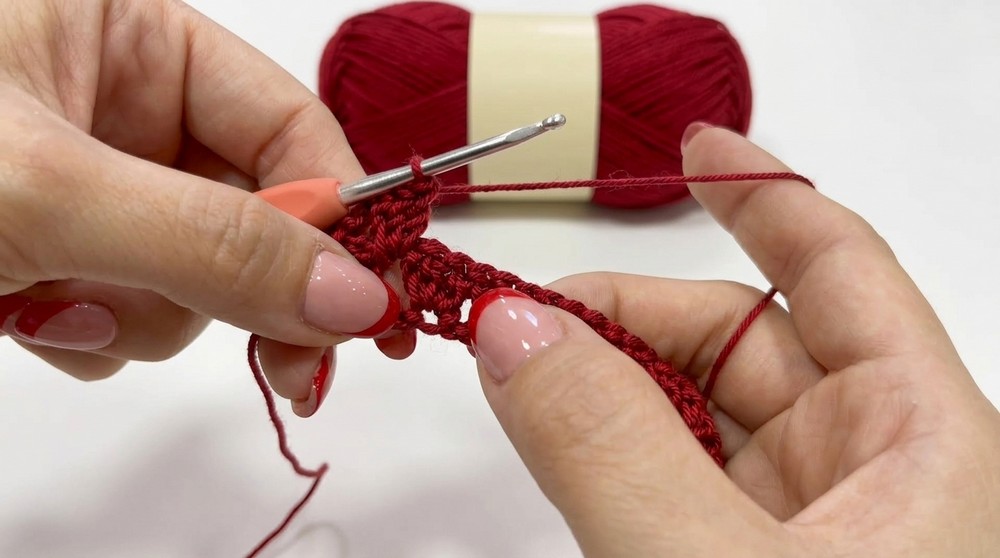
You’ll make a shell/granny group in every third chain across the row.
3. Row 2
- Ch 3 (counts as dc), turn.
- 3 dc in each space BETWEEN previous row’s groups (these spaces are wide and easy to see).
- At end: 1 dc in top of turning ch from previous row.
- Turn.
Summary: Start with a turning chain, and insert your granny groups into the big gaps. When you reach the end, place a single double crochet in the final chain top.
4. Row 3
- Ch 3, turn.
- In the very first space between groups, 2 dc (these plus ch 3 = first shell of 3 dc).
- In each space: 3 dc until end.
- In the last big space, 3 dc.
- Turn.
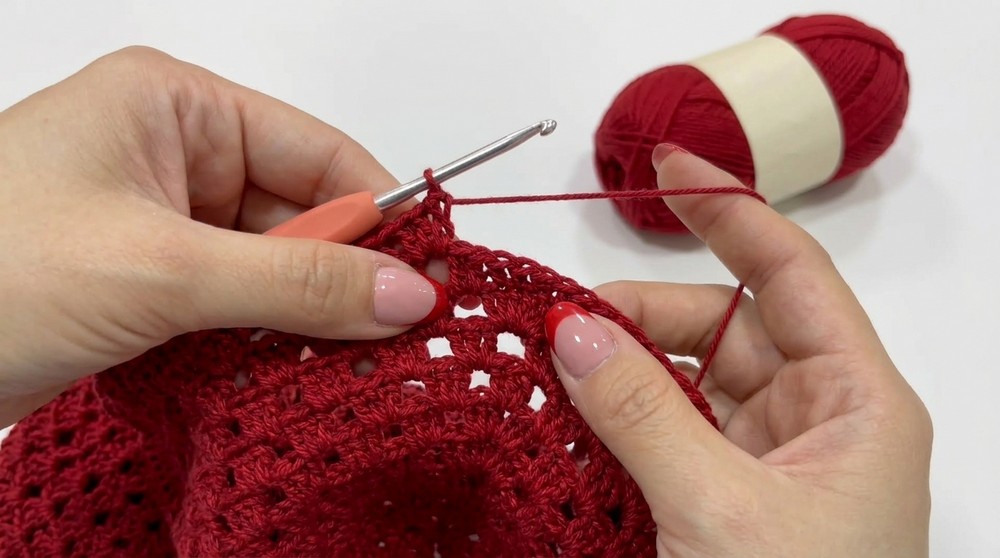
You start with just two more double crochets at the beginning gap to make a 3 dc group. Repeat the granny shell in every gap across.
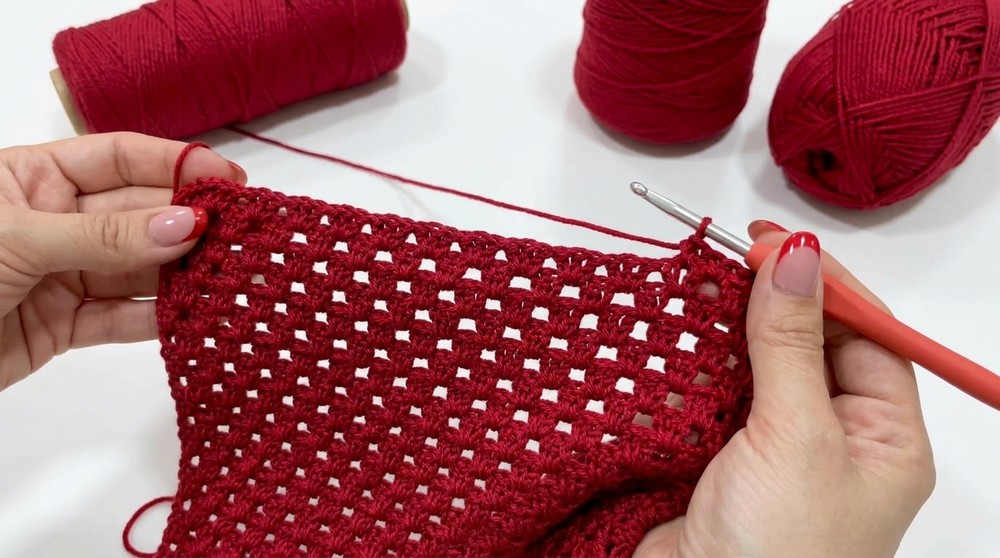
5. Rows 4–30 (or Desired Length)
- Repeat Row 2 and Row 3 alternately, always working groups of 3 dc into the spaces, and a single dc at the row’s ends where needed.
- Continue until you have 30 rows or your desired length (approx. 25cm/10").
Summary: Keep working shells into the gaps, alternating the row style, until you have a rectangle that reaches from bust to hem.
6. Neckline & Strap Decreases
- Fold your rectangle in half and mark the middle granny group with a stitch marker.
For the Left Strap:
Row 1 (Decrease Start):
- Ch 3, turn.
- Do NOT add extra dc (leave edge unshaped—this is the decrease).
- 3 dc in each space until 1 space remains before marker.
- In last gap: 1 dc (not 3 dc). Turn.
Row 2 (Decrease End):
- Ch 3, turn.
- Do NOT add extra dc at beginning.
- 3 dc in each space across to last gap.
- In final gap before row edge, 1 dc only. Turn.
Rows 3–14 (about 12 rows/10cm):
- Repeat these two decrease rows (always starting and ending with chains or a single dc, not a full shell).
Rows 15–21 (about 5–7 rows/5cm):
- Work plain granny rows: Shell in every space, don’t decrease anymore. End off, leaving long tail for sewing.
Summary: Shape the neckline by working just a chain at the edge and 3 dc in each space, but only a single double crochet at the far edge—this "shrinks" the piece to form straps. Continue straight for a few rows to desired strap length.
For the Right Strap:
- Attach yarn in the first empty space after center marker.
- Work the same as for the left strap: 3 dc in each space, single dc at each end for the decrease, then granny groups for strap length.
This gives you a U-shaped top edge with straps coming out each side.
7. Make Identical Back Panel
- Repeat all steps above (including neckline and strap shaping) to create the back panel.
8. Assembly
Join Straps
- Place panels right sides together.
- Using a slip stitch or yarn needle and the long yarn tail, sew/sc both straps together at the tops (one seam for each shoulder).
Join Sides
- With RS facing and matching edges, join at armpit, sl st or sew side seams together up to where the decreasing/strap shaping started (leave top edge and armholes open).
Neckline & Armhole Edging
- Join yarn at any point on neckline.
- Ch 1, then sc (single crochet) in every st and space around entire neckline and both straps. Join with sl st, fasten off.
- Repeat single crochet around armholes and bottom edge if desired for a clean border.
Summary: Lay both pieces together. Sew shoulder straps and side seams. Add single crochet edging around the top for a tidy finish.
Conclusion
You have now finished your Granny Stitch Crop Top! This garment is simple, fast, and effective, with comfortable straps and a lovely airy texture. Customize the length, width, and strap style as you like. Enjoy sewing in your ends and wearing your finished piece.
Quick review: You made two rectangles, shaped the neck/straps, joined them, and added extra neatness with single crochet around the neck and armholes!
Stitches Used (with numbers)
- ch: used at start of rows and for foundation chain
- dc: always in groups of 3 for granny stitch, single dc at ends for shaping
- sc: for edging
- sl st: for joining seams and finishing rounds