Comfort meets style with this free crochet lace-up slippers pattern, helping you stay cozy and chic while customizing your footwear with ease and charm.
Looking for a cozy, stylish way to keep your feet warm this season? Here is a delightful handmade project that combines practicality with charm. The free crochet lace up slippers pattern, showcased in a fantastic tutorial by Márcia Souza Crochê, creates soft, comfy slippers with an eye-catching twist. These slippers serve not only as footwear but also as a cozy treat for yourself or a heartfelt gift for loved ones.
Free Crochet Lace-Up Slippers Pattern with Easy Steps
This project results in slippers that are both useful and beautiful. The snug fit is enhanced by the unique lace up design, which adds decorative flair while allowing adjustable comfort. Perfect for lounging at home or adding a warm touch to casual outfits, these slippers blend form and function effortlessly.
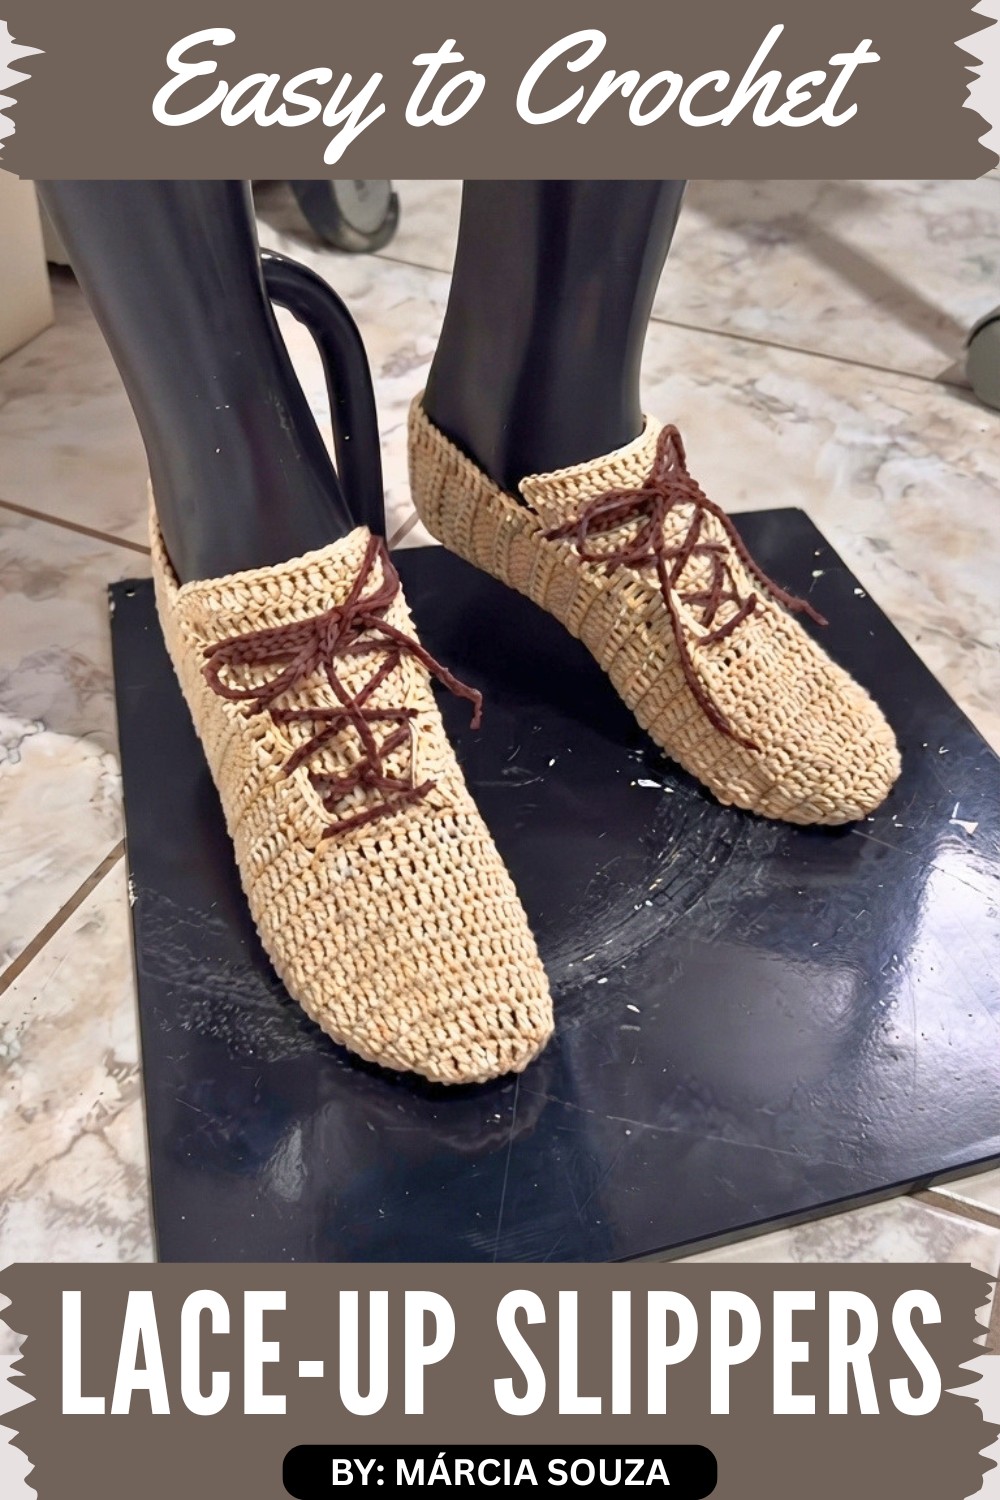
The slippers feature a smooth, dense texture made from tight crochet stitches that gently hug your feet with warmth. Their shape is carefully designed with a closed toe and cushioned sole to ensure comfort. The standout lace up ties wrap elegantly around the ankle or top of the foot, giving a stylish and sophisticated look that makes these slippers truly special.
Whether made as personal gifts or kept for relaxing moments at home, these slippers bring a handcrafted charm that is hard to find elsewhere. Combining softness, style, and customizable fit, the free crochet lace up slippers pattern invites crochet lovers to enjoy warmth and creativity in every stitch. Treat your feet to love and comfort with this enchanting project.
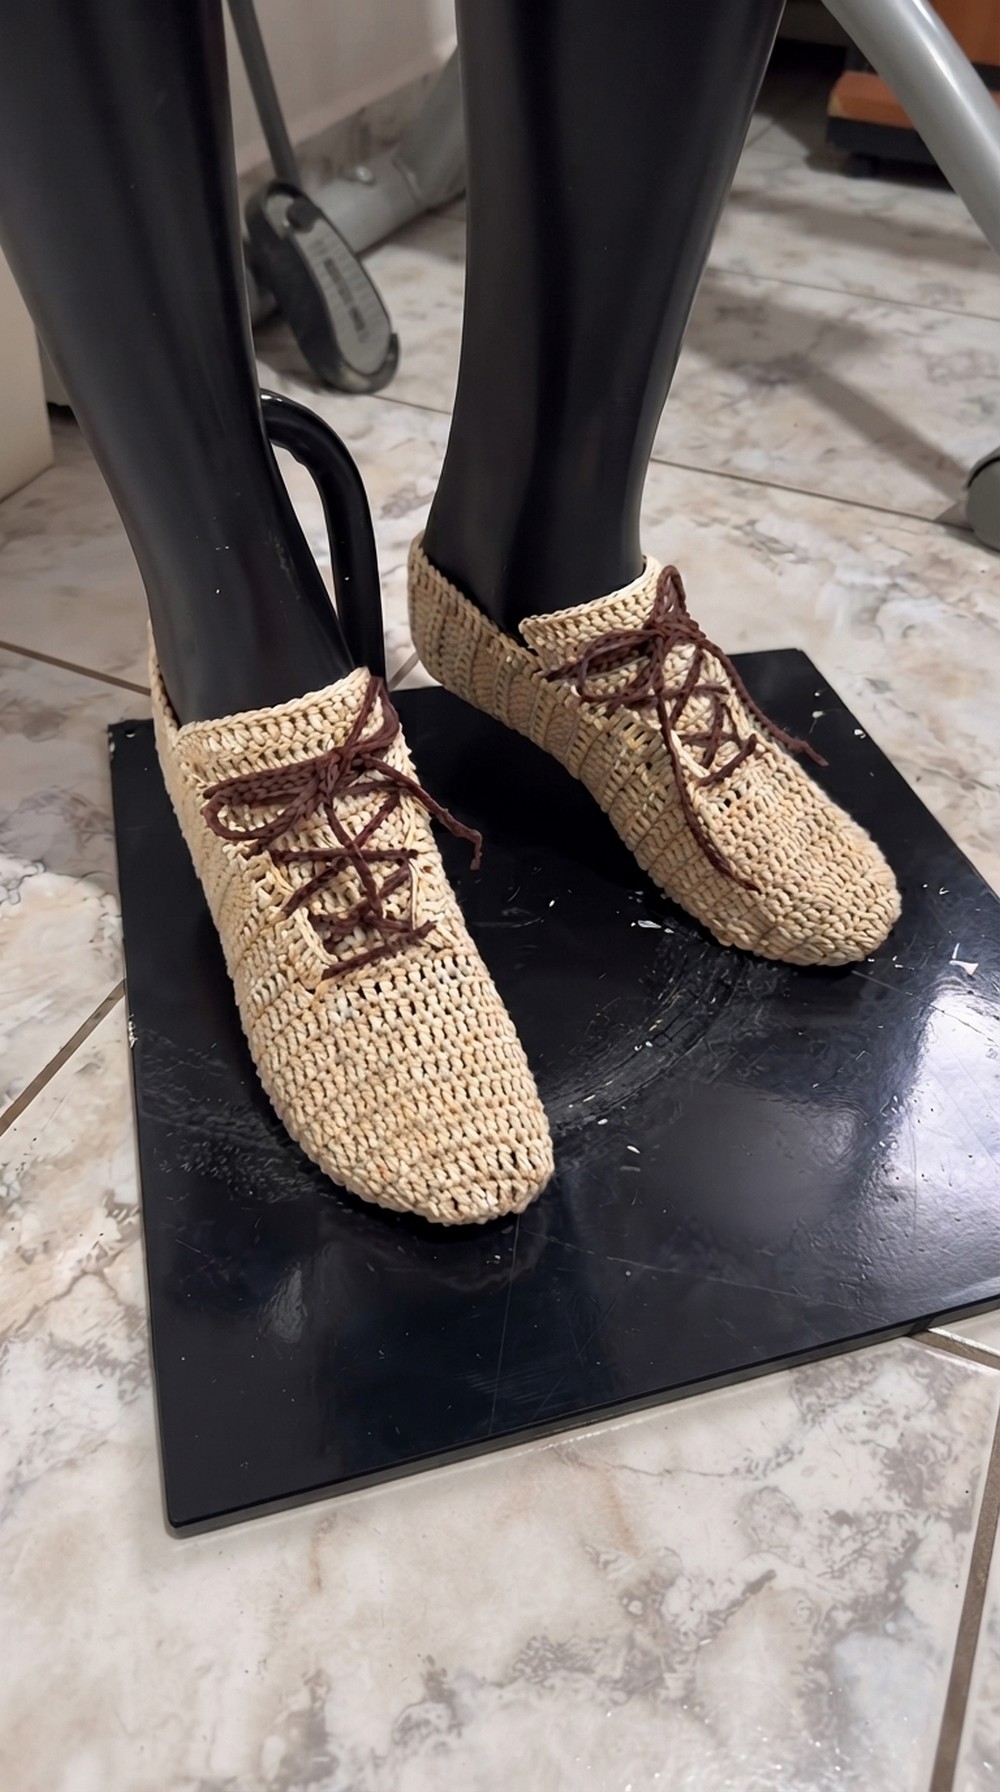
Crocheted Slipper With Laces Pattern
In this pattern, you will learn how to crochet a beautiful slipper with laces. This pattern uses simple stitches and clear step-by-step instructions to guide you through every round and detail, exactly as demonstrated in the video. The finished slipper is comfortable, economical, and customizable, making it perfect for both adults and children. Let’s follow along and create your own pair.
Pattern Highlights
- Economical: Weighs just 93g per pair using Amigurumi yarn.
- Comfortable fit: Adjustable length and width for multiple foot sizes.
- Easy construction: Worked in rounds and rows—no complicated shaping.
- Lace closure: Crocheted chain laces add charm and practicality.
- Beginner-friendly: Uses basic stitches and easy-to-follow rounds.
Notes
- This pattern uses US crochet terminology.
- Measurements and numbers provided are for adult size (EU 36-37) but can easily be adjusted.
- Use Amigurumi yarn or another yarn of your choice.
- Yarn color names in the video: "porcelain" (light beige) & "brigadeiro" (brown).
- Adjust length and width as you work for a custom fit.
Skill Level
Beginner – Advanced Beginner
You should be comfortable with chain, slip stitch, double crochet, single crochet, and basic sewing/finishing.
Materials
- Yarn: Amigurumi, colors "porcelain" (main color) and "brigadeiro" (lace color)
- Crochet hook: 2.5mm
- Scissors
- Tapestry needle
- Measuring tape
Measurements / Sizing
- Finished slipper length: 22 cm (from toe to heel)
- Pair weight: 93g
- Lace length: 78 cm (200 chains)
- Adult size: EU 36-37 (see notes below for adjustment)
Gauge
Not specified due to easy adjustments. For best results, compare with your own foot as you go.
Stitch Abbreviations
| Abbreviation | Meaning |
|---|---|
| ch | Chain |
| sc | Single Crochet |
| dc | Double Crochet |
| sl st | Slip Stitch |
Special Stitches
- Magic Ring: Loop yarn, crochet stitches into ring, pull to close.
- Increase: Two dc in the same stitch.
- Slip Stitch Seam: Insert hook through both layers, pull up a loop, pull through existing loop to join.
Step-by-Step Pattern
Toe – Sole Shaping
Magic Ring Start
- Wrap yarn around two fingers to make a magic ring.
- Pass hook behind loop, pull up working yarn.
- Ch 1–2 for height.
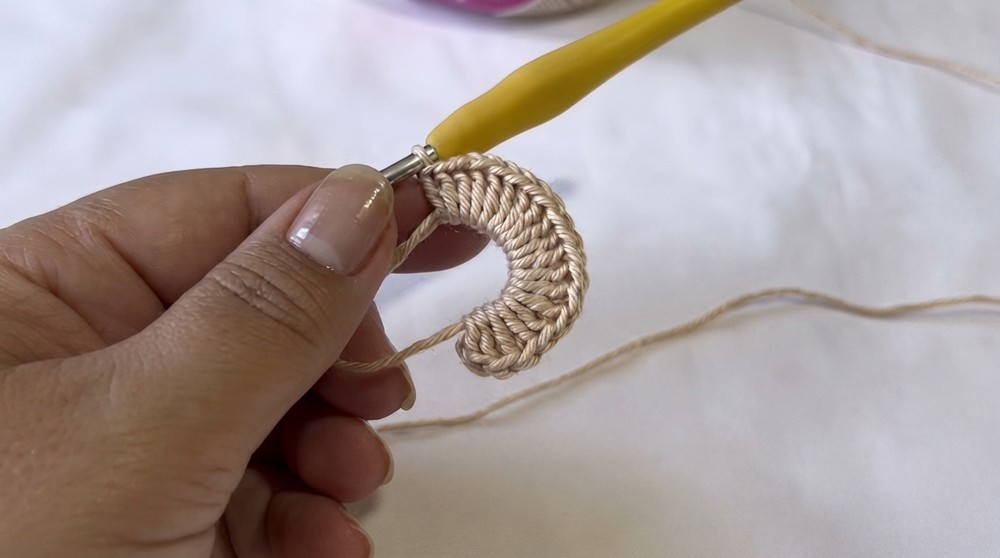
Round 1
- Work 18 dc into the magic ring (do not count initial chain as dc).
- Pull end to close tight.
- Option: Walk the tail through the back loop of upcoming stitches for easier finishing.
- Join with sl st to first dc (skip chain stitches).
Round 2
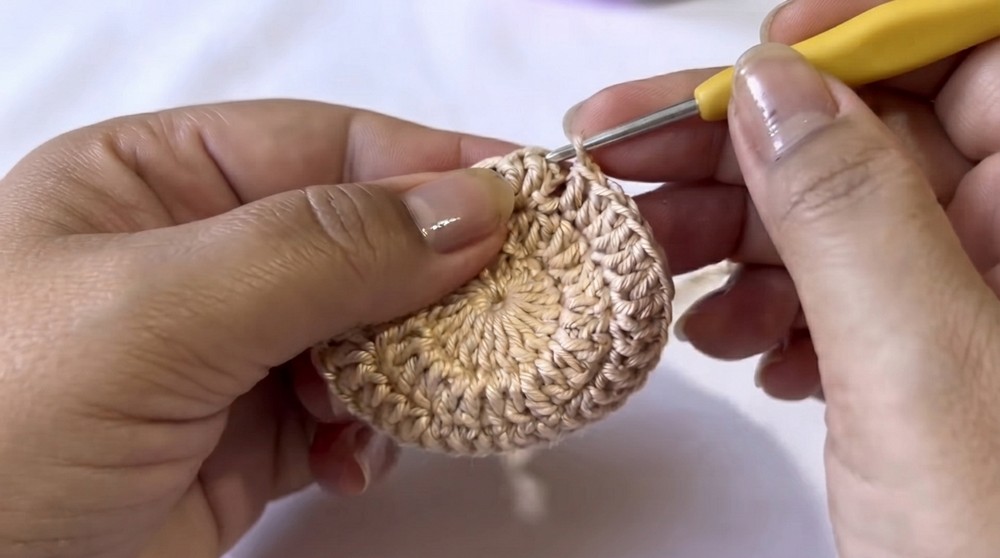
- Ch 2 for height.
- In same space: 2 dc (increase).
- Next dc: 1 dc.
- Repeat:
- Increase (2 dc in 1 stitch)
- dc in next stitch
- Continue sequence to end of round.
- Join with sl st to first dc.
- Staples: 2 dc, next dc, 2 dc, next dc... (alternating)
- Total: 27 dc
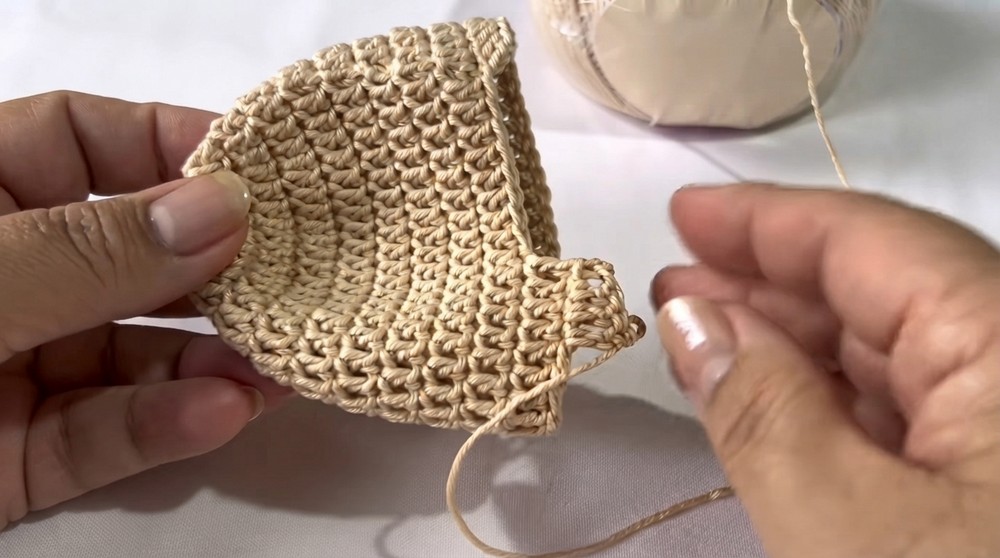
Round 3
- Ch 2 for height.
- In same space: 2 dc (increase).
- Next two stitches: 1 dc in each.
- Repeat sequence:
- Increase, dc, dc
- Continue to end, join with sl st.
- Total: 36 dc
Round 4
- Ch 2 for height.
- In same space: 2 dc (increase).
- Next three stitches: 1 dc in each.
- Repeat sequence:
- Increase, dc, dc, dc
- Continue to end, join with sl st.
- Total: 45 dc
Upper Foot – No Increases
Rows 5-9
- Ch 2 for height (not counted as dc).
- 1 dc in each stitch around, no increases.
- Join with sl st at end of each round.
- Do 5 rounds (total of 9 rounds from toe).
- Optionally finish tail as you go.
Instep and Heel Section
Row 10
- Ch 2 (counts as first dc).
- 1 dc in each stitch for 37 dc.*
- You will leave 8 stitches unworked at end.
- Turn.
Rows 11-27
- Ch 2, turn.
- 1 dc in each stitch across (37 dc).
- Work back-and-forth in rows, not rounds.
- Continue for 17 rows or as needed for your foot length.
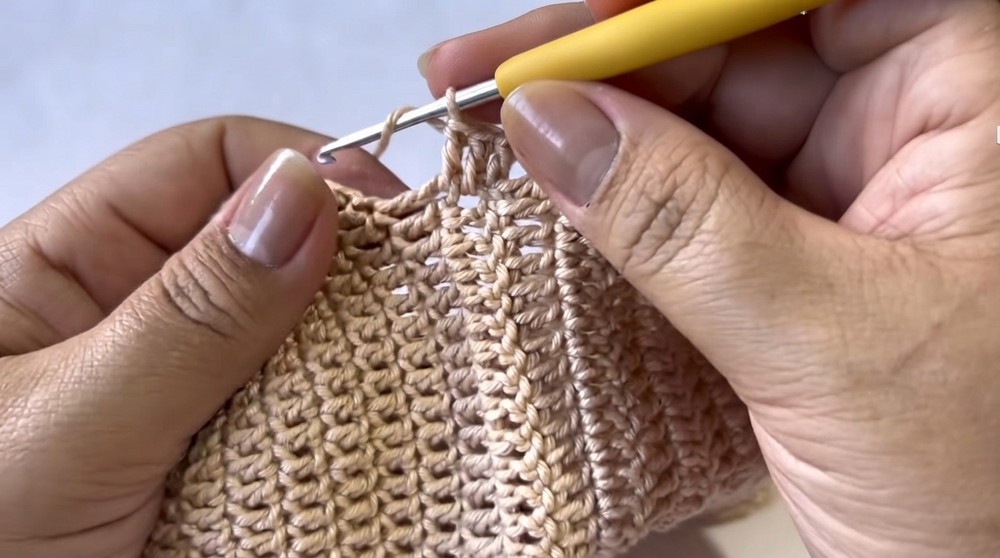
Heel Assembly
Seaming the Heel
- Fold slipper with right side together.
- With hook, seam back edge (heel) with sl st:
- Insert hook through both sides (2 loops on each), pull up yarn, sl st.
- Continue to end; do not skip stitches!
- At last stitch, make a ch, cut 15–20 cm yarn, thread tapestry needle.
- Gather bottom:
- With needle, weave through top edge of seam.
- Pull to gather, tie a knot.
- Weave in end and finish.
Side Edge (Ankle Opening)
Side Border
- Pickup working yarn along slipper opening edge.
- Starting at first dc, work:
- 1 sc or dc (chain 2 if dc) at joining point.
- Along horizontal stitch: dc.
- At junction (where stitches meet): dc.
- Repeat: junction, horizontal, junction, horizontal...
- Continue along opening, up to seam.
- Finish with ch, cut yarn, weave in.
Lace Border (Front Opening)
Front Border
- Pickup yarn at edge of remaining 8 dc on top opening.
- Work:
- 2 dc in first dc (increase).
- 1 dc in each dc to second-to-last.
- 2 dc in last dc (increase).
- Turn.
- Repeat increase rows:
- Ch 2, turn, 2 dc in first dc, dc across, 2 dc in last dc.
- Do 8 rows with increases at both ends.
- On final row, work without increases for neat straight edge.
- Cut yarn, finish off.
Shoelace
- With "brigadeiro" (brown) yarn, make chain of 200 stitches.
- Finished lace should measure ~78 cm.
- Optionally, make thicker lace: go back over chain with sl st.
- Cut yarn, adjust ends, and leave a small tail.
Lacing & Finishing
Lace Installation
- Insert lace:
- At edge of front flap, thread lace through:
- First dc on left and right sides.
- Pull to align evenly.
- At edge of front flap, thread lace through:
- Weave lace:
- Skip 5 stitches, thread lace through next.
- Alternate under and over on both sides.
- Repeat for remaining eyelets (usually four pass-throughs).
- Adjust, tie a bow, and trim ends to ~1 finger width.
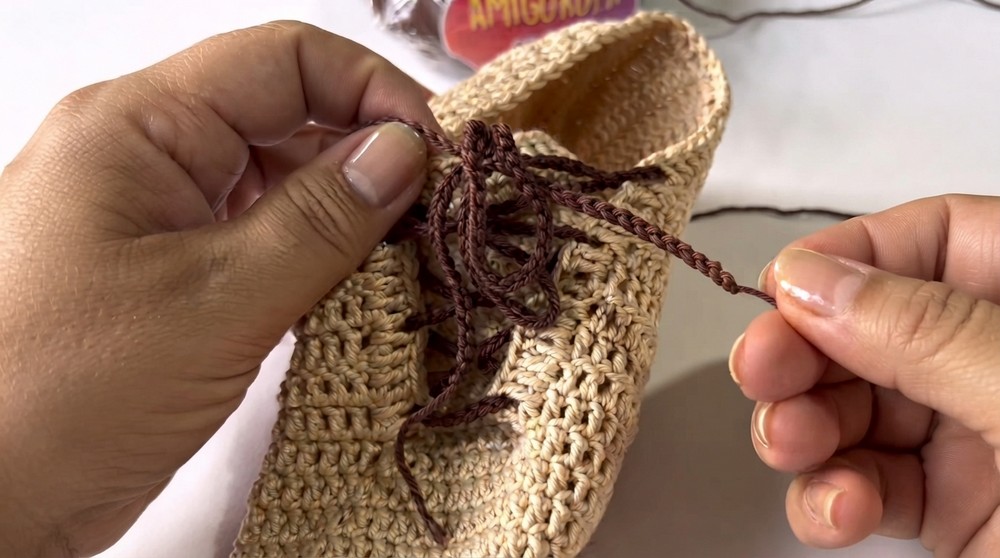
Assembly & Finished Size
- Length: 22 cm from toe to heel for adult size 36-37.
- Weight: 93 g per pair.
- Shoelace: 78 cm (200 chains).
- Adjust row counts for smaller/larger sizes as needed.
- Try on as you work for best fit!
Conclusion
Congratulations! You have completed a stylish and comfortable pair of crocheted slippers with laces. The pattern’s easy-to-follow rounds make it accessible for beginners and allow for custom adjustments in size, yarn, and color. These slippers are light, beautiful, and practical—perfect for gifting or personal use.