
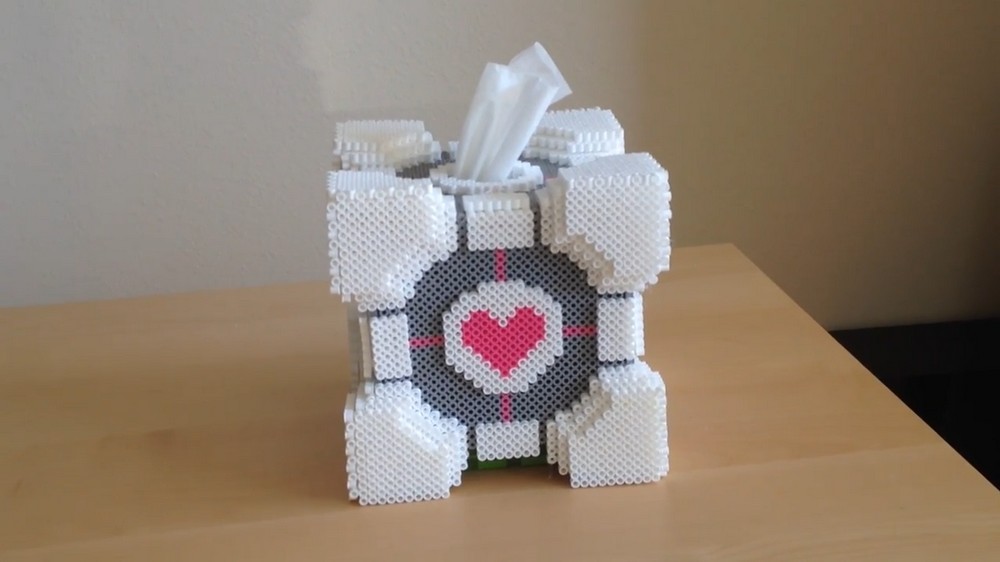
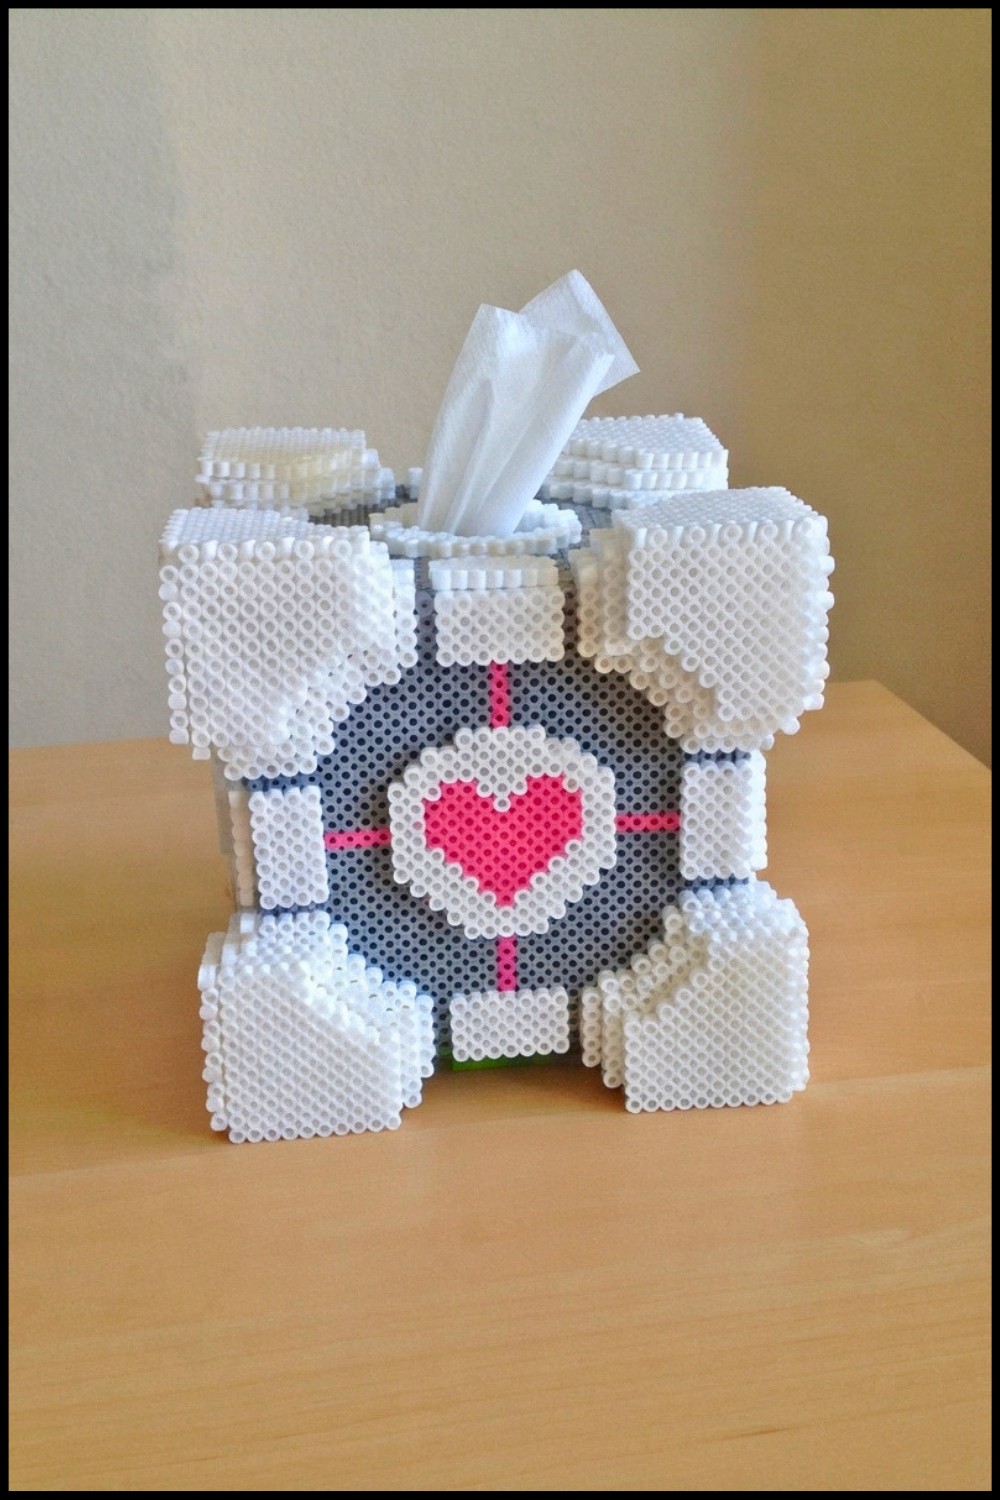
Turn an everyday tissue box into eye-catching gaming decor with this DIY 3D Portal Companion Cube Tissue Box, made for creative gamers.
If you’re on the hunt for a tissue box cover that’s not just functional but a geeky conversation starter, this project is perfect for you! Recreating the iconic Portal Companion Cube into a 3D tissue box combines practicality with fandom fun. Whether you’re looking to upgrade your home décor or showcase your love for gaming, this DIY is a creative way to blend utility with a beloved gaming element. It’s not just a box; it’s a tiny piece of the gaming universe sitting on your table.
DIY 3D Portal Companion Cube Tissue Box – Fun Gamer Gift Idea
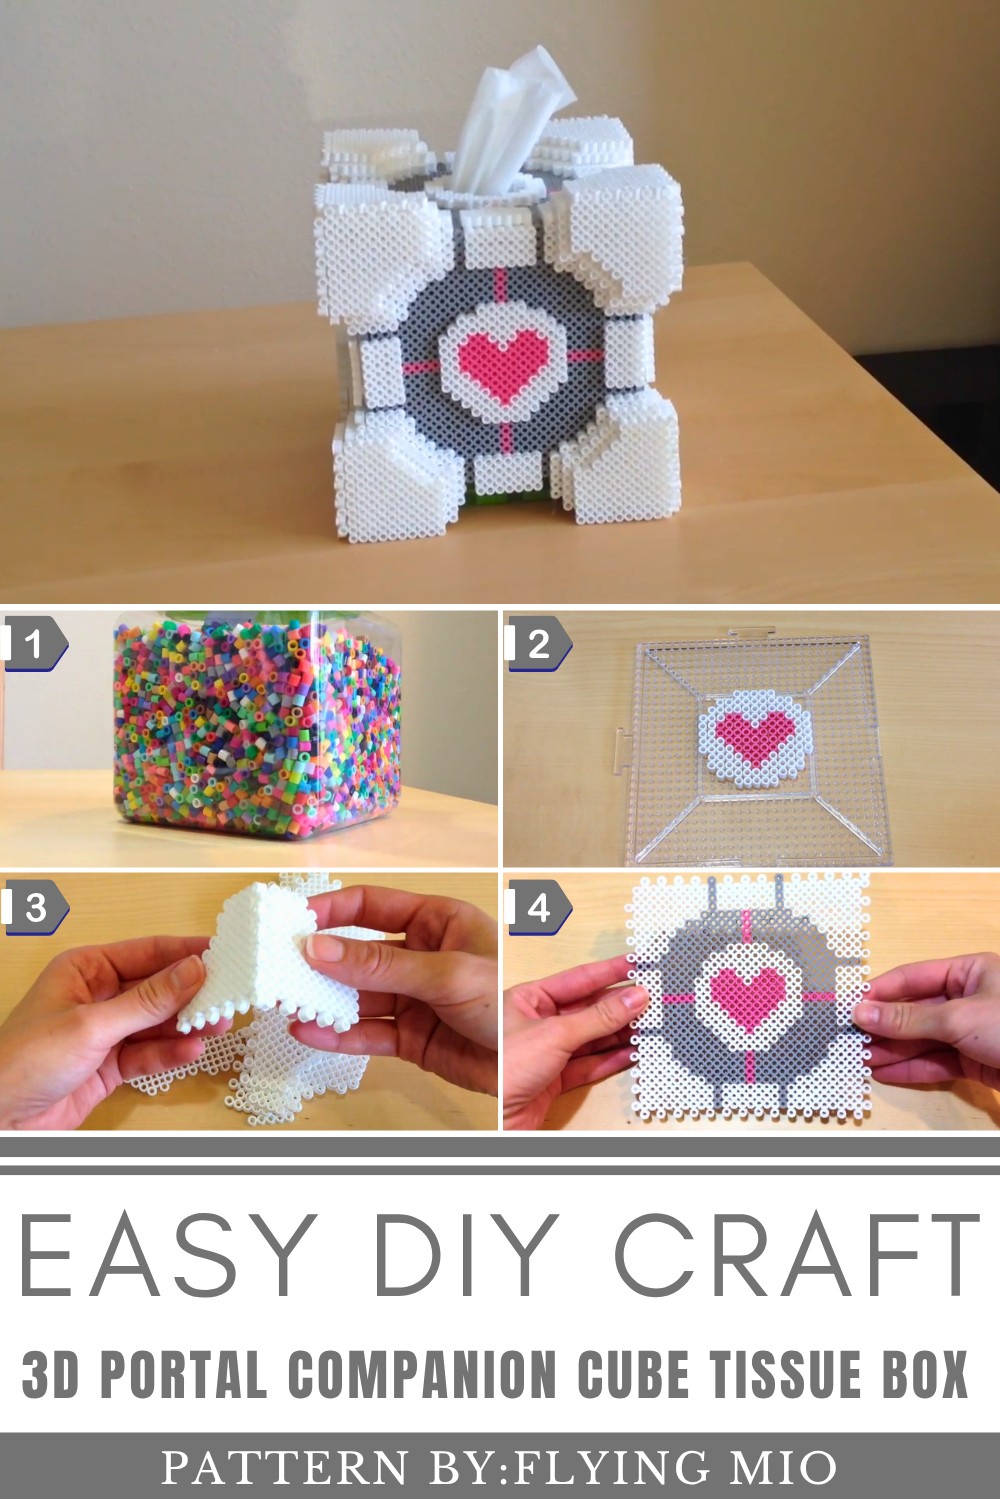
What makes it even better? The design is easily customizable! You can stick to the classic gray with pink heart accents from the game or add a personal touch with your own color choices. Use it as a decorative piece in your home, office, or gaming room, or gift it to a fellow gamer who’ll appreciate the thoughtful craftsmanship. It’s a practical yet quirky addition to any space.
Not only will this project help you build something awesome, but it’s also a soothing and rewarding DIY activity. Plus, the end result is a functional item you’ll use every day—talk about crafting with purpose!
Full credit goes to Flying Mio’s, who shares a detailed and beginner-friendly tutorial on her YouTube channel (watch it here). She makes the process super simple and fun. Dive into this creative project and turn your tissues into a delightful portal adventure.
Companion Cube Tissue Box Craft
Phase 1: Materials You’ll Need
Gather these supplies before starting:
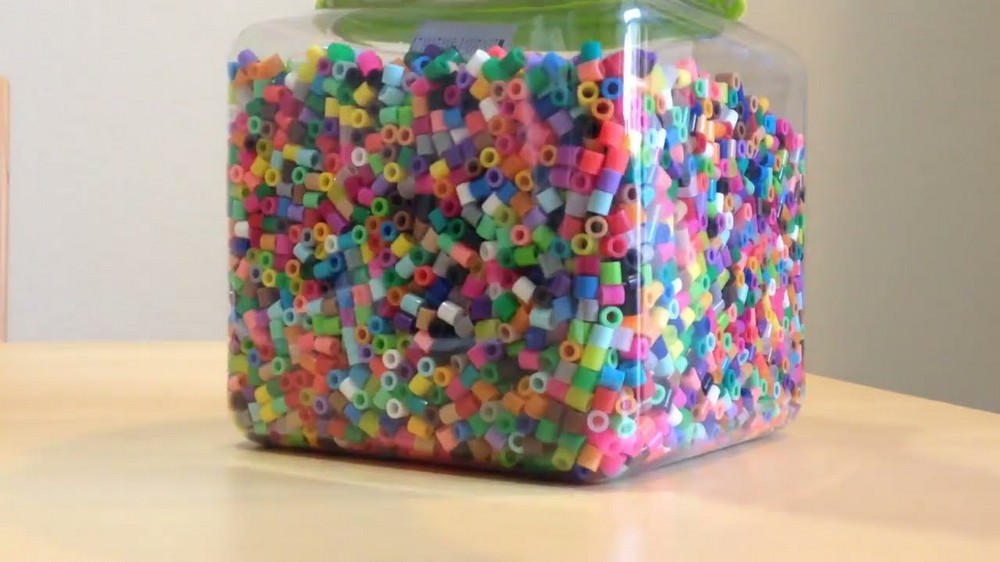
- Perler Beads (or Hama Beads):
- White
- Gray
- Pink
- Perler Bead Pegboard:
- Use a large square pegboard or multiple boards that can be clipped together.
- Iron:
- For melting the beads together.
- Parchment Paper or Ironing Paper:
- Protects the beads while ironing.
- Tweezers or Toothpick:
- To pick up and position beads easily.
- Hot Glue Gun:
- For assembling the cube.
- Tissue Box:
- To measure the size and fit of your finished design.
Phase 2: Plan Your Design
The Companion Cube has six panels:
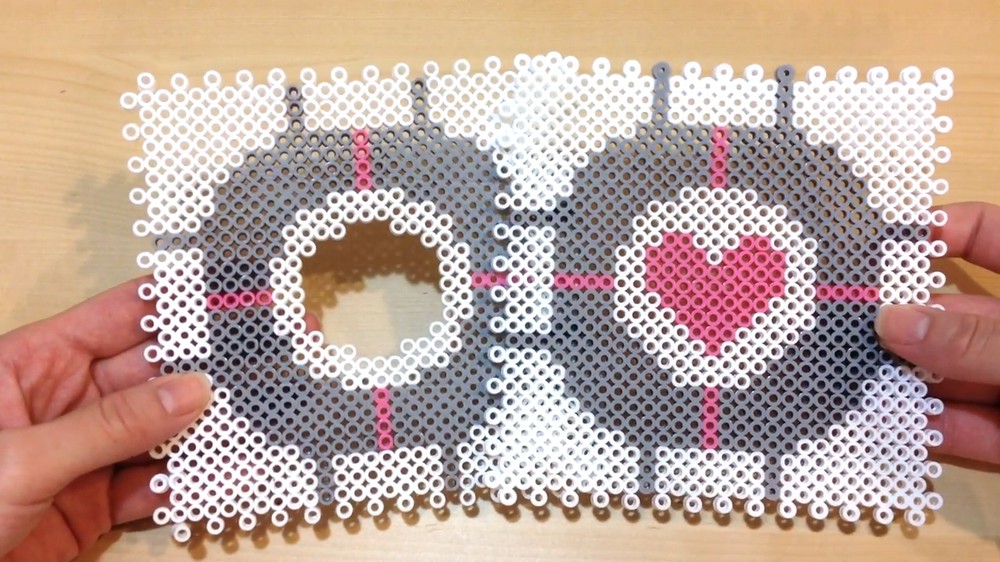
- Four identical square panels on the sides with the iconic heart design.
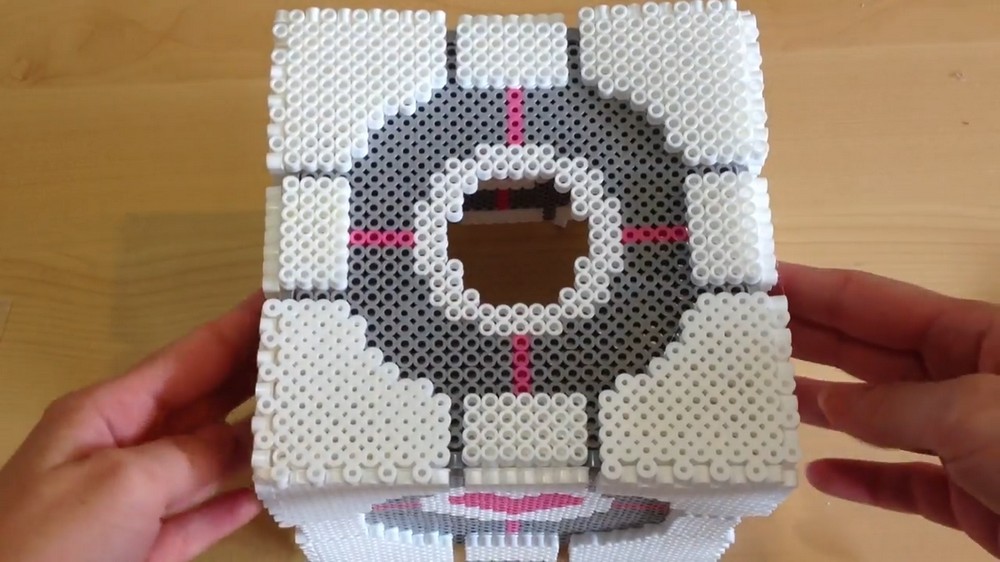
- One square panel for the top with a tissue slot.
- One plain square panel for the bottom (no opening).
Take your tissue box and measure its dimensions to ensure your panels fit properly. Most tissue boxes are cube-shaped, making it easy to keep all panels square.
Phase 3: Create the Side Panels (x4)
These panels feature the iconic Companion Cube heart design.
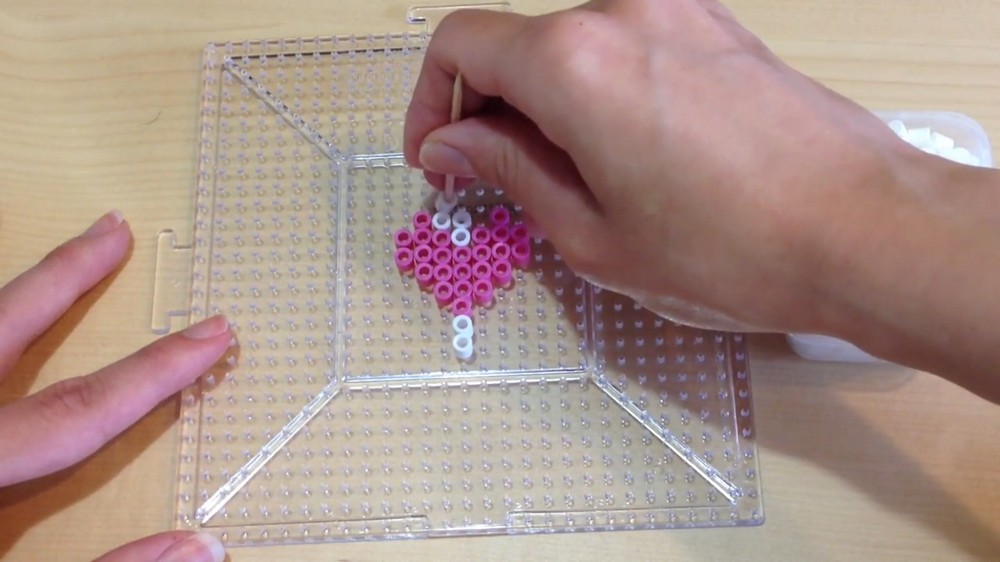
Step 1: Create the Heart
- Start in the center of your pegboard and make a small pink heart.
- Parameters:
- The heart is 4 beads tall along the centerline.
- The widest part of the heart is 7 beads across.
- Adjust size based on your specific tissue box dimensions, if needed.
- Parameters:
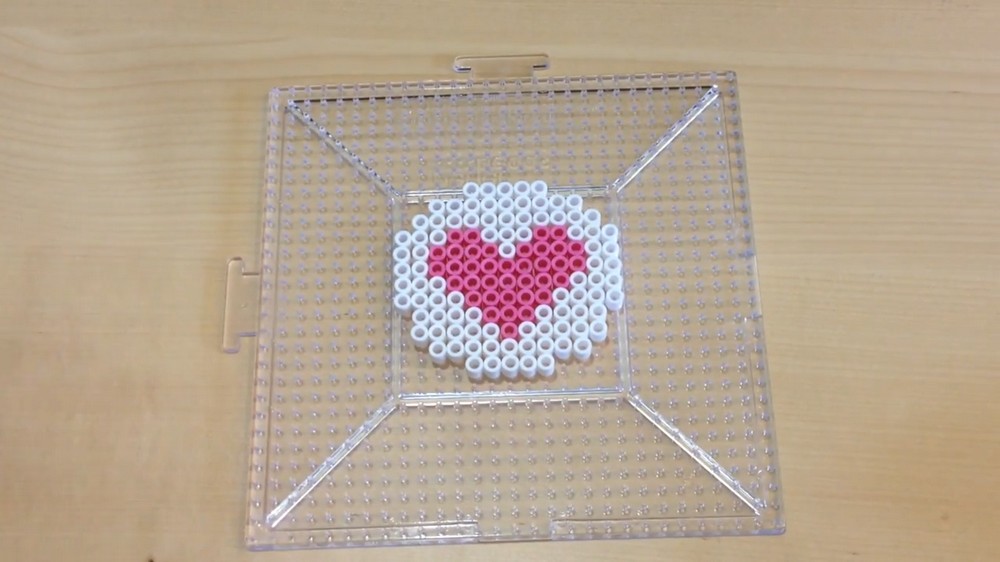
Step 2: Add the First Ring
- Surround the heart with a ring of white beads, keeping the shape symmetric.
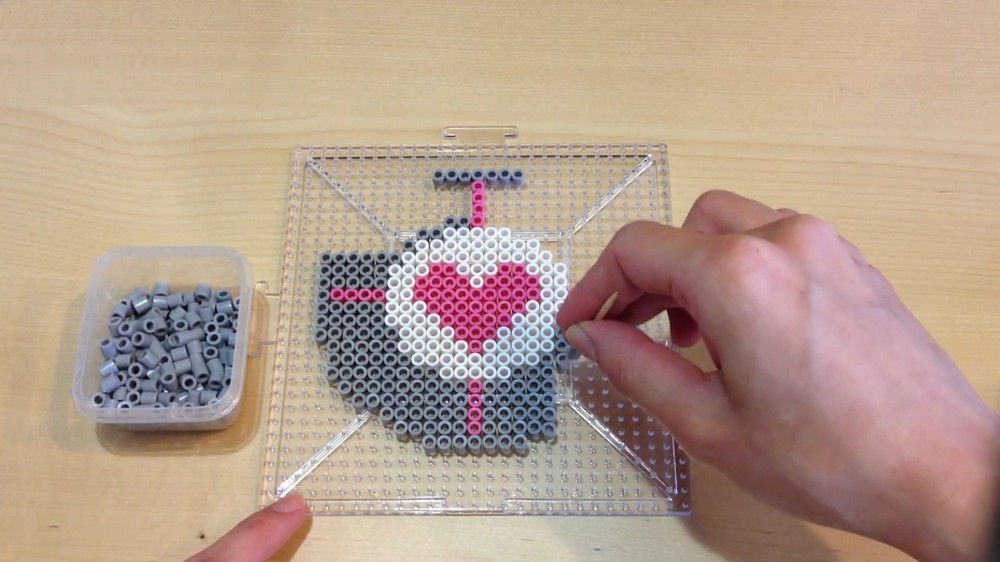
Step 3: Add the Pink Cross
- Create a pink cross extending outward from the heart.
- Each arm of the cross is 4 beads long.
Step 4: Add the Gray Frame
- Surround the entire design (heart and cross) with gray beads to create the central circle-like section.
- Adjust the beads on the edges to make the circle resemble a rounded square by removing and re-shaping beads at the edges.
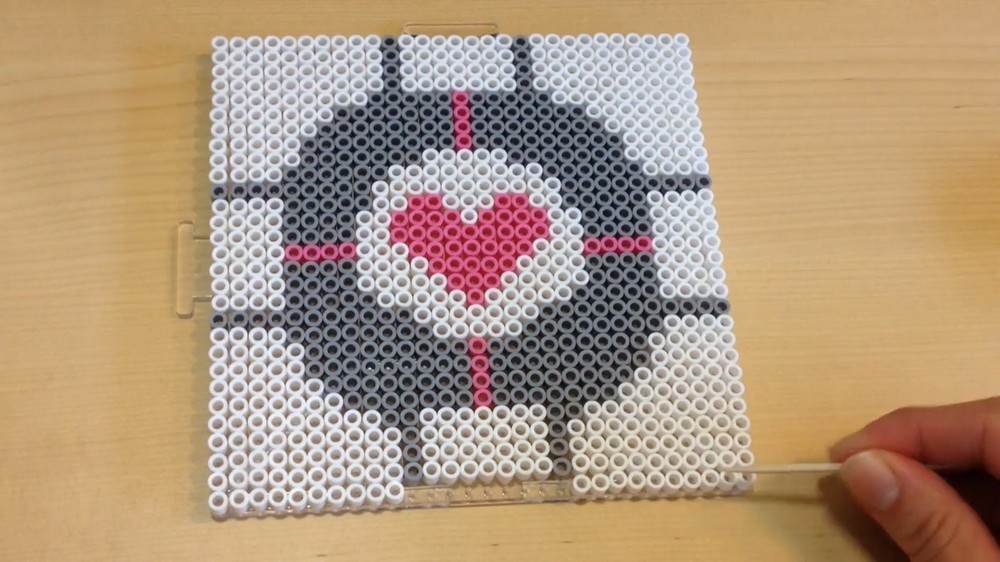
Step 5: Add White Squares
- Surround the pink cross sections with white squares.
- These squares will be the "corner accents" visible on the cube.
Step 6: Fill the Background
- Fill the remaining areas of the pegboard around the heart, cross, and white squares with gray beads.
Phase 4: Create the Top Panel (x1)
The top panel is similar to the side panels but has a tissue slot.
Step 1: Create the Heart Design
- Repeat the heart and gray circle design as outlined for the side panels.
Step 2: Add the Tissue Slot
- After finishing the design, leave a rectangular opening in the gray section where the tissues will come out.
- Adjust the size of the slot based on the tissue box opening.
Phase 5: Create the Bottom Panel (x1)
- For the bottom of the tissue box, create a plain gray panel without any heart or opening.
- Ensure it matches the size of the other panels.
Phase 6: Iron the Panels
Step 1: Iron Each Panel
- Place a sheet of parchment paper over the completed bead designs on the pegboard.
- Heat up your iron to a medium setting.
- Carefully iron over the parchment paper until the beads start fusing together.
- Keep applying gentle heat and check frequently to avoid over-melting.
Step 2: Shape Puzzle Edges
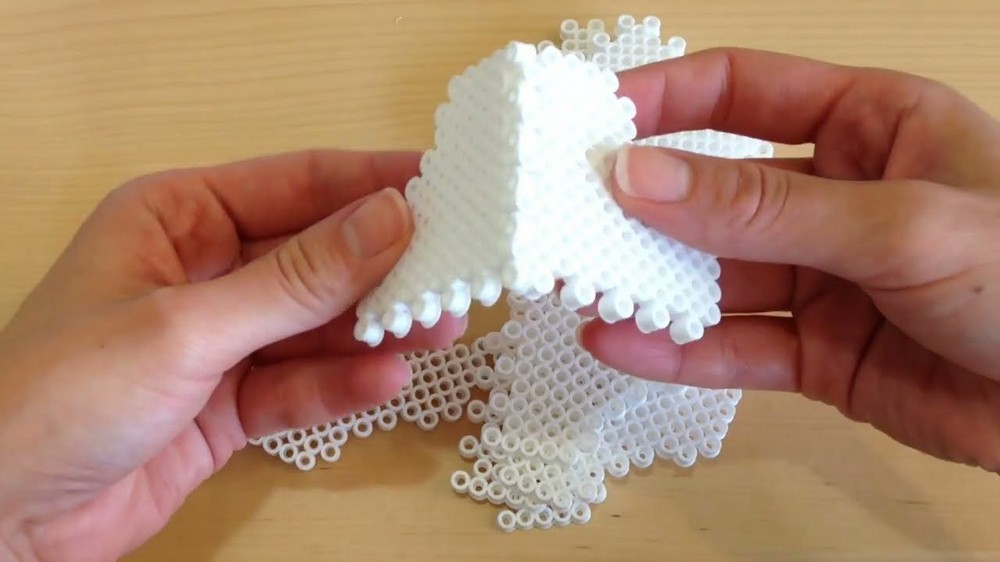
- For each panel, remove every other bead along the edges to create a jigsaw-like design.
- This allows the panels to interlock when assembling the cube.
Step 3: Cool Completely
- Let the panels cool before peeling them off the pegboard.
Phase 7: Assemble the Cube
Step 1: Start With the Side Panels
- Position two side panels together so their puzzle-like edges interlock.
- Carefully glue them together along the seam with a hot glue gun.
- Repeat this process until all four side panels are connected.
Step 2: Attach the Bottom Panel
- Take the plain gray panel and attach it to the bottom of the cube using the same hot glue method.
- Ensure it is securely in place, as this will stabilize the tissue box.
Step 3: Attach the Top Panel
- Finally, place the top panel with the tissue slot onto the cube.
- Glue it securely, ensuring the tissue slot aligns with the opening of your tissue box.
Phase 8: Add 3D Edges (Optional)
For a more realistic and detailed look, consider adding extra layers of Perler beads around the edges.
Step 1: Make Corner Pieces
- Create additional corner accents with pink hearts surrounded by a border of gray beads.
- Glue the corner pieces onto the existing cube edges.
Step 2: Add Layers to Edges
- Create thin rectangular strips of beads to glue onto the edges of the panels.
- This "steps" the edges outward, enhancing the 3D effect.
Phase 9: Final Assembly
- Assemble all additional accents, ensuring they're securely glued in place.
- If needed, clean up any hot glue strands or irregularities using your fingers or scissors.
- Place the tissue box inside the cube by lifting the top panel slightly (or sliding the tissue box up from the bottom if it's removable).
Tips & Tricks
- Plan Ahead: Sketch your design or follow a printed Companion Cube pattern for precision.
- Patience Is Key: This project takes time and multiple sessions, so don’t rush.
- Organize Beads: Sorting beads by color beforehand will save time.
- Use Tweezers/Toothpicks: These make handling the beads much easier.


