Create a fun DIY 3D Perler Bead Cube with Creeper using colorful beads and a simple design, making it a playful craft project for Minecraft fans.
Turning your favorite Minecraft character into a cube-shaped masterpiece! Crafting a 3D Perler bead cube featuring the iconic Creeper isn’t just fun, it’s a way to bring the pixel-styled Minecraft world into reality. Perfect for fans of the game or anyone who loves creative DIYs, this cube is more than just decoration, it's an expression of your hands-on ingenuity. You can use it as a desk ornament, personalized gift, or even as a playful keepsake.
DIY 3D Perler Bead Cube with Creeper Handmade Project
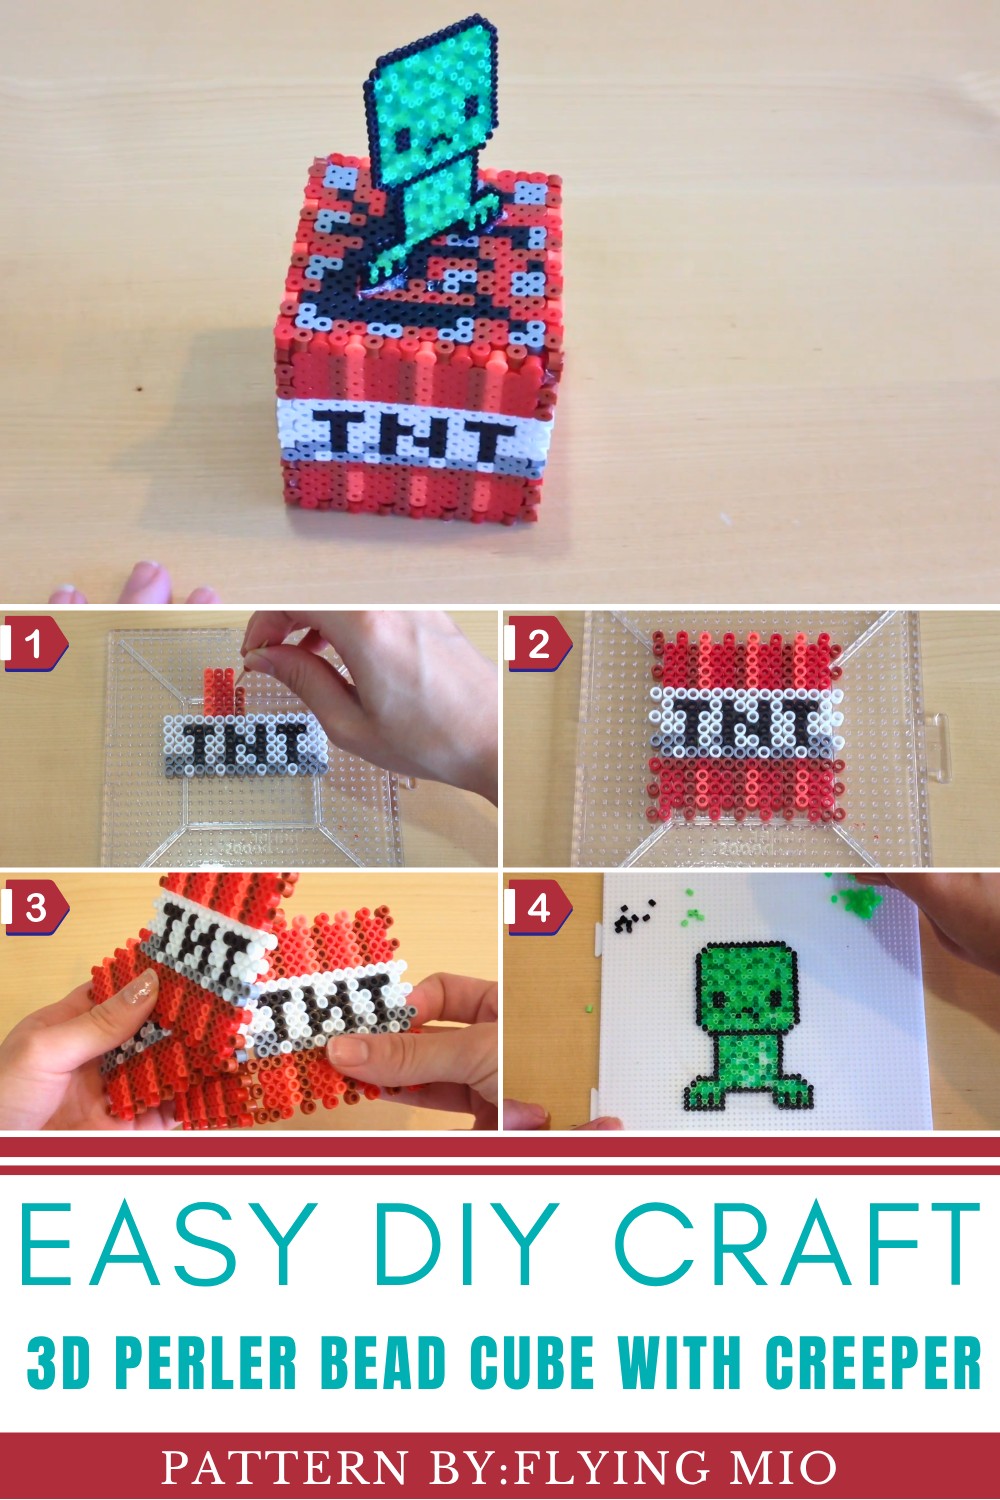
The styling opportunities are endless. Add vibrant shades to make a lively Creeper or go for darker tones for a dramatic effect. If you’re feeling extra adventurous, you can even add interactive elements like movable sides or hidden compartments. The 3D structure allows you to experiment while giving the finished cube a strong presence, perfect for display.
Not only is this project beginner-friendly, but it also helps develop patience and precision, making it an excellent activity for all ages. Plus, with Perler beads, every creation becomes durable and long-lasting.
For the ultimate guide to crafting this Minecraft-inspired cube, check out Flying Mio’s YouTube tutorial (watch it here). Full credit to her channel for the step-by-step instructions and inspiring creativity.
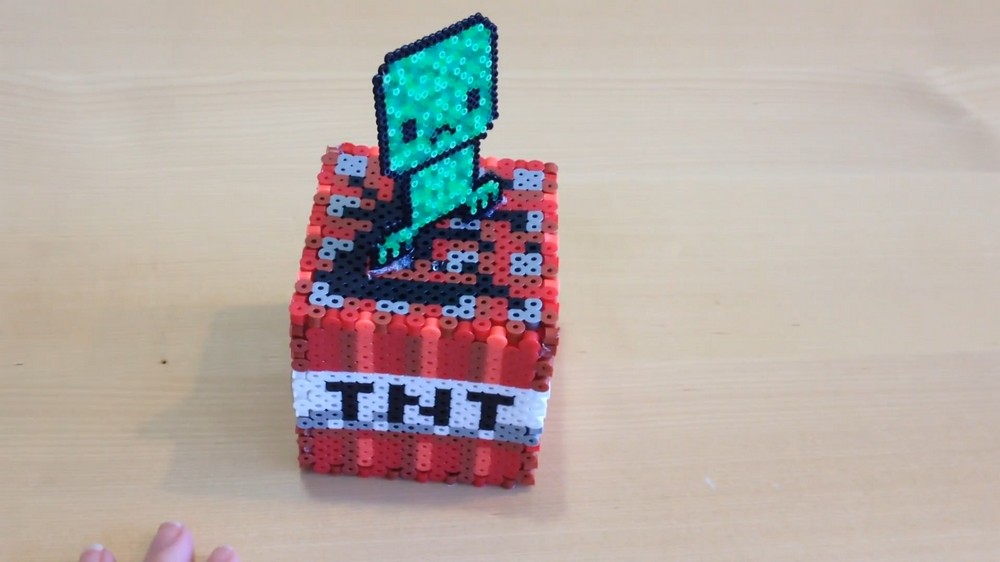
Minecraft Explosive Box with Creeper Top
Phase 1: Materials
Before starting, make sure you have the following:
- Perler Beads (or Hama Beads):
- Red, brick-red, orange, white, gray, green (at least 3 shades), and black beads.
- Perler/Hama Pegboard: Large enough for your designs.
- Iron: To melt the beads.
- Ironing Paper or parchment paper: To protect the beads while ironing.
- Toothpick or tweezers: Helpful for placing beads (especially Hama beads).
- Hot Glue Gun or Super Glue: For attaching parts.
- Small container: To organize beads (optional).
Phase 2: Making the TNT Side Panels
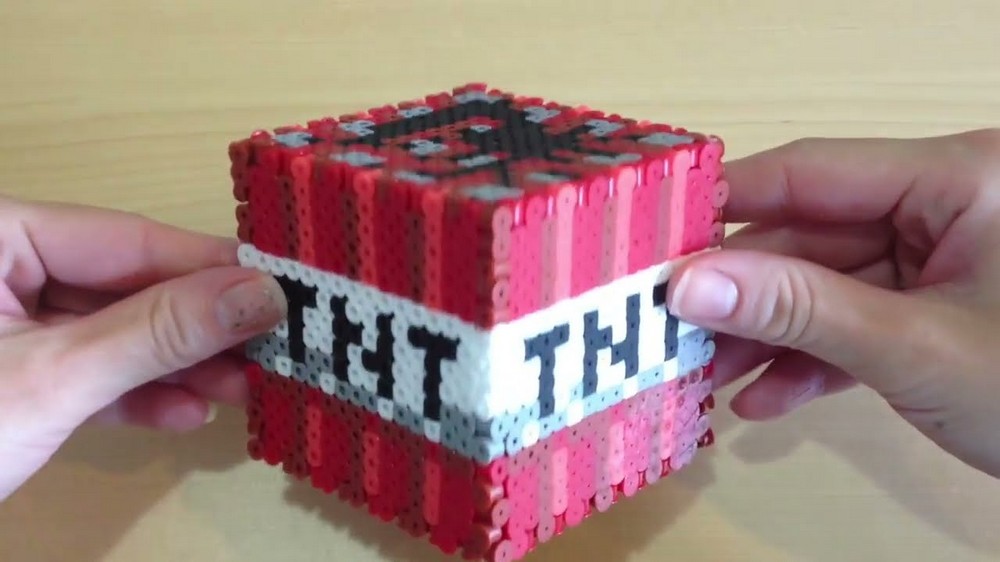
The box will have 4 identical side panels featuring the TNT design.
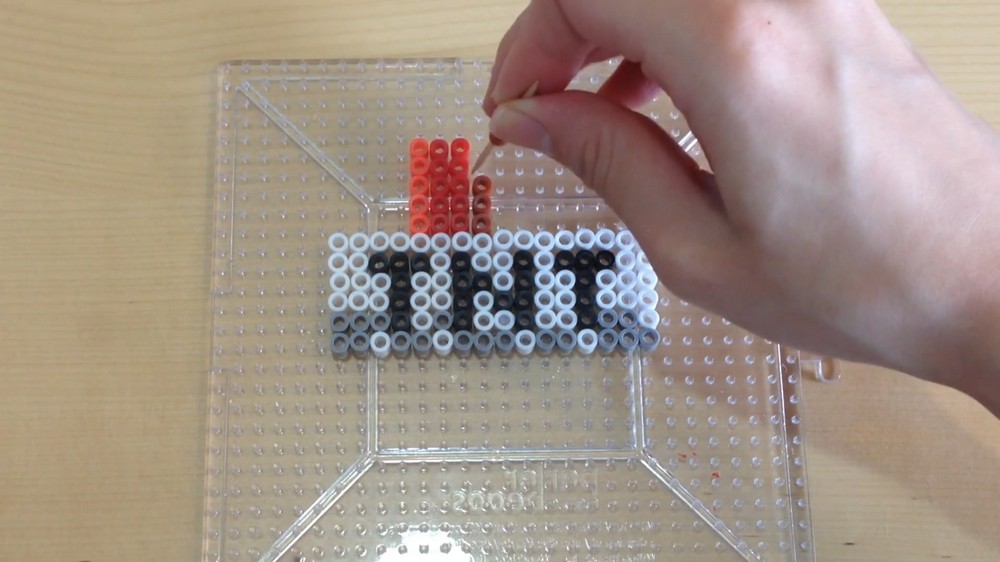
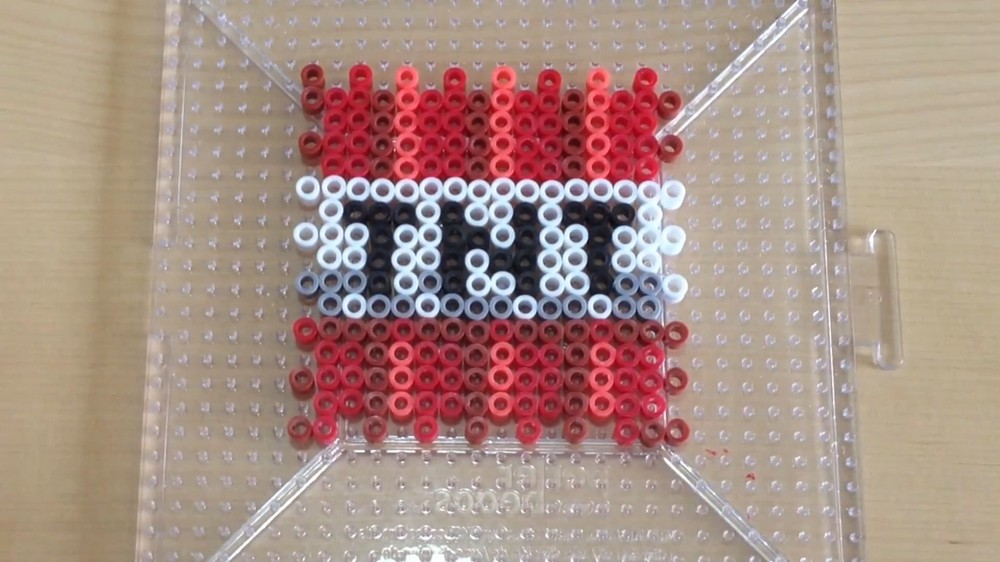
Step 1: Create the Letters "TNT"
- On your pegboard, align the Perler beads to spell out TNT:
- Each letter should be 4 beads tall and 4 beads wide.
- Use white beads to outline the letters to make them stand out.
- Add gray and white beads around the lettering to fill the background:
- Use two rows of alternating gray and white beads.
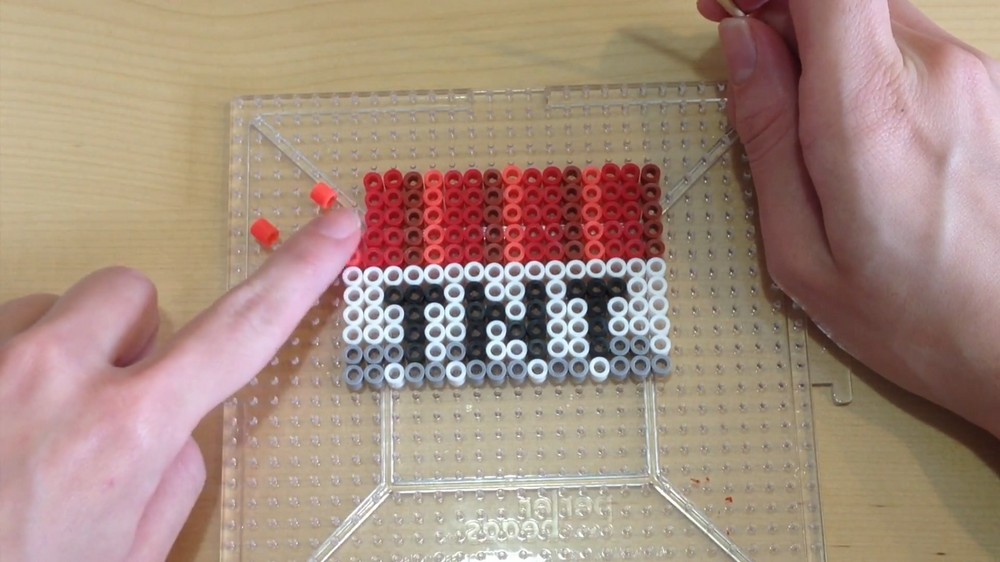
Step 2: Add the Fire Pattern
- Add orange-red beads and brick-red beads:
- Make a pattern by alternating 5 rows with 2 orange-red rows at the top, followed by 2 regular red rows, and 1 brick-red row.
- This pattern creates the fiery effect of a TNT box.
- Fill in the bottom row:
- Alternate red and brick-red beads. Place 2 red beads and then 2 brick-red beads across the row.
Step 3: Form Puzzle-Like Edges
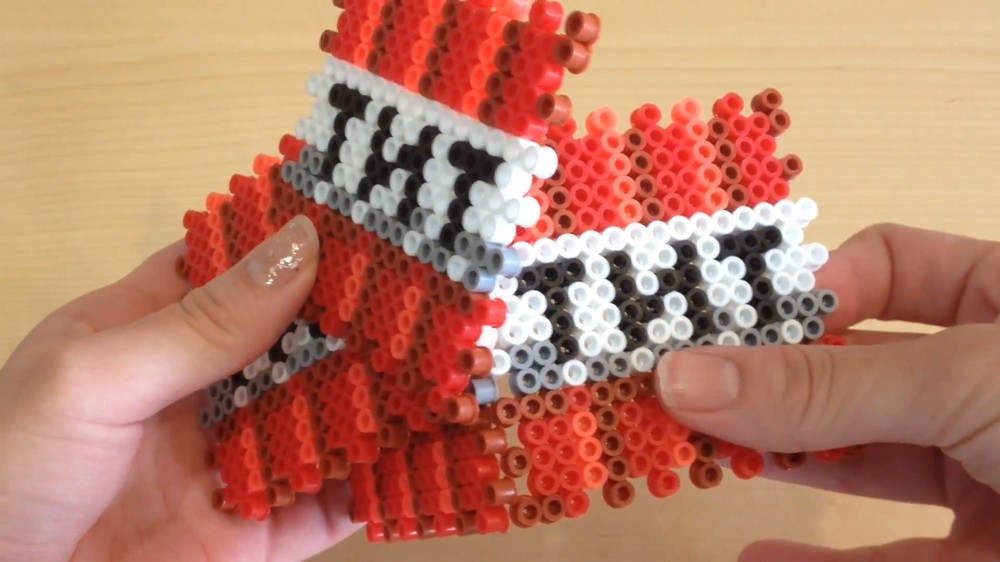
- Remove every other bead on the edges of the square you just created.
- This ensures that the box sides can fit like puzzle pieces later.
- Once complete, iron the panel:
- Place parchment paper over the beads and iron for about 10 seconds. Watch to make sure they melt and fuse together well.
- Carefully peel the panel off the pegboard once cooled.
- Repeat Steps 1–3 to create 3 more panels, making a total of 4 identical panels.
Phase 3: Creating the Top and Bottom Panels
The top and bottom panels feature a different design than the side panels.
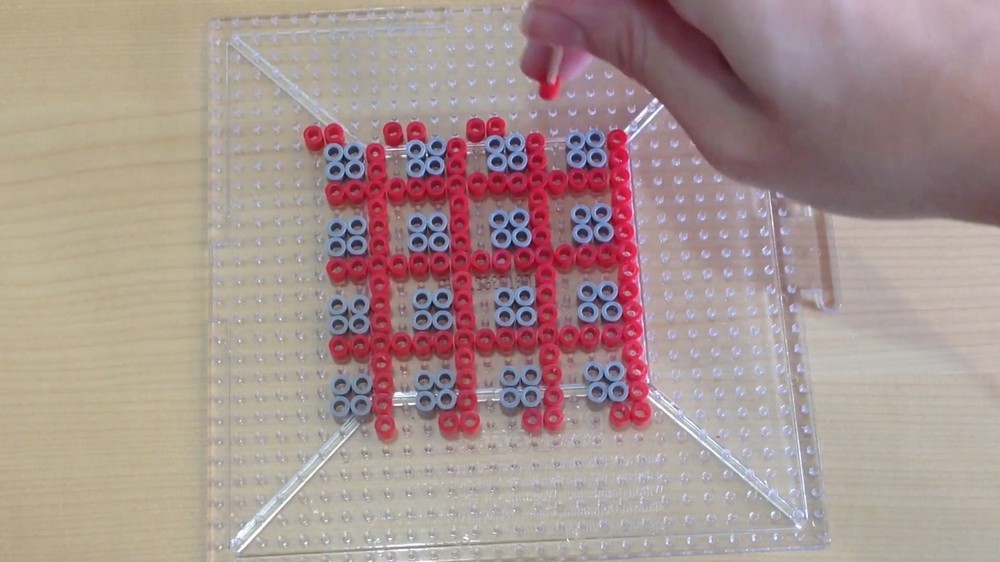
Step 1: Make the Base Pattern
- Start with gray beads, stacking them into 16 small square groups (4 beads in each square).
- Place the gray beads with space between them, and form a grid pattern.
Step 2: Add Borders
- Add brick-red beads as borders:
- Create 4 rows of red beads on the right-hand side of the gray square grid.
- Place red beads along the left-hand side too, starting from the bottom.
- Fill remaining spaces:
- Between the red and gray beads, fill with darker brick-red beads to complete the design.
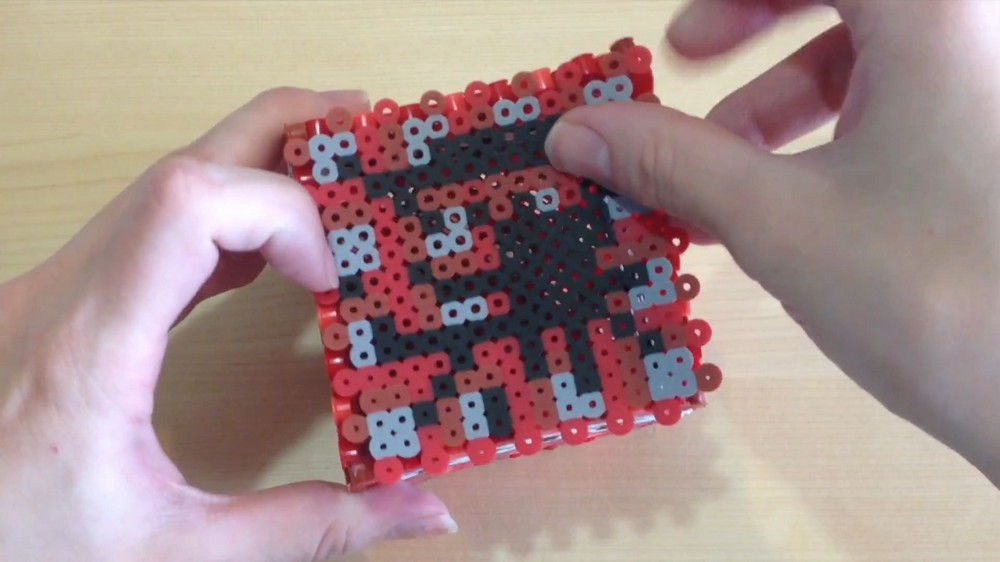
Step 3: Customize Top Panel with Dynamite Fuse
- Using black beads, create a curled black line in the center of the top panel, resembling a dynamite fuse:
- Add tiny black lines extending outward to mimic sparks.
- Optional: Use a reference image from Minecraft for inspiration.
Step 4: Iron These Panels
- Follow the same ironing process:
- Place parchment paper and iron until beads fuse together (about 10 seconds for Perler beads, 2–3 seconds for Hama beads).
Phase 4: Assembling the Explosive Box
Step 1: Fit Pieces Together
- Position the sides and top/bottom panels:
- Fit the puzzle edges together. The removed beads will help the pieces fit seamlessly.
- If edges don’t stick securely:
- Use a hot glue gun or super glue along the edges to hold the box together.
Phase 5: Creating the Creeper
The Creeper is a cute, chibi-style character that adds a fun Minecraft touch to the box.
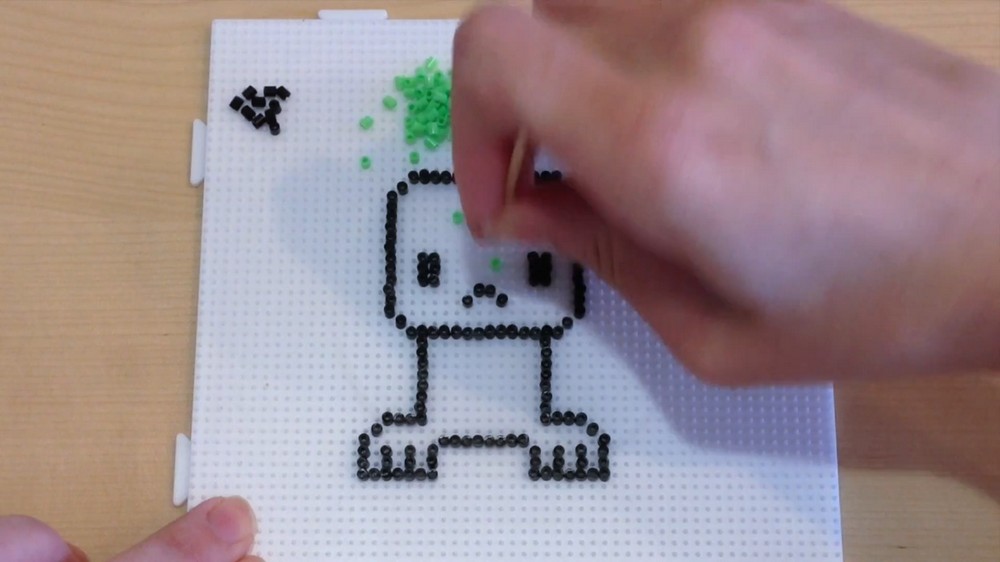
Step 1: Outline the Creeper
- Use black beads to outline the face:
- Large rectangular face with prominent eyes and downturned mouth.
- For the body:
- Keep the head larger in proportion to the body (chibi style).
- Add small toes/nubs at the base to emulate legs.
Step 2: Fill in the Creeper
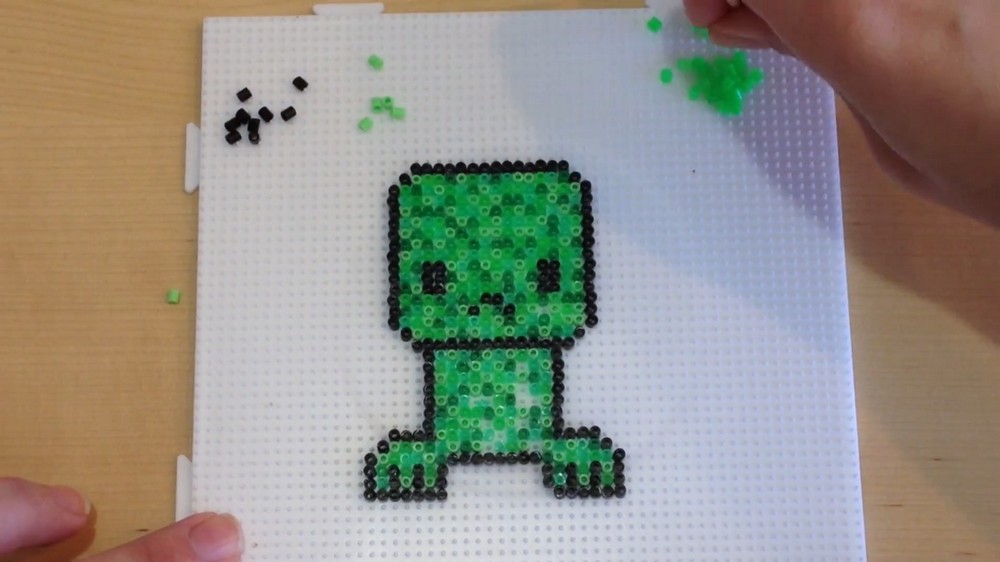
- Use three shades of green beads to fill the inside of the Creeper:
- Scatter the colors randomly to create an organic, pixelated look that matches the Minecraft vibe.
- For added detail:
- Use lighter shades of green on the face for highlights.
- Space the colors slightly unevenly for a realistic Creeper pattern.
Step 3: Iron the Creeper
- Place parchment paper over the Creeper design and iron:
- Be quick—Hama beads melt faster than Perler beads (only 2–3 seconds).
- Let it cool completely before handling.
Phase 6: Final Assembly
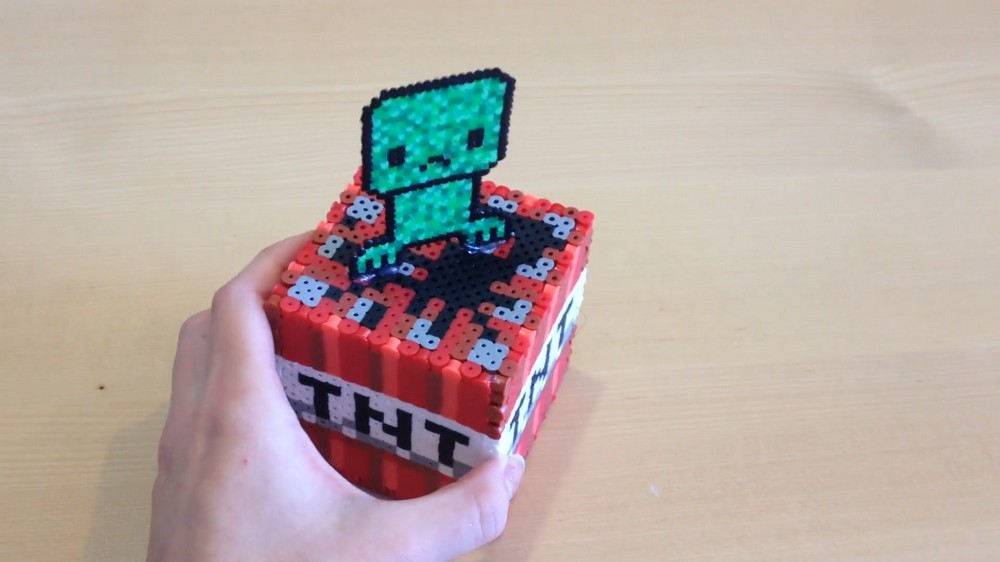
Step 1: Attach the Creeper to the Box
- Use a hot glue gun to attach the Creeper to the top panel of the box.
- Adjust the position to ensure the Creeper is stable.
Step 2: Add Personal Touches
- Decorate the box further with more random beads or designs if desired.
- Seal any loose sections with glue for durability.
Phase 7: Enjoy Your Craft
Congratulations! You’ve created your very own Minecraft Explosive Box with Creeper Top. Perfect for decorating your room, gifting to a Minecraft fan, or enjoying as a DIY keepsake.
Crafting Tips for Beginners
- Organize beads beforehand to save time.
- Handle Hama beads carefully since they're much smaller and require patience.
- Take breaks if needed—precision can take time but is worth it!
- If melting beads is tricky, use a lower iron setting and adjust based on bead type.