
Hop into fun with Crochet Rabbit Amigurumi Pattern to create an adorable cuddly friend that adds charm and joy to gifts home decor and playful collections.
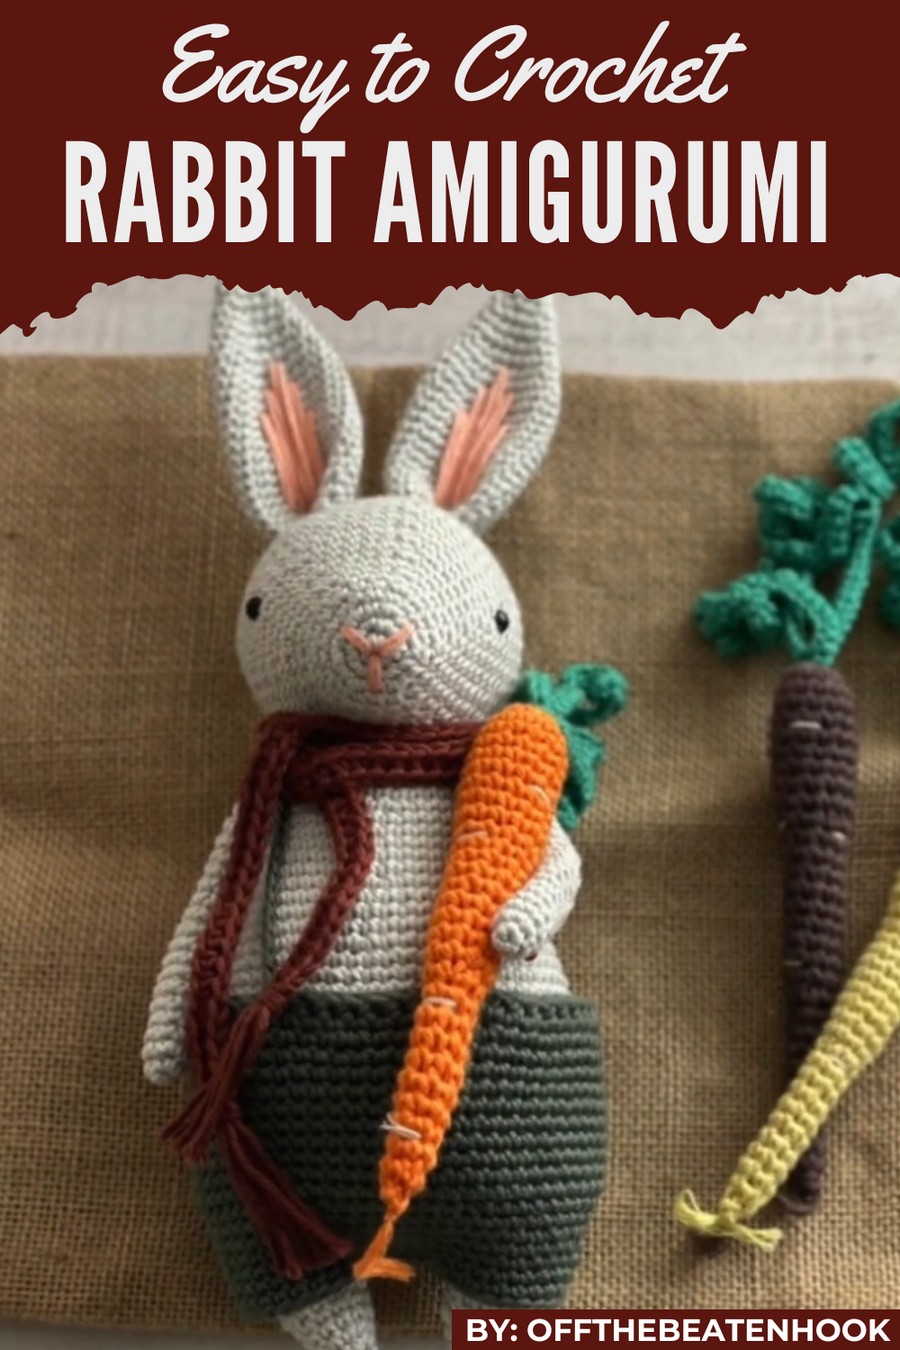
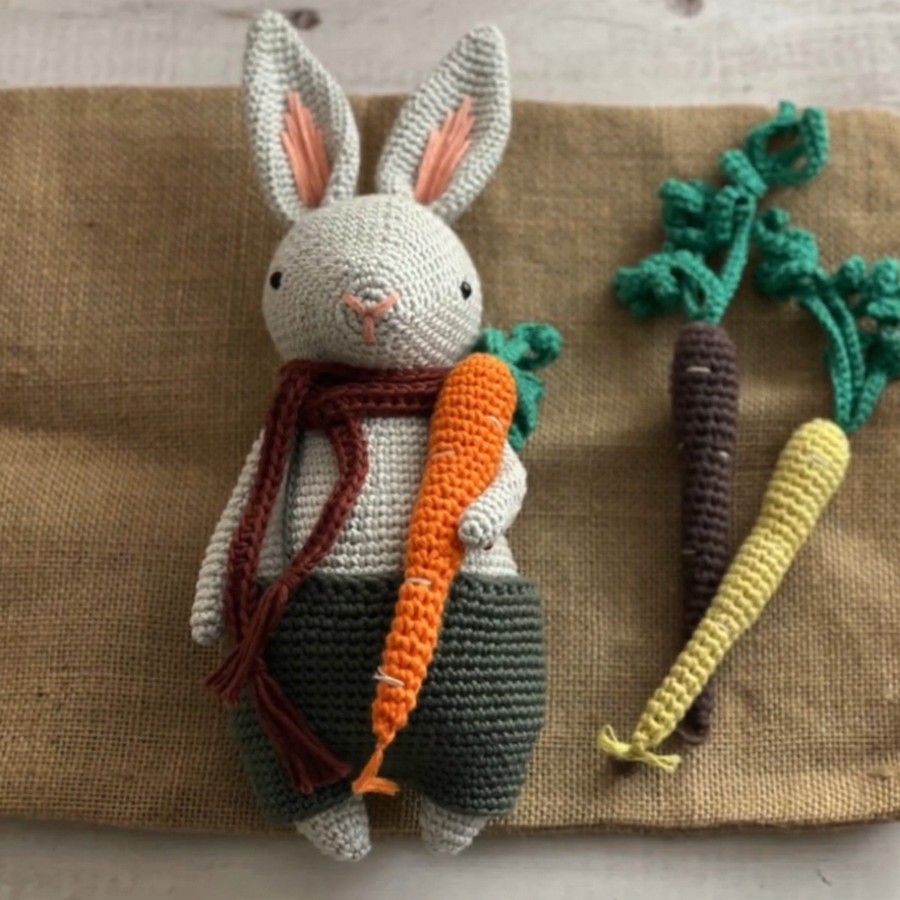
Creating a soft, lovable bunny that brings a warm smile to every face. With its floppy ears, round little body, and cute button-like nose, this crochet design is the perfect mix of charm and creativity. It’s not just a toy; it’s a beautiful piece that can brighten up any space, whether it’s a nursery, a living room, or a cozy corner.
Crochet Rabbit Amigurumi Pattern Use to Teach Kids
Ideal for gifting or simply keeping as a delightful companion, this adorable bunny is full of personality. Its handmade charm and timeless design make it a project that spreads happiness wherever it goes.
Difficulty Level:
Intermediate to Advanced
This pattern requires knowledge of US crochet terminology and some experience with assembling amigurumi parts, embroidery, and sewing.
Materials Needed
- Yarn:
- Body: Worsted-weight yarn in desired main color (e.g., white, gray, beige).
- Embroidery (Nose/Ears): Worsted-weight yarn in pink or any contrasting color.
- Collar: Worsted-weight yarn in your chosen contrasting color.
- Hook Size:
- Use a 3.5 mm (E) crochet hook for tight stitches suitable for amigurumi.
- Safety Eyes:
- 6mm safety eyes (or 8mm depending on preference).
- Tapestry Needle: For embroidery and sewing.
- Stuffing Material: Polyester fiberfill or similar stuffing.
- Scissors: For cutting yarn.
- Stitch Markers: Optional but helpful when counting rounds.
- Pins: For positioning and securing parts (especially ears and the collar) during assembly.
Key Abbreviations (US Terminology)
- ch: Chain.
- sc: Single Crochet.
- st(s): Stitch(es).
- inc: Increase (2 single crochets in the same stitch).
- dec: Decrease (single crochet 2 stitches together).
- sl st: Slip Stitch.
Special Notes
- Gauge: Tight stitches are required to prevent visible stuffing. Adjust hook size if needed.
- Assembly Tip: Keep pins handy to position parts before sewing to ensure symmetry.
- Safety Note: Firmly secure safety eyes to ensure they cannot be removed.
Pattern Instructions
Step 1: Embroidering the Nose
- Setup:
- Use pink yarn and thread it onto your tapestry needle.
- Locate the magic circle from Round 1 of the head.
- First Stitch:
- Insert the needle from the inside to the outside of the magic circle.
- Pull to secure the yarn. Bring the needle across, inserting it into the gap between Rounds 3 and 4 of the head, and pulling it back out through the magic circle.
- Repeat once more in the same location to create a double backstitch.
- Second and Third Stitches:
- For symmetry, repeat this process toward both the left and right of the first stitch, following the curve of the nose area. Each side should have two layers of yarn side-by-side for a fuller look.
- Finally, create the bottom tip of the nose following the same process, positioning your stitches between Round 3 and 4 for a triangular shape.
- Finish:
- Tie off the yarn securely inside the head, knotting it with the starting thread without pulling too tightly to avoid puckering.
Step 2: Adding the Safety Eyes
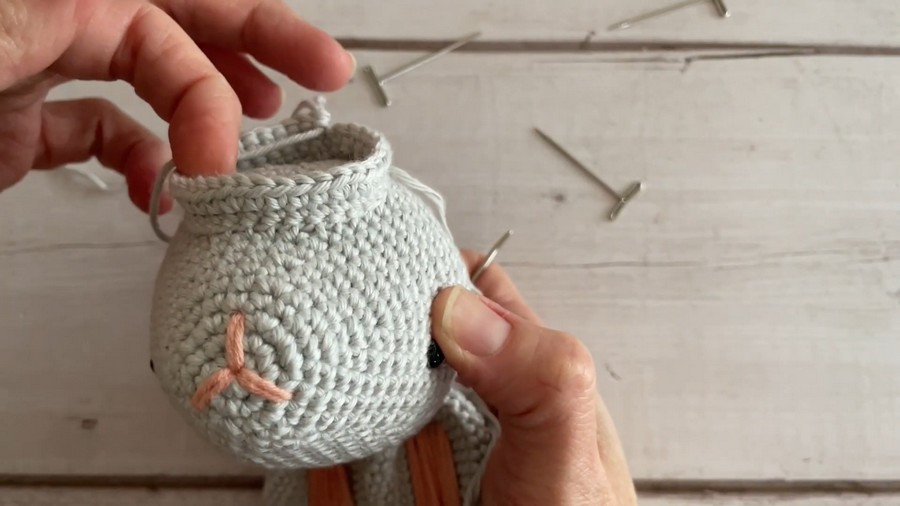
- Placement:
- Locate Rounds 13 and 14 of the head.
- Place the eyes by guiding them outward from the edges of the embroidered nose.
- You can estimate placement visually, ensuring the eyes are evenly spaced. Alternatively:
- Count approximately 20 stitches apart across the top curve of the head.
- Insertion:
- Once positioned, secure the eyes tightly with their safety backings.
Step 3: Embroidering the Bunny Ears
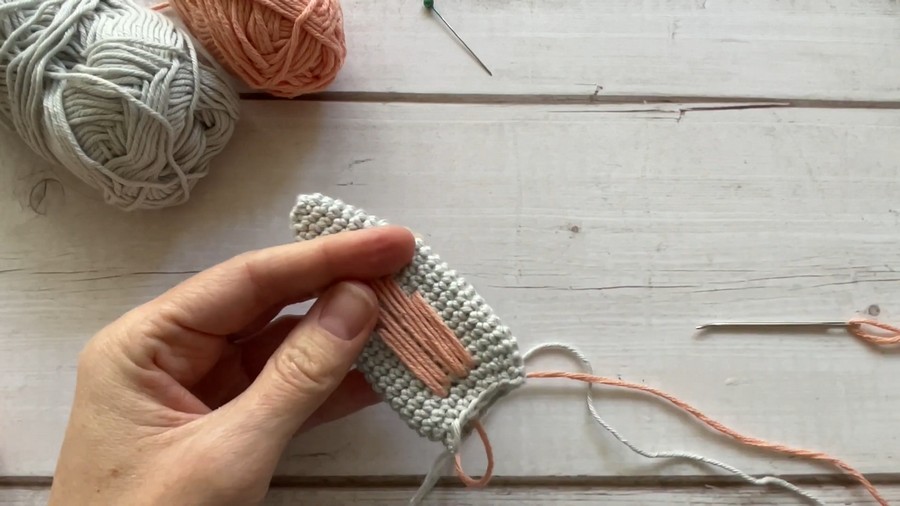
- Preparation:
- Thread pink yarn on your tapestry needle.
- Flatten the crocheted ear so the ending tail aligns with one side, ensuring symmetry when folded later.
- Work on embroidery starting 2 rounds up from the last row to avoid bulk at the bottom.
- Outer Embroidery:
- Start in the center-top of the ear and work embroidering down toward the base.
- Move the tapestry needle between Rounds 8 and 9, counting rows to ensure precision. Repeat to create a consistent, smooth line.
- Layer the Embroidery:
- Create three layers:
- The longest stitch running the entire length of the ear.
- Smaller stitches (over by 1 stitch, down by 2 rows). Work symmetrically on the opposite side.
- Create three layers:
- Finishing:
- End the embroidery by tying the yarn off securely inside the ear. Trim the excess yarn.
Step 4: Closing and Sewing the Ears
- Shape:
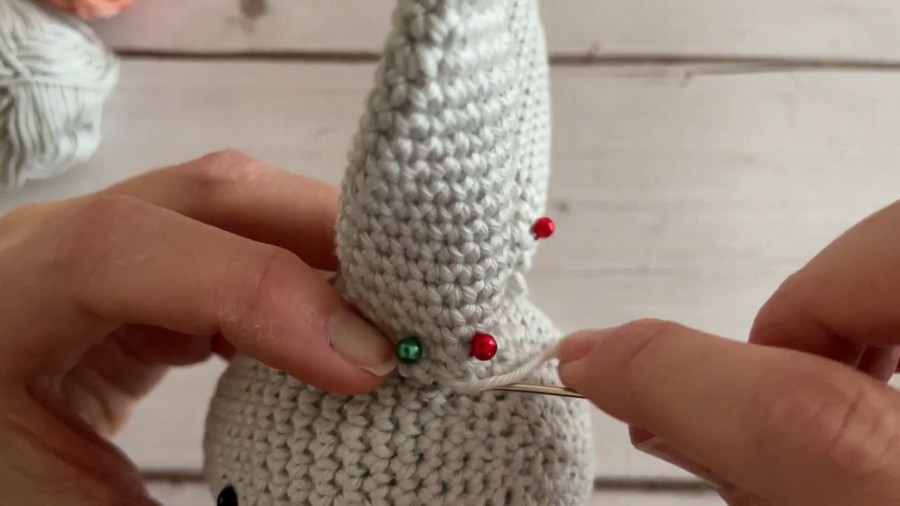
- Fold each ear in half lengthwise, pinching the bottom edges together. Align and pinch so the ear is symmetrical.
- Sewing:
- Use the long tail left at the end of the ear.
- Thread the tapestry needle and sew through both loops of each row, starting at the bottom tip. Work your way across, pulling firmly but not too tight.
- Attachment:
- Pin the ears onto the head first for proper placement. (Position the ears over Rounds 21–24.)
- Sew each ear onto the head using the same method, sewing from the back, around the curve, and back down to secure.
Step 5: Pinning and Sewing the Collar
- Pinning the Collar:
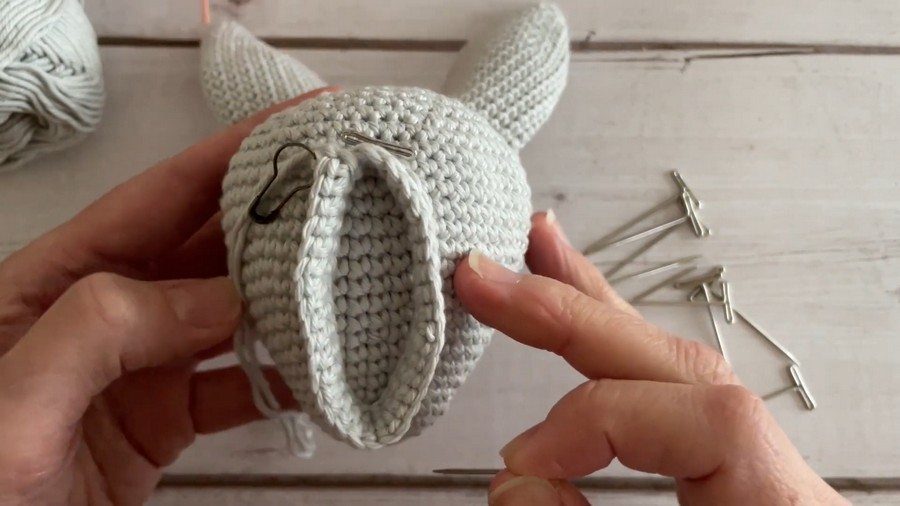
- After crocheting Round 2 of the body, stop and pin the collar.
- Position the back of the collar along Round 20 of the head, and the front along Round 10.
- Ensure the collar retains a circular shape, pinning all 36 collar stitches evenly to their corresponding stitches around the head.
- Sewing On:
- Thread the long tail from the collar onto your tapestry needle.
- Start from the back, and sew by picking up one loop from each stitch on the head and threading it through both loops of each stitch on the collar.
- Work around the collar until fully secured.
Conclusion
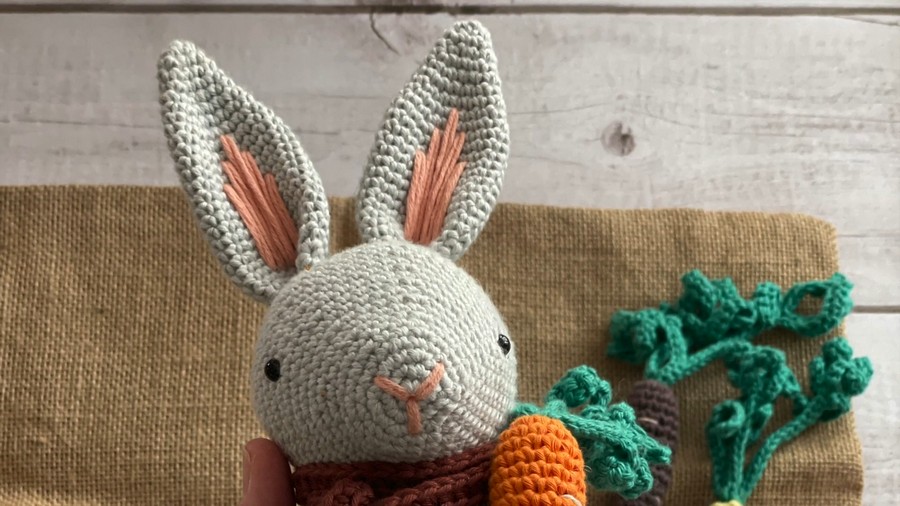
Congratulations! You’ve now completed Barnaby the Rabbit, a detailed amigurumi project with charming details like embroidered ears, a sweet nose, and a well-fitted collar. Your handmade creation is perfect as a thoughtful gift for loved ones or as a keepsake for yourself.
Pattern Corrections
- Ensure the safety eyes are inserted between correct rounds. Rounds mismatch is a common error.
- When pinching the ears, align the rows carefully to avoid asymmetry during sewing.
Tips for Success
- Stuffing: Be careful not to overstuff the head, body, or ears, as this can distort their shapes.
- Pin as You Go: Whether it’s the ears, eyes, or collar, pinning helps maintain alignment and neat stitching.
- Embroidery: Use long lengths of yarn at the start to avoid frequent rethreading, which can disrupt the flow.



