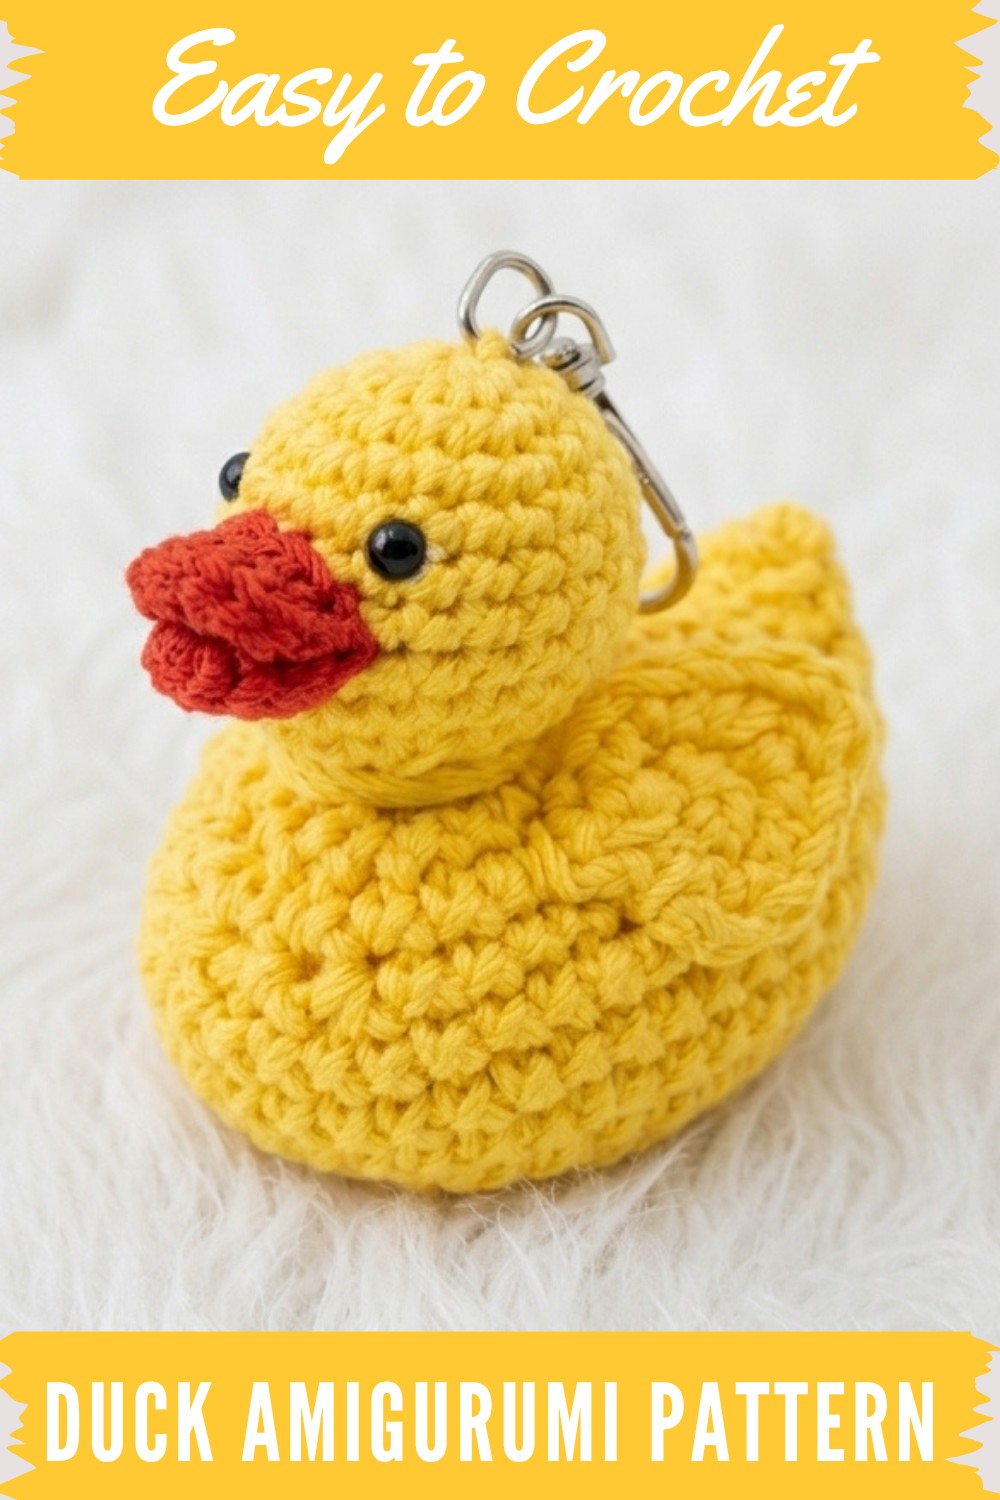
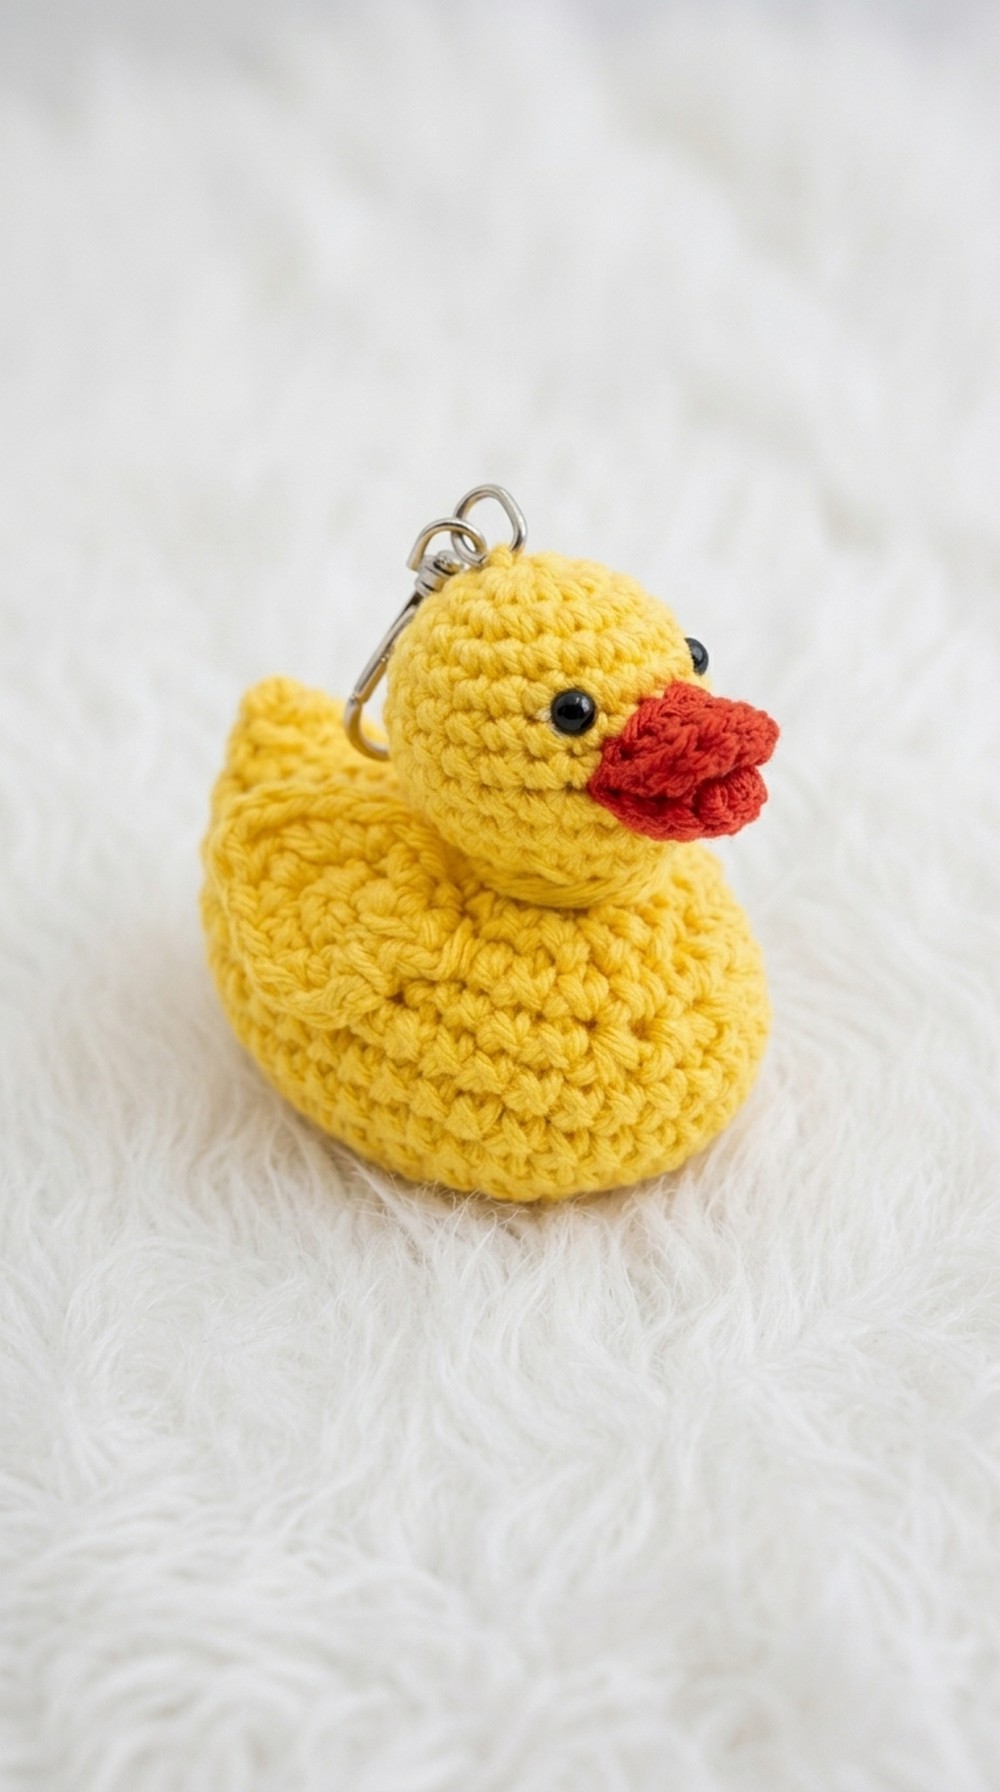
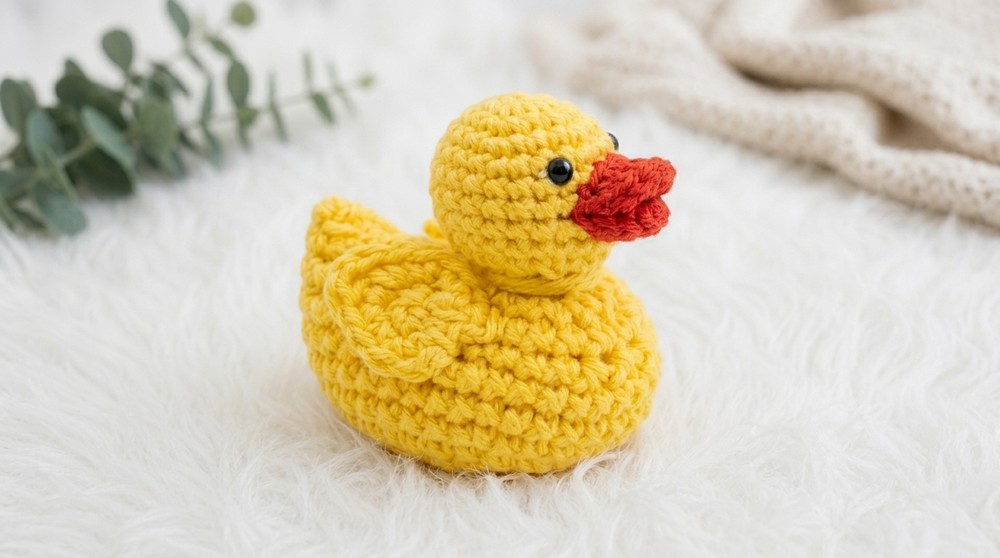
Bring your crochet dreams to life with this fun and free crochet duck amigurumi pattern that’s perfect for handmade gifts or adorable home decor.
Bringing a little whimsy and charm to your crochet projects is easy with the Free Crochet Duck Amigurumi pattern. This delightful amigurumi design features an adorable little duck with a rounded, cuddly shape that’s perfect for both beginners and experienced crocheters looking for a quick, satisfying project. With its soft texture and cute details like a tiny beak and expressive eyes, this duck stands out as a sweet companion or a fantastic handmade gift.
Adorable Free Crochet Duck Amigurumi Pattern
The style is simple yet endearing, capturing the essence of a friendly duck in a compact, huggable form. Its smooth stitches create a plush surface that feels cozy to the touch, while the rounded body and small wings add personality and charm. This pattern suits anyone interested in amigurumi, with room to customize colors or adjust the size by changing your yarn weight or hook size to create anything from a tiny keychain friend to a larger stuffed toy.
Constructed mainly using single crochet stitches worked in continuous rounds, this project guides you through shaping each part separately before assembling them seamlessly. For best results, I recommend using soft cotton or cotton-blend yarn, as its slight firmness helps maintain the duck’s shape while giving a pleasant stitch definition.
Inspired by nature’s simple joys, this design is perfect for baby showers, birthday gifts, or just adding a cheerful handmade touch to your home. I love seeing how makers add their own flair, whether by experimenting with color combos or adding embellishments. If you’re craving a cute and approachable amigurumi, this duck pattern is a joyful way to dive in and let your creativity soar.
Cute Crochet Duck Family Pattern
Make your own adorable duck family with this easy, step-by-step amigurumi crochet pattern! Perfect as a decorative item, toy, or showpiece, this pattern creates a delightful mama duck or baby duck using simple stitches and minimal shaping. You can personalize each duck with different colors and faces, use beads or safety eyes, and add a little pond or showcase for extra charm. The project is suitable for beginners and provides great practice for basic amigurumi techniques: working in rounds, increasing, decreasing, and simple sewing.
Pattern Notes
- The ducks are worked in continuous rounds from the center outwards using single crochet.
- All increases and decreases follow standard amigurumi methods.
- Use a small hook for tight stitches and a sturdy shape.
- Safety eyes or beads can be added, or you can embroider the eyes.
- Small wings and beaks are made separately and sewn on.
- You can make ducks of different sizes by playing with yarn weight, hook size, or working additional rounds.
Skill Level
Beginner to Advanced Beginner
Simple shaping, sewing, and stuffing. No advanced techniques required.
Materials
- Yarn: Light yellow/acrylic or cotton for body, orange for beak, any contrasting color for wings (optional)
- Hook: 2 mm (or as recommended for your yarn weight)
- Stuffing: Polyester fiberfill or cotton
- Needle: Yarn/tapestry needle for sewing parts
- Eyes: Small beads, safety eyes, or black yarn/thread for embroidering
- Scissors
Measurements / Sizing
- Finished size: Baby duck approx. 5–7 cm tall, Mother duck approx. 10–12 cm tall (depends on yarn and hook)
- Wings: approx. 2–3 cm
- Beak: approx. 1–2 cm
- Eyes: ~3 mm beads or safety eyes
Gauge
- Not critical; stitches should be tight enough to prevent stuffing from showing.
Stitch Abbreviations
| Abbreviation | Meaning |
|---|---|
| ch | chain |
| sc | single crochet |
| inc | increase (2 sc in one st) |
| dec | decrease |
| sl st | slip stitch |
| st(s) | stitch(es) |
| MC | magic circle/ring |
Special Stitches
- Magic ring (MC): Make a loop, pull up yarn, and crochet inside the ring.
- Increase (inc): 2 sc in one stitch.
- Decrease (dec): single crochet two stitches together (sc2tog).
The Crochet Pattern
1. Duck Body
With yellow yarn and 2 mm hook:
- Start:
- Make a slip knot, ch 4, join with sl st to first ch to form a ring. (Alternatively, use MC.)
- Round 1:
- Ch 1, work 6 sc into ring. Join with sl st. (6 sc)
- Round 2:
- Ch 1, inc in each st around (2 sc each). (12 sc)
- Round 3:
- Ch 1, repeat [inc, sc 1] around. (18 sc)
- Round 4:
- Ch 1, repeat [sc 1, inc, sc 1] around. (24 sc)
- Round 5:
- Ch 1, repeat [sc 3, inc] around. (30 sc)
- Rounds 6–7:
- Sc in each st around (no increases).
- Shaping:
- Work the next round as follows:
- Sc in 12 sts, dec 3 times, sc in remaining 12 sts.
- Work the next round as follows:
- Round 8:
- Sc in each st around.
- Stuff body firmly.
- Fasten off, leaving a tail for sewing.
2. Duck Head
With yellow yarn:
- Start:
- Ch 4, join to form a ring (or MC).
- Round 1:
- 6 sc into ring. Join.
- Round 2:
- Ch 1, inc in each st around. (12 sc)
- Rounds 3–4:
- Sc in each st. (2 rounds, 12 sc)
- Round 5:
- Repeat [dec, sc 2] around for shaping.
- Stuff head lightly.
- Fasten off, leaving a tail for sewing.
3. Wings (Make 2)
With yellow yarn (or contrast):
- Start:
- MC, 6 sc into ring. Join.
- Round 2:
- In first 2 stitches, inc.
- In 3rd st: sc, dc.
- In 4th st: dc, sc.
- In last 2 sts: inc.
- Fasten off, leaving tail for sewing.
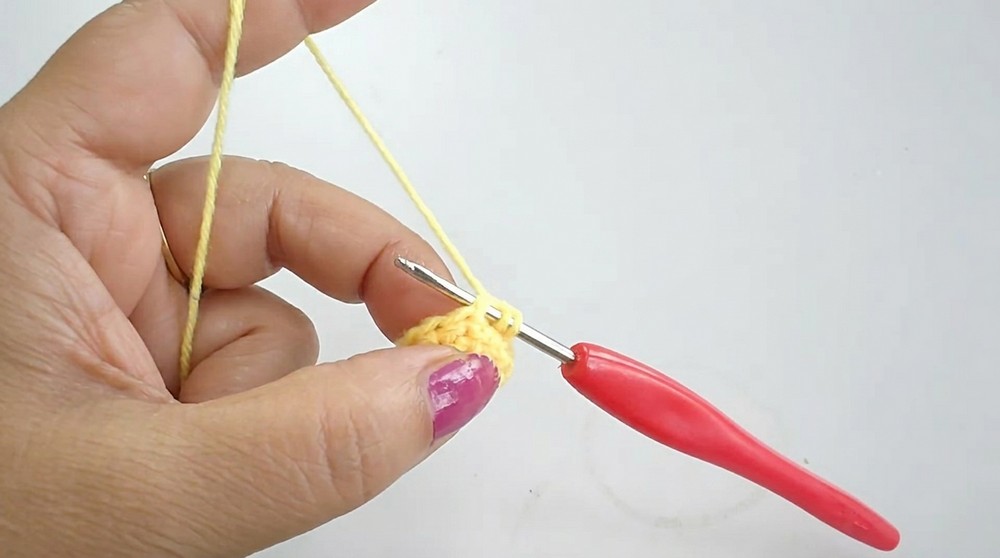
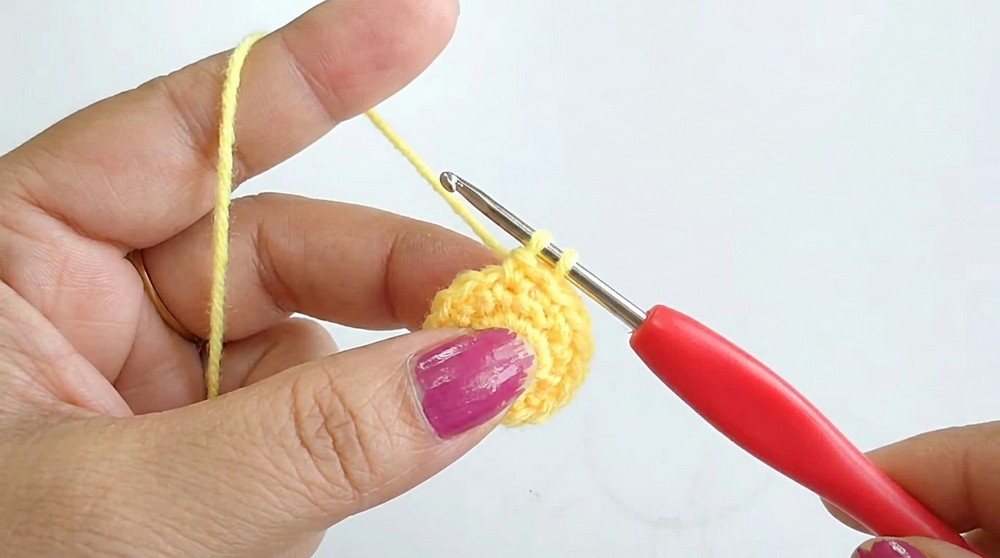
4. Beak
With orange yarn:
- Start:
- MC, 6 sc into ring. Join.
- Round 2:
- Sc around (or just sc once for smaller beak).
- Fasten off, fold piece in half, sew into a little triangle, leave a tail for sewing.
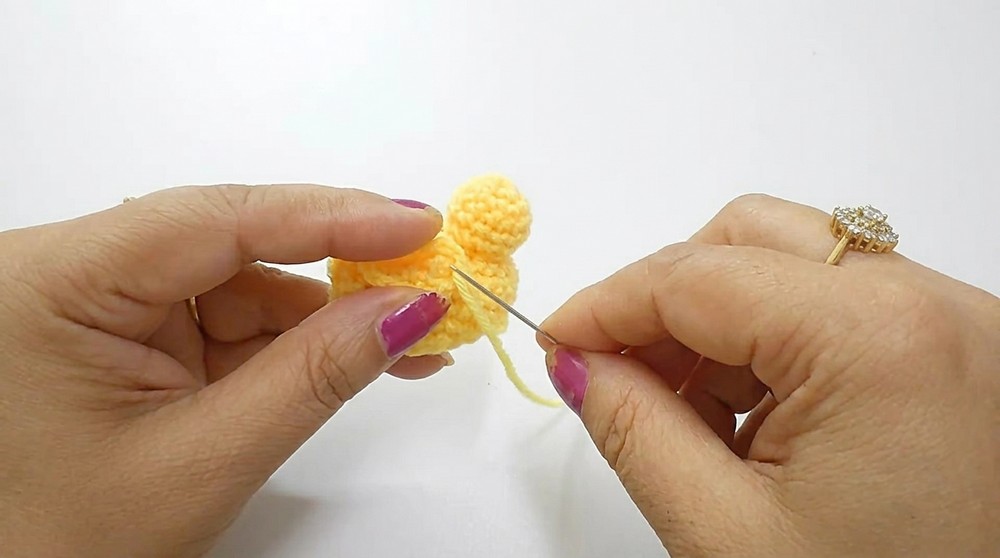
Assembly & Finished Size
- Stuff body and sew closed.
- Stuff head, sew to body at one end.
- Sew wings to sides, only sew base of wing for 3D effect.
- Fold and sew beak to head, tucking in slightly for shape.
- Attach safety eyes, beads, or embroider eyes using black yarn.
- Adjust placement for character.
- Finished duck sits flat and stands well.
Quick Overview for Beginners
- Crochet body and head in the round, stuff and sew shut.
- Make two wings and a small beak.
- Sew wings and beak on, making sure wings stand out for “flapping” effect.
- Add eyes/beads on head.
- Mix colors for your duck family, arrange as a playful display!
Tips for Success
- Use small hook/yarn for tight stitching and sturdy shape.
- Stuff firmly, but not overfill for a neat contour.
- Sew wings only at the base for a natural 3D effect.
- Experiment with eye placements for personality.
- Make a group in different sizes for a duck family!
- Add a small blue circle for a pond or display as a showpiece.