
Create a beautiful and lightweight crochet headband with this easy and free pattern, perfect for all sizes and customizable for a stylish handmade touch.
Delicate, versatile, and stylish, this lacy crochet headband is the perfect accessory for any occasion. With its airy openwork texture and modern design, it’s both functional and easy to customize. The lightweight feel ensures all day comfort, while the delicate pattern adds an elegant touch to any outfit. Whether used to keep hair neatly in place or as a finishing detail for a casual or dressy look, it’s sure to stand out.
Free Crochet Headband Pattern for Daily Fashion
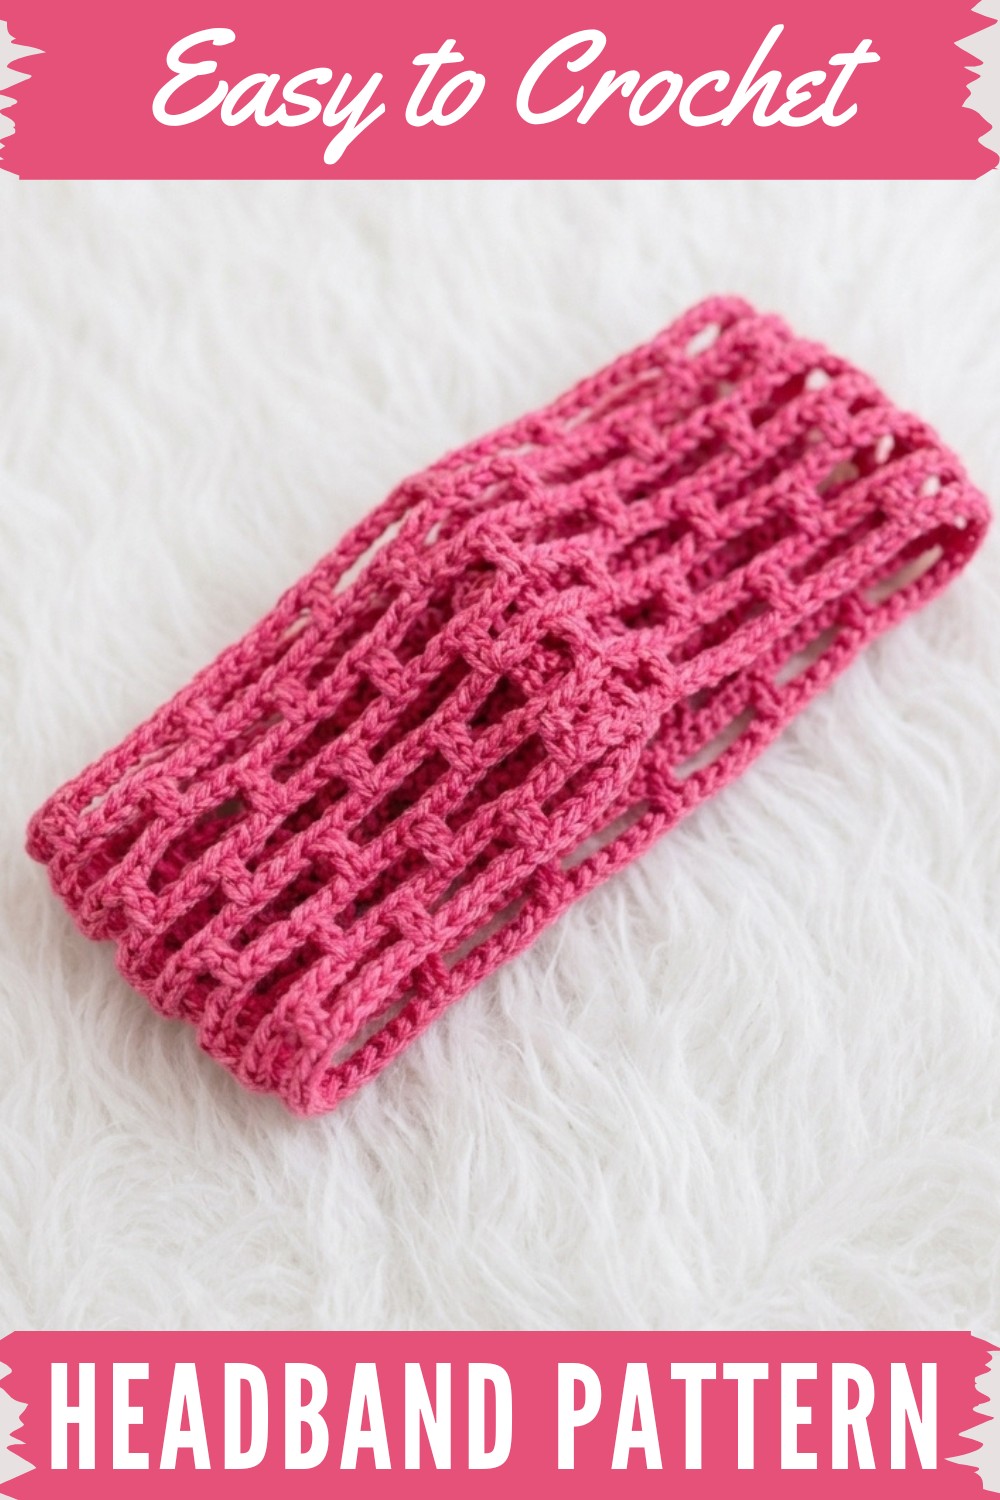
This free crochet headband pattern is adaptable for a variety of sizes and styles, making it suitable for everyone from kids to adults. A narrow version offers a minimalist vibe, while a wider variation can tame voluminous hair beautifully. Finishing options such as ties or a button closure make it even more versatile, allowing for a snug yet adjustable fit.
This piece works up quickly, making it a great project for handmade gifts, from thoughtful surprises to simple tokens of appreciation. Simple and satisfying to make, this crochet project blends function with beauty, becoming a perfect addition to any crochet collection.
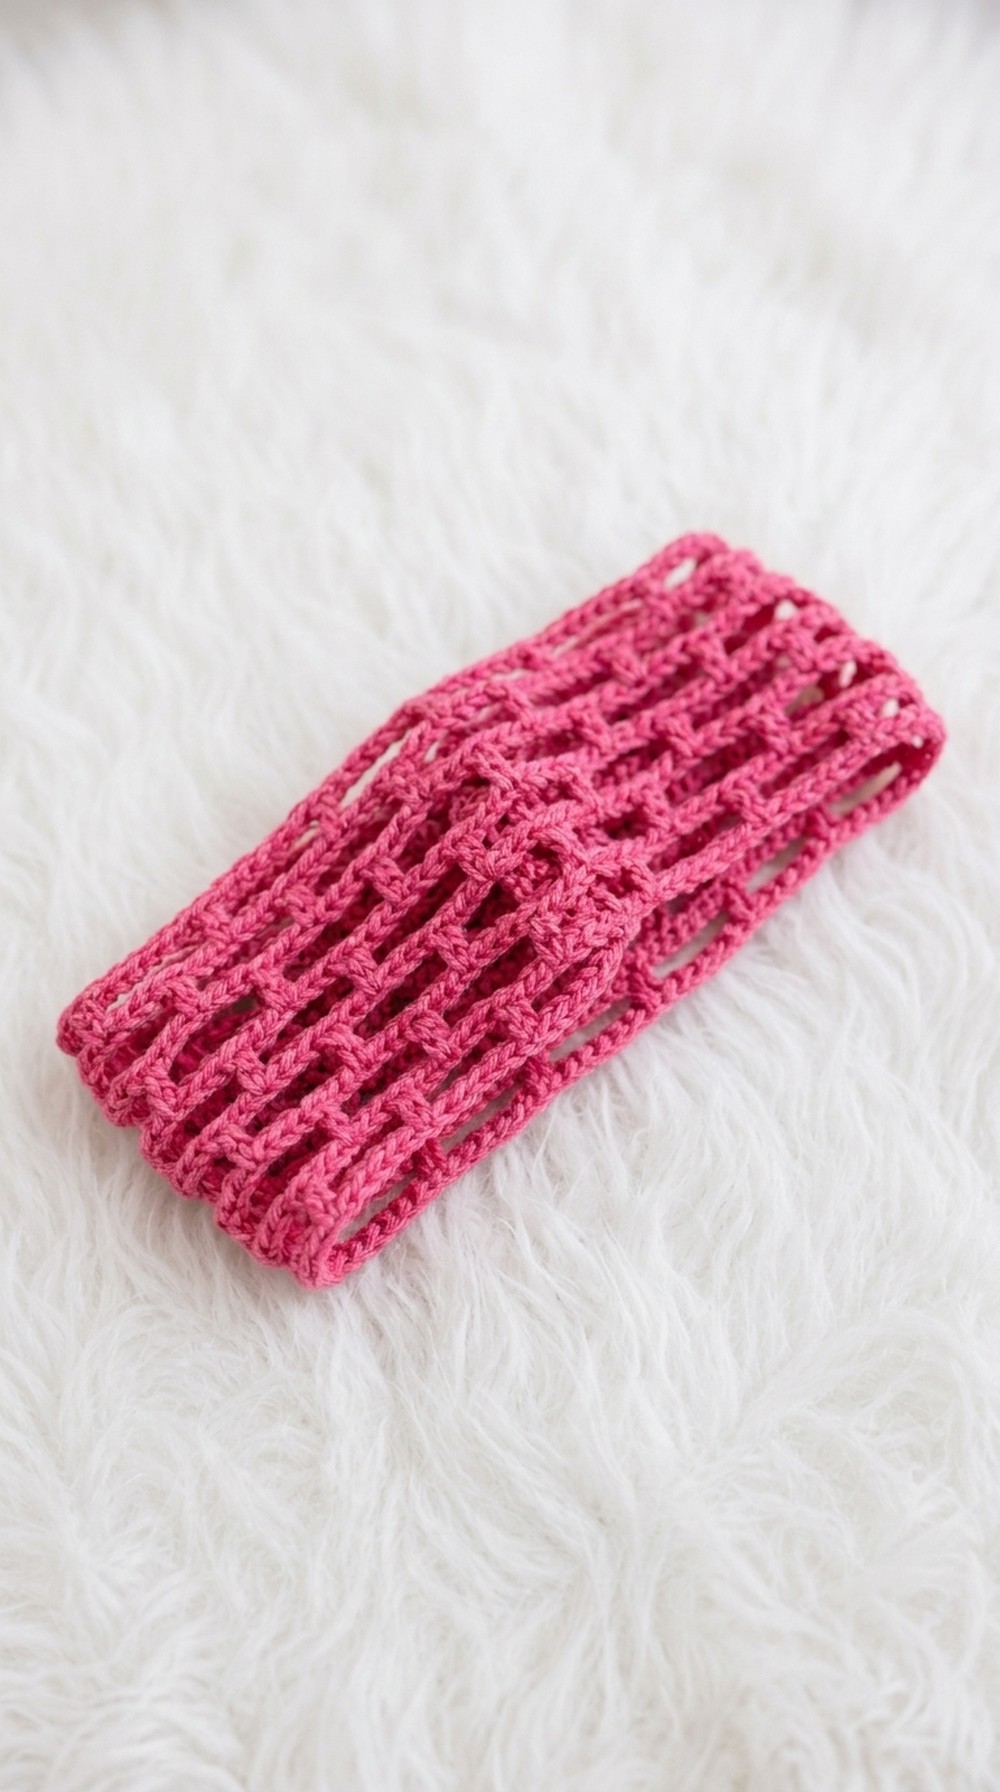
Crochet Headband Pattern
1. Materials
- Yarn: DK weight cotton yarn (e.g., YarnArt Jeans) or any similar cotton, bamboo, silk, or mercerized cotton
- Hook: 2.0 mm crochet hook (or a hook slightly smaller than what you usually use for this yarn to keep chains neat)
- Other:
- Yarn needle for weaving in ends
- Scissors
- Optional: E8000 glue (or similar) for extra security at ends
- Optional: Small button (if you choose the button closure option instead of long ties)
2. Gauge (Approximate)
This pattern is chain‑based and adjustable. Exact gauge is not critical.
With DK cotton and a 2.0 mm hook:
- 10 chains ≈ 3 cm (1.2 in)
- 10 rows of pattern ≈ 6–7 cm (2.5–2.75 in)
Use this as a reference. If your fabric is too loose, use a smaller hook; if too tight, a larger one.
3. Finished Size
- Width (6 row version): approx. 6–7 cm (2.5–2.75 in)
- Width (9 row wider version): approx. 9–10 cm (3.5–4 in)
- Length: adjusted to head size; pattern examples use long ties made of 60 chains at each end so the band can be tied at the back of the head.
5. Special Techniques
5.1. Third Loop / Back Bump of Chain
The pattern uses what she calls the “third loop” of the starting chain:
- When you look at a chain from the top, you see the “V”.
- Flip the chain to the back; there is a single bump (back bump).
- Work into this back bump (“third loop”) for neater edges and more stable structure.
5.2. Brick / Mesh Effect
The pattern creates a lacy brick like mesh:
- Alternating sections of 4 chain arches and 9 chain long arches, anchored by double crochet posts (US terms).
- On some rows, the 9 chain arches are centered above lower arches; on others, they shift, creating a staggered “brick” look.
6. Stitch Key (US Terms)
- ch = chain
- sl st = slip stitch
- sc = single crochet
- dc = double crochet
- ch sp = chain space
- rep = repeat
7. Pattern Instructions
Use US crochet terms.
Foundation
- Slip Knot & Chain:
- Make a slip knot.
- Chain the desired length (e.g., 127 ch for adults as in the pattern), working loosely but evenly.
- Work all subsequent stitches of Row 1 into the back bump (third loop) of the chains.
Row 1 – Base Mesh Setup
This row creates a lacy mesh: 4 ch arches separated by skipped chains, all worked into the third loop of the foundation chain.
- Ch 4 (counts as 1 dc + ch 1).
- Working into the fourth chain from the hook, in the back bump:
- Sl st into that bump.
- Ch 4, skip next 4 ch, in the 5th ch (back bump) work 1 sc.
- Repeat the above step along the chain until you have reached the portion you want to reserve for the center lacy section.
- In the pattern, she leaves about 15 chains at the far end for the final mesh section and uses the middle part for long arches.
- At the start of the middle section:
- Ch 4, skip 4 ch, and in the 5th ch (back bump) work 1 dc.
- Central section (long arches):
- Ch 9, skip 9 chains, in the 10th ch (back bump) work 1 dc.
- Repeat this step across until 15 chains remain before the end of the foundation chain.
- Final small arches (mirroring the first side):
- From the point where 15 chains remain:
- Ch 4, skip 4 ch, in the 5th ch (back bump) work 1 sc.
- Repeat as needed so that the final section mirrors the start.
- At the last segment, work a sl st into the last chain to anchor.
- From the point where 15 chains remain:
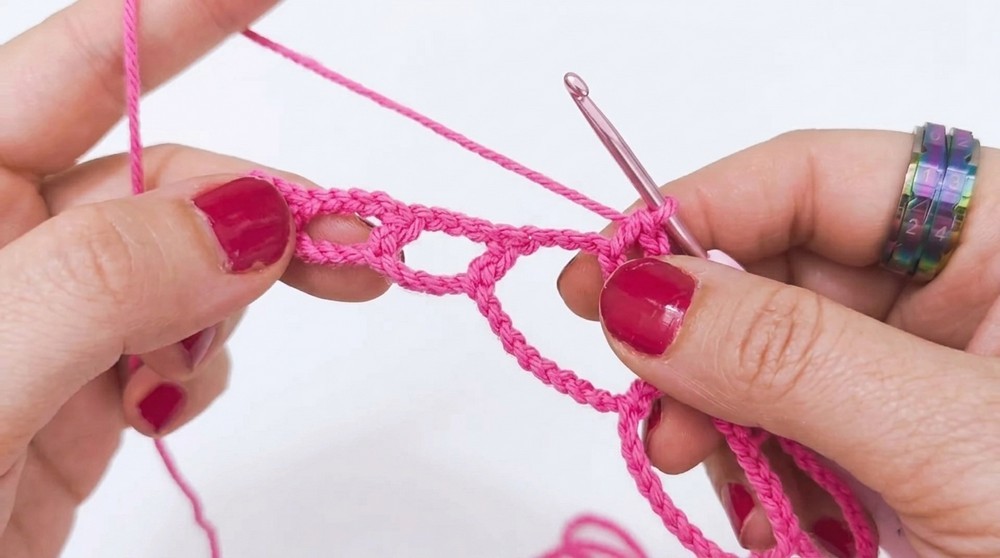
You now have:
- Small 4 chain arches at both ends
- A central section of long 9 chain arches anchored with dc posts
Row 2 – First Brick Shift
This row begins shaping the brick like pattern above the base.
- Turn: Ch 2, turn your work.
- Sl st into the first sl st (or the first arch connection) of the previous row.
- Ch 4, sc into sc of previous row (over the first small arch).
- Ch 4, dc into dc of previous row (still staying in the small arch edge section).
- Ch 4, dc into the first dc of the central 9 chain arch section, catching the diagonal strand as shown in the pattern (this keeps the post straight).
- Now, to begin “shifting” the bricks:
- Ch 4, and instead of chaining 9 immediately, place a dc into the 5th chain of the next 9 chain arch (insert hook under the full V of that chain space, leaving the back loop behind for neatness).
- After this first shift, continue across the central section:
- Ch 9, in the next 9 ch arch, dc in the 5th chain of that arch.
- Repeat this until you reach the last central arch.
- At the final central arch, set up the small arch edge:
- Ch 4, dc into the last dc on that side.
- Edge to finish the row:
- Ch 4, sc into sc of the previous row.
- Ch 4, sl st into the final edge sl st.
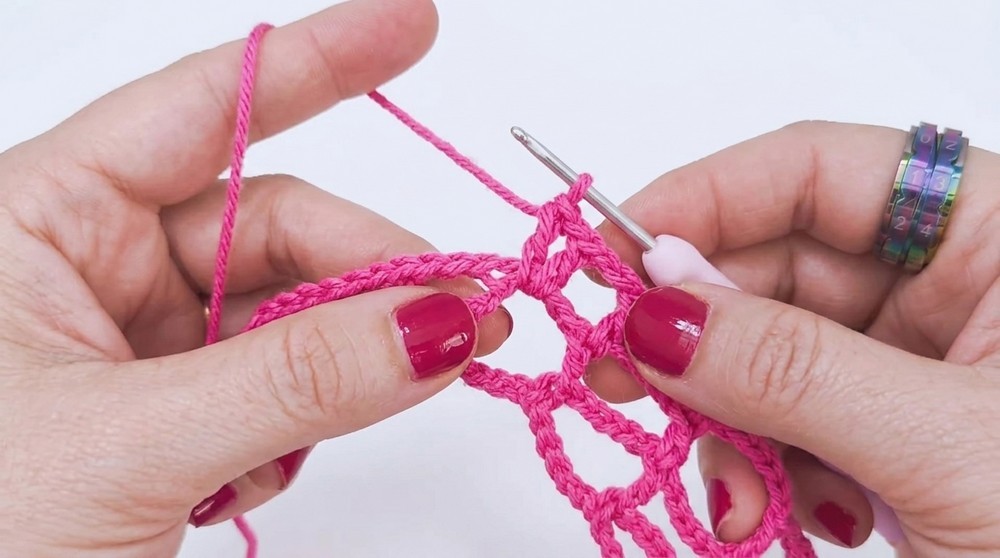
Row 3 – Second Brick Row
This row repositions the 9 chain arches to align differently, forming the brick pattern.
- Ch 2, turn.
- Sl st into the first sl st of the row below (as you did previously).
- Ch 4, sc on top of sc of previous row.
- Ch 4, dc on top of dc of previous row.
- Ch 4, dc on top of dc at the start of the central section, remembering to catch the slanted strand.
- Now we place 9 chain arches across the central section again, but positioned to keep the alternation:
- Ch 9, dc in the 5th chain of the next 9 ch arch (or of the ch 9 space, taking the full “wheat” V), leaving the back loop behind.
- Repeat across the central section.
- At the far end, mirror the start:
- Ch 4, dc on dc,
- Ch 4, sc on sc,
- Ch 4, sl st into the edge sl st.
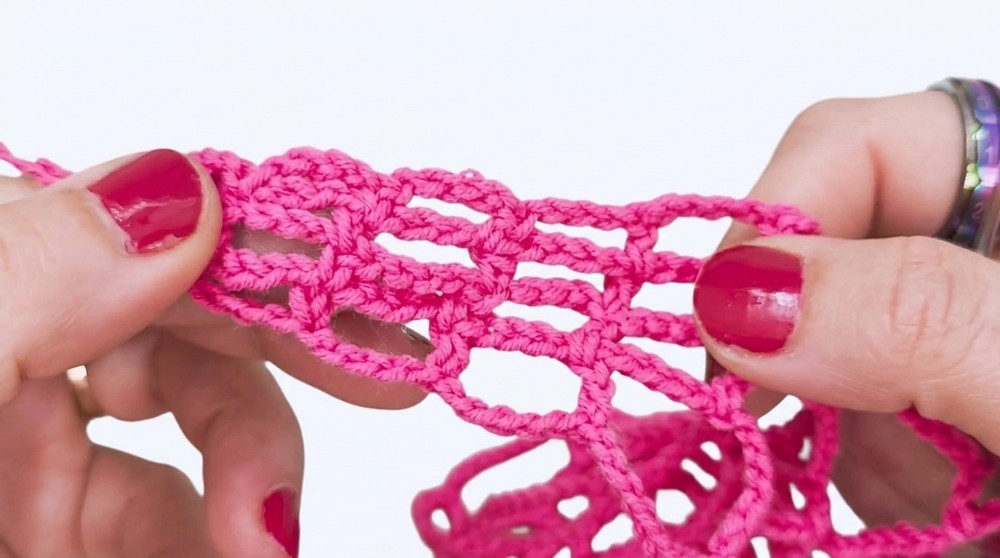
You now see clear brick like rectangles forming in the central area.
Rows 4–6 (or more) – Continue Pattern
Repeat the logic of Rows 2 and 3:
- Edge sections always:
- Ch 4, sc on sc
- Ch 4, dc on dc
- Central section alternates between:
- One row where you first do a 4 ch offset then dc in the 5th chain of the next arch
- Next row where you directly build 9 ch arches on top of existing arches
You are free to stop when:
- 6 pattern rows are complete for a standard width
- 8–9 pattern rows for a wider headband
8. Ties / Band Ends
You have two main options.
Option A – Long Ties
- At one short end:
- From the last edge sl st, ch 60.
- Turn and work back along these chains:
- Work 1 sl st in the back bump (third loop) of each chain back to the headband edge.
- Sl st into the edge to secure.
- Repeat on the other end:
- Ch 60, sl st back into the back bump of each, sl st to edge.
This yields two slender, slightly stretchy cords you tie behind the head.
Option B – Button Loop
- Instead of a long tie, ch 5–8 at one end (depending on button size).
- Join with a sl st to the same point to form a small loop.
- Work 1 round of sl st or sc around the loop for thickness, if desired.
- Sew a small button to the opposite end of the headband to close.
9. Finishing
- Weave in ends:
- Use a yarn needle to weave tails into the stitches neatly.
- Optional glue reinforcement:
- Apply a tiny dot of E8000 (or similar) at the main knots / ends, then lay the yarn flat over it.
- Let it dry fully; this adds security against unraveling.
- Block (optional):
- Lightly steam or wet block to open up the lace pattern and straighten edges.
10. Tips and Customization
- Width:
- Work fewer rows for a narrow band (e.g., 4 rows) or more rows for extra coverage (8–10 rows).
- Hair volume:
- If you have very thick hair, adding extra rows helps hold hair in place, as shown with the wider pink version in the pattern.
- Color:
- Solid colors show the brick lace clearly; variegated yarn yields a playful effect.
- Yarn choice:
- Cotton, bamboo, and silk are ideal for warm climates.
- Mercerized cotton gives a slight shine and crisp definition.
11. Final Look and Remarks
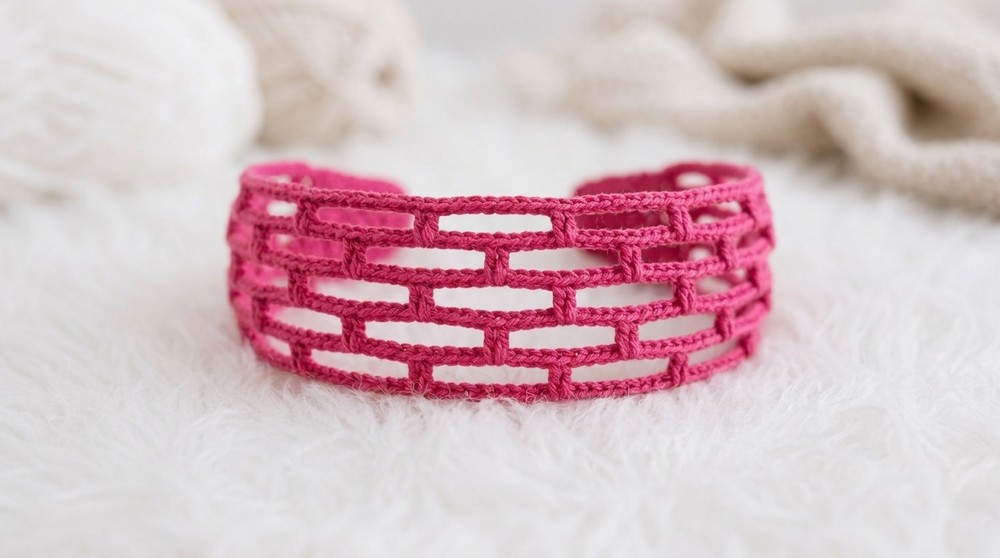
The finished headband is a light, lacy, brick‑patterned band with:
- Neat 4 chain edging on both sides
- Staggered 9 chain arches across the center
- Slender ties that pull the piece snug over the head
When worn, the band stretches slightly, the mesh opens, and the pattern displays beautifully while holding the hair back without making the head feel hot.



