Skip the trip to the hardware store and recycle your old tin cans into something special that fits right inside your home. This helpful guide shows how to make unique and beautiful DIY tin can projects, including making a hanging planter, fun holiday ornaments, and even a wine bottle caddy. They’re perfect for decorating any home.
There’s no need to contribute further to landfills. Instead, give your leftover tin cans a new life as one of these building block-inspired creations. We’ve got dozens of crafty DIY tin can projects and crafts to bring out the inner artist in you using recycled tin cans, so you can have plenty of fun while reusing and recycling something that otherwise might have ended up in the trash bin. This series is specifically geared toward helping people create some useful home décor from recycled materials. I highly recommend this list to anyone on a budget for ways to save money on trash removal and keep your used tin cans.
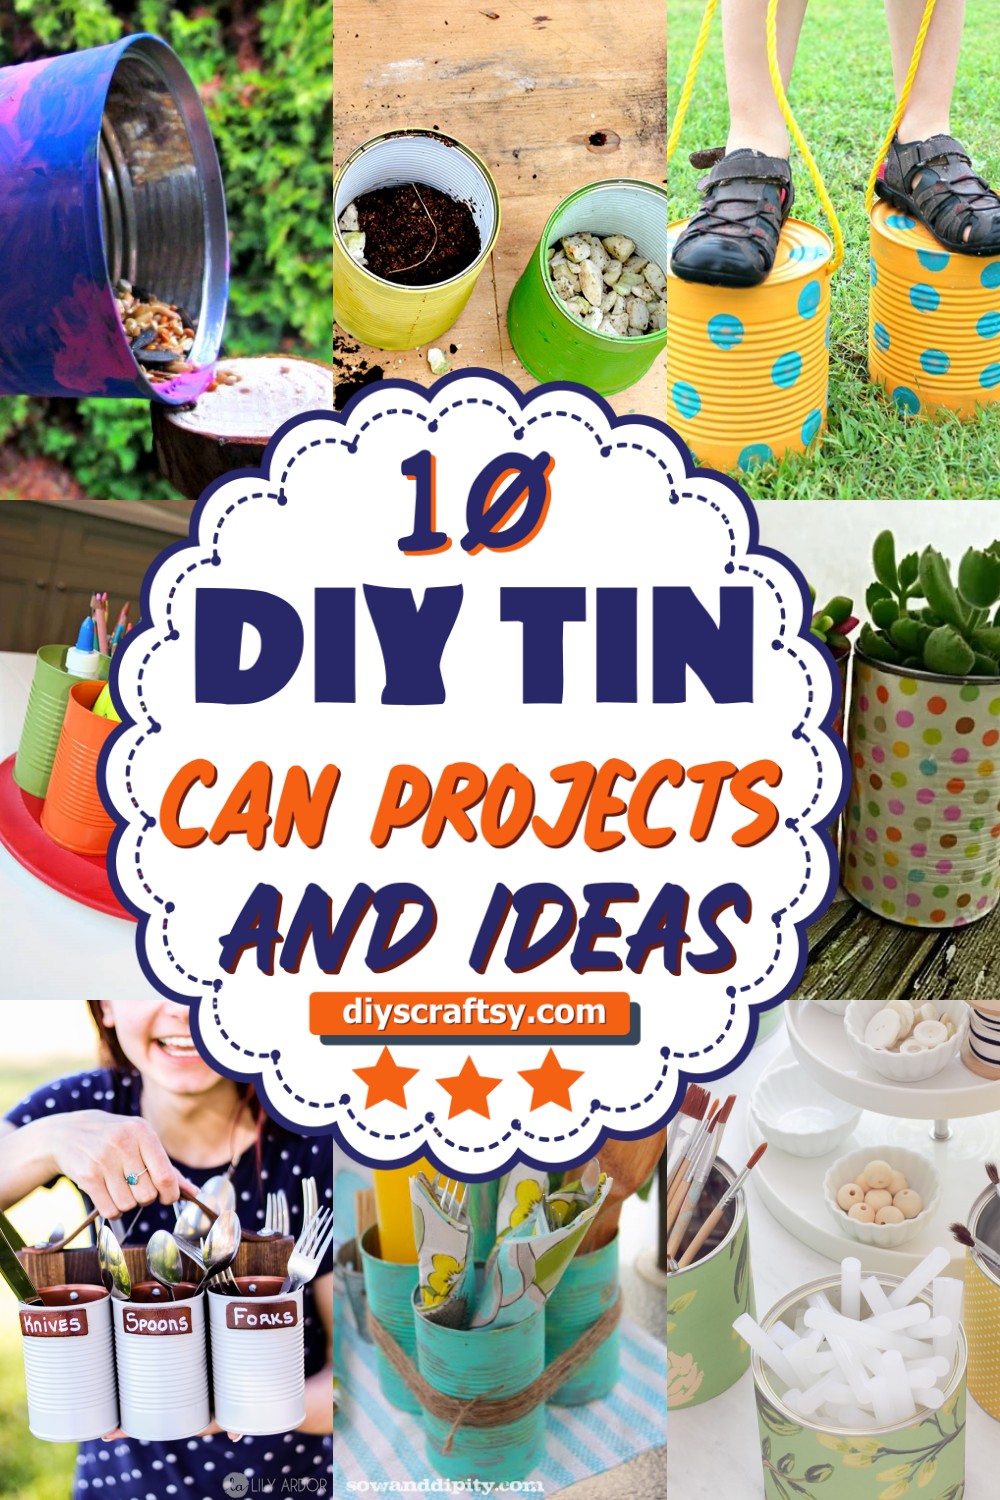
DIY Tin Can Projects
Tin can crafts are great because you don’t have to buy any supplies or materials. You probably have everything you need in the kitchen or garage. This guide will show you how to recycle and reuse your aluminum cans into useful things like lamps, bird feeders, and plant trays that are beautiful and practical.
DIY Tin Can Hanging Planters:
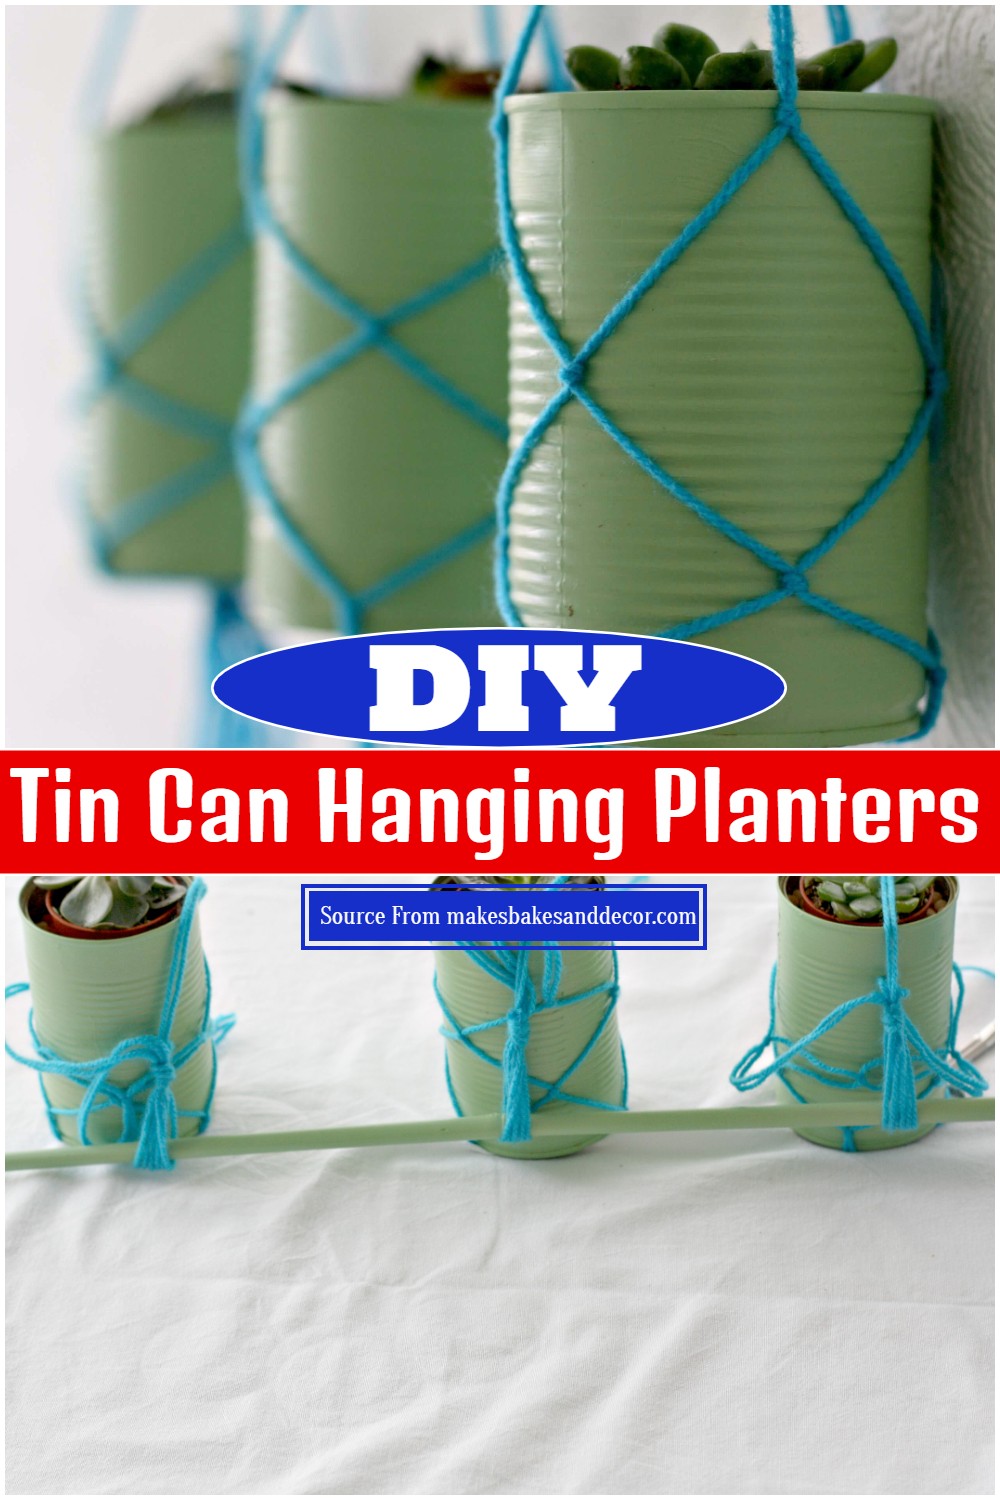
Bring a touch of greenery to any space with these delightful Tin Can Hanging Planters. By repurposing empty tin cans, a splash of bright paint, and some simple macramé skills, these planters make a vibrant and eco-friendly home decor addition.They are also perfect for growing succulents or herbs in your kitchen.
Begin by painting the cans with two coats, allowing the first coat to dry before applying the second. Once dry, cut six long strands of wool and tie them together to form a tassel. Create knots using pairs of strands, spacing them about an inch apart. Repeat this process three times, knotting strands from neighboring knots together, until the can fits securely within the resulting hanger. Decide the desired hanging length, trim excess wool, and tie a loop for hanging. You can also use a painted bamboo stick to hang multiple cans together if desired.
Materials:
- Empty, cleaned tin cans
- Paint
- Ball of wool (for the macrame hanger)
- Scissors
- Optional: Bamboo stick
DIY Decoupage Tin Can Planters:
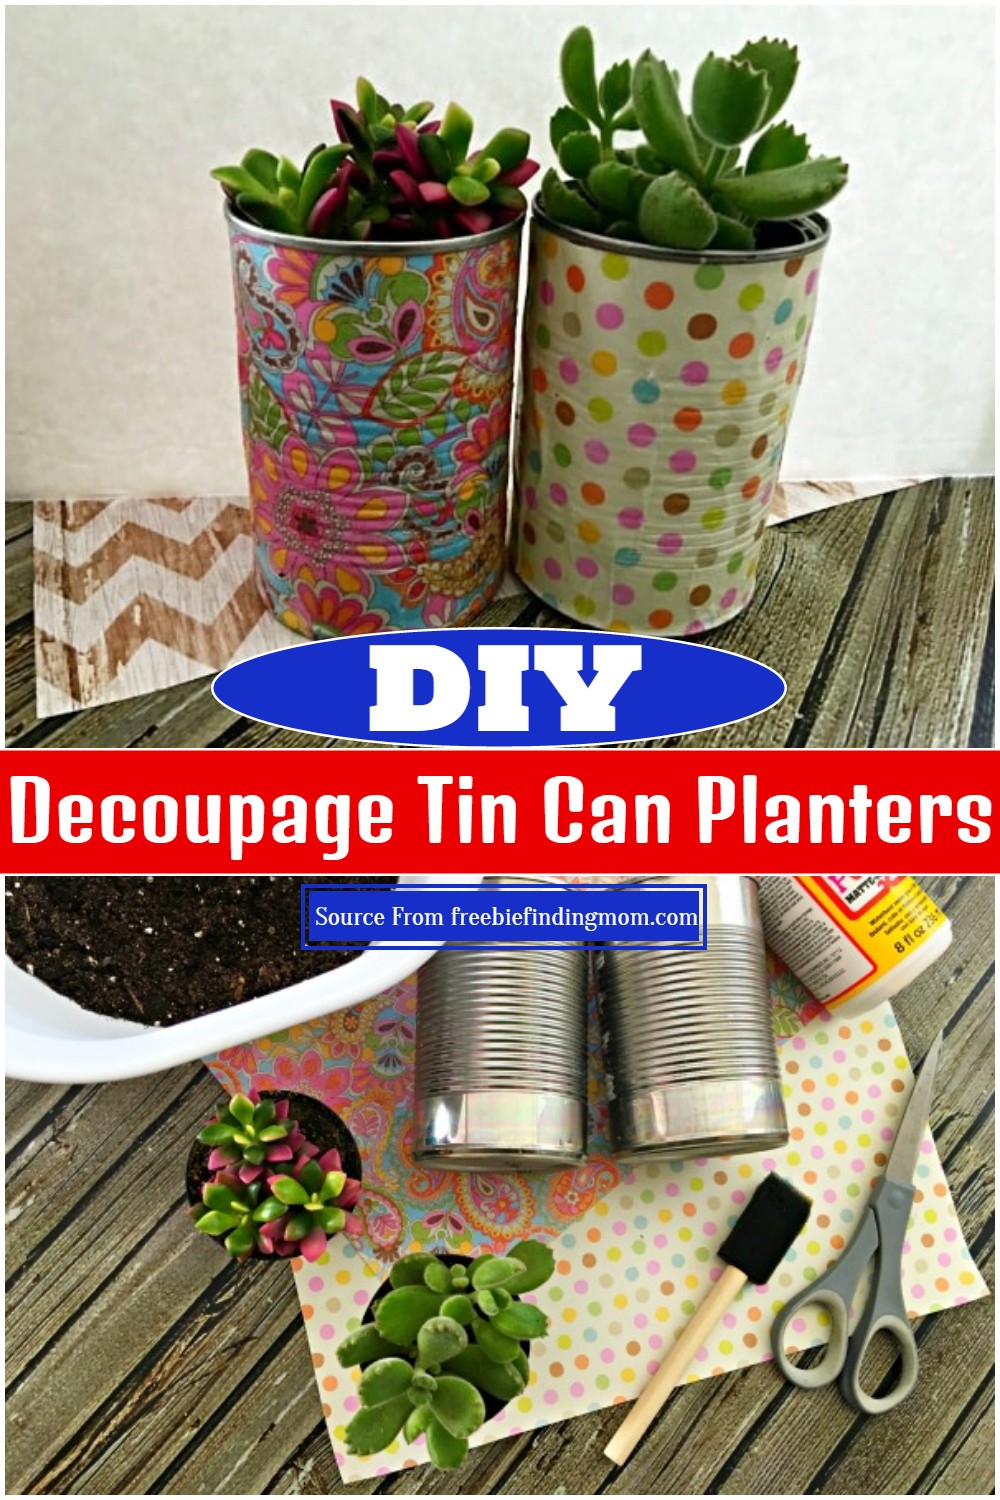
The DIY Tin Can Planters Decoupage is a unique DIY project that brings life, color, and vibrancy into any indoor space. Comprising of basic materials, these tin cans become small, green wonders that brighten up rooms, desks, or patios. These planters are not only budget-friendly but are also eco-friendly, re-purposing items that may otherwise end up as waste.
First, remove labels and clean the cans. Make sure cans aren't sharp on top. Measure each can from the top to the bottom and write the measurement down. Then, measure the length around each can. Cut your paper to these measurements. Apply mod podge around the outside of the cans and adhere paper firmly, smoothing out any bubbles. Paint another layer of mod podge over top of the paper and use your fingers to press the paper into can indentations for character. Let it dry. Add your plants with suitable soil and display as you desire.
Materials:
- 2 empty soup cans
- Scrapbook paper
- Mod podge
- Foam brush
- Scissors
- Tape measure
- Pencil
- Tiny Succulents
- Cactus/succulent soil
DIY Homework Supply Caddy:
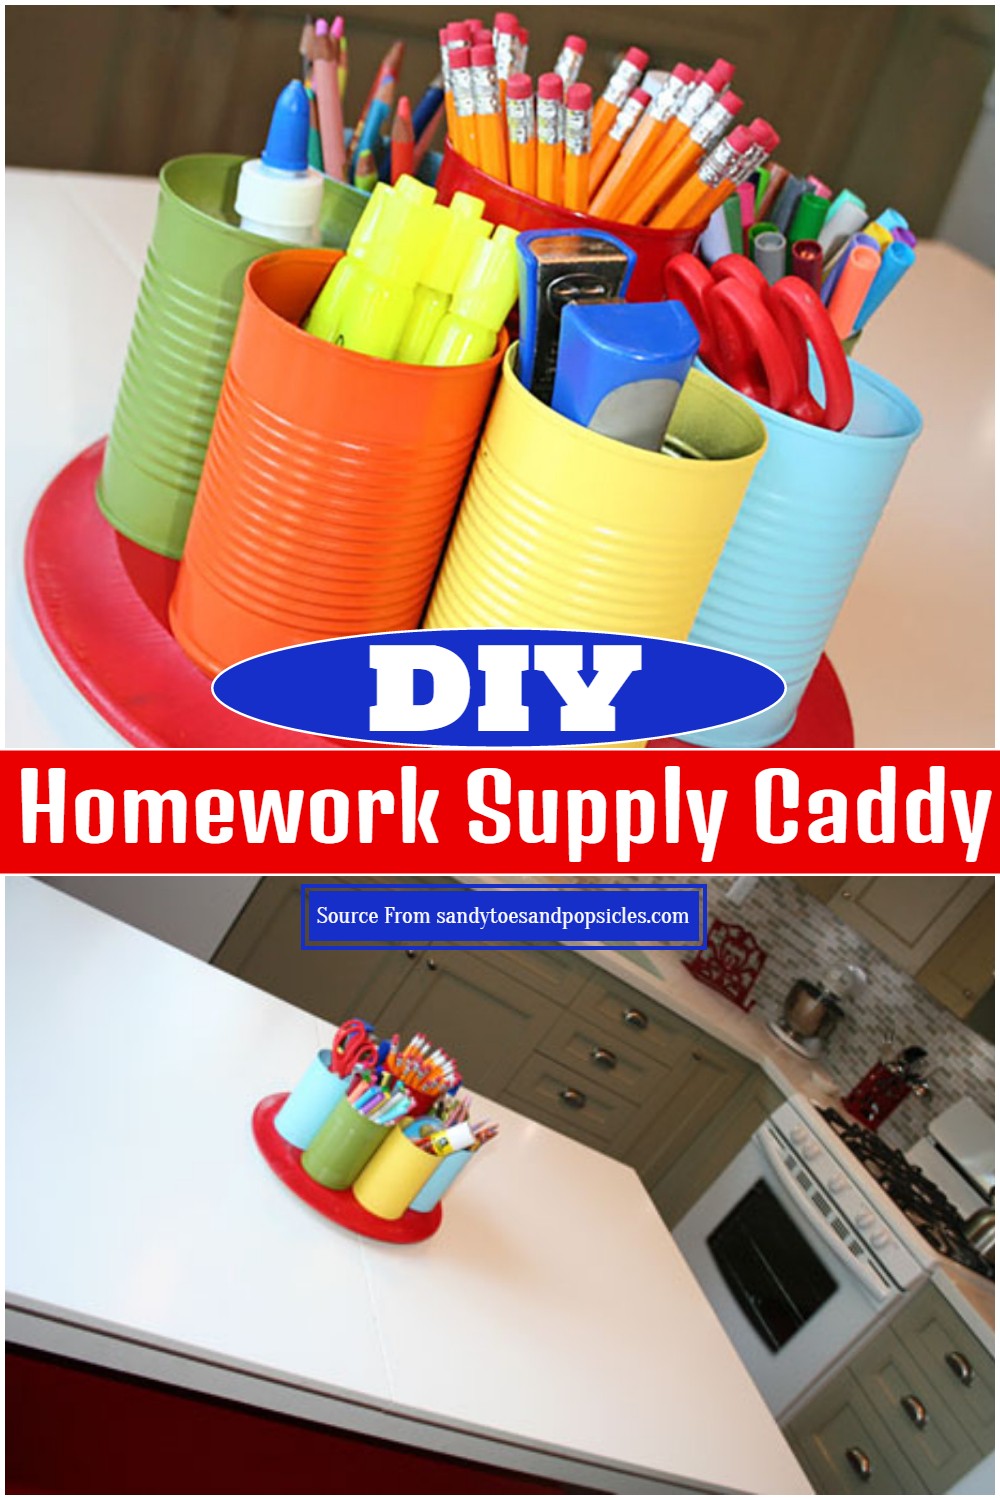
Stay calm during homework time! This DIY Homework Supply Caddy stores all your child's school supplies and writing tools, so there's no more searching for a pencil, marker, or eraser. Keep sticky notes and glue close by, away from spills in the kitchen or craft table. Plus, hang it anywhere you need to make supplies convenient for kids, like the refrigerator door or in a hallway.
Once your cans and lazy susan are painted and dry, attach the lazy susan to the wooden circle, and place rubber feet underneath to prevent sliding. Arrange the cans on top and secure them with screws. To create risers, put smaller cans inside medium ones for shorter supplies. Affix a pencil sharpener using a magnet. Fill the cans with homework supplies, and your homework caddy is complete!
Materials:
- Wooden circle plaque
- Empty canned food cans
- ½" self drilling screws
- Spray paint
- Lazy susan
- Little rubber feet thingys
- Screwdriver
DIY Upcycling Tin Cans With Scrapbooking Paper:
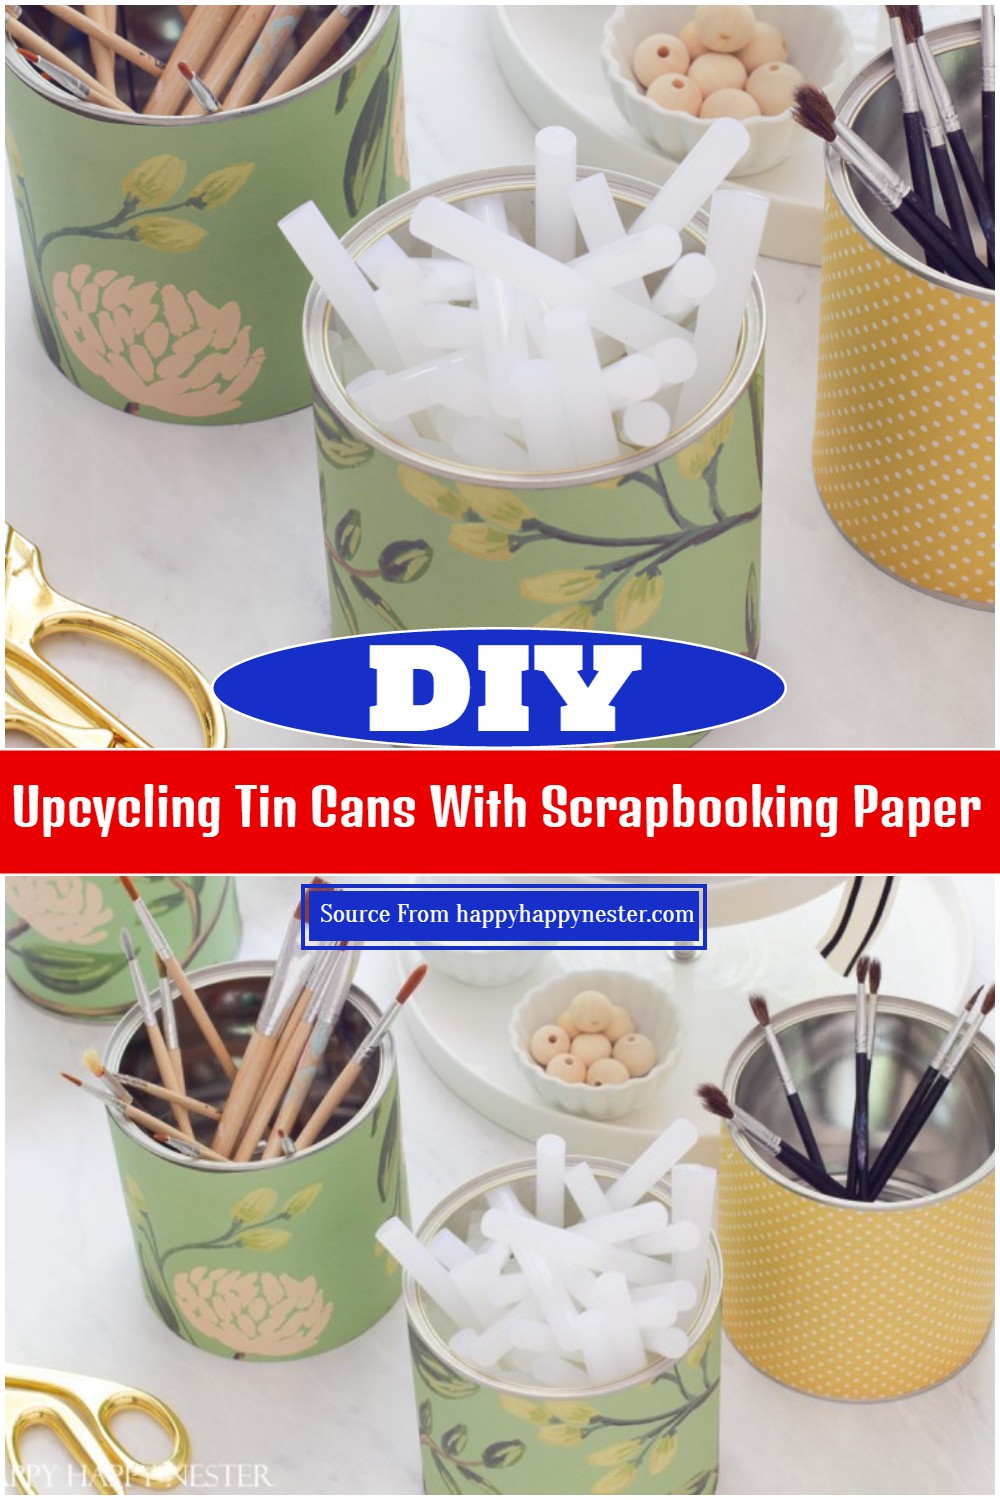
Add a distinctive touch to your craft room or school supplies with this upcycling tin cans project using scrapbooking paper. The tin organizers are stylish, practical, and perfect for storing various items. By upcycling tin cans, you're giving them a new, purposeful life in a beautiful and functional way.
Begin by measuring the height of your tin can on a piece of paper, marking the top and bottom. With this mark as a reference, create a line across your paper, and cut along this line, ensuring you have enough to wrap around your can. After cutting, applying glue or tape to the ends, stick the paper around the can, ensuring not to glue all of the paper to prevent bubbling. Optionally, spray adhesive could be used to fully adhere the paper to the can.
Materials:
- Craft Paper
- Ruler with a steel edge
- Scissors
- Tape or glue
DIY Buffet Style With Portable Silverware Caddies:
Stop thinking and start shopping if you plan to serve guests at your next party! I love this set of eight useful silverware caddies and seriously grab some cute points in the kitchen. You can use them to serve party snacks or store all your cutlery in an Ikea Kallax shelving unit. The options are endless, and they’ll make any room more welcoming. This DIY buffet-style silverware caddie will bring any kitchen to life while fitting in a modern decor style. These portable silverware caddies are so simple to make, and they can be made within 1 hour and 20 minutes. They are easy to assemble, and all you need is a few supplies that can be found at your local dollar store.
To create your silverware caddy, first ensure your cans are clean and paint the insides. Allow them to dry before painting the outsides in a different color. Meanwhile, stain your piece of wood and let it soak for around four hours. Next, measure a strap from the belt and attach it to the wood to act as handle. Use the remaining belt to make labels and write descriptions on them using a permanent marker. Predrill holes on the side of cans with glue residue, securing them onto your wood board. Finally, use glue to stick the labels and allow it to dry.
Materials:
- Wood
- stain
- spray paint (rustoleum brand)
- leather belt
- washers and two ¾ inch screws
- six ½ inch screws
- clear coat
- scissors
- drill
- screw driver
- 6 aluminum cans
- E6000 glue
DIY Easy To Make Colourful Tin Can Planters:
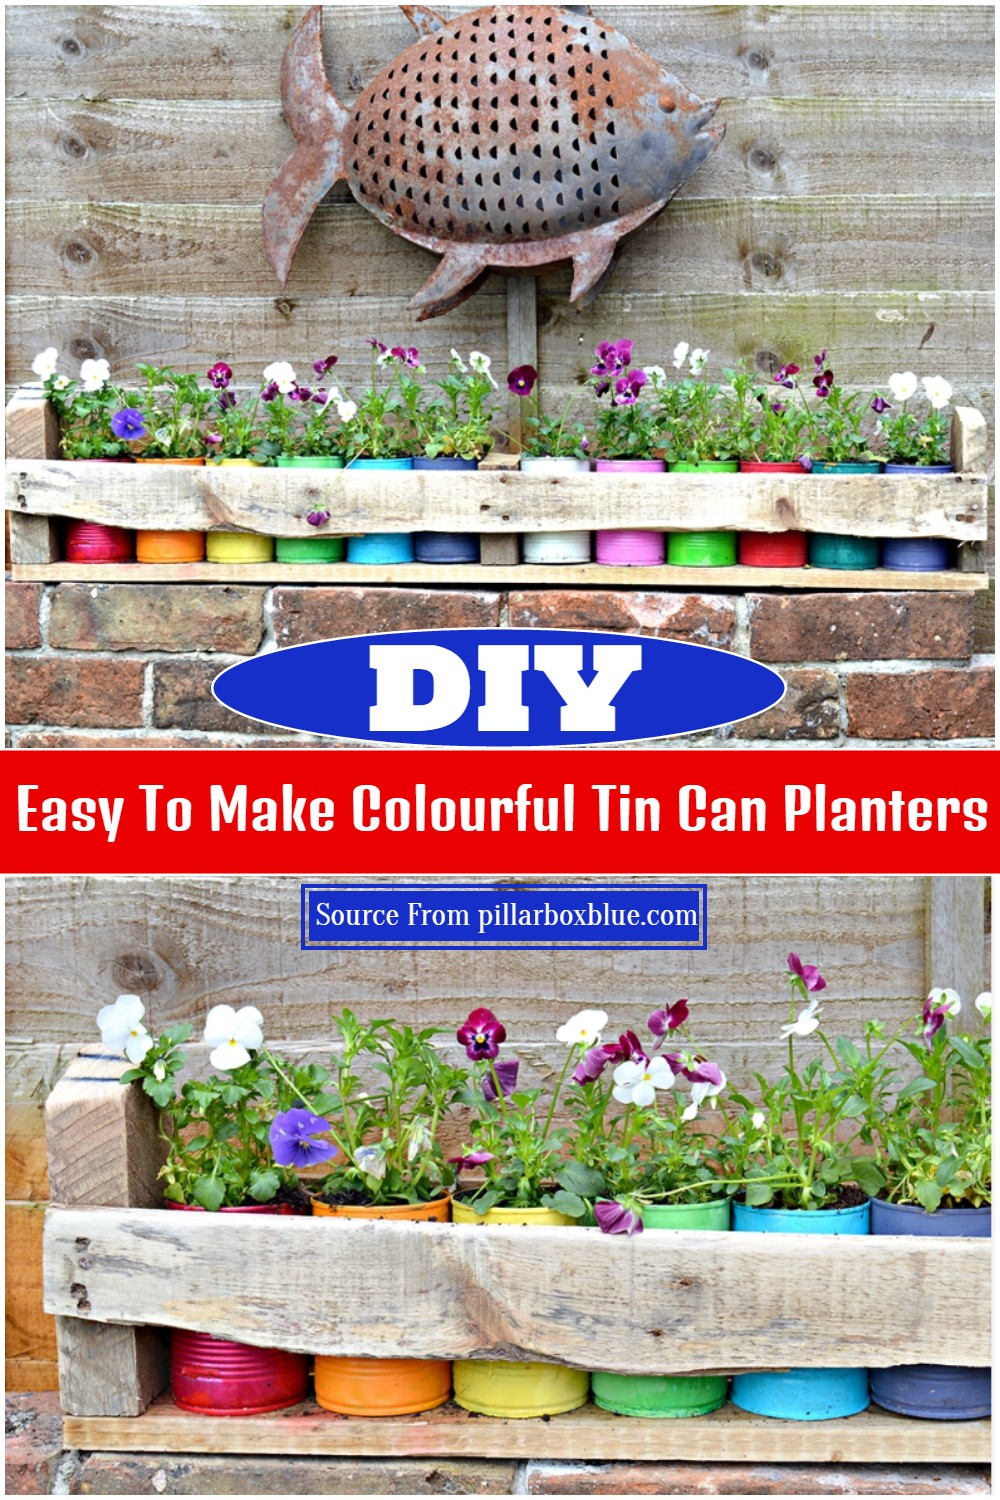
These bright, colorful planters are so simple and easy to make. If you have any empty tin cans around (pasta tins or even baked beans tins work well), this is the perfect way to display your flowers and plants. They'd look great in the garden or be an excellent addition to your kitchen in the summertime, giving it that 'cottagey' feel. It will be a fun and environmentally friendly craft activity with your children.
First, paint your cans in different colors and leave them to dry. Once dry, spray the cans with varnish to make your paint waterproof. Create a wooden holder by sawing off the bottom rung of a pallet and nailing another plank to create a trough-like structure. Sand it smooth. Fill the painted cans ⅓ with pebbles for drainage, add some activated charcoal for water absorption, a layer of sand, before finally adding your plants and potting compost.
Materials:
- 12 Empty tin cans
- Old paints in as many colours as you have
- Paint brush
- Acrylic varnish spray
- Old pallet
- Saw
- Nails
DIY Inviting Hanging Bird Animal Feeder:
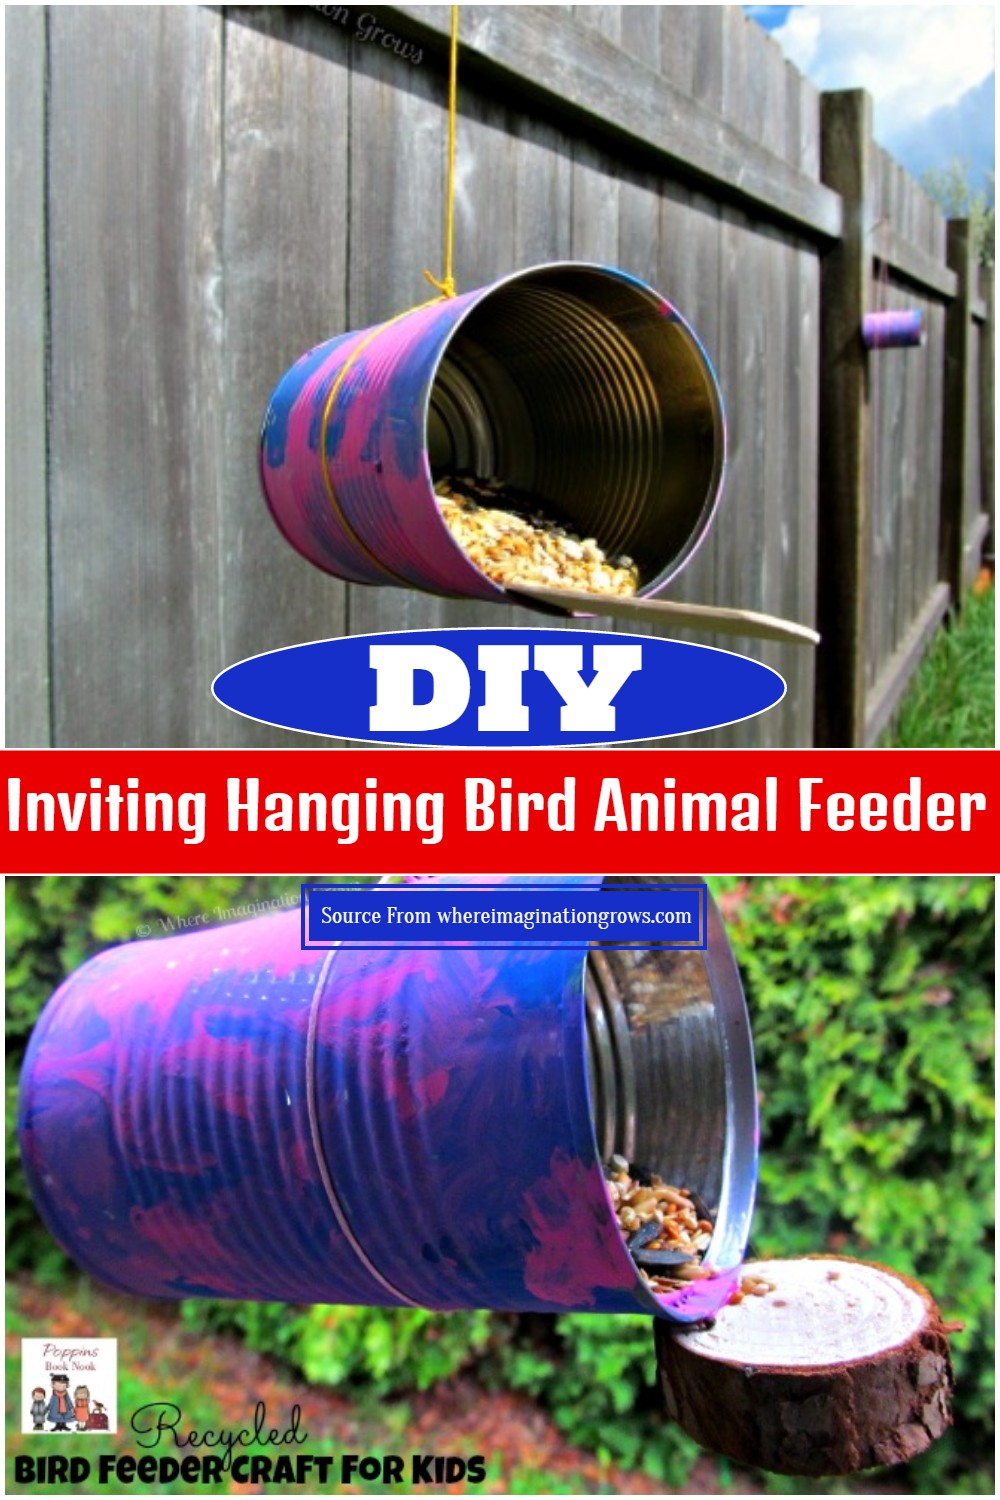
What do you get when you combine the fun of building a feeder with a color-and-learn story for preschoolers? The DIY Inviting Hanging Bird Animal Feeder will keep kids entertained for hours by making their unique hand-held feeders fun and engaging activity for preschoolers. As children follow the clear instructions and colorful illustrations, they will create a darling feeder bird just like the one in the story. A fun activity for preschoolers that encourages the need for green spaces in cities and suburbs.
To make a bird feeder start by painting your can. Once the paint is dry, use a hot glue gun to affix a craft stick or tree slice inside the can, ensuring that about ¼ to ⅓ sticks out as a perch for the birds. Next, tie some string around the can, ready for hanging. Upon finding the right spot, hang your bird feeder. Remember to keep the spatial relationships in mind as indicated from the book's lesson "Into the Outdoors". These can be above the kids' heads but below the trees. You now have a homemade bird feeder ready for birds to visit.
Materials:
- Recycled Tin Can
- Acrylic Paint
- Hot Glue Gun
- Craft Sticks
- String
- Bird Seed