
Start stitching your way to chic with fun and fabulous crochet blouse ideas that will have you turning heads and showing off your handmade style.
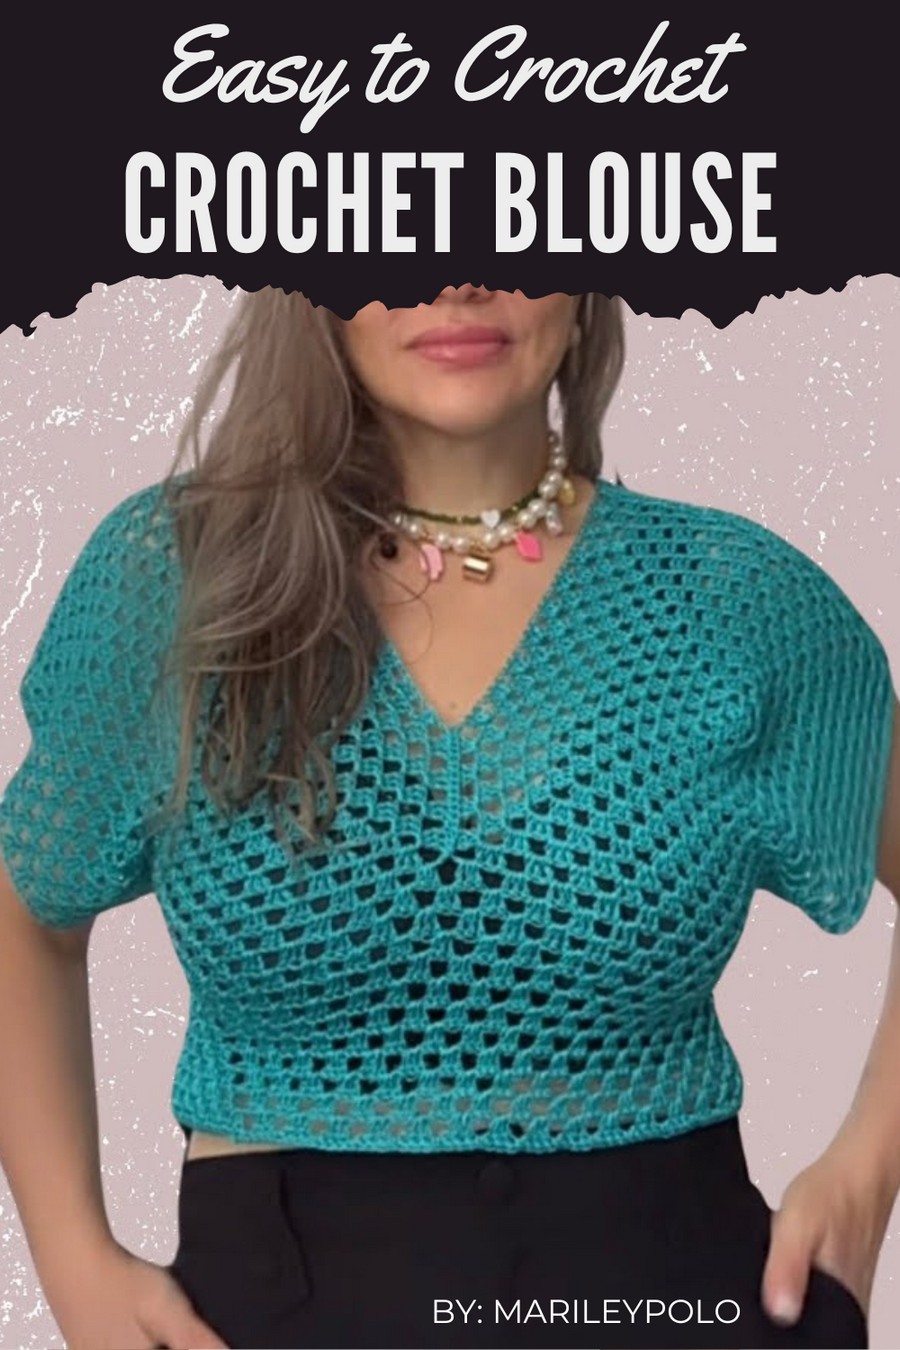
There’s something truly magical about creating your own wardrobe staples, and crochet blouses are the perfect project to blend style with craftsmanship. With designs that range from airy summer top to elegant evening wear, you can crochet pieces that match your taste and needs.
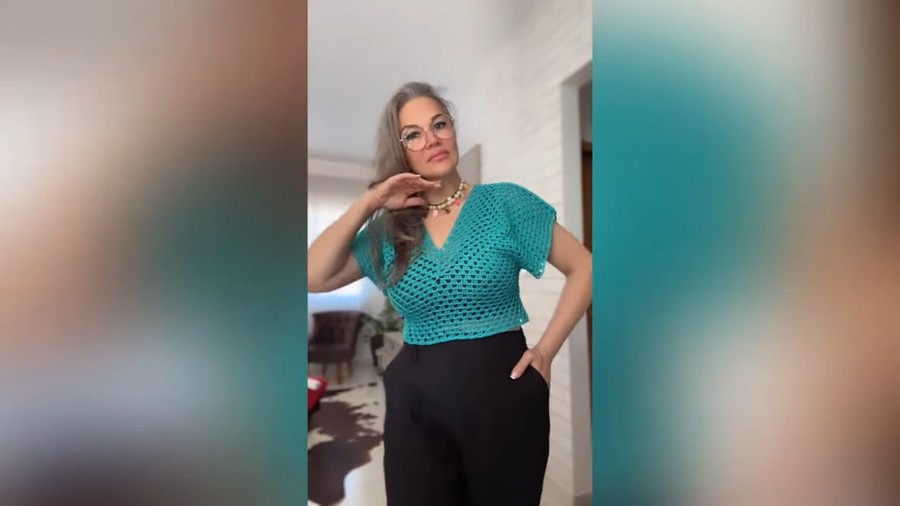
Best Crochet Blouse Pattern for Summer Style
A free crochet blouse pattern lets you explore endless styles, textures, and colors while offering a personal touch that’s as unique as you are. Ideal for casual days, layering, or special occasions, these handmade pieces are both versatile and timeless.
Get ready to turn simple yarn into wearable art that you’ll cherish for years to come.
Materials Needed
Yarn
- Type: Raíza brand yarn (or any polypropylene yarn with a similar texture).
- Weight: Medium or lightweight (#3).
- Quantity: Approx. 500 m (Java green or your desired color).
Crochet Hook
- Size: 2.5 mm crochet hook (or size needed for snug stitches).
Tools
- Scissors
- Stitch markers
- Tape measure
- Tapestry needle (for securing ends)
- Lighter (for finishing polypropylene yarn securely)
Skill Level
Intermediate
Key Abbreviations (US Crochet Terminology)
- ch: Chain
- sl st: Slip Stitch
- sc: Single Crochet
- dc: Double Crochet
- sp: Space
- rnd: Round
Step-by-Step Instructions
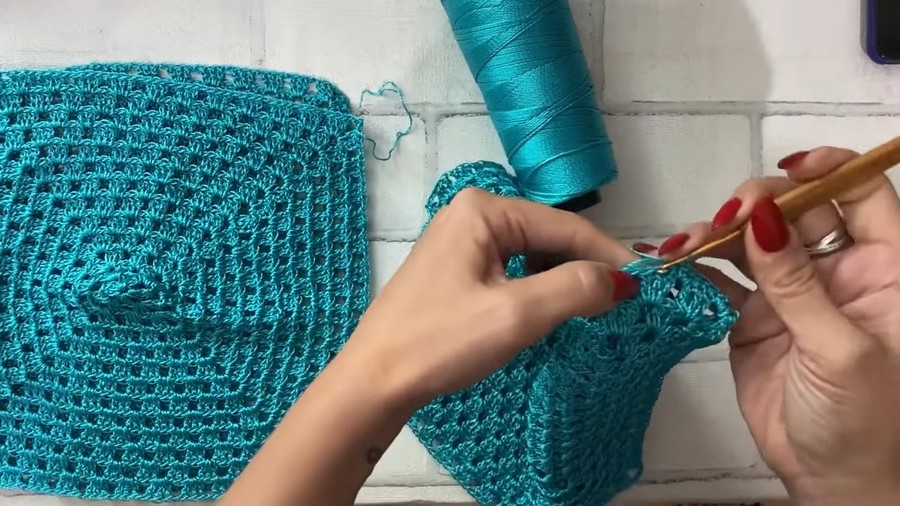
Step 1: Create Granny Squares
- Foundation Round:
- Begin with a magic ring.
- Ch 3 (counts as the first dc) and create 2 more dc into the ring. Ch 2.
- [3 dc, ch 2] repeat three times. Join with a sl st into the 3rd ch from the start to create four corners.
- Successive Rounds:
- Ch 3 (counts as the first dc).
- Work 2 dc into the corner sp and ch 2. Then, work 3 dc into the same corner sp.
- Along the sides, work 3 dc into each sp (created by the ch 1 from the previous rnd). Corners will have 3 dc, ch 2, 3 dc.
- Repeat until your squares measure 30x30 cm or to your preferred measurements (adjust for bust size).
- Make 4 identical squares.
Step 2: Assembly (Front and Back)
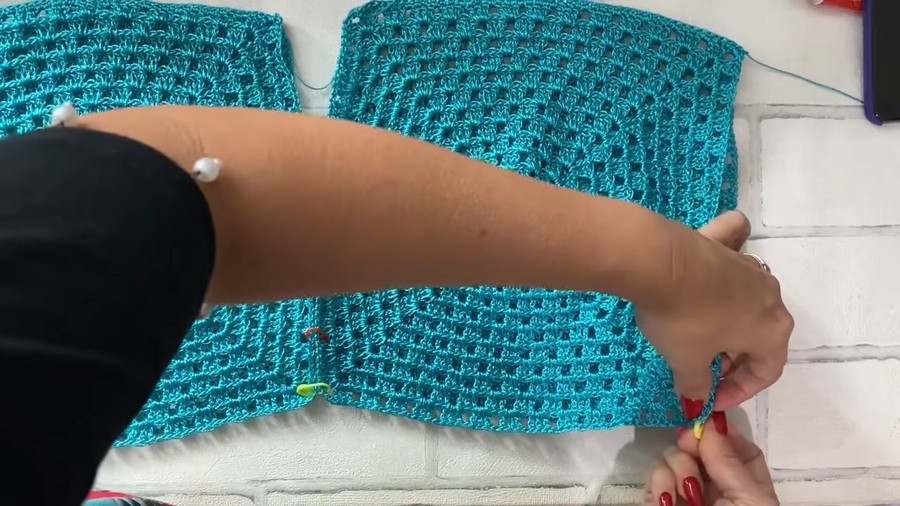
- Position Squares:
- Place two squares for the front and two squares for the back. Arrange them side by side, with the reverse sides facing outwards.
- Seam Squares:
- Attach the squares by sewing or crocheting them with sc along their edges.
- Work through both layers to secure seams neatly.
- Tip: Use the same yarn color for seaming to create a subtle, decorative effect.
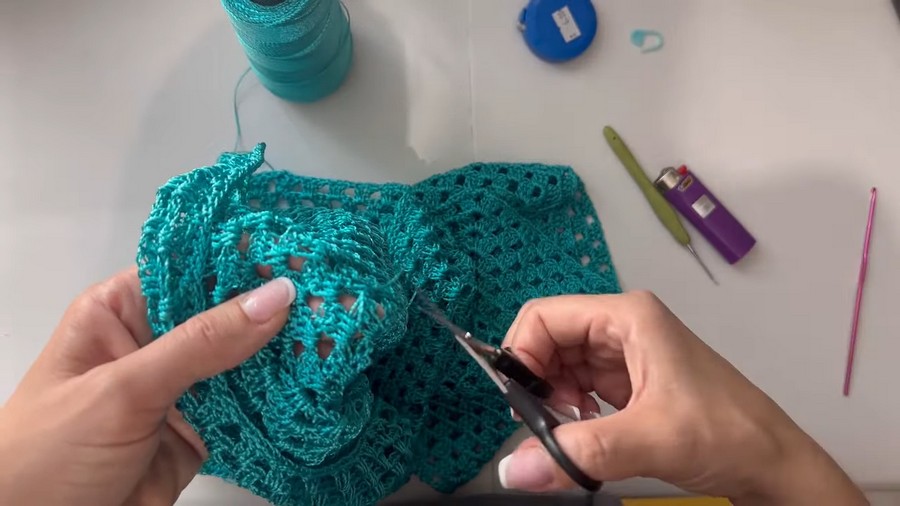
Step 3: Neckline Opening
- Determine Neckline Size:
- Use stitch markers to outline the neckline opening. Measure and adjust according to personal preference (e.g., round or boat neckline).
- Leave enough room (approx. 22–25 cm) for comfortable wear.
- Secure Neckline:
- After confirming the neckline size, seam the unmarked portions of the front and back squares using sc stitches.
Step 4: Armholes and Side Seams
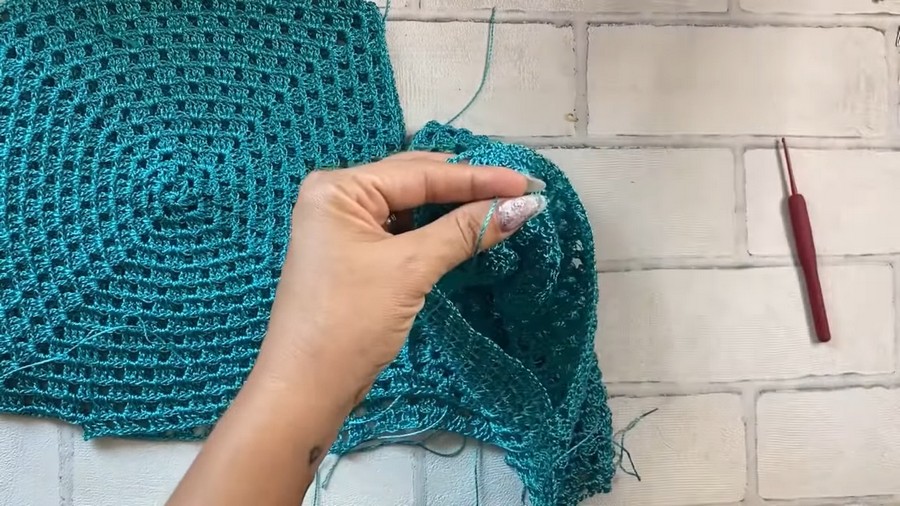
- Measure Armhole Depth:
- Use a measuring tape to mark ideal armhole depth (approx. 22–25 cm).
- Place markers to outline the armhole opening and side seams.
- Seam Sides (Below the Armholes):
- Use sc stitches to close the side seams below the armholes, leaving space for movement and comfort.
Step 5: Body Extension
- Add Length to the Body:
- Attach yarn to the bottom edge of the blouse.
- Work traditional granny square blocks (3 dc, ch 1 in sp) around the blouse perimeter.
- Continue crocheting rows until reaching your desired length (cropped, regular blouse, or tunic).
Step 6: Finishing Touches
- Optional Border (Hem and Sleeves):
- To refine the edges, switch to a smaller hook (e.g., 2.0 mm).
- Work sc rows along the blouse hem, sleeve openings, and neckline for a polished look.
- Secure Yarn Ends:
- For polypropylene yarn, use a lighter to melt the ends. Press melted ends gently against the fabric to secure them.
Pattern Variations
Color Variations
- Use variegated yarn for the granny squares to create a vibrant, multi-tone effect.
- Alternate colors for each round of the granny square for a dynamic, patchwork-style blouse.
Size Customizations
- Adjust square size as needed:
- For larger sizes, increase square dimensions (e.g., 40x40 cm).
- For smaller sizes, decrease square dimensions (e.g., 25x25 cm).
- Lengthen the body of the blouse by adding more rows at the bottom.
Tips for Success
- Test Fit: Use markers to pin squares and test fit before seaming. This allows for neckline and armhole adjustments.
- Neat Seams: Use sc stitches for visible seams or opt for a slip stitch seam for an invisible join.
- Lightweight Drapey Look: Choose thinner yarn and a larger hook for a breezier garment.
Conclusion
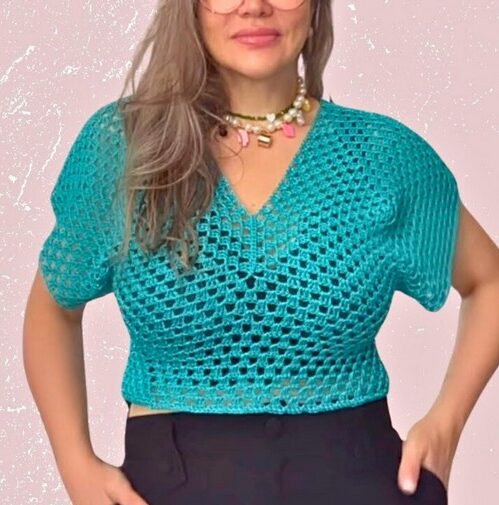
This granny square blouse combines simplicity and elegance to create a timeless wardrobe staple. With a rich texture from the traditional granny square design and options for customization, you can easily adapt this pattern to your style. The finishing steps ensure durability and neatness for long-lasting wear.



