Bring whimsy to life with this DIY Polymer Clay Mushroom project, ideal for decor, accessories, or fun handmade gifts full of charm and creativity.
Mushrooms have a magical and charming appeal, making them a perfect subject for a fun DIY project. This activity lets you turn polymer clay into whimsical, tiny mushroom decorations that can be used as charms, keychains, or simply adorable accents for your space. With their playful shapes and vibrant colors, these mushrooms are a great way to explore your creativity while crafting something unique and completely customizable. Whether you’re a beginner or an experienced crafter, you’ll love how easy and rewarding this activity feels.
DIY Polymer Clay Mushroom Earrings for Nature Lovers
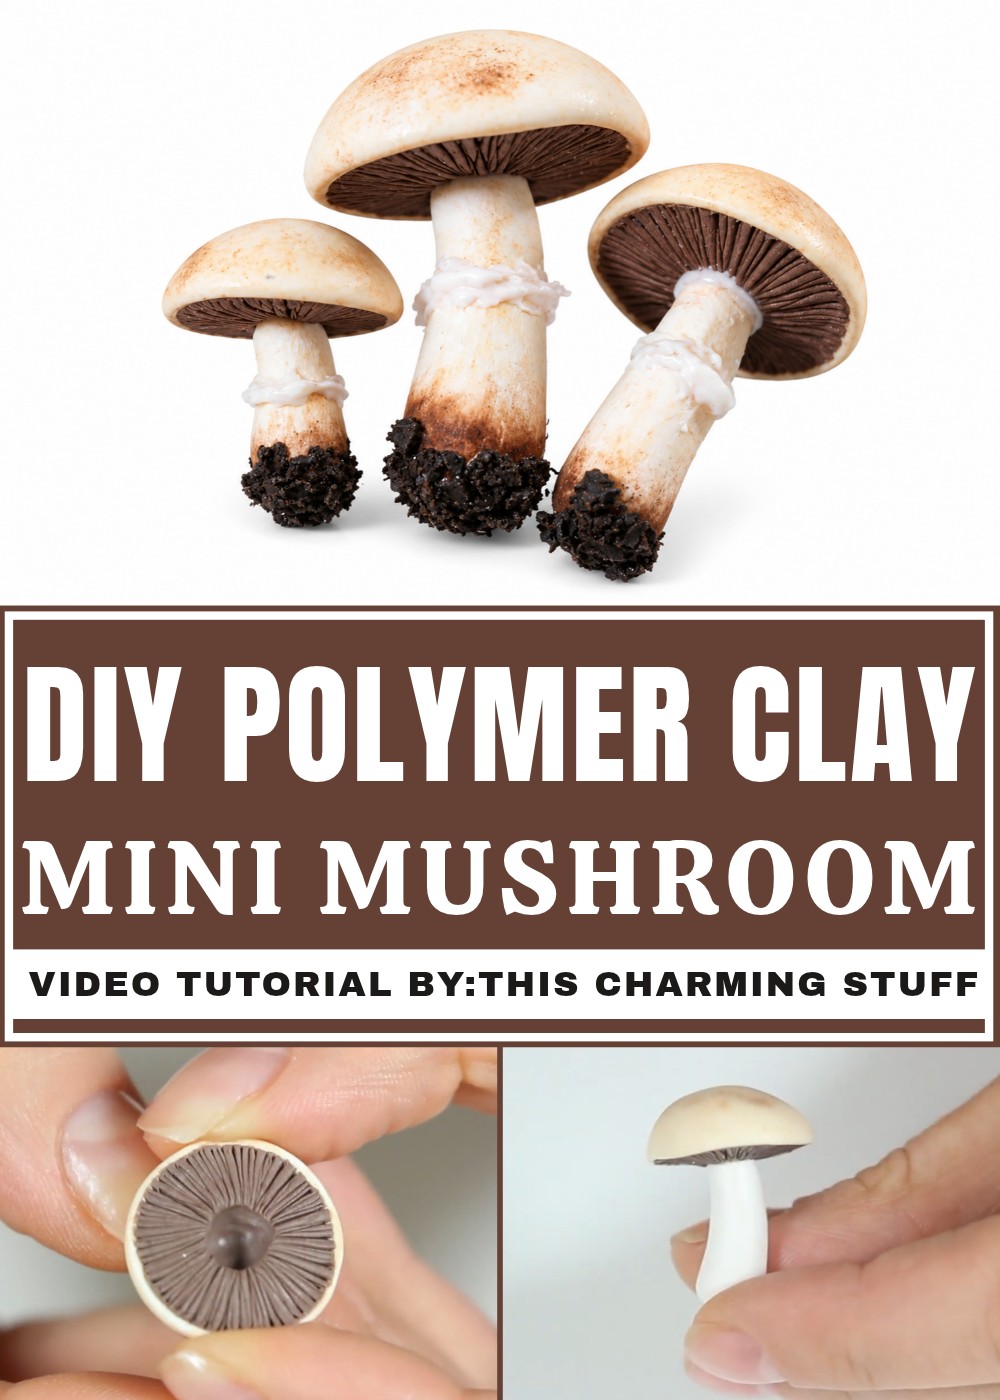
What makes this project fascinating is how versatile polymer clay can be. From shaping the mushroom stem and cap to adding cute little spots or experimenting with bold color combinations, there’s plenty of room to let your imagination shine. With just a few tools, like toothpicks for details or blades for trimming shapes, you can create mushrooms of all sizes and styles. Once baked, the design becomes durable and ready for display, gifting, or use as a creative accessory.
These DIY polymer clay mushroom creations are an excellent way to add a touch of whimsy to your crafting adventures without requiring expensive supplies. They’re simple, quick, and fun to make, making them ideal for all ages and skill levels.
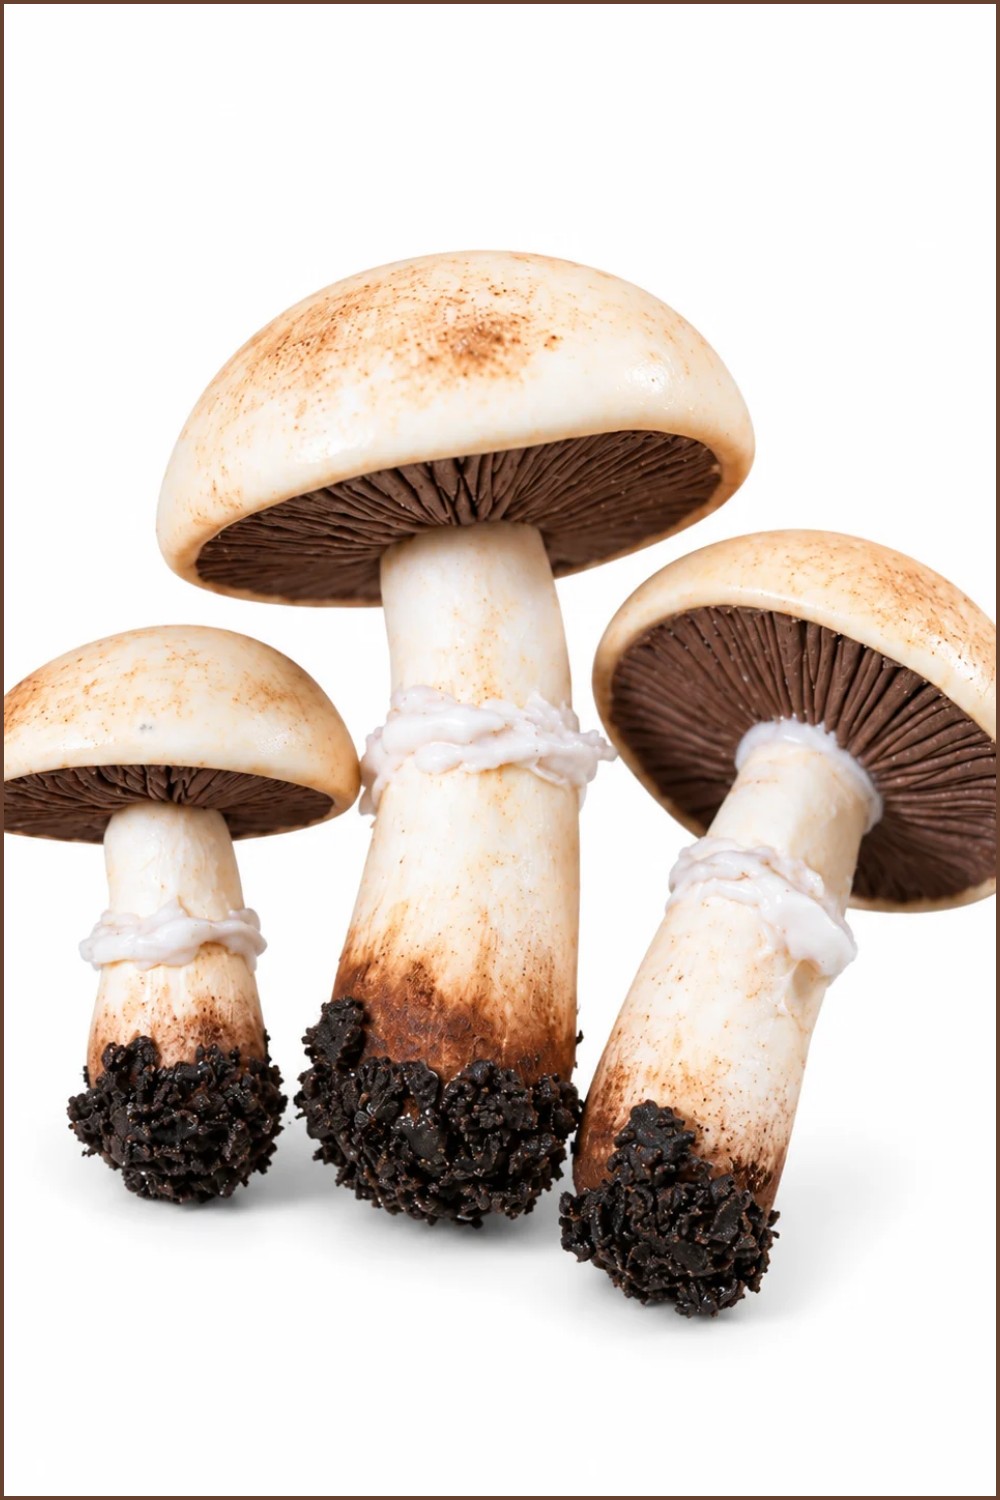
Realistic Polymer Clay Mushrooms
Why You'll Love This Project
- Quick and satisfying miniatures suitable for jewelry, dioramas, or decor.
- Builds core polymer‑clay skills: shaping, texturing, pastel shading, and attaching small parts.
- Uses inexpensive materials and basic tools — great for beginners and advanced makers alike.
What You'll Need
- White polymer clay (for caps and stems).
- Light brown and dark brown clay (for cap interiors and shading).
- Black clay (for soil base).
- Soft pastels in brown tones and a small makeup brush for shading.
- FIMO liquid (or compatible polymer clay liquid) to act as glue and binder.
- Rubbing alcohol and cotton pads (for cleaning excess pastel).
- Tools: razor or straight blade, X‑Acto knife, awl or needle tool, dotting tool, tweezers, small pincette, small paintbrush.
- Oven and baking surface (follow clay manufacturer’s instructions).
- Optional: gloss varnish for a realistic sheen on caps.
A Few Things Before You Start
- Condition clay by kneading until soft and consistent; this prevents cracks and improves adhesion.
- Work on a clean surface and keep tools free of dust; tiny debris shows on miniature pieces.
- Test‑bake a small scrap to confirm oven temperature if you haven’t recently used it.
- Pace your workflow: some pieces are prebaked (caps), others are added later and rebaked or glued.
Let's Make It
Getting Started
- Form the mushroom caps:
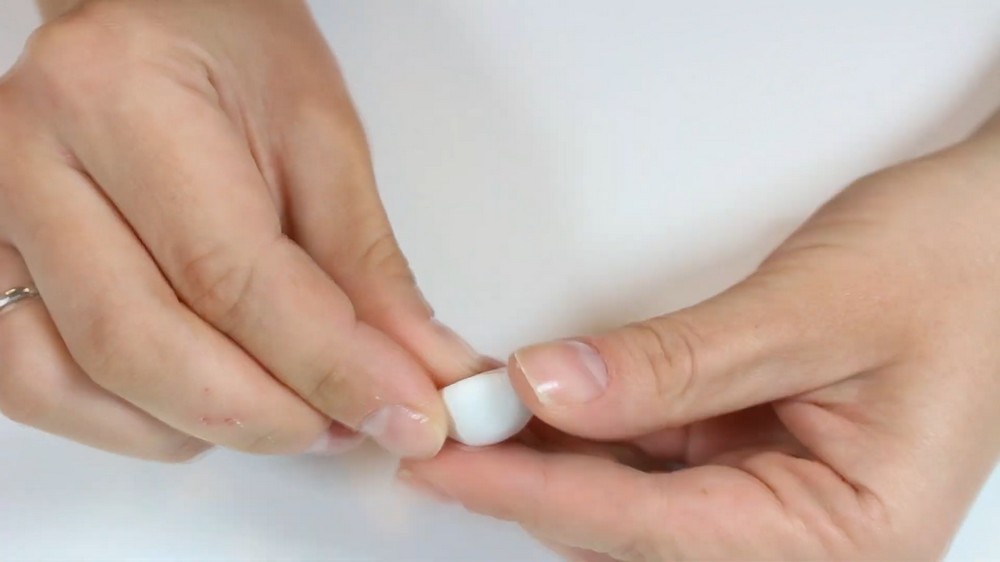
- Condition white clay and roll into even balls.
- Flatten one half of each ball to create a dome; use your thumb to twist into a shallow hollow for the underside.
- Ensure the flattened rim is smooth and forms a consistent curve — this helps when adding gills later.
- Prebake option:
- Bake caps according to the manufacturer’s instructions if you want a stable base for adding interior clay and detailed work later.
- Allow baked pieces to cool completely before continuing.
Creating the Main Shape
- Add inner cap color:
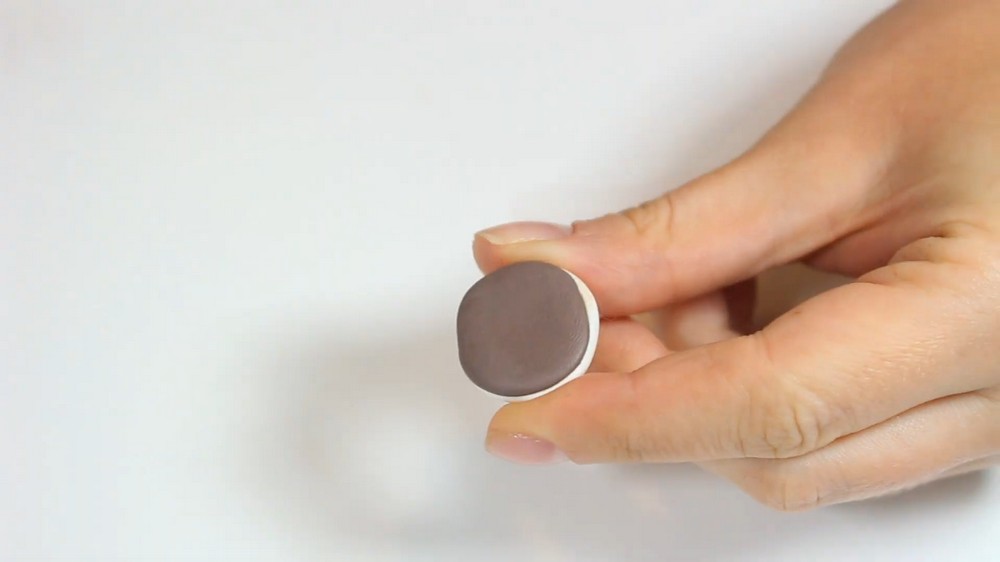
- Push a thin layer of light brown clay into the hollow underside of the baked cap (or into the uncured hollow if you didn’t prebake).
- Smooth the join carefully and trim excess with a razor so the interior looks natural and even.
- Make the stems:
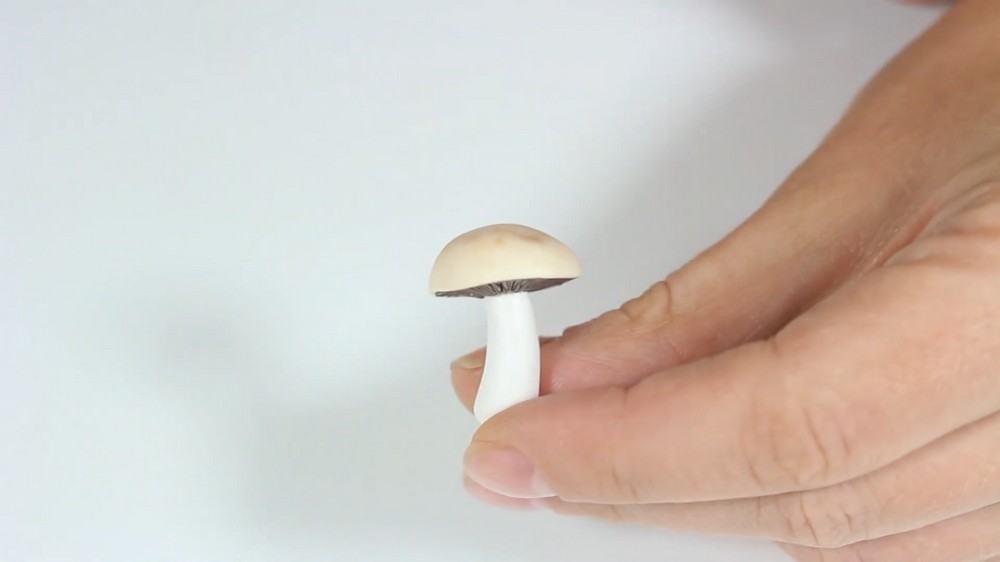
- Roll white clay into small cylinders of consistent diameter for stems.
- Trim ends cleanly and taper slightly if you want a natural stem silhouette.
- Attach stems by pressing gently into the central dimple you created with a dotting tool.
Adding the Details
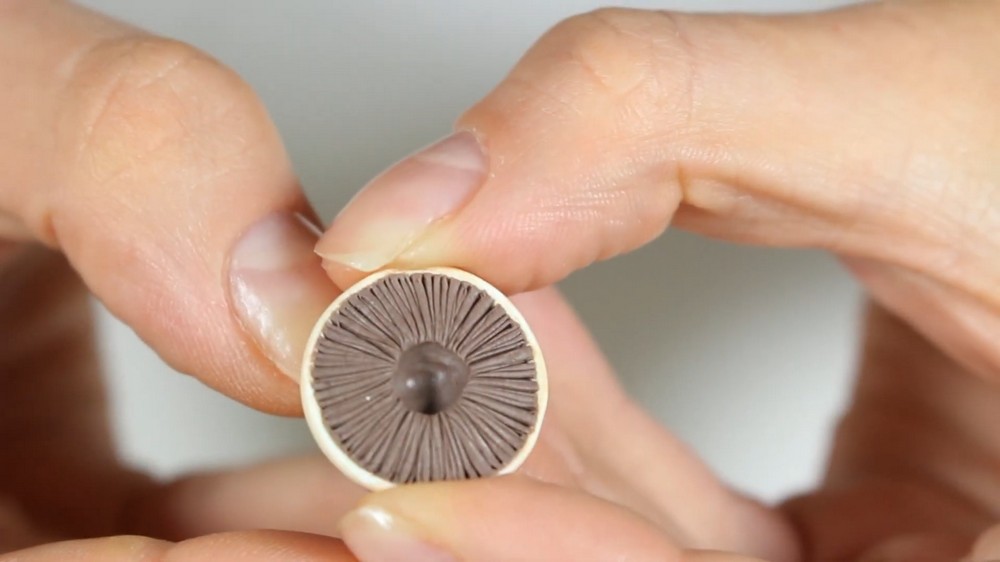
- Sculpt the gills:
- Use a razor or X‑Acto knife to make shallow, evenly spaced cuts under the cap to simulate gills.
- Keep cuts shallow and fine; too deep can weaken the cap.
- Work from the center outwards or in a radial pattern to keep lines consistent.
- Shade with pastels:
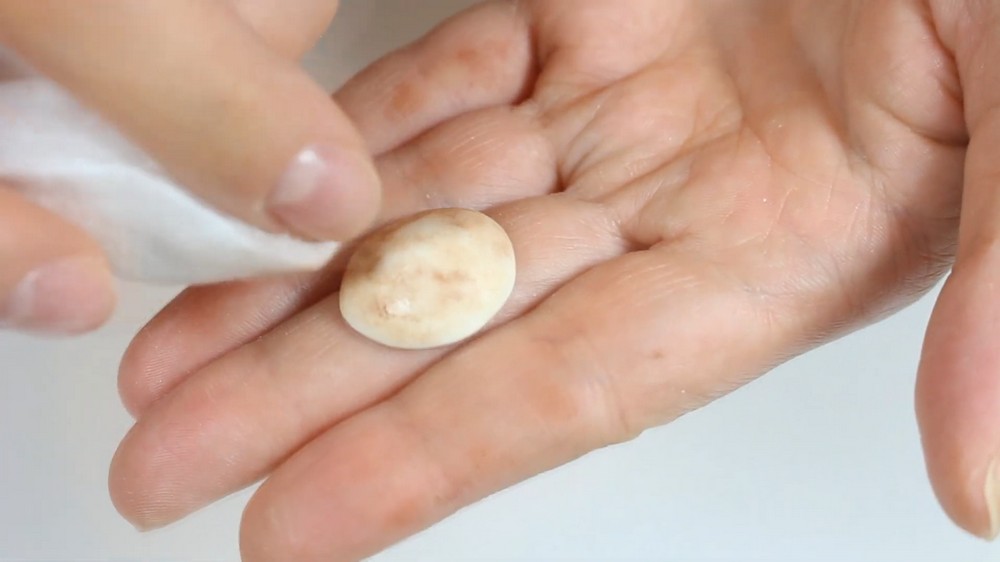
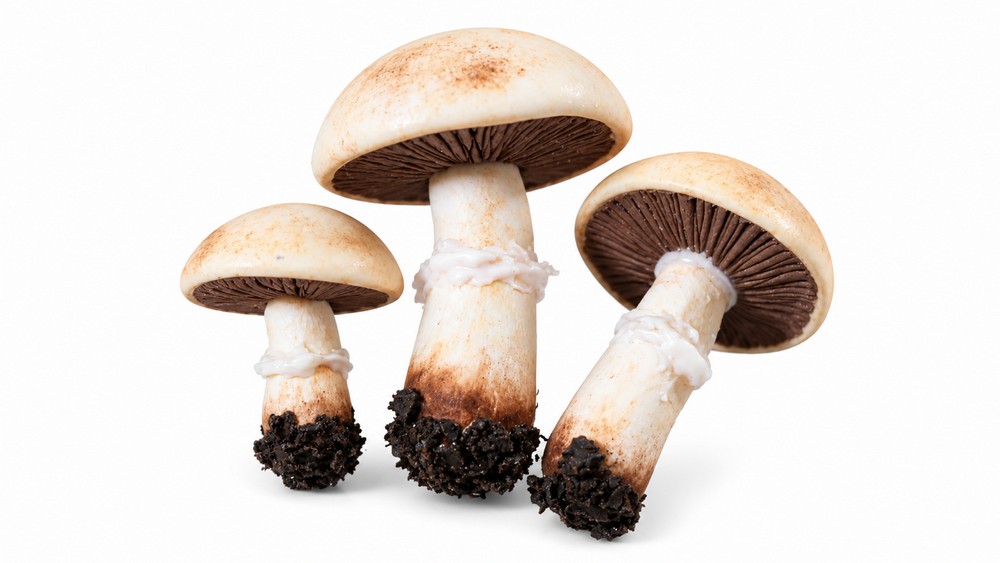
- Lightly rub brown soft pastel powder onto the caps and lower stem with a makeup brush to add natural shading.
- Concentrate darker tones near the cap rim and the base of the stem.
- If you overdo the pastel, gently wipe away excess using a cotton pad dampened with rubbing alcohol.
- Soil base:
- Crumble black clay into tiny pebble‑like bits using a needle tool to simulate soil.
- Use FIMO liquid as an adhesive: apply a tiny amount around the stem base and press the soil bits into place, forming a small mound to make the mushrooms look freshly collected.
Bringing Everything Together
- Attach and reinforce:
- Position the stem into the cap dimple and press gently to secure.
- If the cap was prebaked and stem is raw, use FIMO liquid as a bonding agent and bake again according to recommended parameters that won’t overcook previously cured parts (or use a post‑bake adhesive if rebaking is not recommended).
- Add ring detail:
- Mix a tiny bit of white clay with FIMO liquid for a malleable ring paste.
- Use a needle tool to draw a thin ring or flange around the stem just under the cap to mimic universal veil remnants found on some mushroom species.
Finishing the Design
- Final bake:
- Bake the fully assembled mushrooms per the clay manufacturer’s instructions, ensuring the thickest area reaches the required temperature/time.
- Allow pieces to cool completely on a protected surface to avoid fingerprints or thermal shock.
- Optional varnish:
- Apply gloss varnish to caps if you want a damp, fresh‑looking finish. Avoid varnishing shaded pastel areas that might change appearance; test on a scrap first.
Tips for a Beautiful Finish
- Work in multiples: make several caps and stems at once for consistent batches and efficient baking.
- Keep tool pressure light for gills — subtlety reads better at miniature scale.
- Use a small pincette (as in the tutorial) to pick up and place tiny strawberries or other embellishments for other projects; for mushrooms, tweezers help position soil bits.
- Blend pastel with a soft brush in thin layers — build color slowly for natural depth.
Make It Your Own
- Variation in species:
- Change cap shape (flat, conical, or bell‑shaped), coloration, and gill spacing to imitate different mushroom types.
- Scale and function:
- Scale up for display pieces, or make tiny versions for jewelry and charms — consider embedding eyelets or pinbacks before baking.
- Diorama ideas:
- Arrange multiple mushrooms with moss (green flocking or finely shredded green clay) and tiny twigs for whimsical scenes.
Final Thoughts
- These polymer clay mushrooms are a compact, rewarding project that improve fine motor skills and detail work.
- Follow the sequence: shape → texture → shade → assemble → finish. This keeps pieces stable and gives you control over each detail.
- Have fun experimenting with shapes, colors, and presentation — small changes create a big effect in miniatures.